Learn Realistic 3D Face Rendering with Maya & Arnold
Following this quick-paced tutorial, you will be guided through a practical lesson on achieving realistic 3D face rendering using Maya and Arnold. We will explore skin shading, subsurface scattering, and displacement maps for more natural and lifelike results. We cover setting up cameras and basic lighting, then dive into skin shading, including subsurface scattering. We also use displacement maps to provide detailed skin texture and create a realistic eye cornea shader. Subscribe to our newsletter below and win a free course for Unreal Engine 5 (create your first game).
Workflow
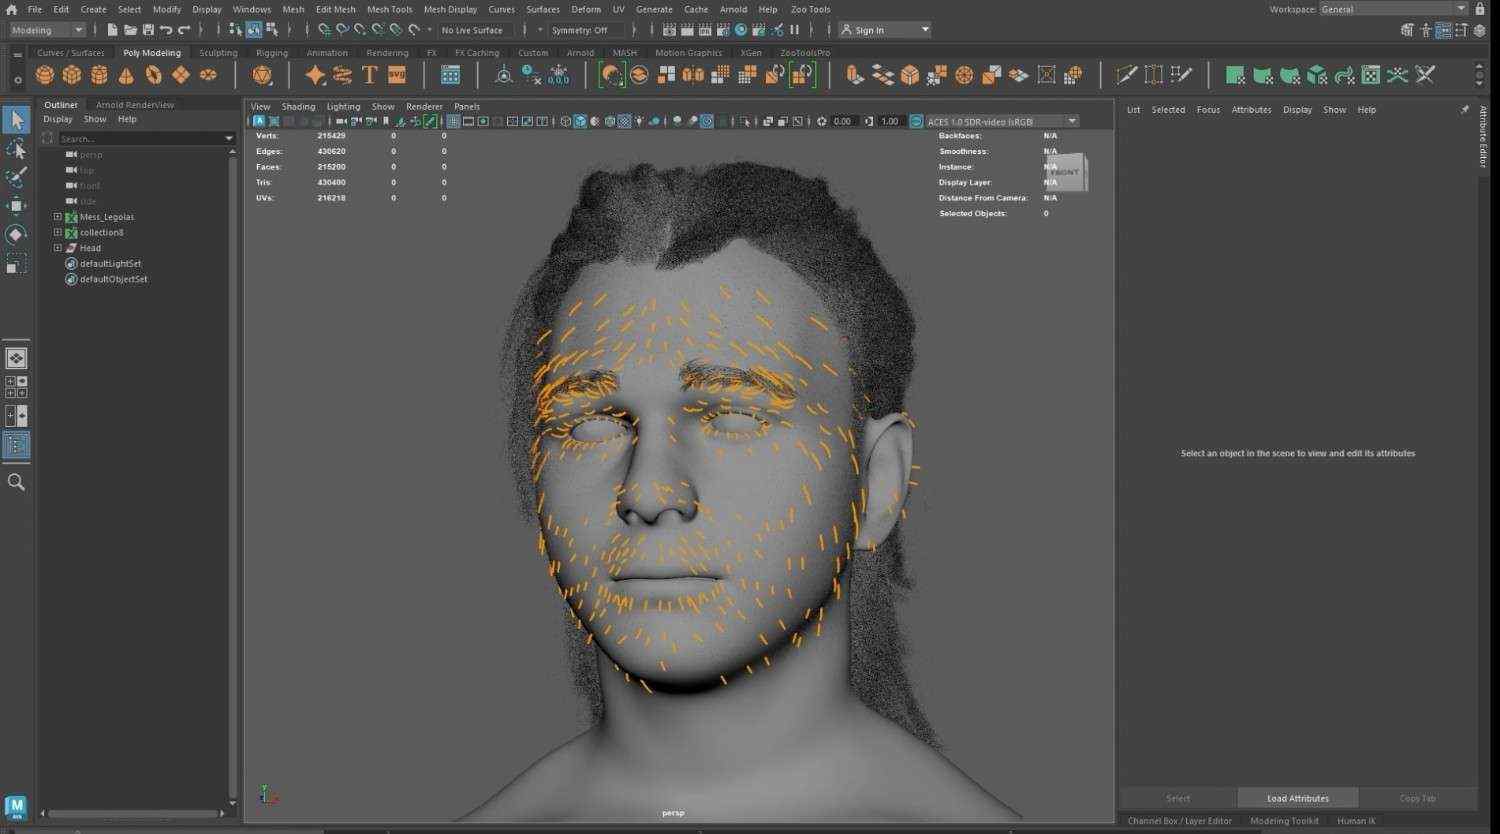
In this 3D face rendering tutorial, we’ll go through how to set up nodes inside Arnold to make realistic renders.
Adding Lighting
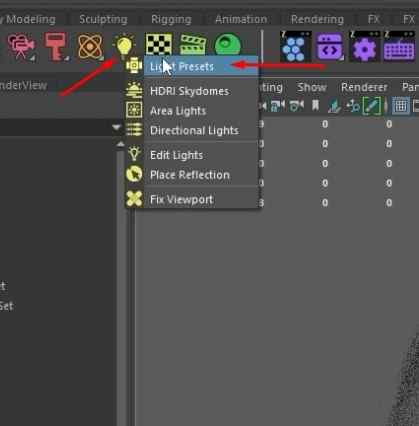
- Add light presets from the ZooTools sub-menu.
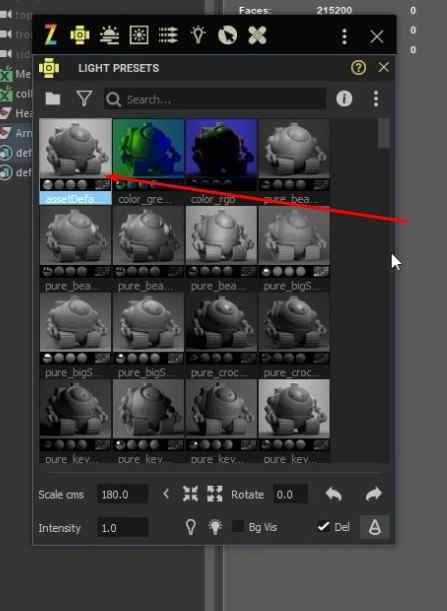
- Select a light preset.
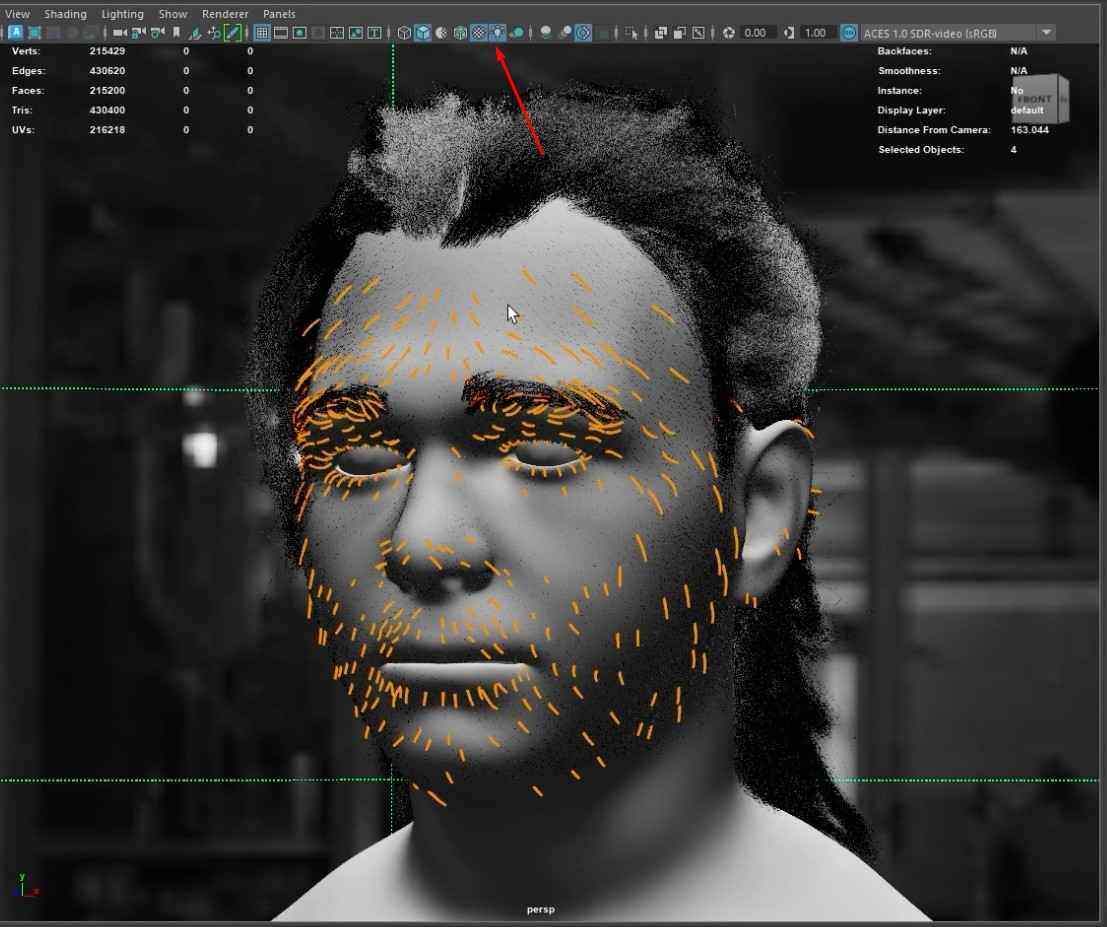
- Turn on the light.
Creating a Camera
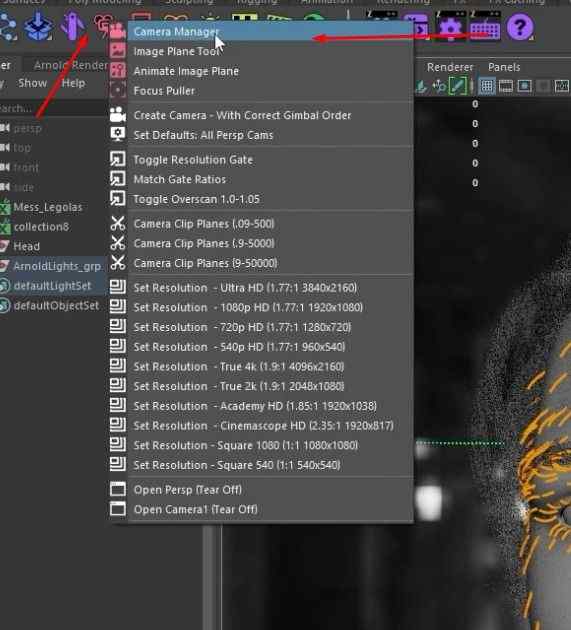
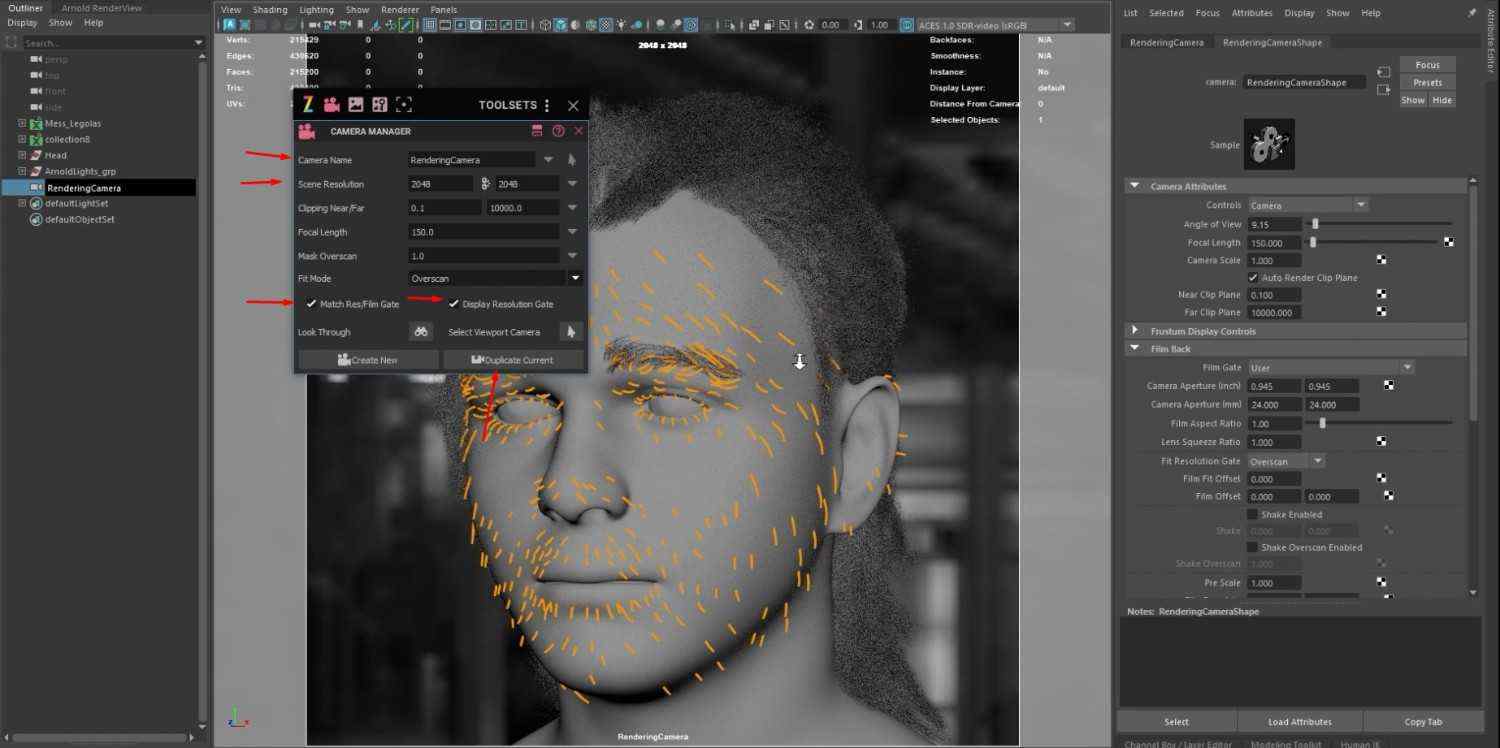
- Create a new camera in the Camera Manager.
- Change the name and resolution.
- Tick the Match Res/Film Gate and Display Resolution Gate options.
- Duplicate the current camera to create multiple cameras for different angles.
Adding Keyframes for Camera Movement
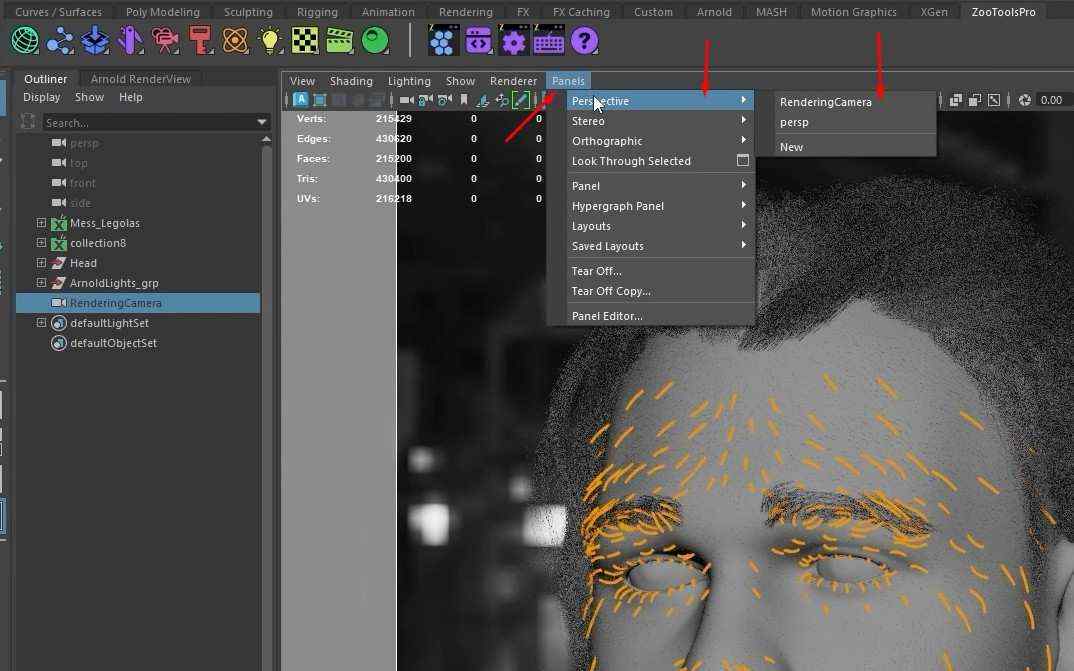
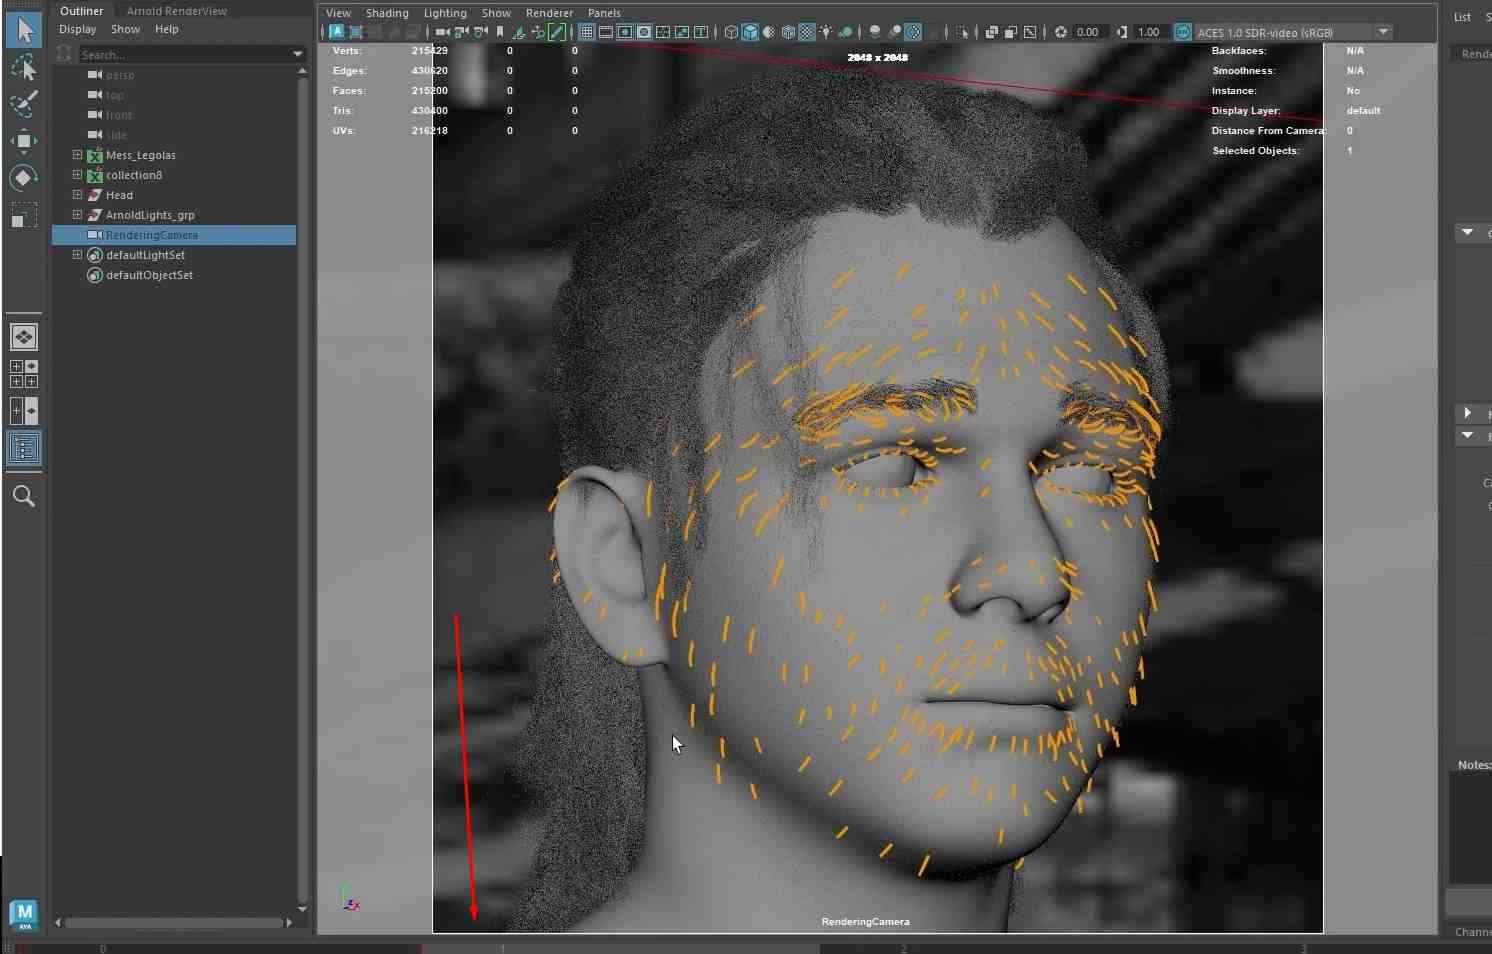
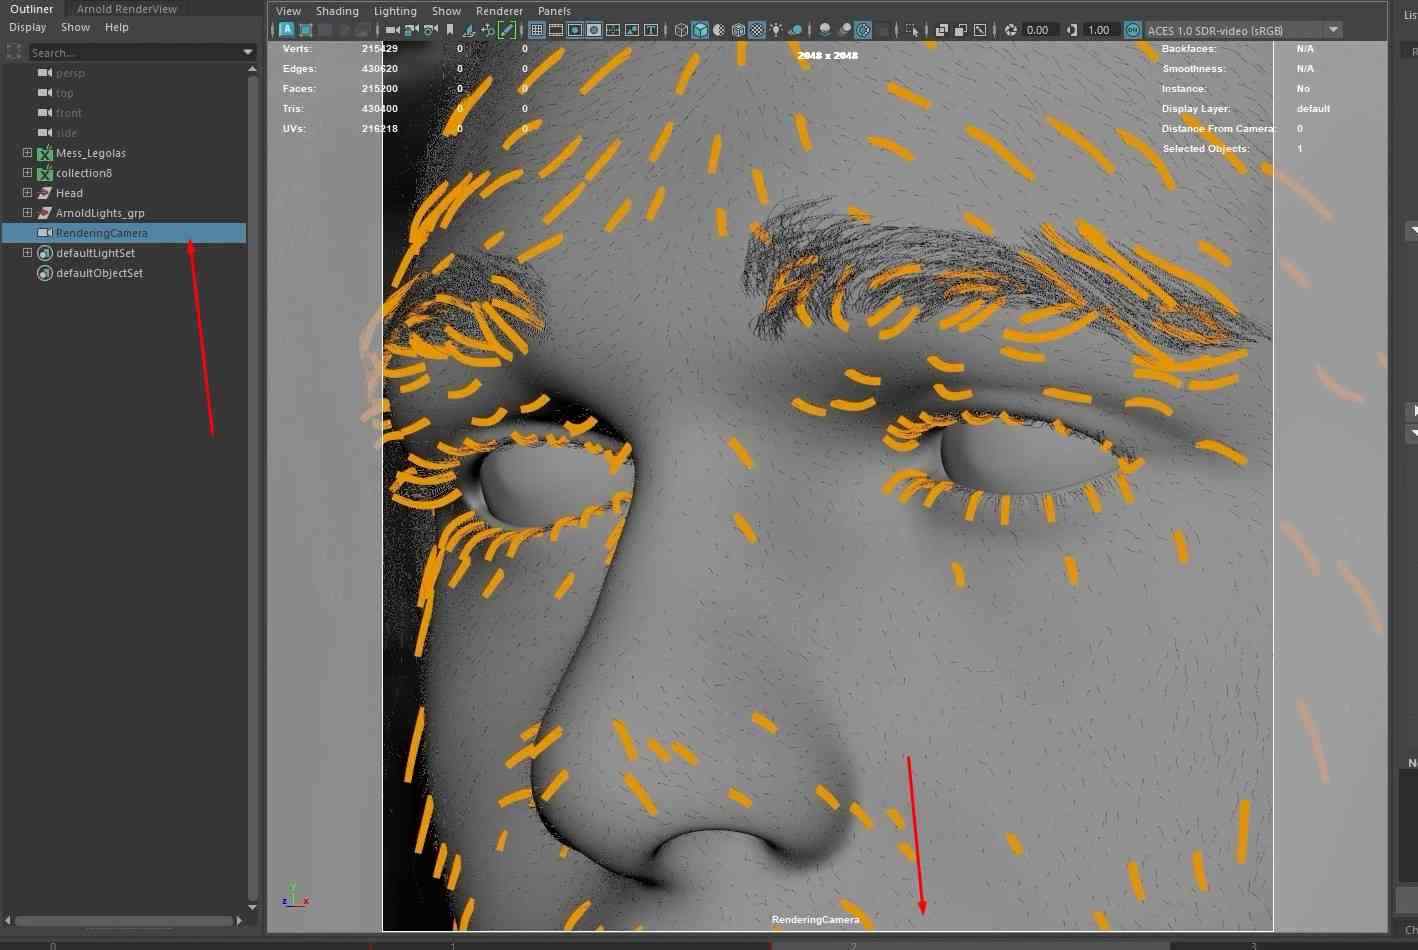
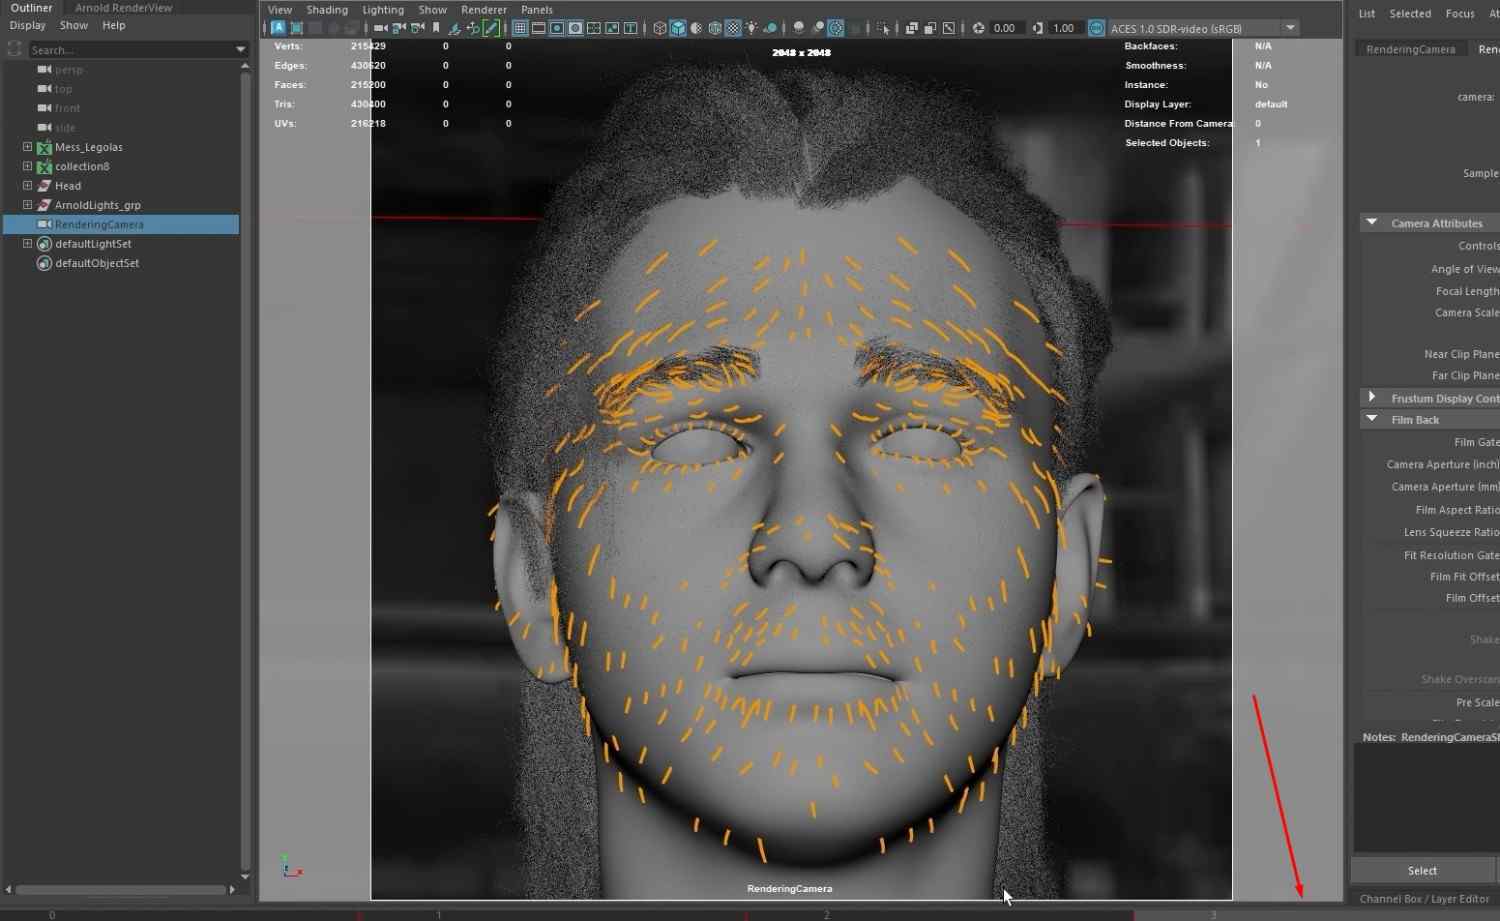
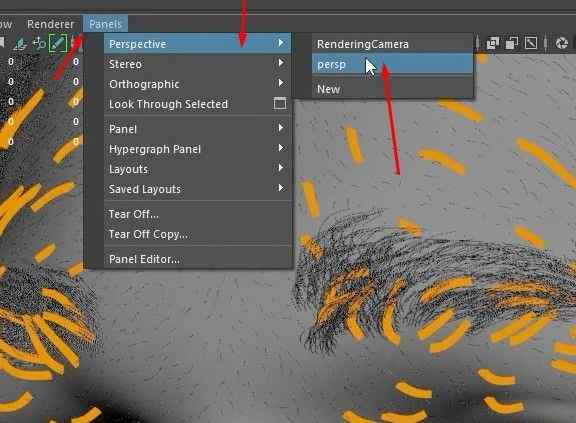
- Select the render camera in the Outliner and Panels.
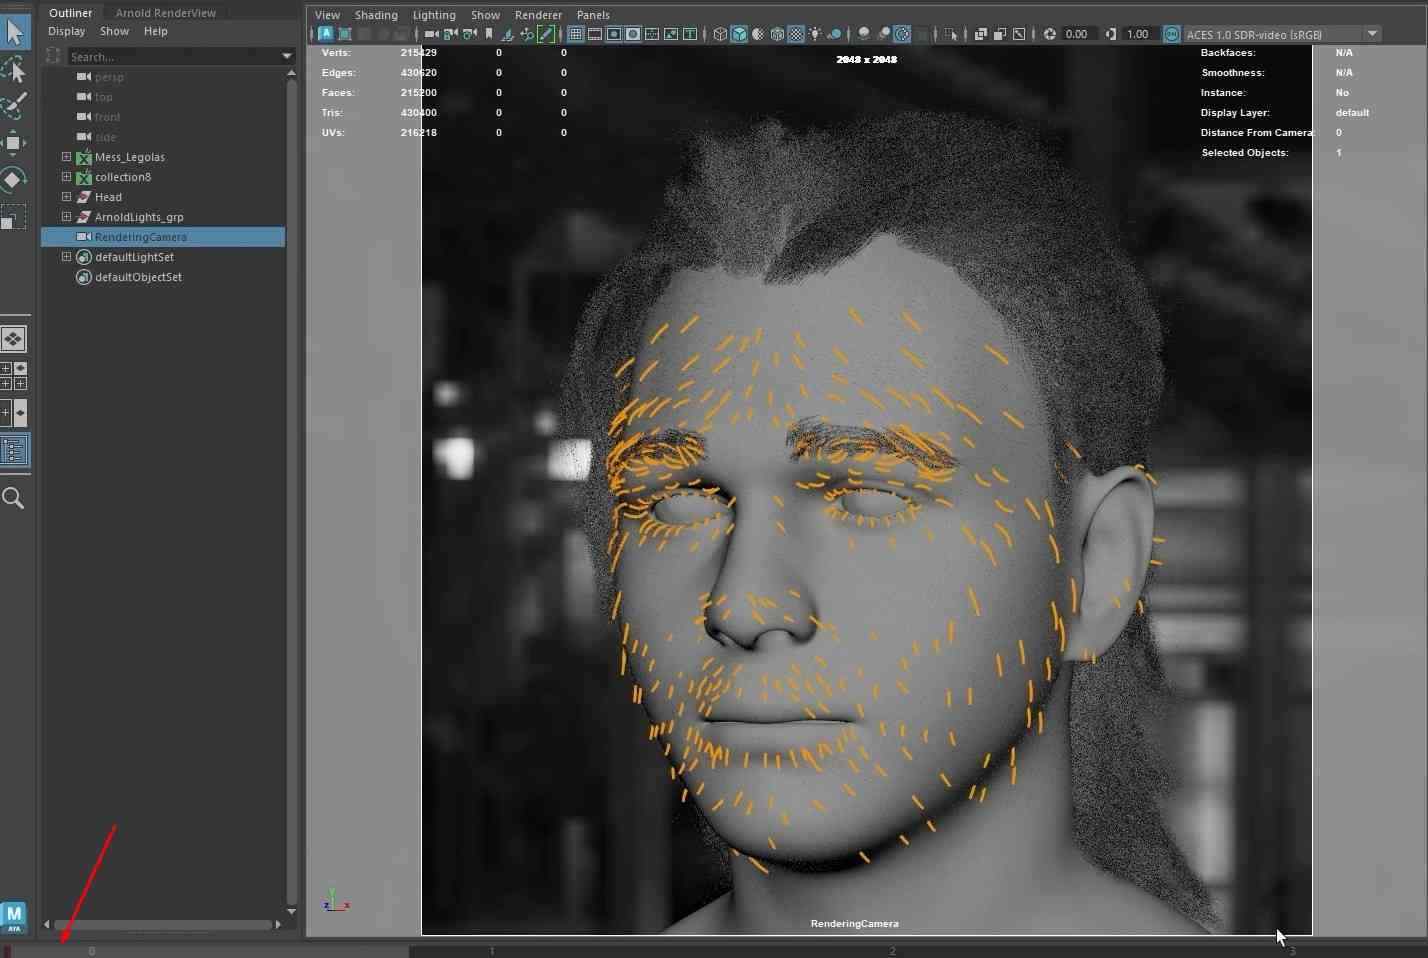
- Add keyframes at different frames to define camera angles.
Setting Up Materials
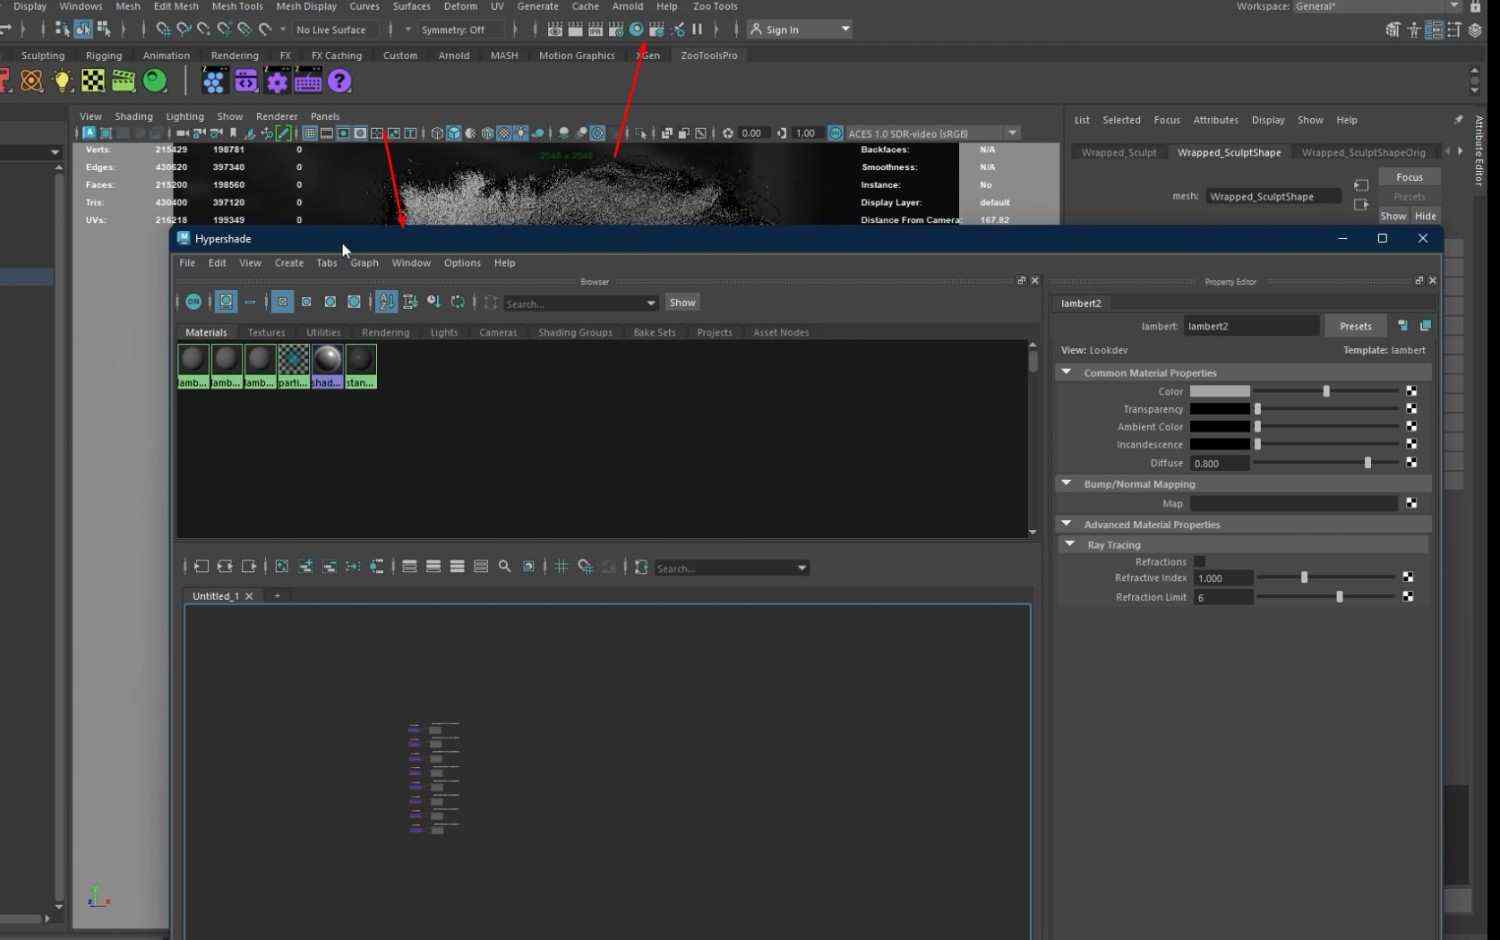
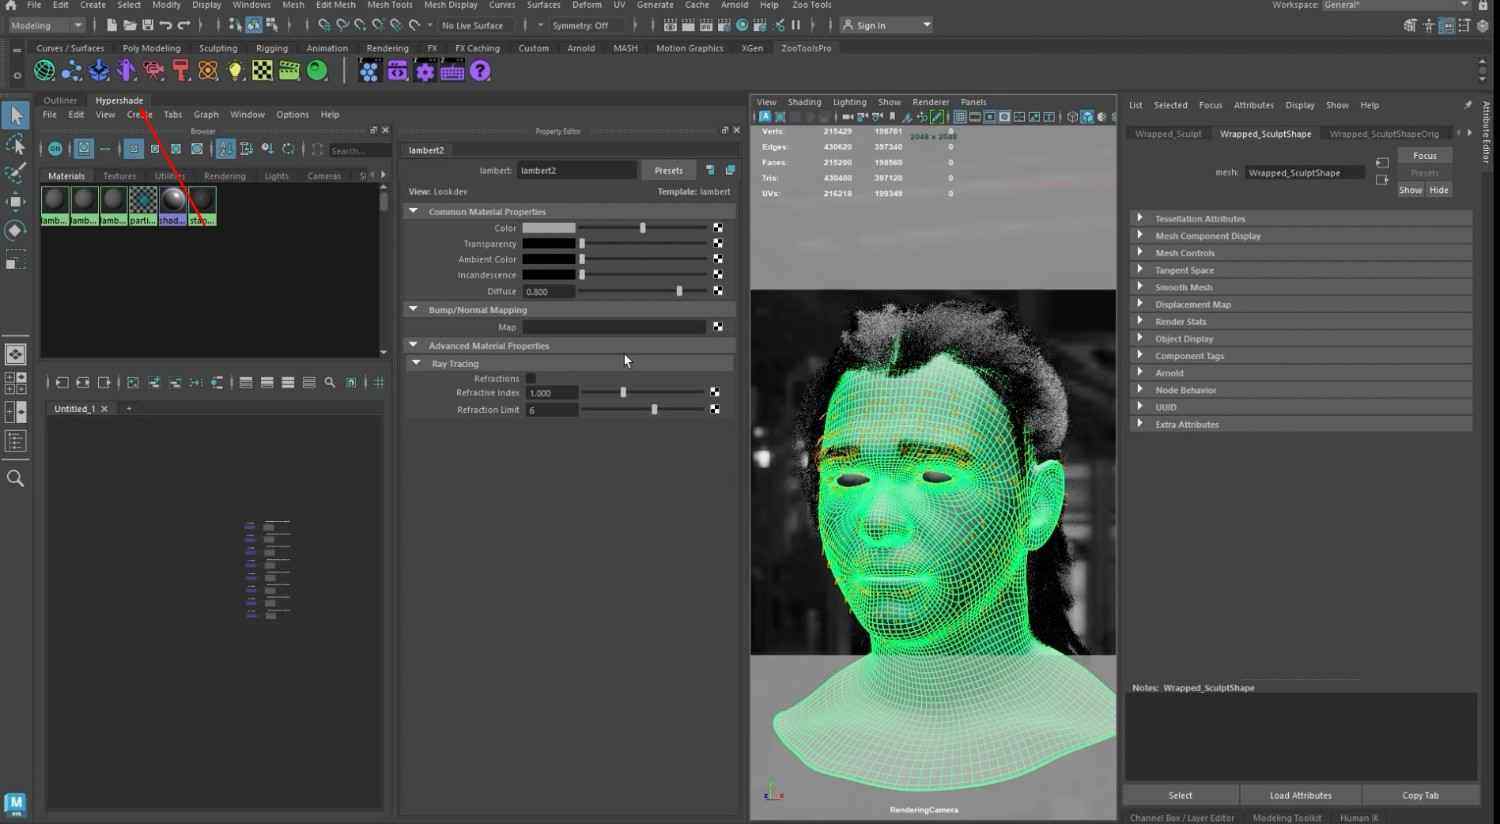
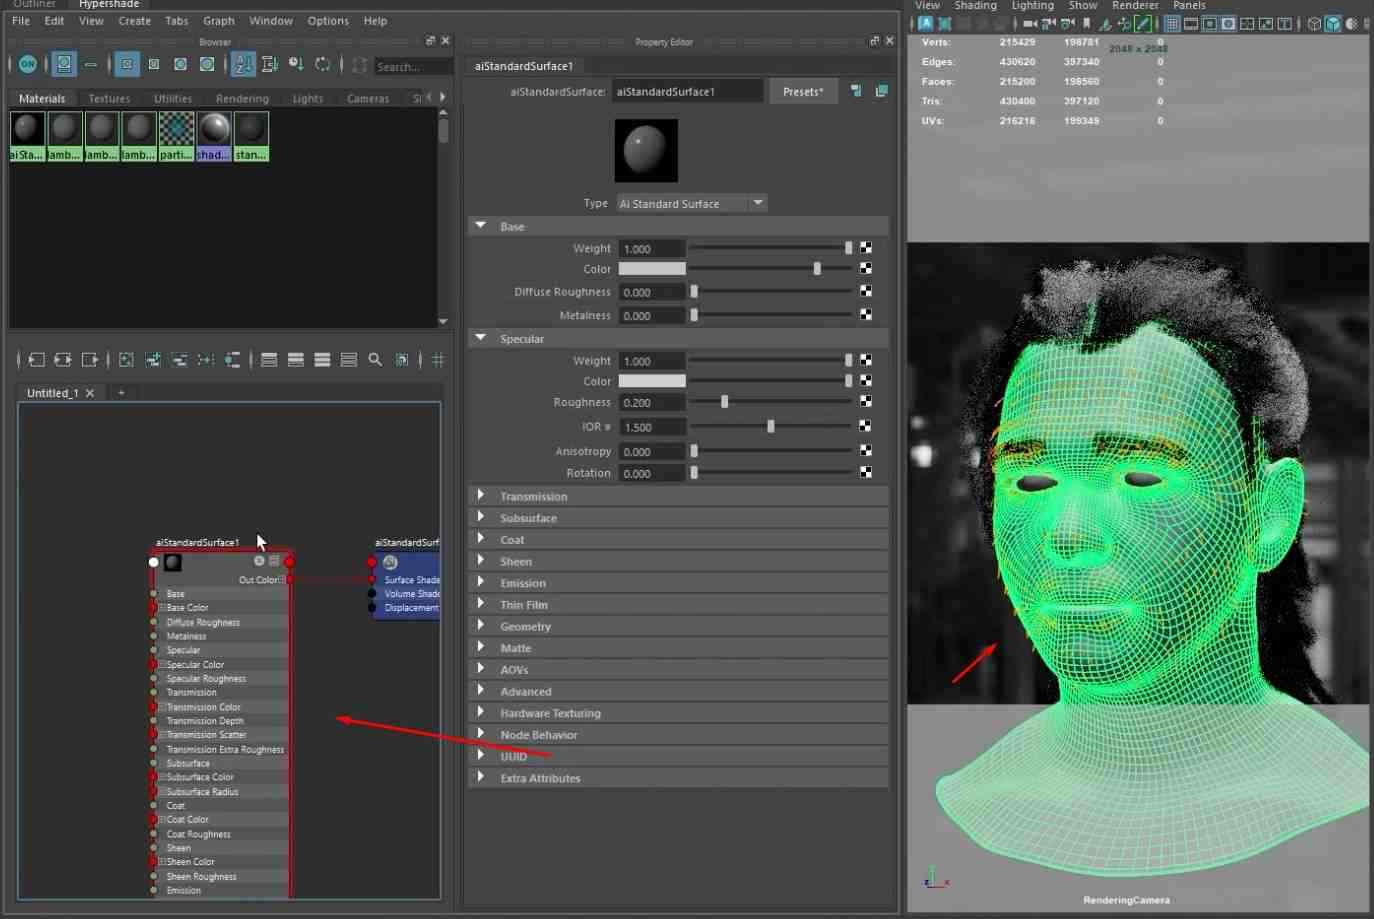
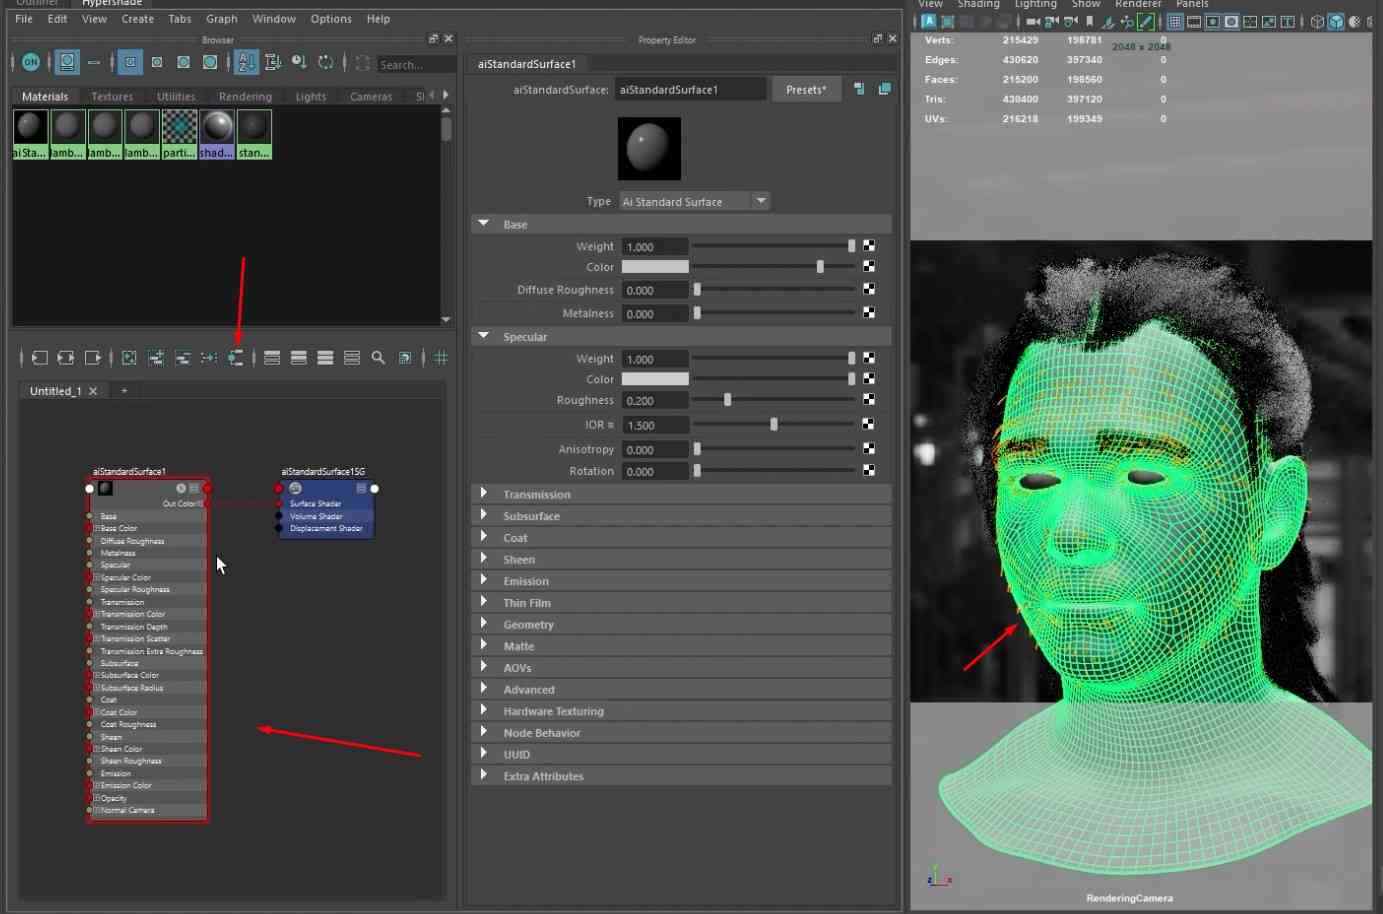
- Open the Hypershade window and dock it next to the Outliner.
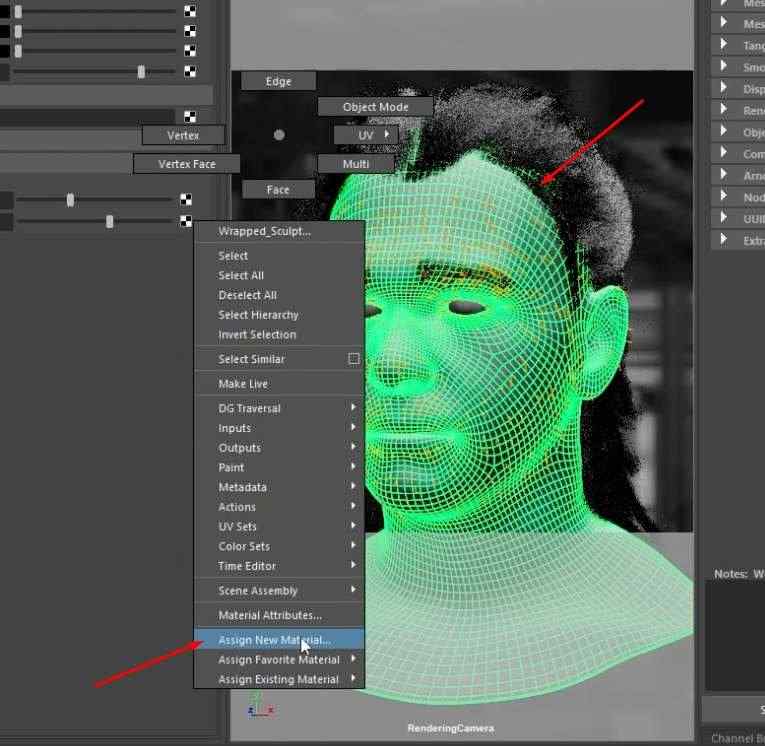
- Select a model part, right-click, and add a new material.
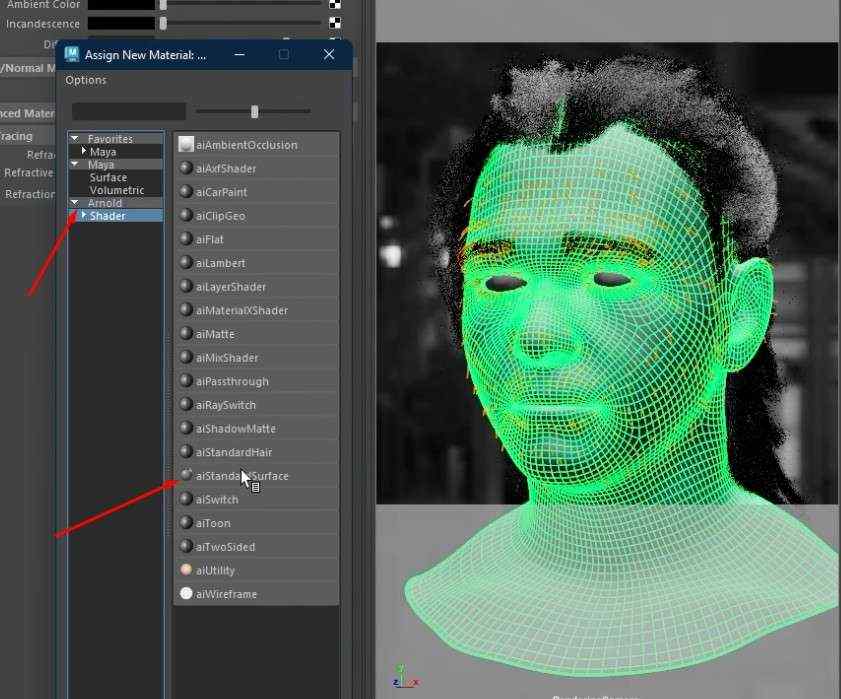
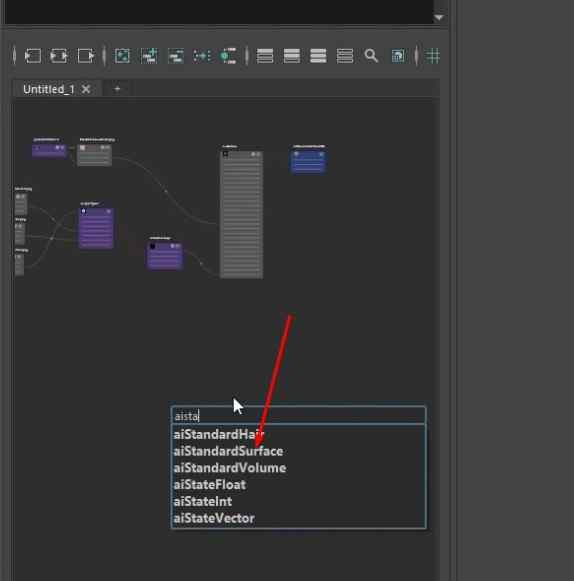
- Choose the aiStandardSurface material.
- Locate nodes using the locator button in the Hypershade.
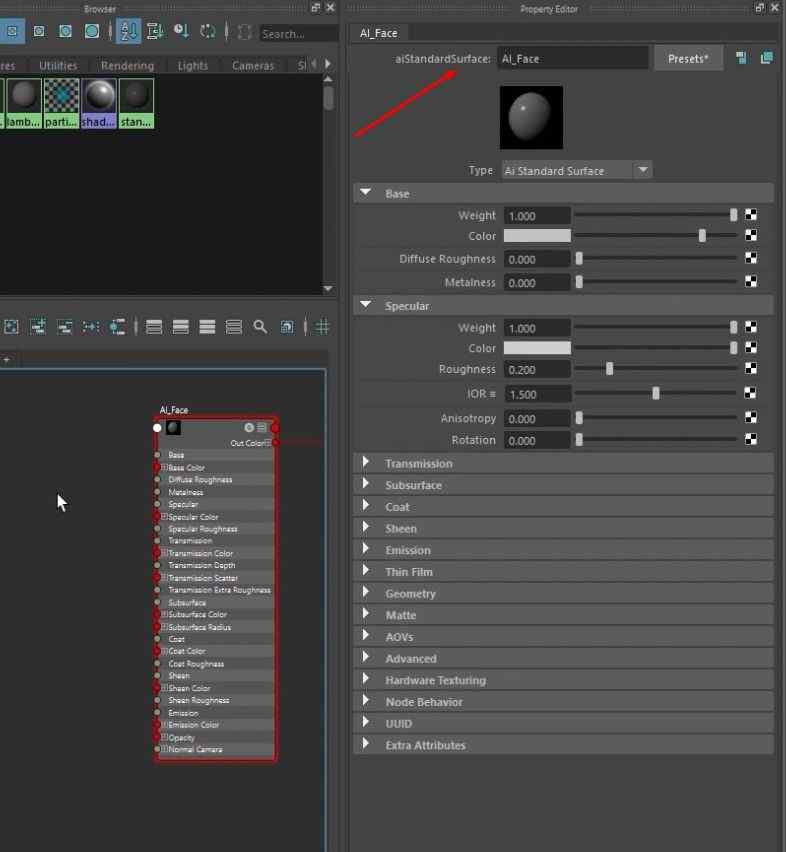
- Rename the material to AI_Face.
Applying Texture Maps
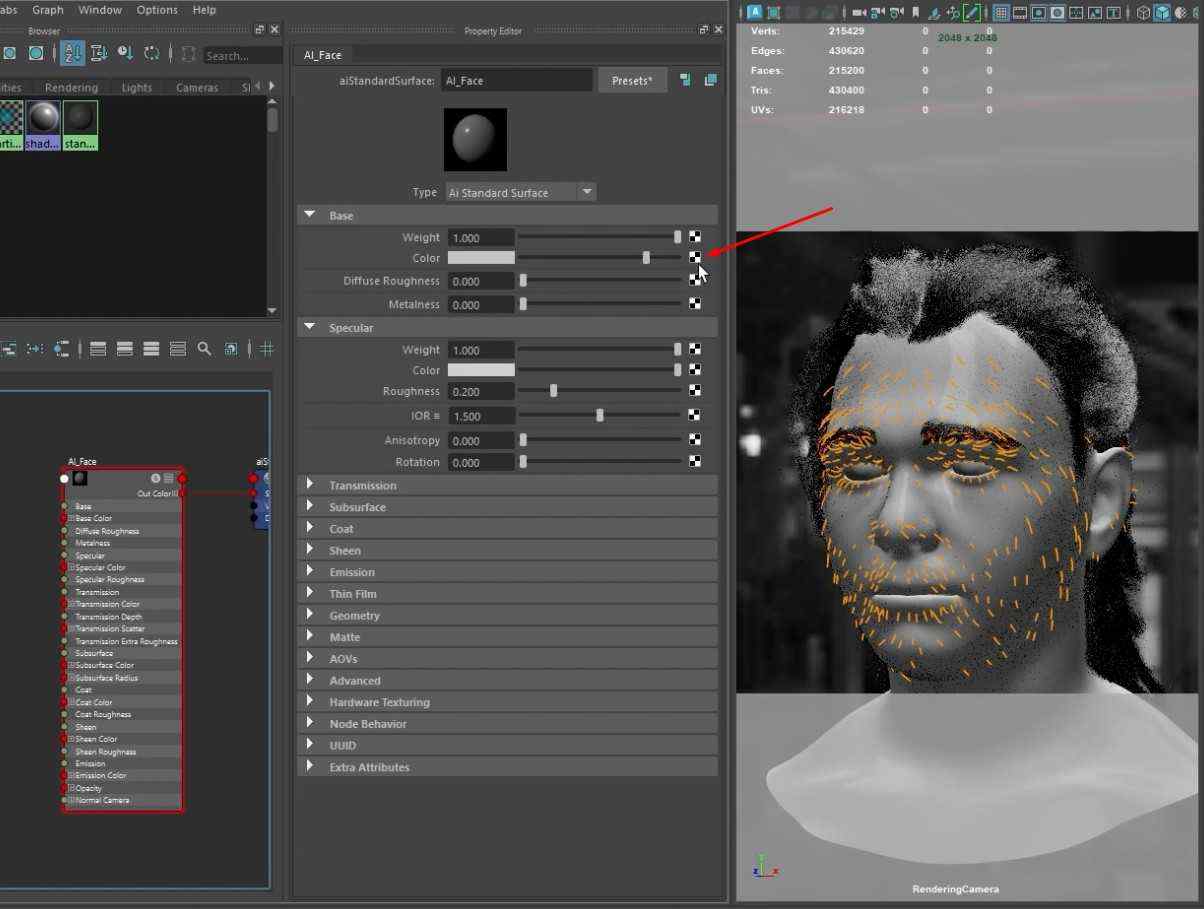
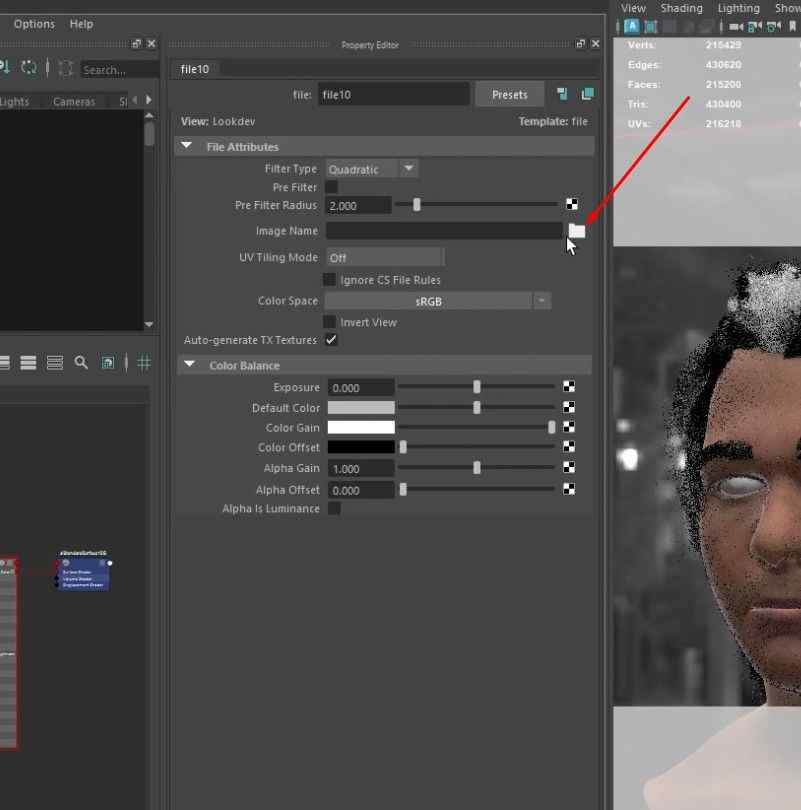
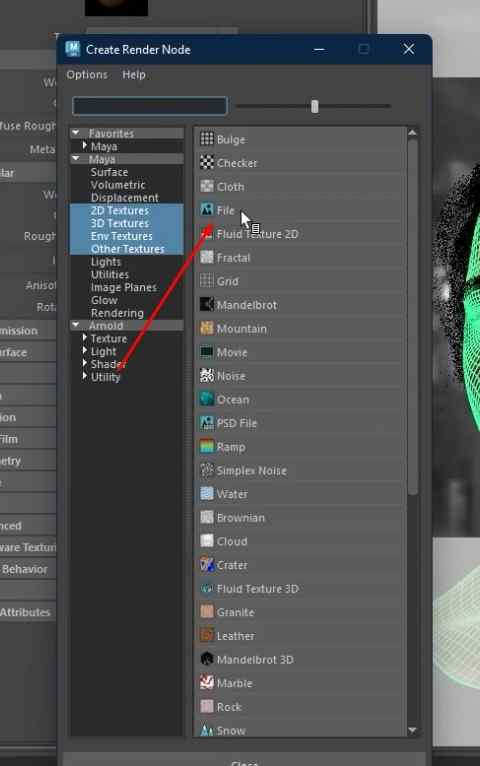
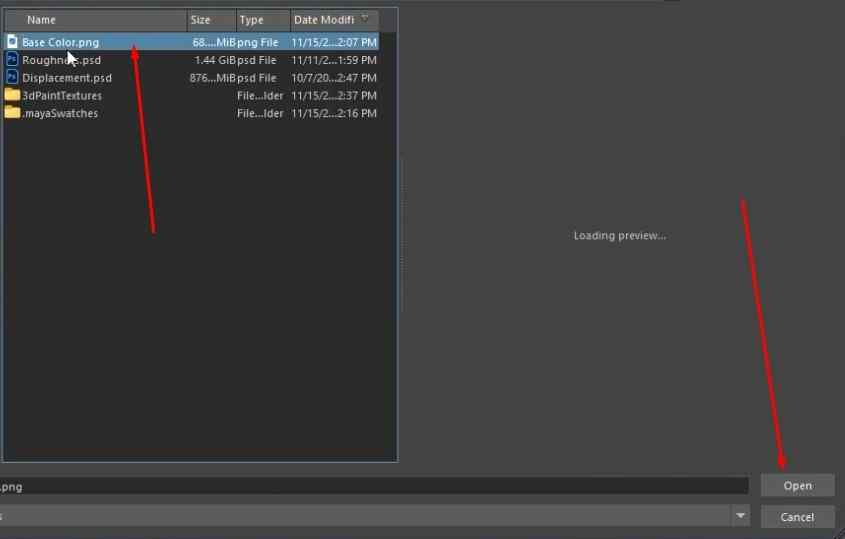
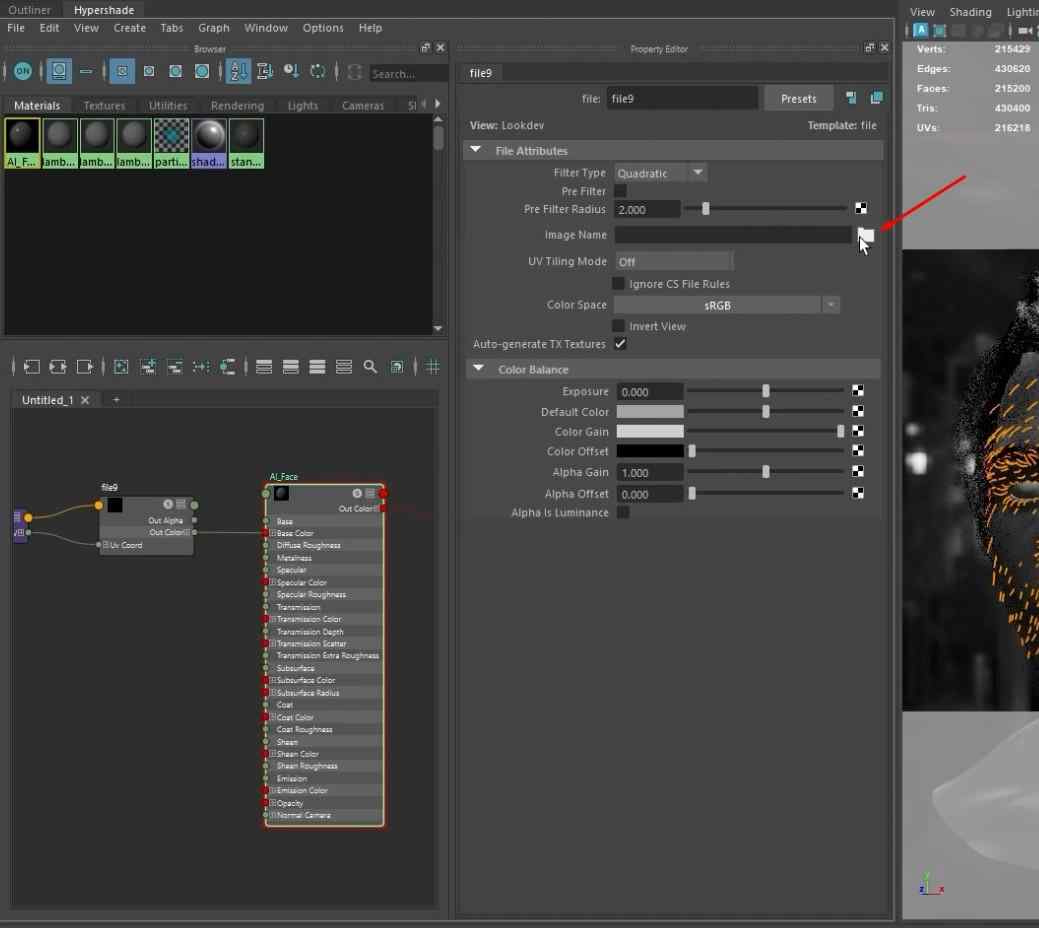
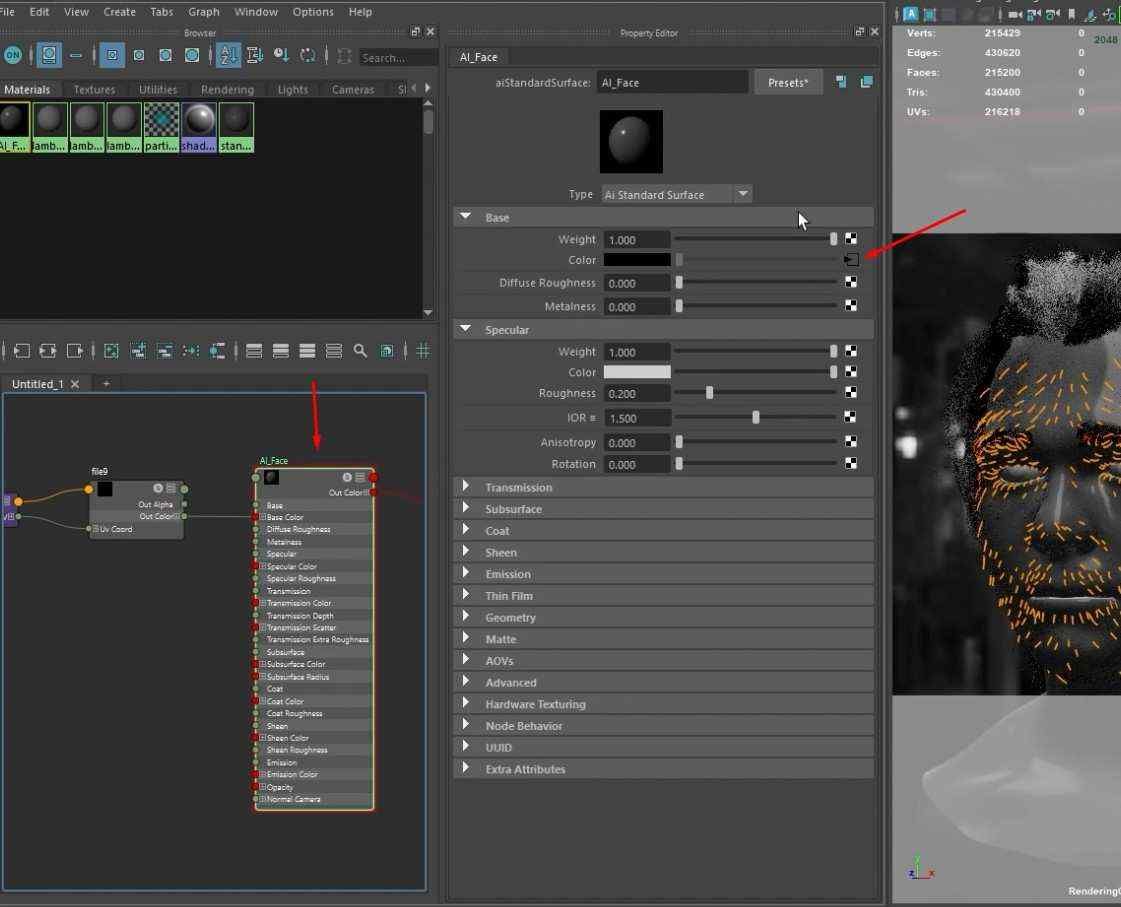
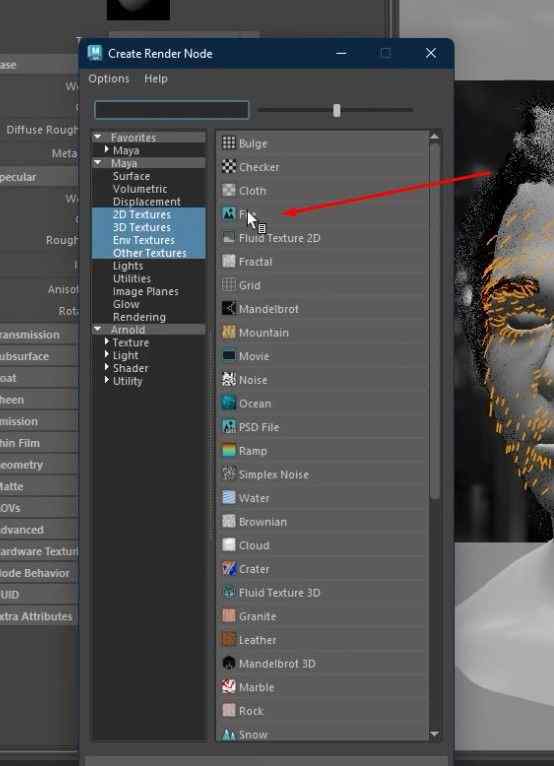
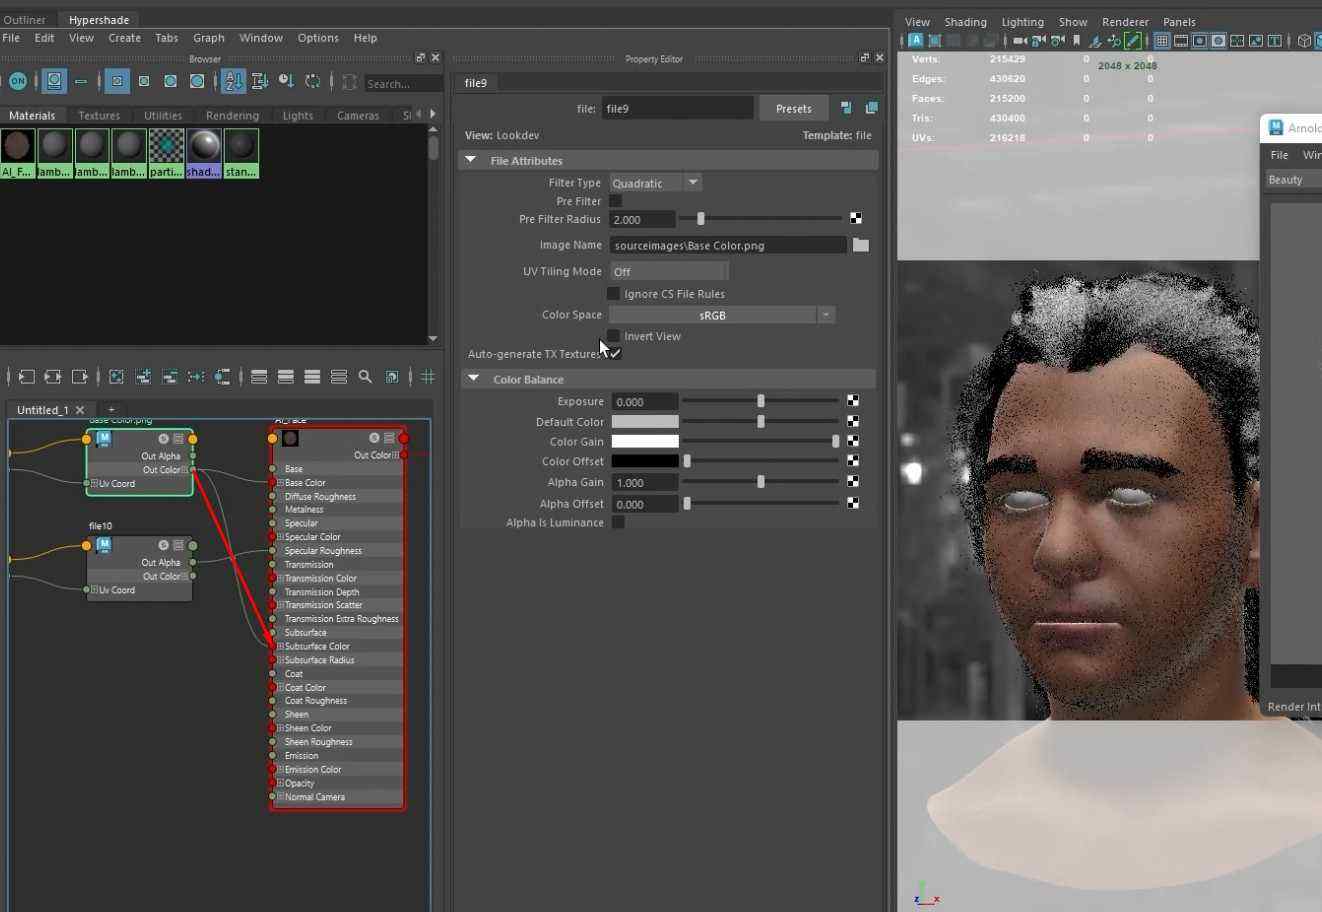
- Assign the Base Color PNG file to the Base Color of the AI_Face material.
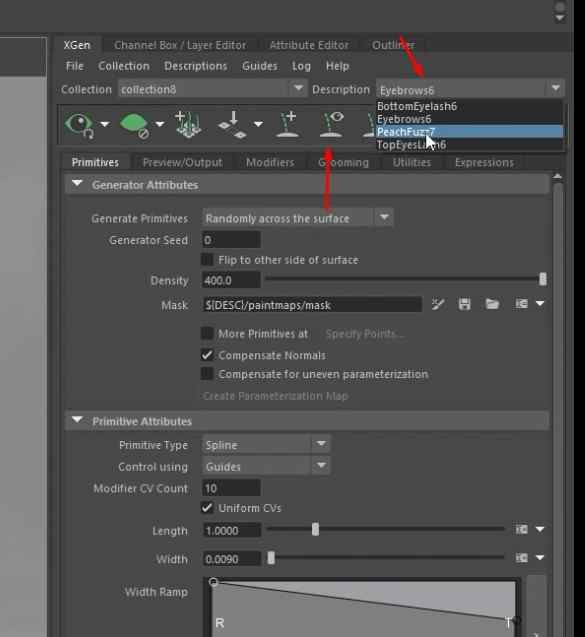
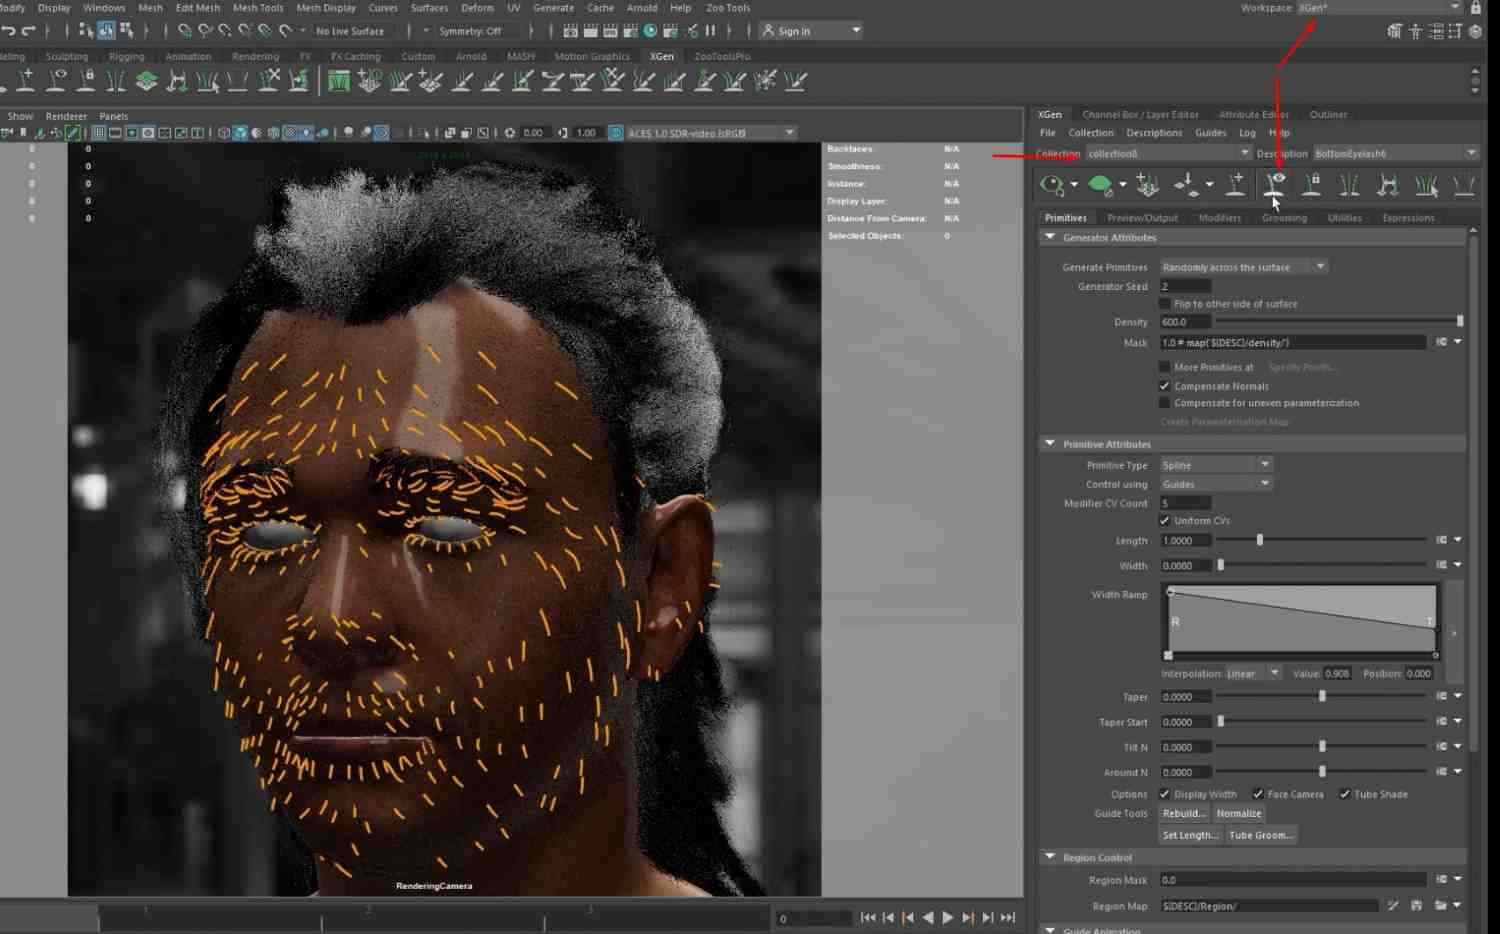
- Disable XGen guides by switching to the XGen workspace, selecting Collection and Description, and pressing the Hide Guides button.
- Repeat for each Description until all guides are hidden.
- Switch back to the General workspace to continue adding texture maps.
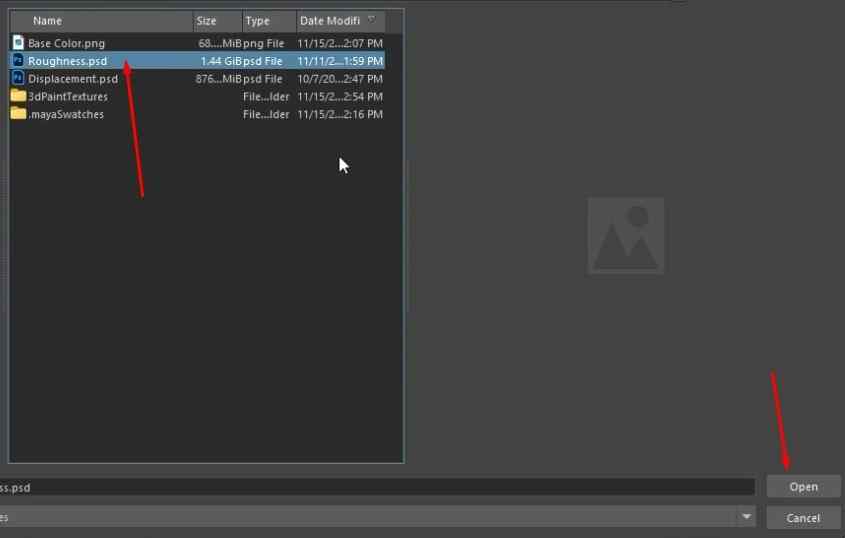
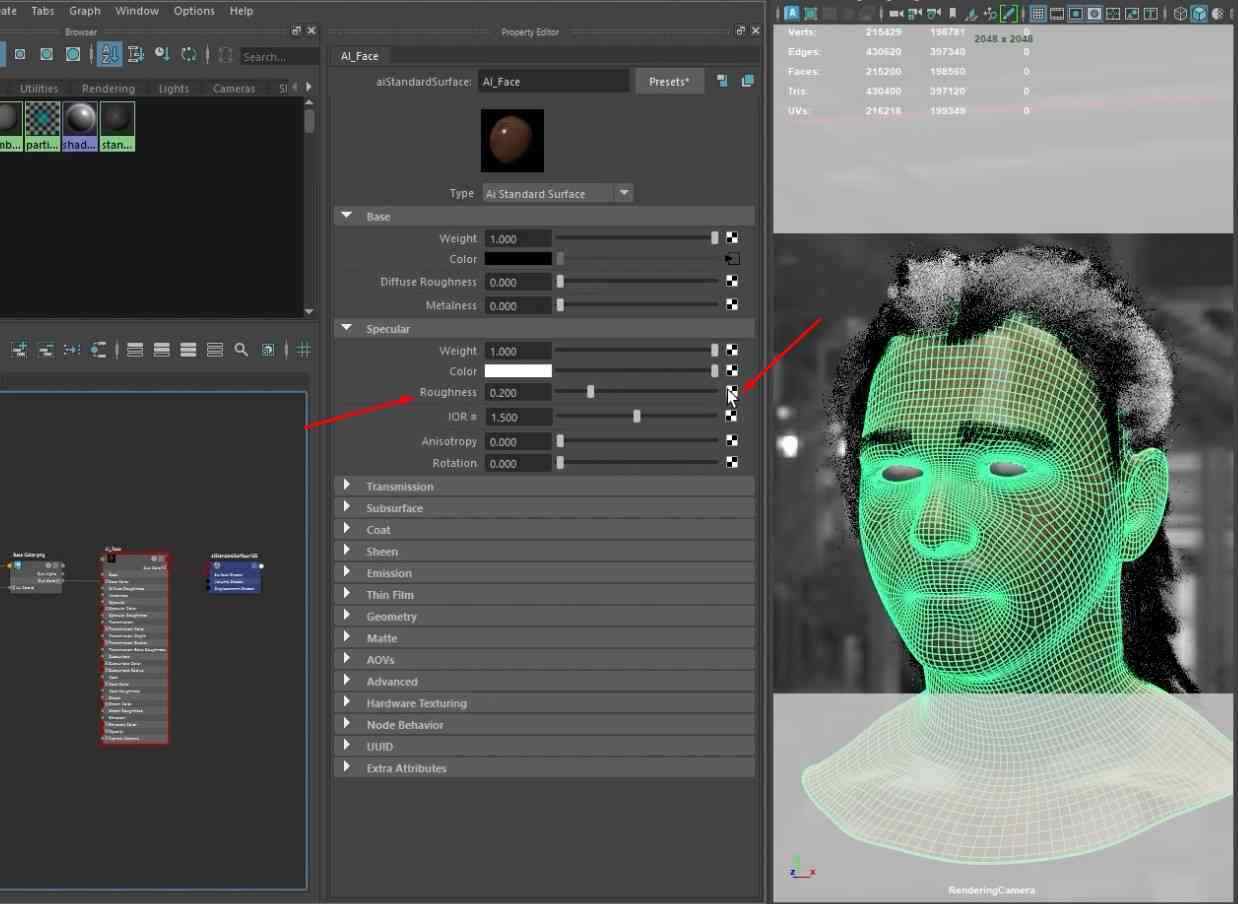
- Assign the Roughness PDS file to the Roughness of the AI_Face material.
Rendering and Fine-Tuning
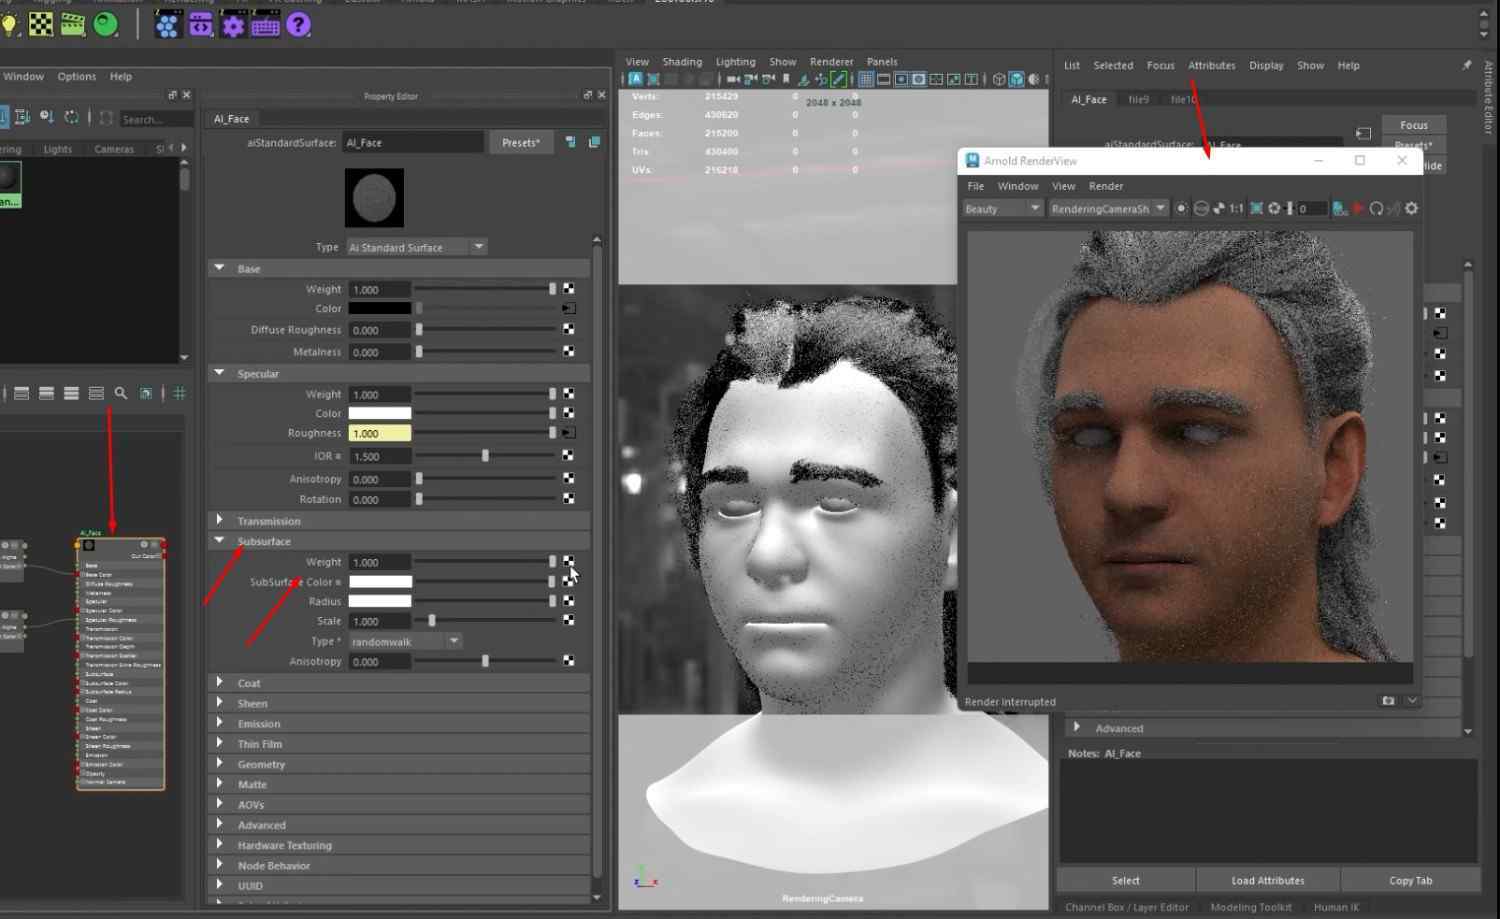
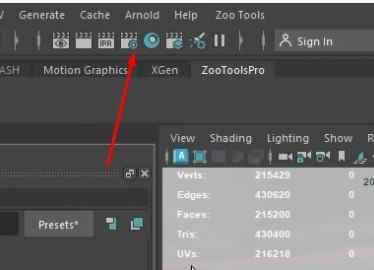
- Open the RenderView from the Arnold tab.
- Minimize the window and place it on the side.
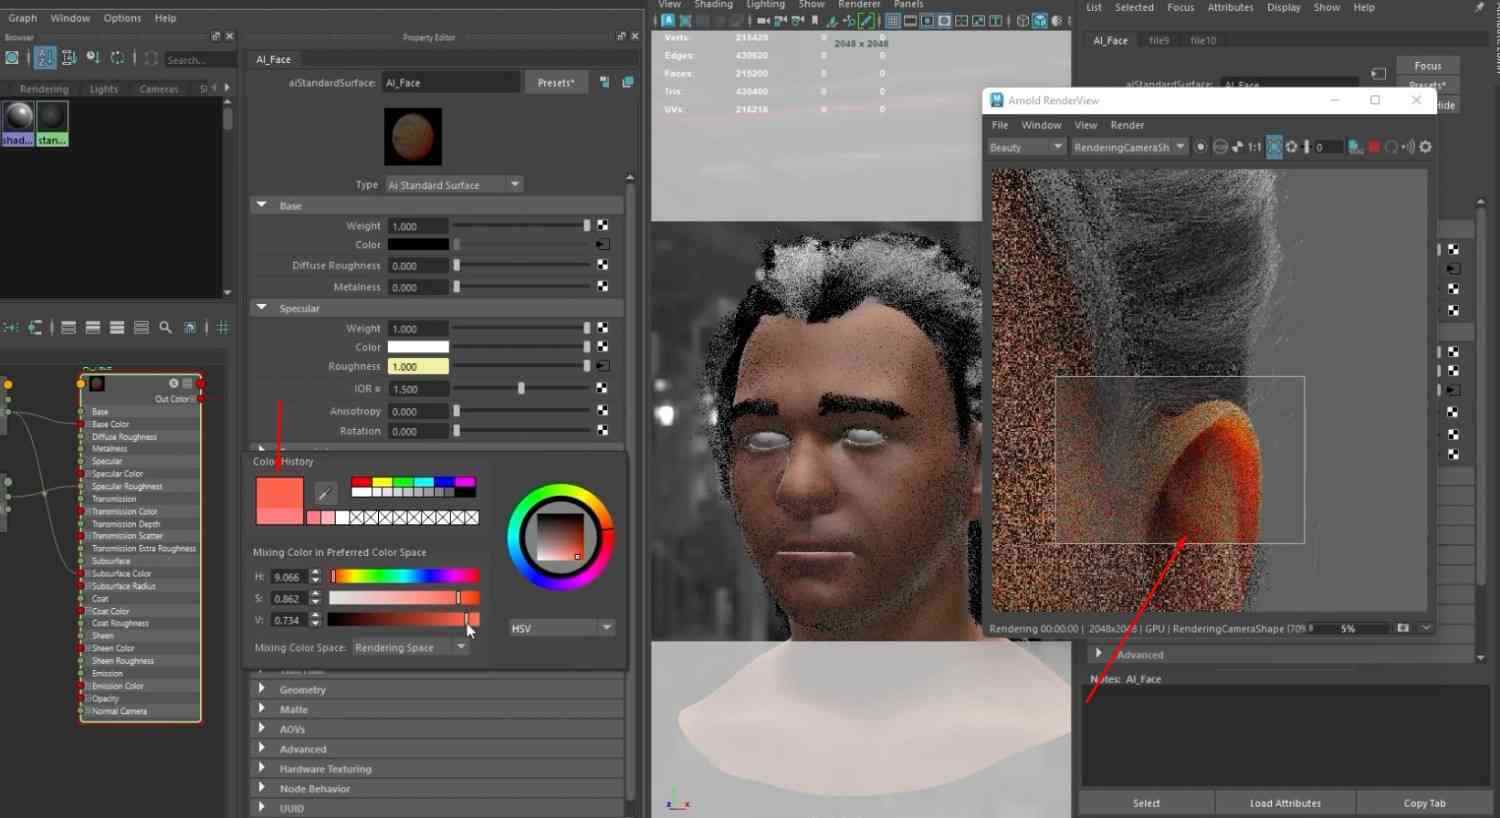
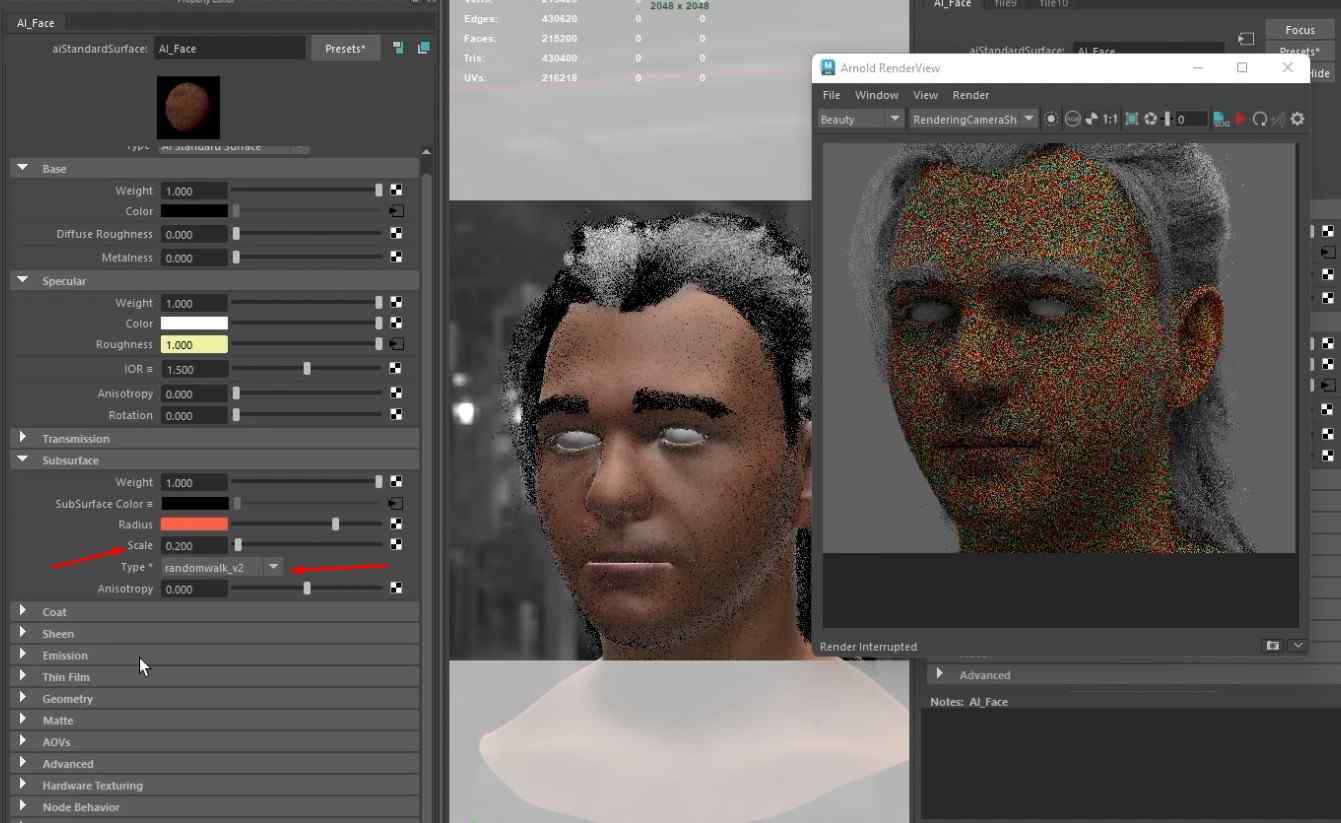
- Open the Subsurface sub-menu inside the AI_Face material and increase the Weight to 1.
- Connect the Base Color node’s Out Color to the Subsurface Color inside the AI_Face node.
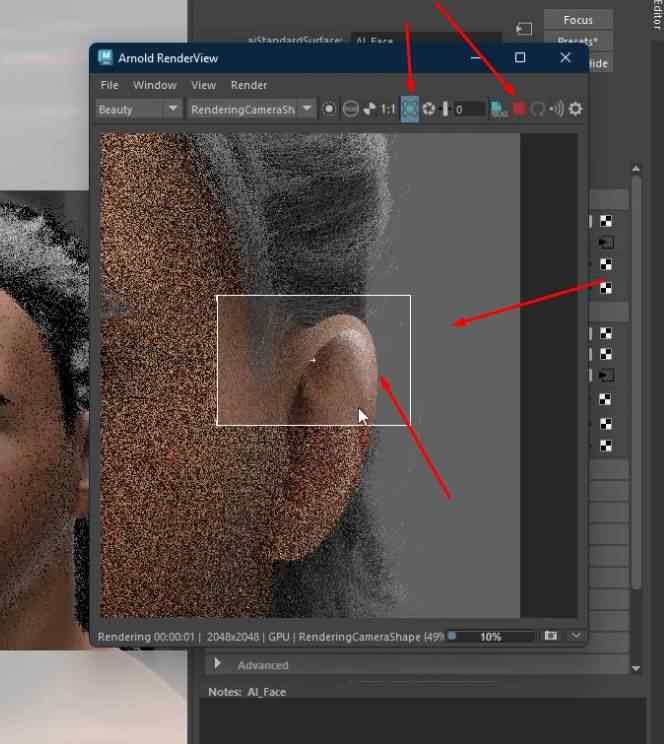
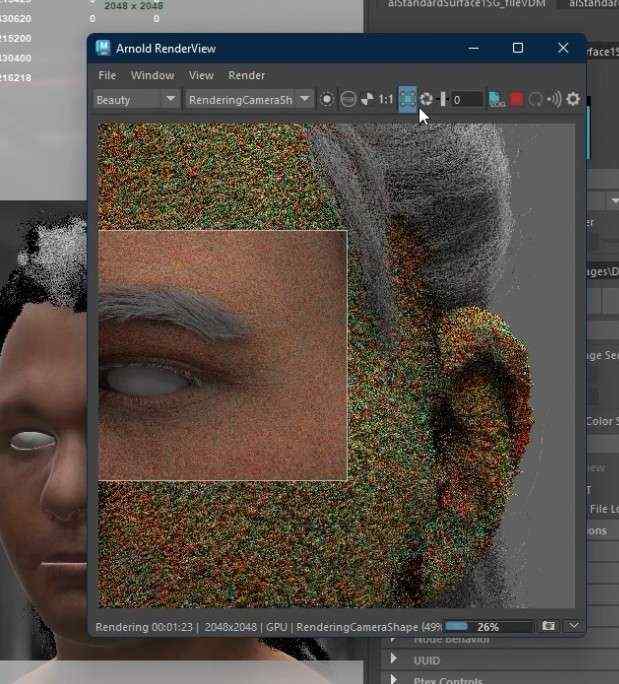
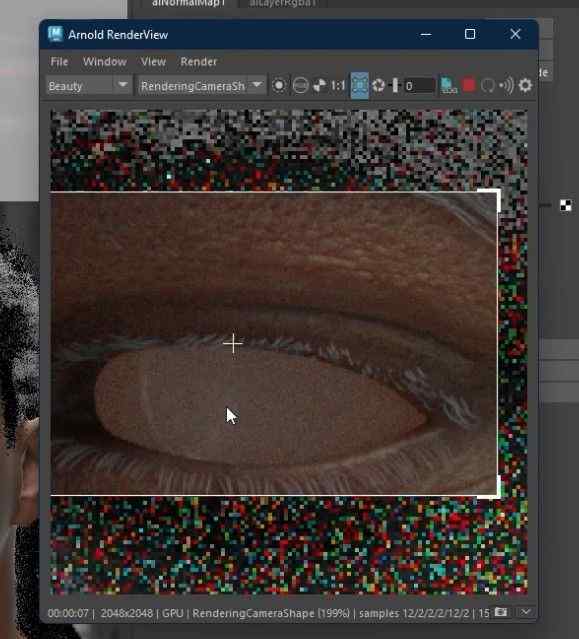
- Click play in the render view, select the selection tool, and only select the ear on the model so that it renders only that area, making the render faster.
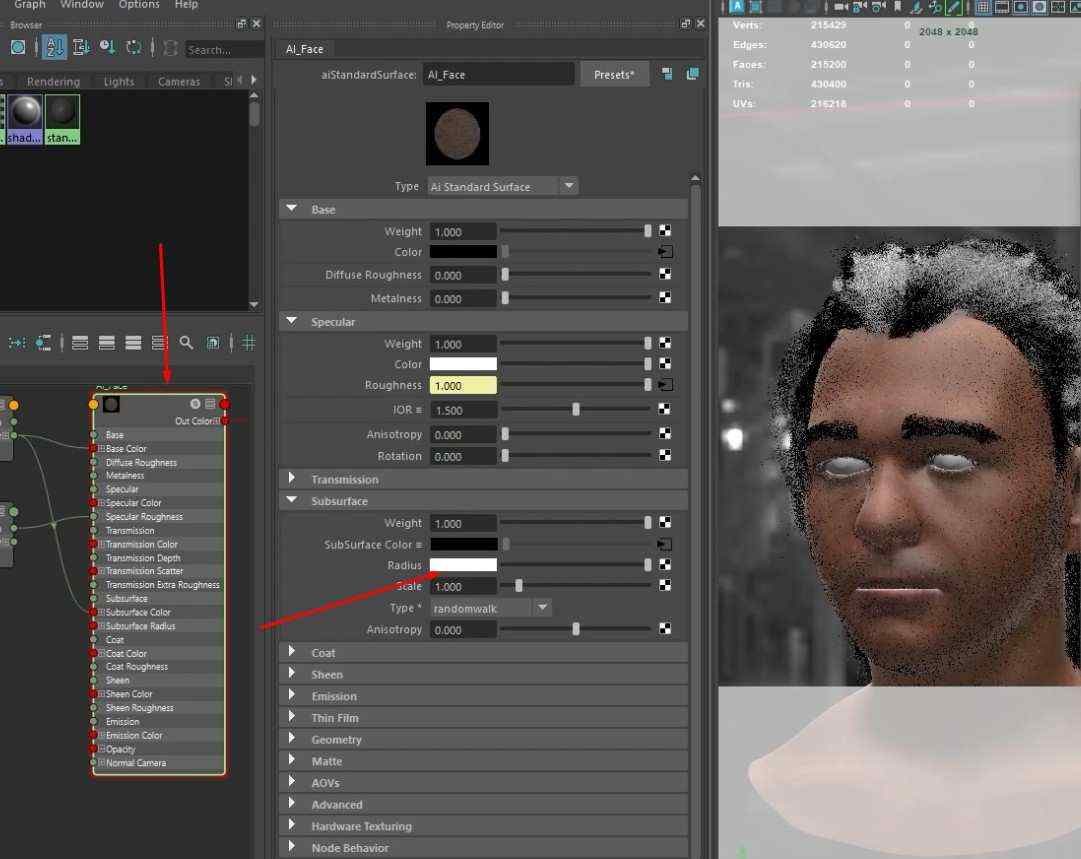
- Change the color of the subsurface scattering by clicking on the Radius white box and selecting a red-ish color.
- Adjust the Scale value to control how intense the subsurface scattering is.
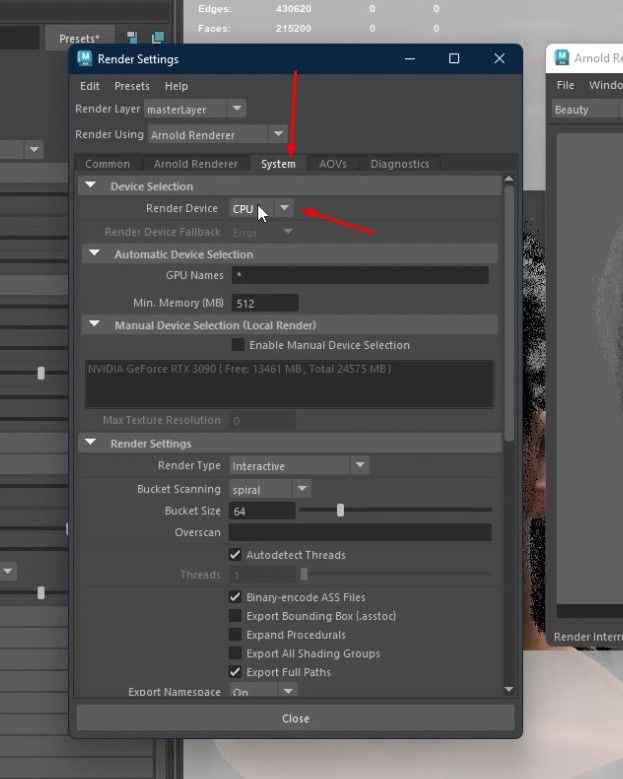
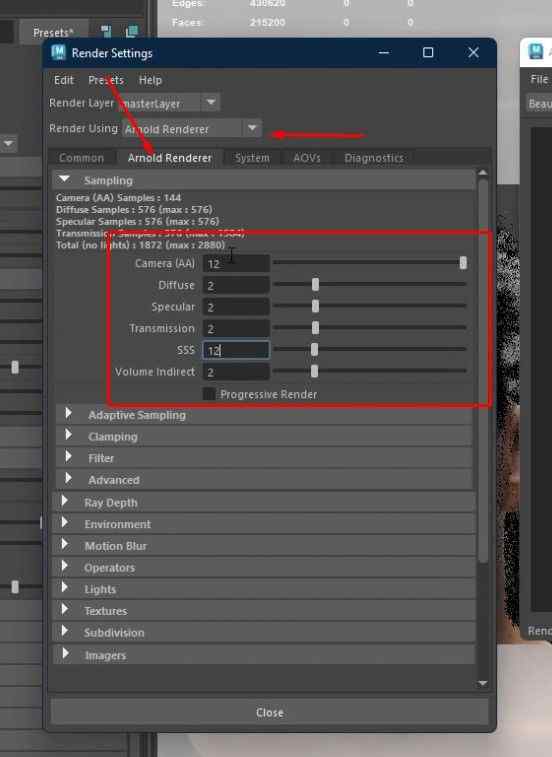
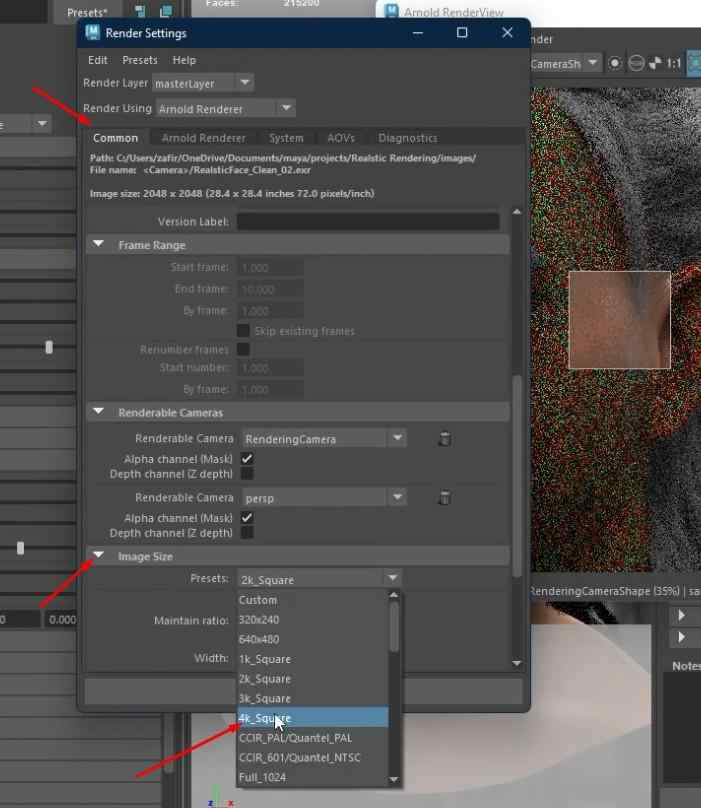
- Open the Render Settings window.
- Set the software to render with the GPU if you have a powerful one.
- Make sure that Render Using is set to Arnold Render.
- If you are rendering with a CPU, open the Arnold Render settings to make sure each value is set properly, especially the SSS (Subsurface Scattering).
- To add a Displacement map, the model needs to have a high amount of polygons.
Alternatively
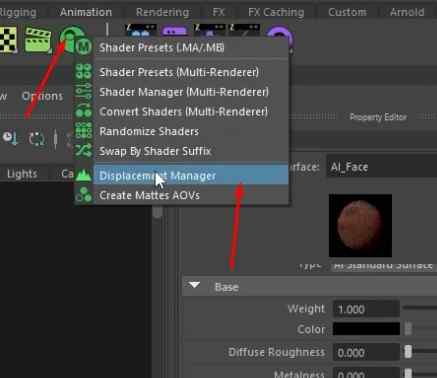
- Instead of adding more divisions to the model, we can instead use the save Displacement Manager to add more topology on the rendered image rather than the model itself.
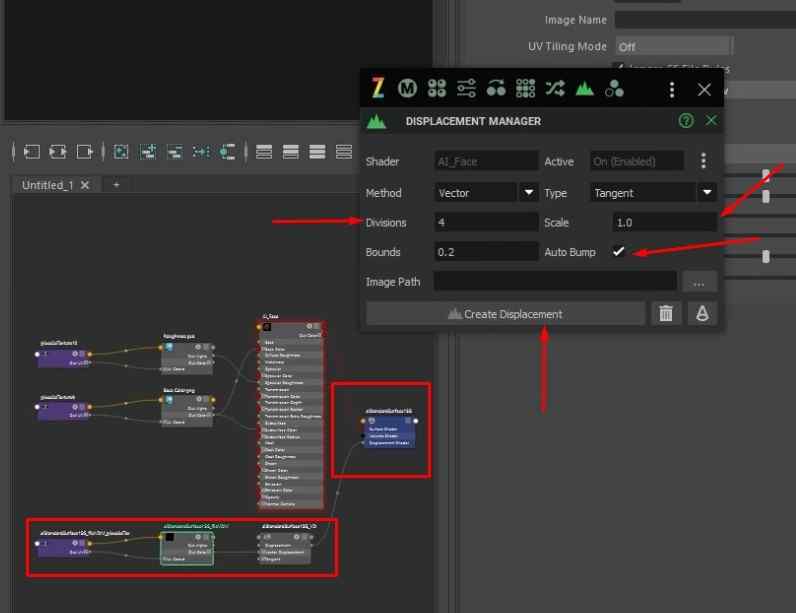
- In the Displacement Manager, add 4 Divisions, set the Scale to lower than 1, 0.07, and tick the Auto Bump box.
- Click on Create Displacement to make new nodes inside the graph for the displacement.
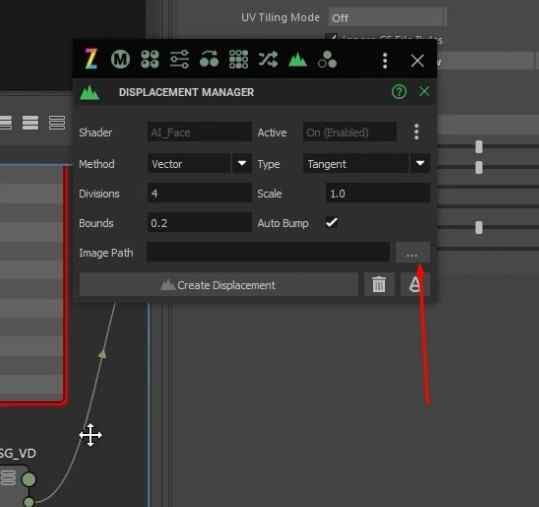
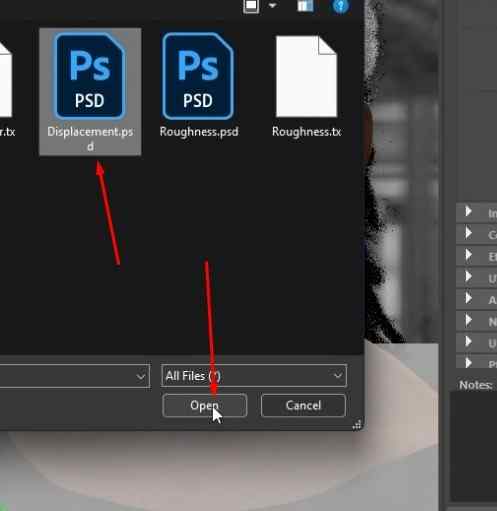
- Select the Displacement PSD file from the Image Path.
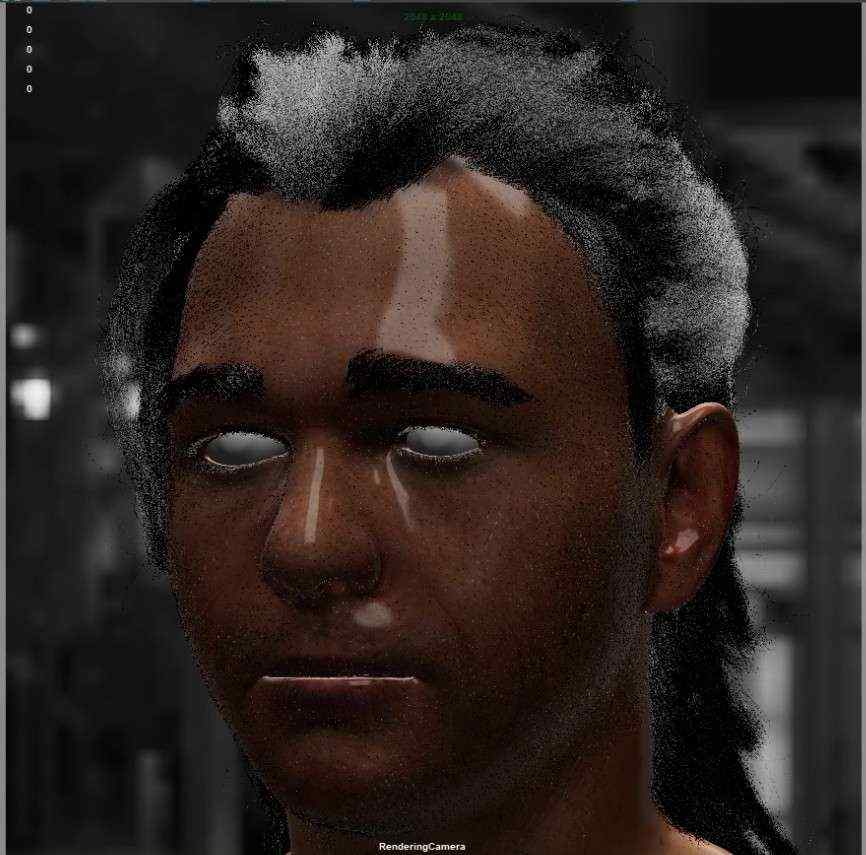
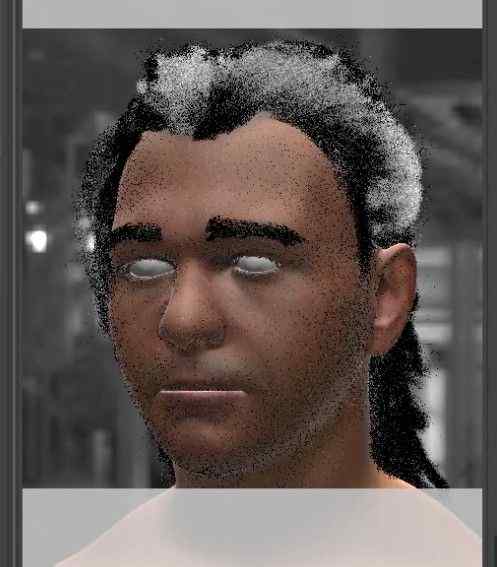
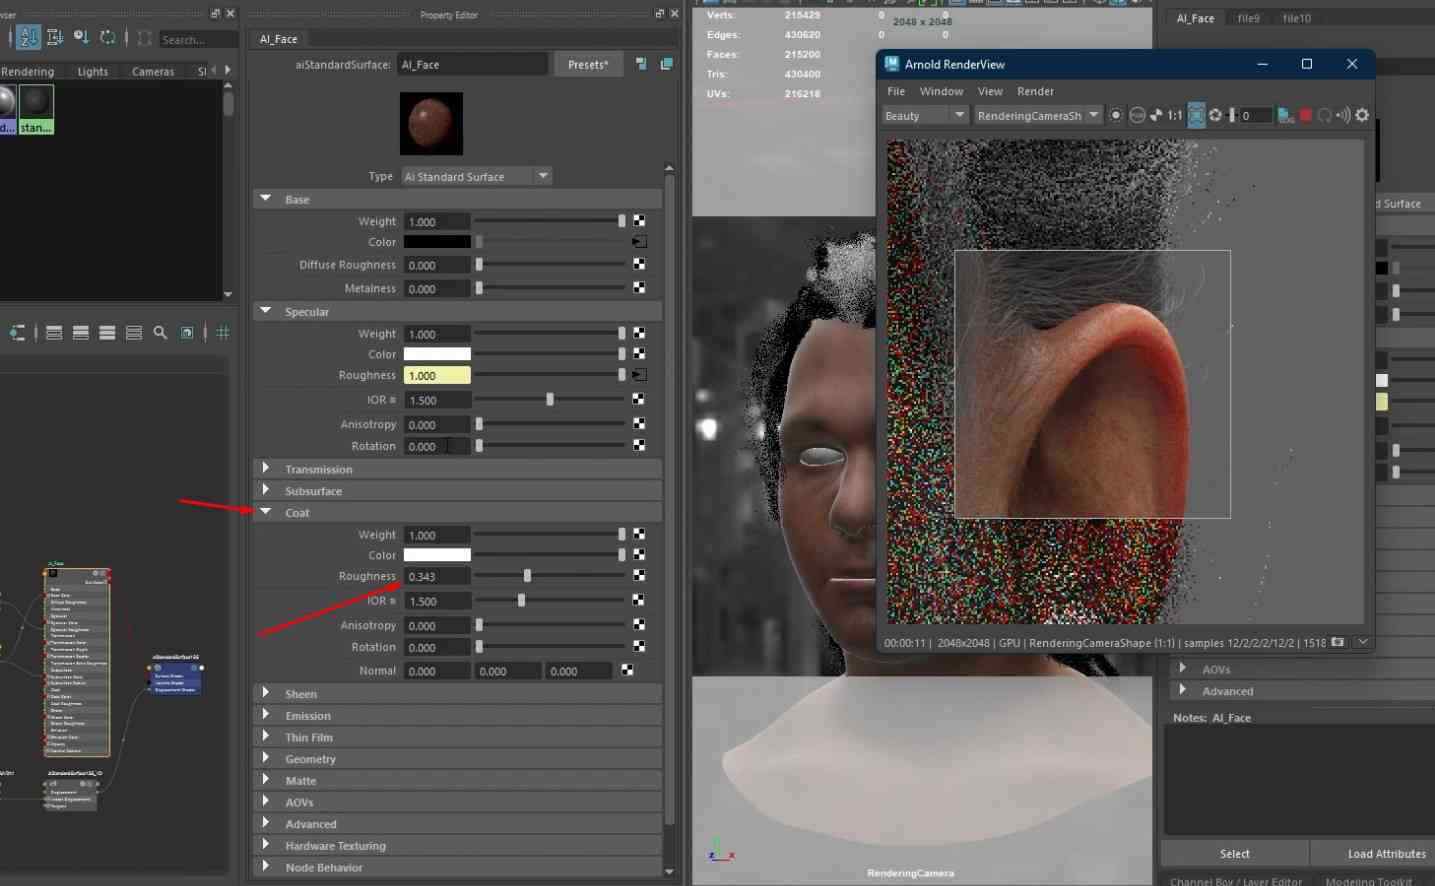
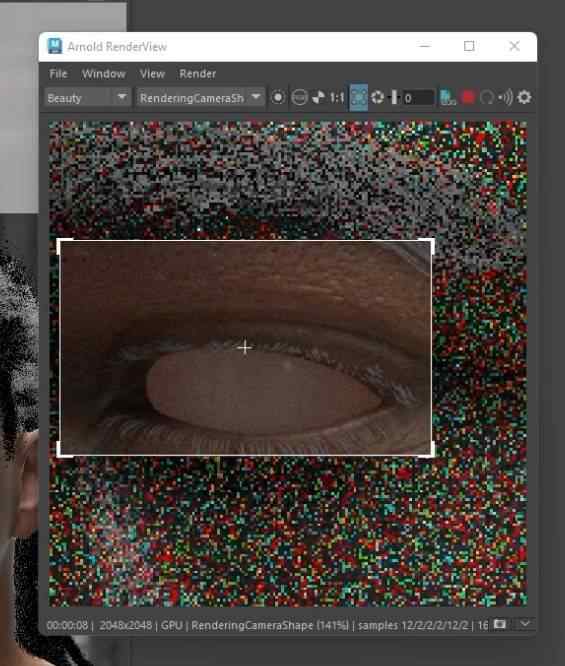
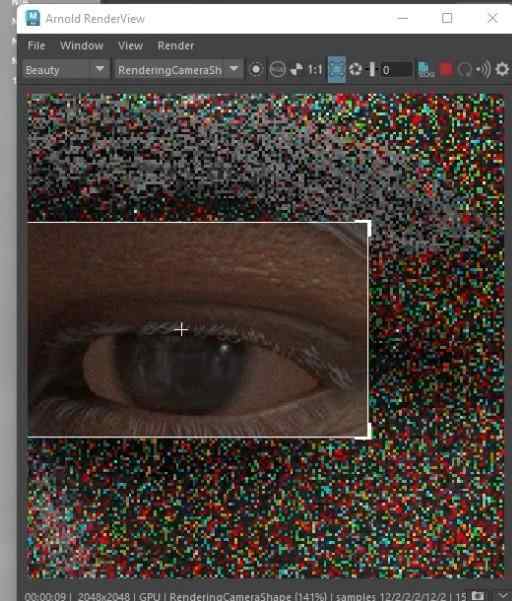
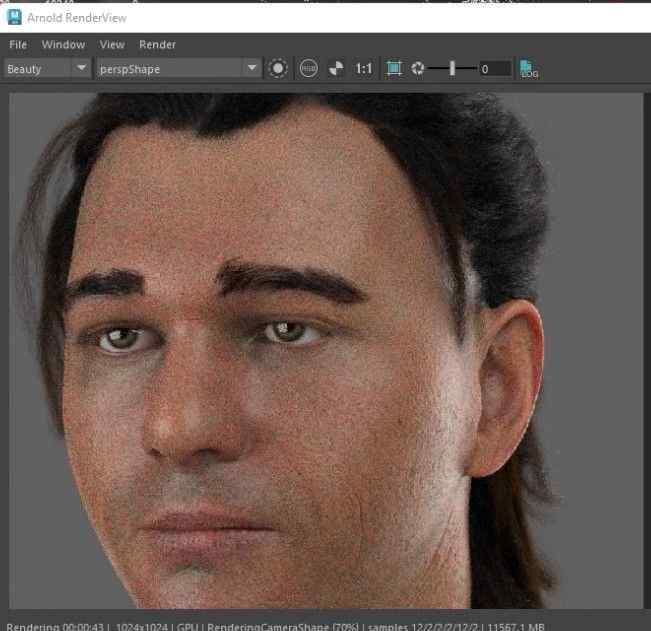
- When we play the render we can see pores on the surface of the skin.
- You can change the Scale to adjust how big the bumps from the displacement maps are going to be at any time.
Texture Maps to the Corneas of the Eyes
1. Prepare the Corneas
- Open the Render Settings and change the Preset resolution for better quality.
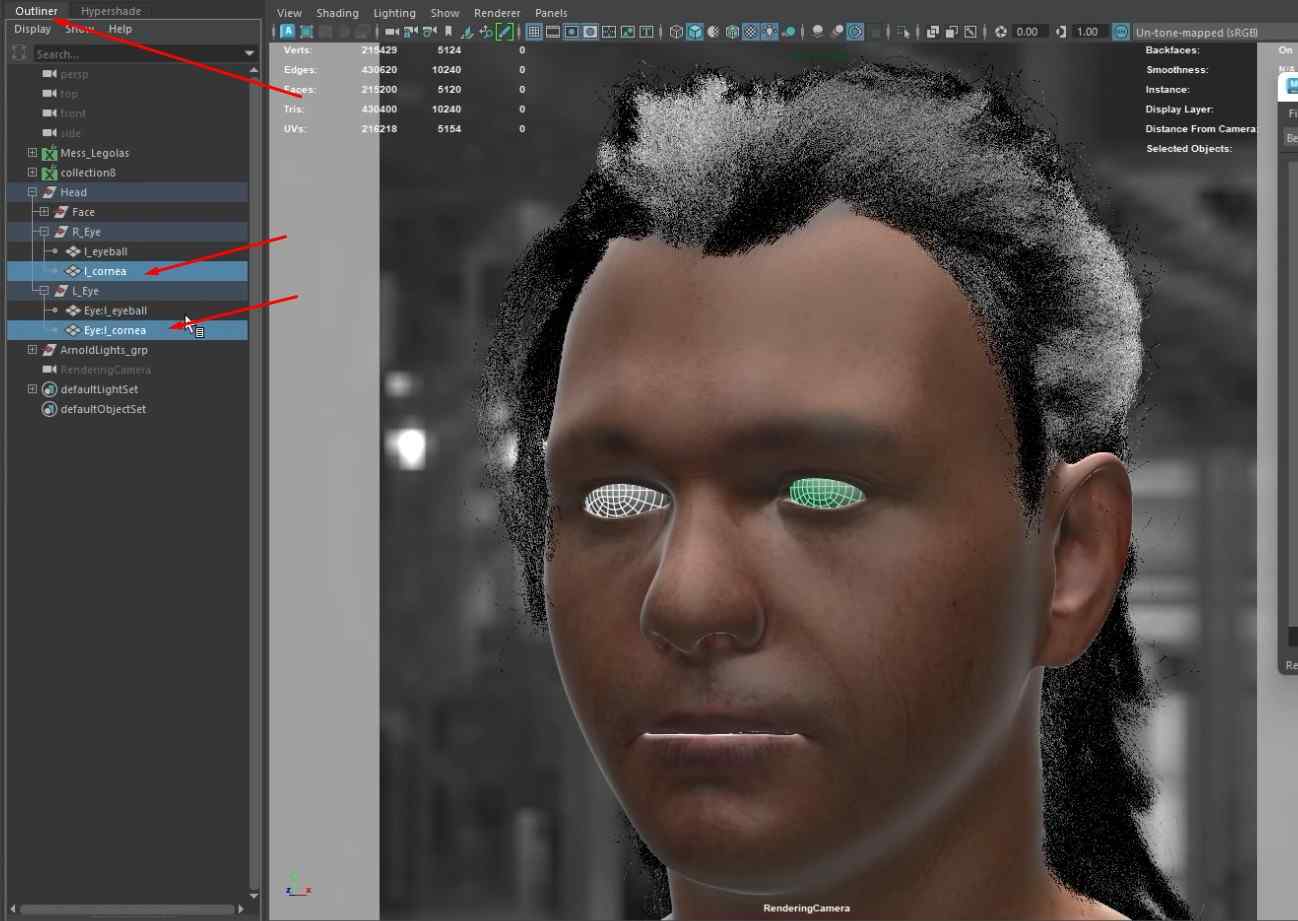
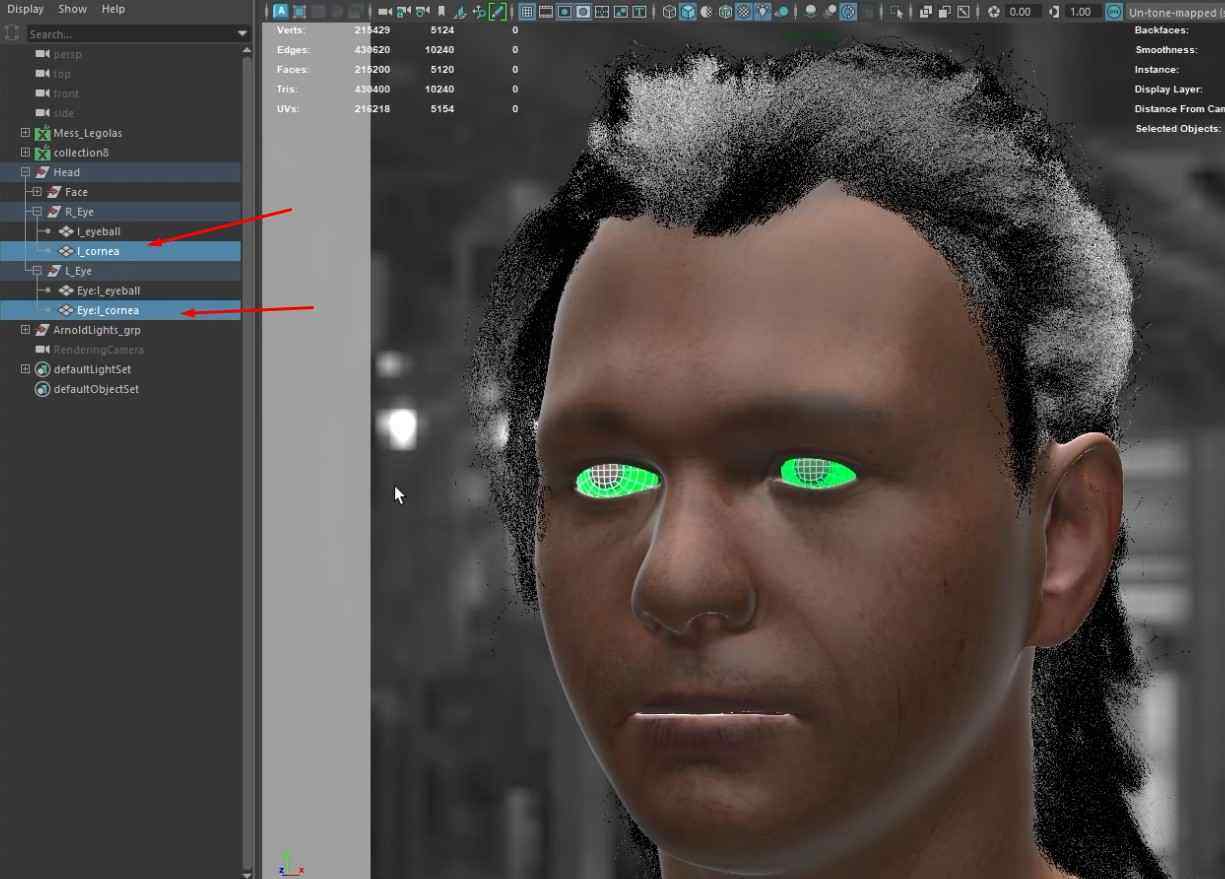
- Select the right and left cornea from the outliner.
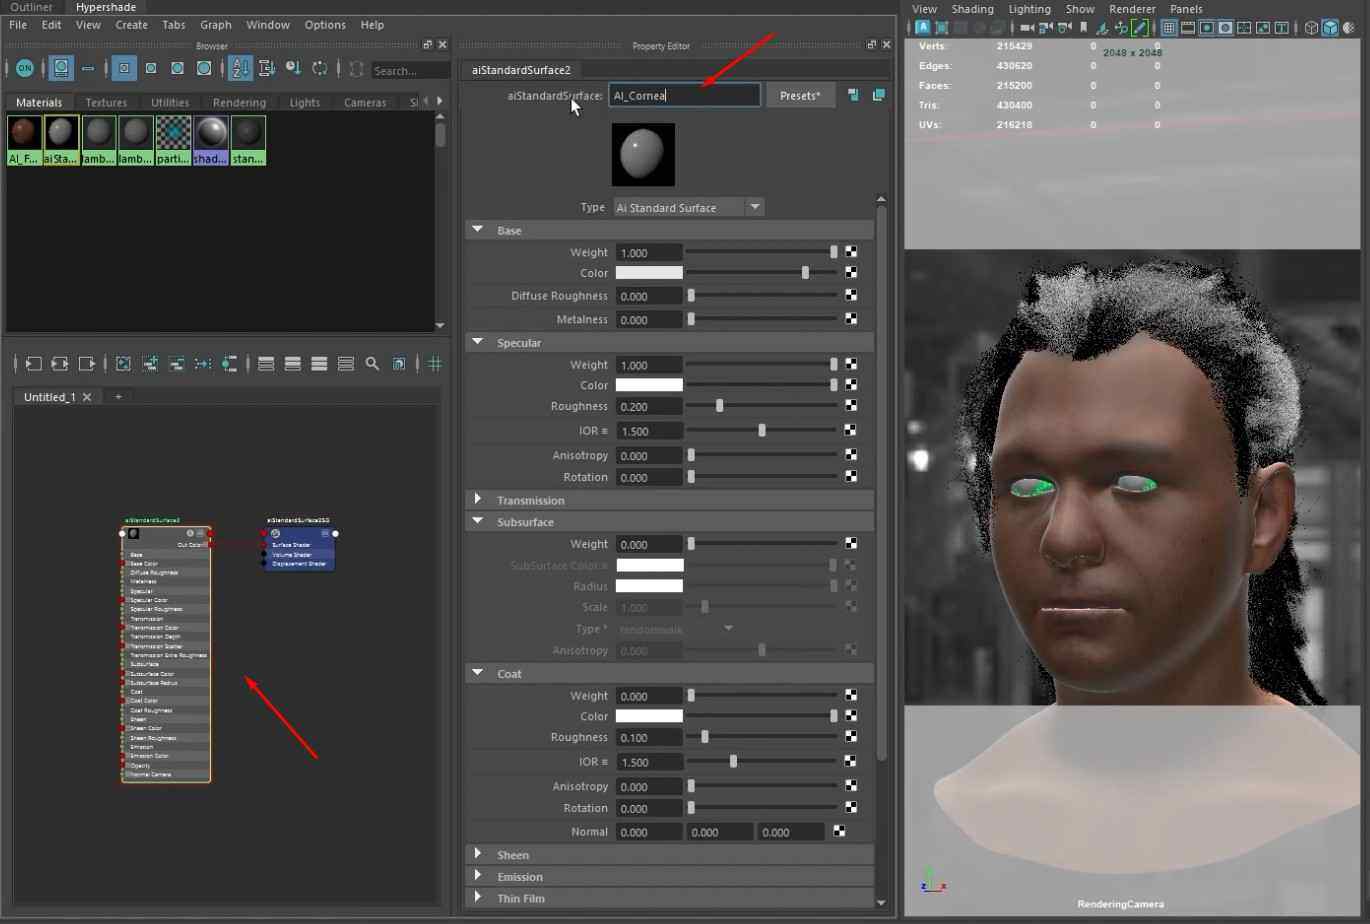
- Assign a new aiStandardSurface material to each cornea.
- Rename the material to AI_Cornea.
2. Put in Texture Maps
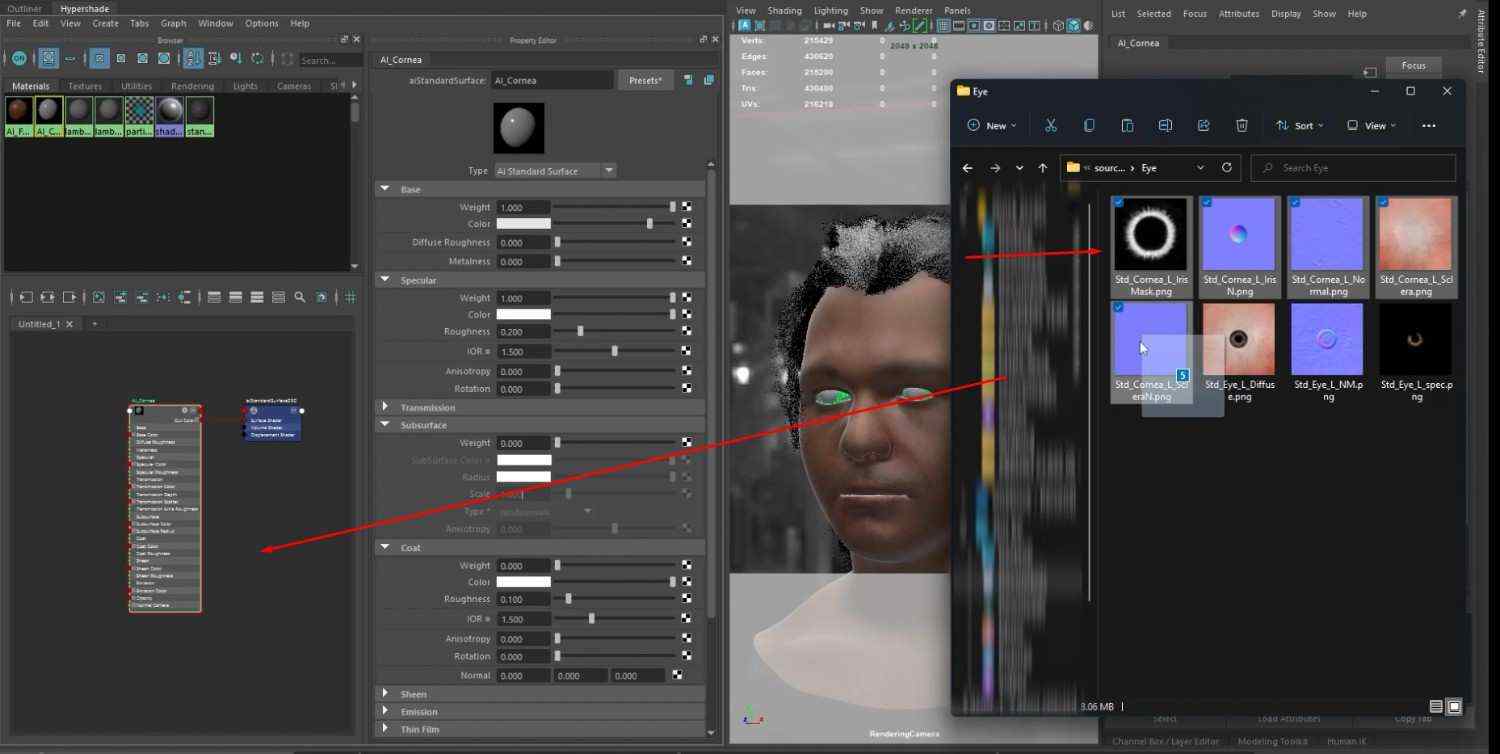
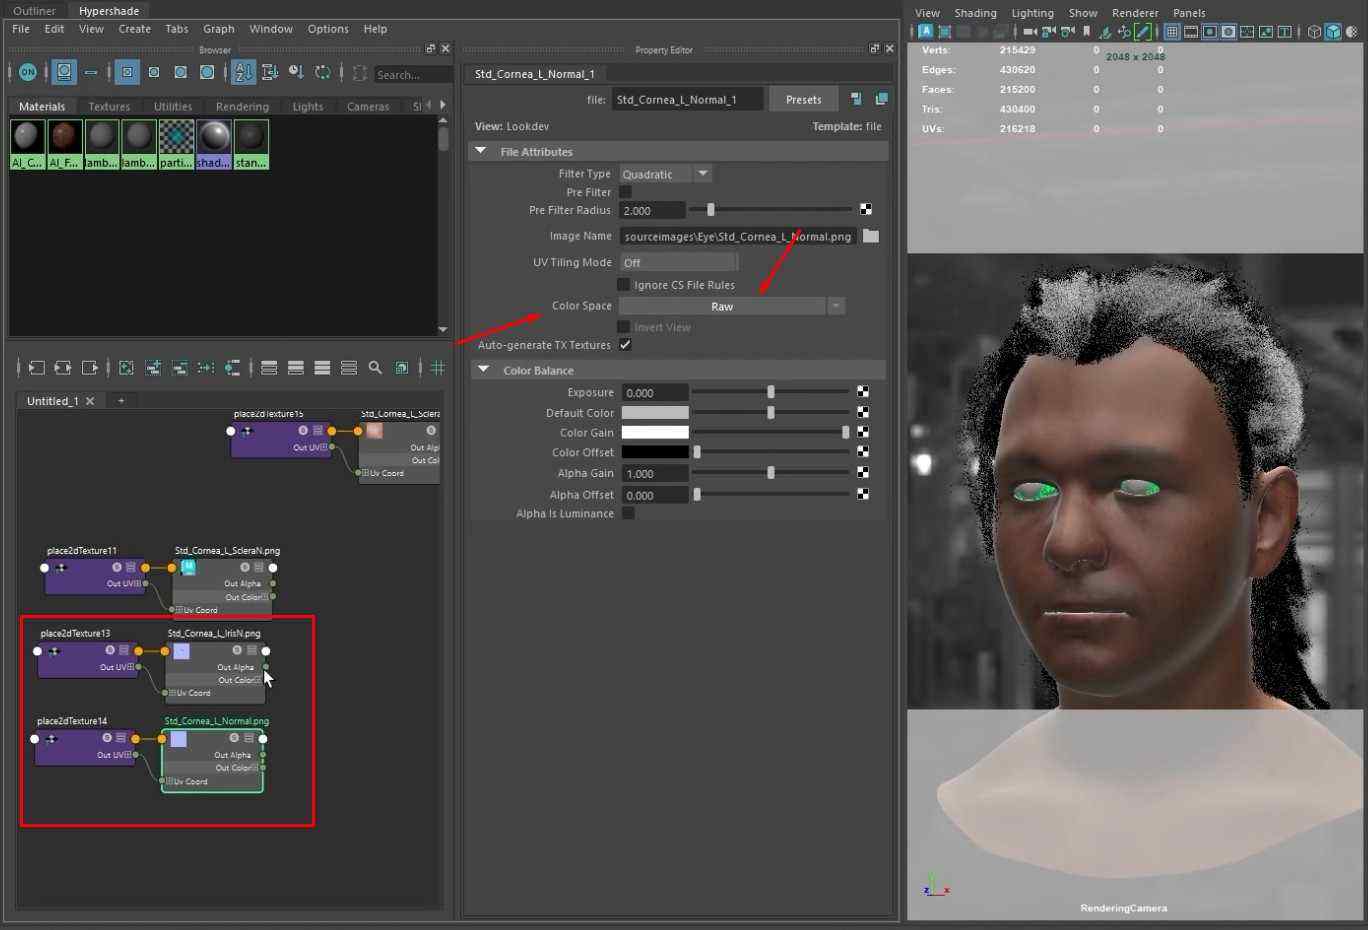
- Drag and drop all cornea maps into the graph.
- Arrange them in the correct order.
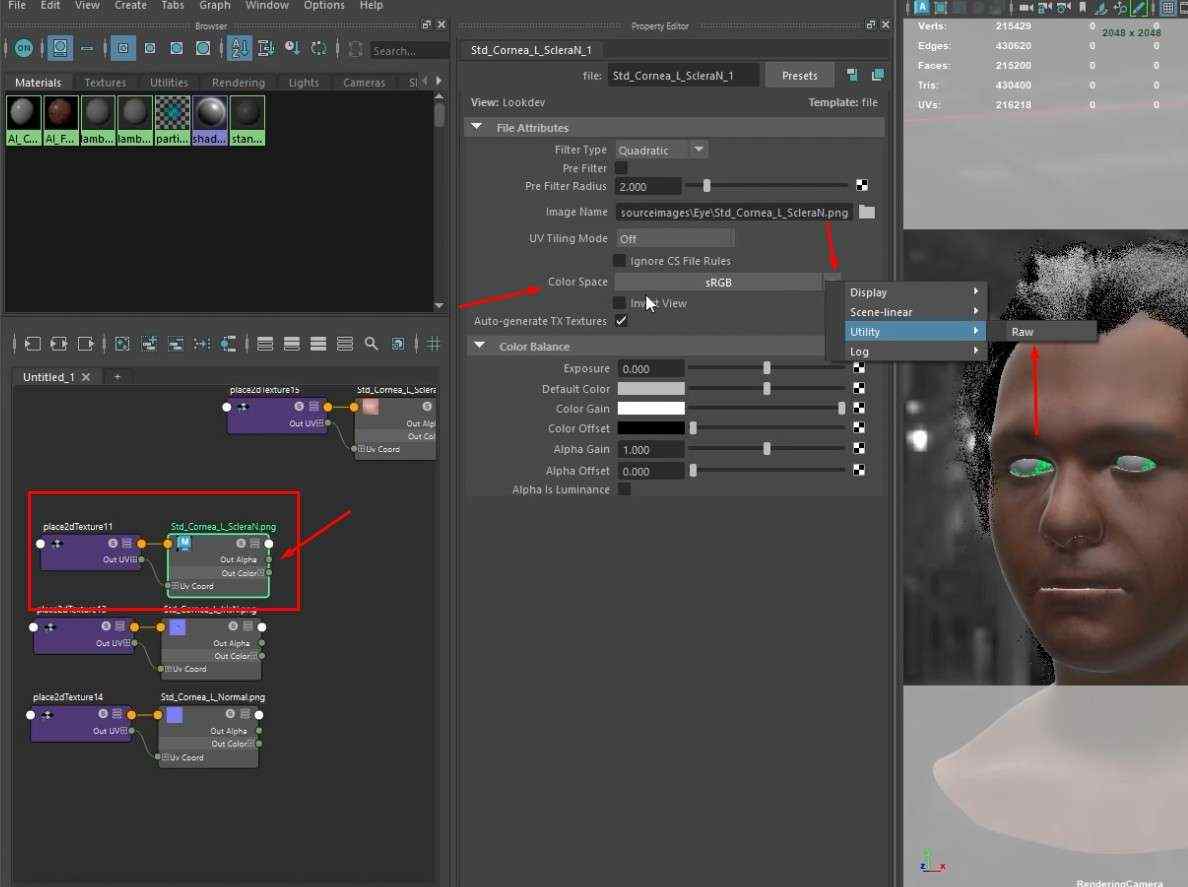
- Switch the Color Space of each Normal map from sRBG to Raw.
3. Fine-tune Subsurface Scattering
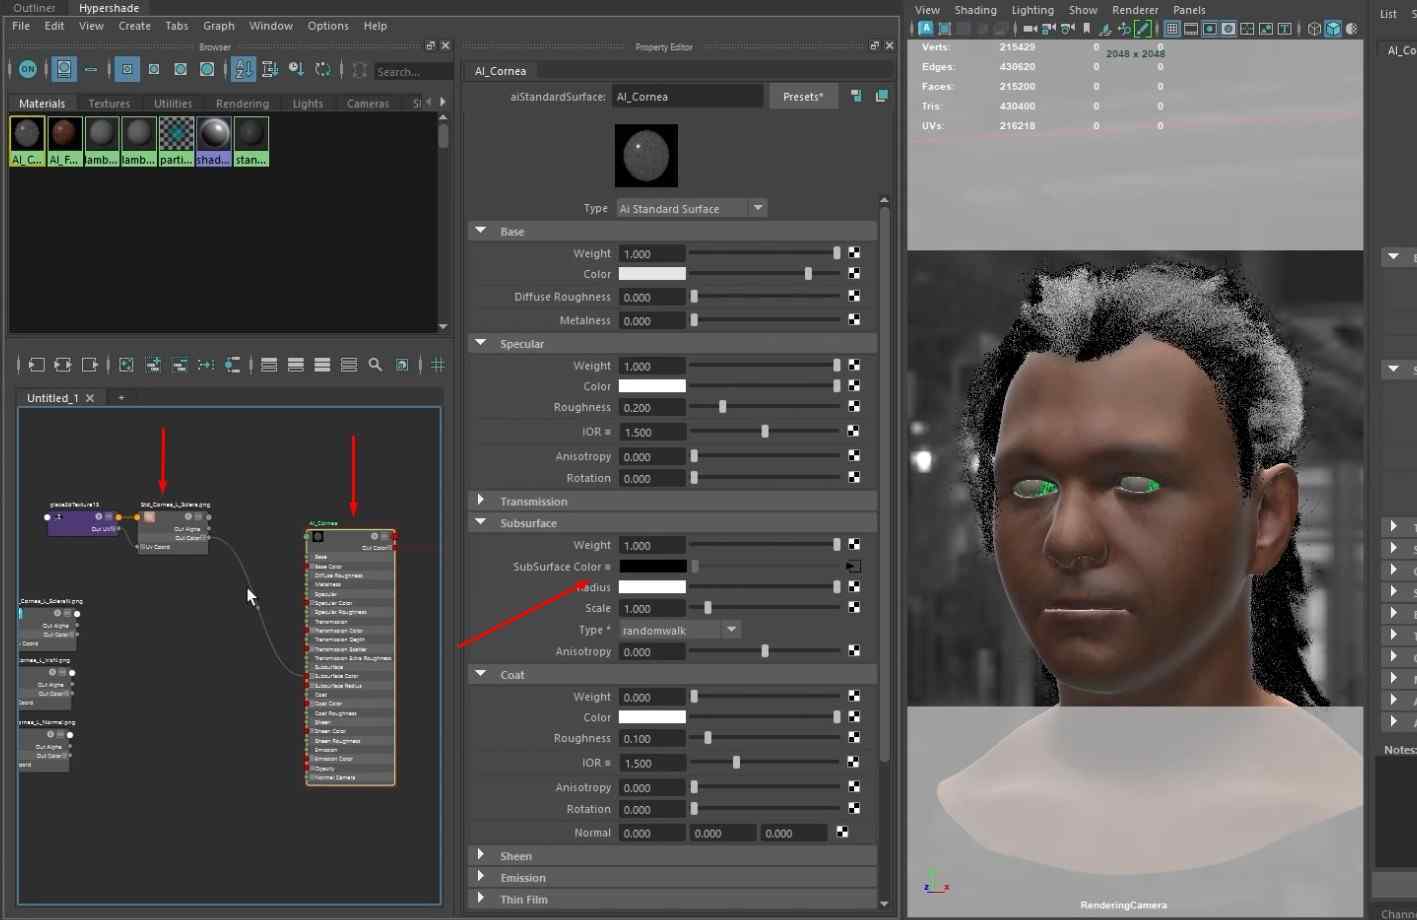
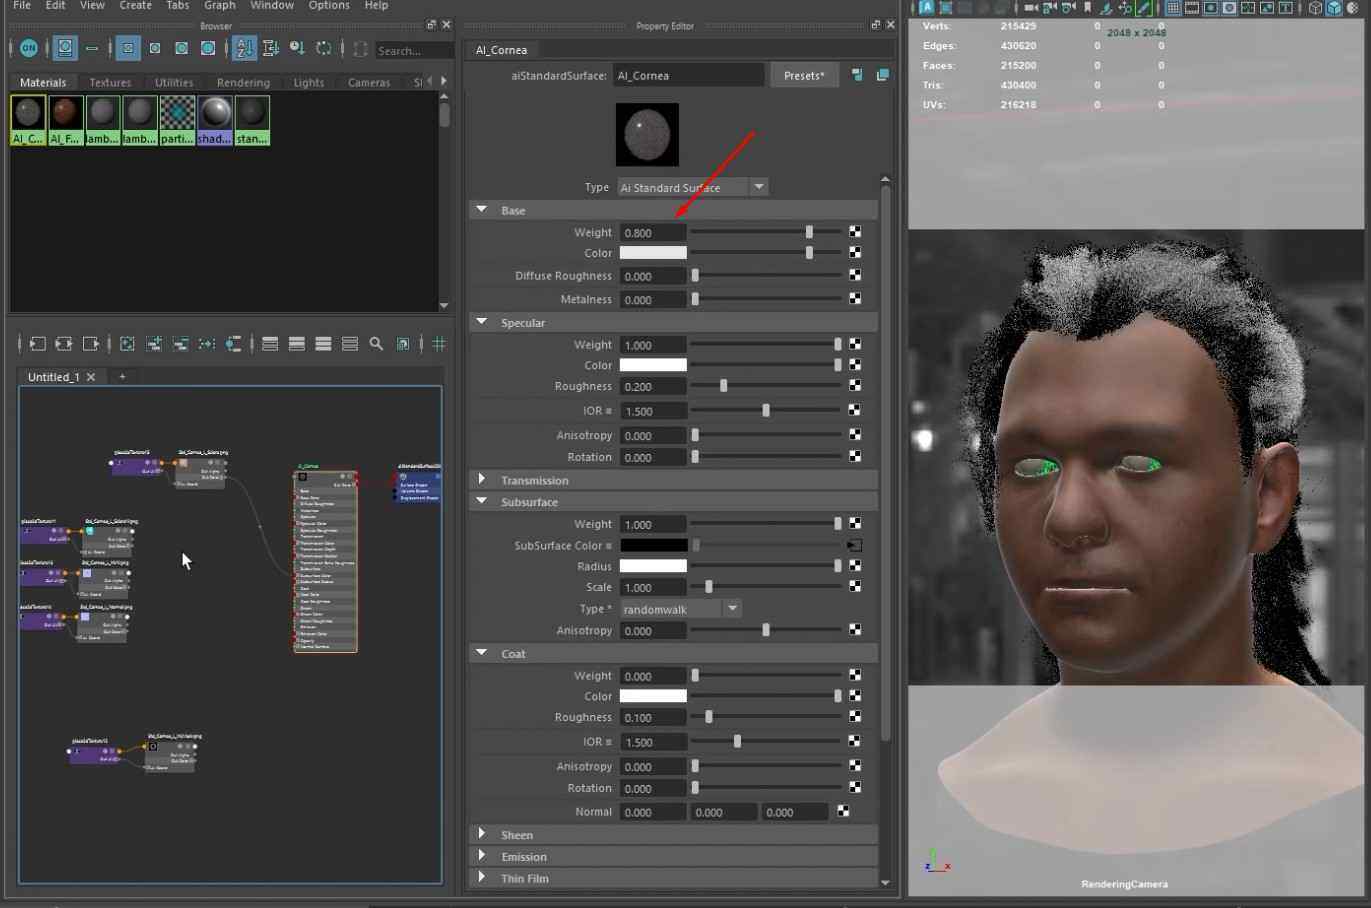
- Increase the Subsurface Weight to 1 in the AI_Cornea material/node.
- Connect the Base Color node to the Subsurface Color.
4. Connect Normal Maps
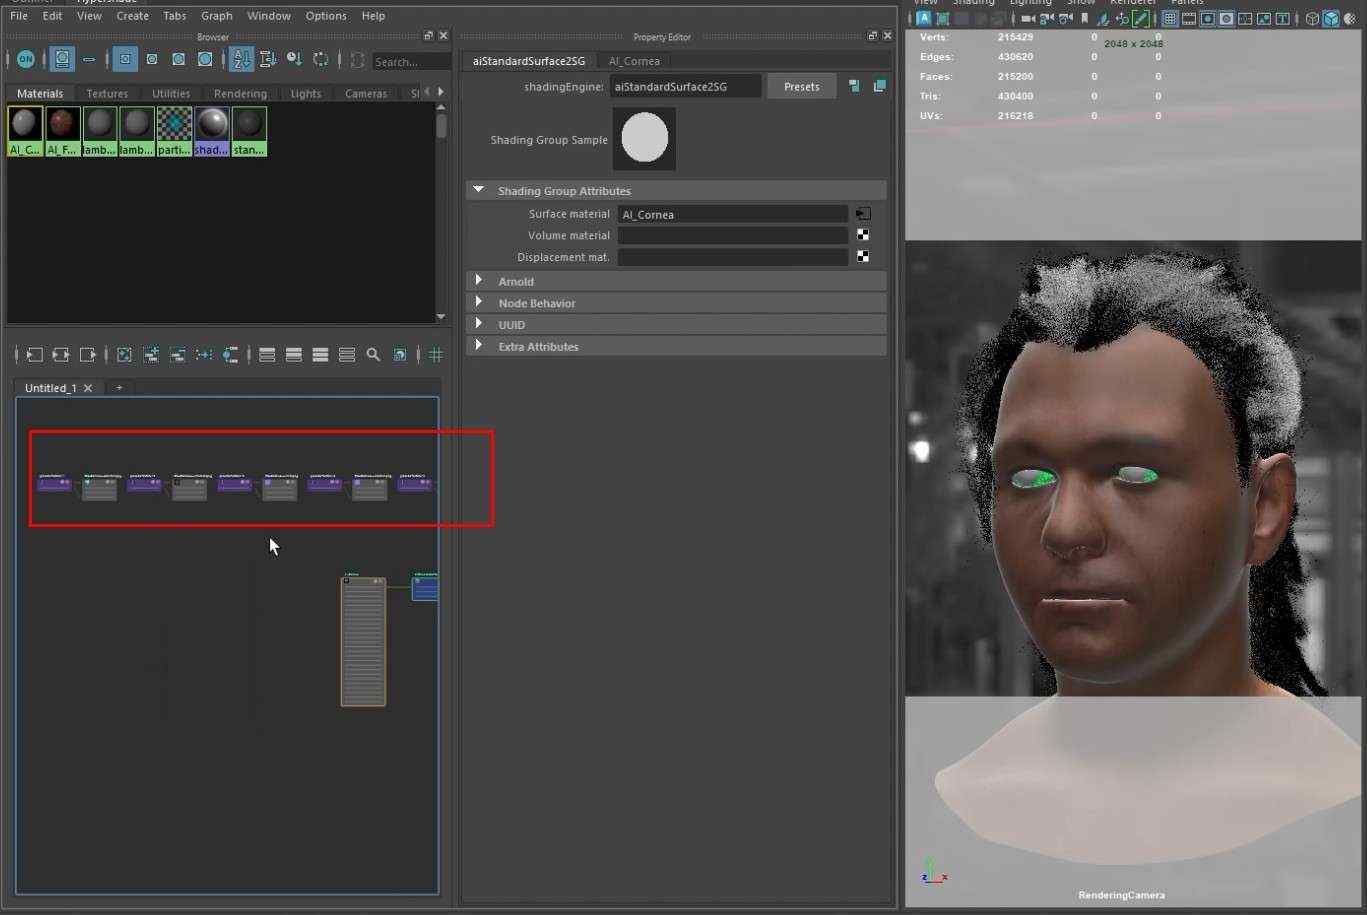
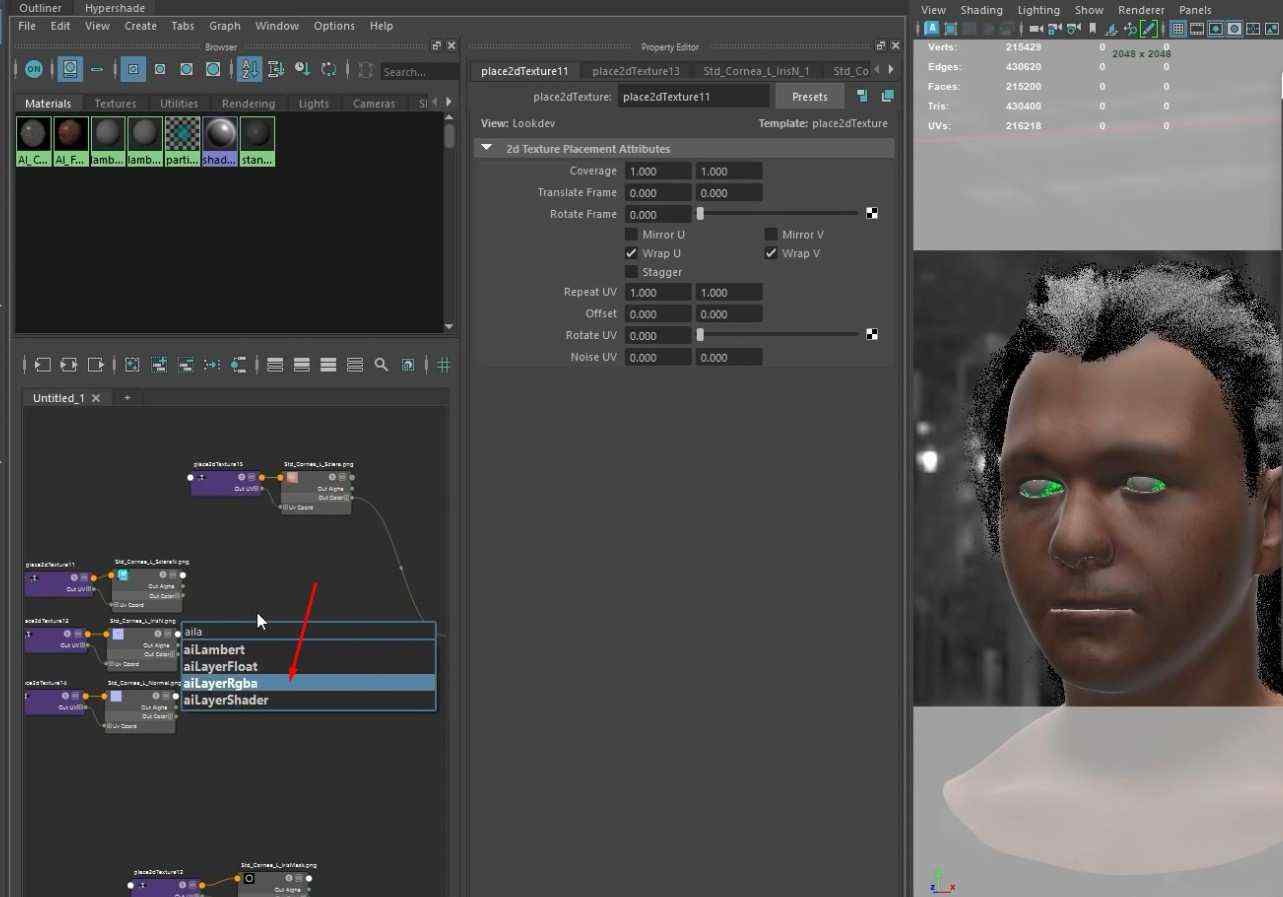
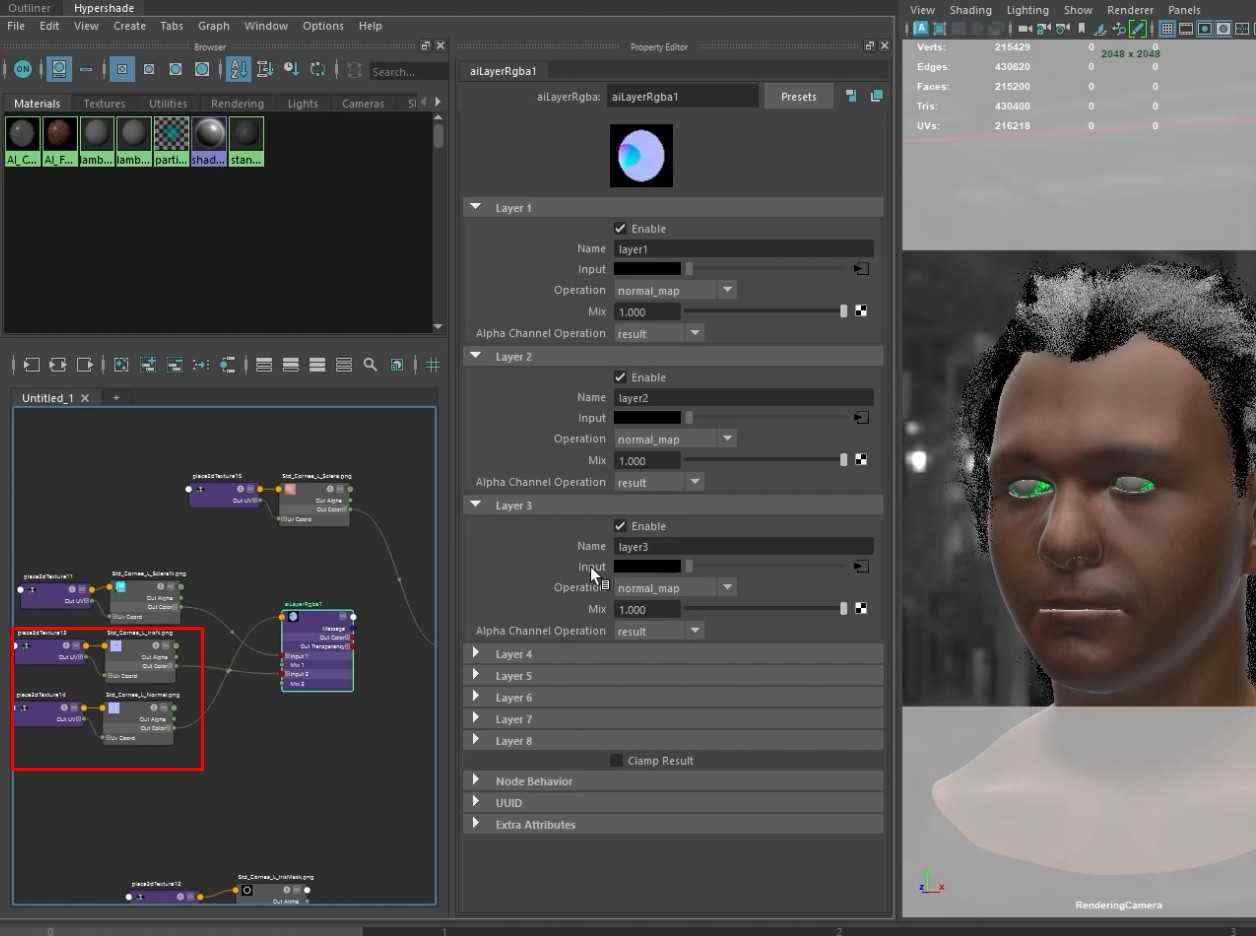
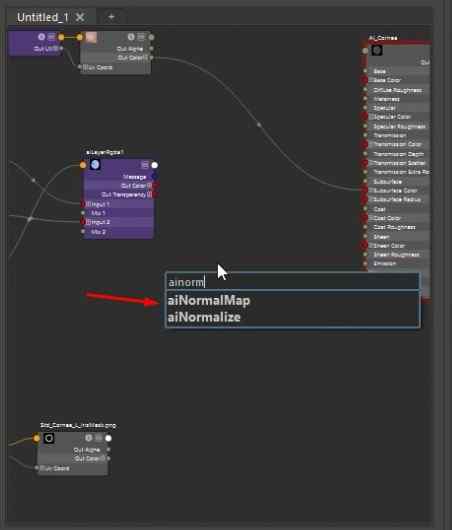
- Click Tab while hovering on the graph and search for aiLayerRgba.
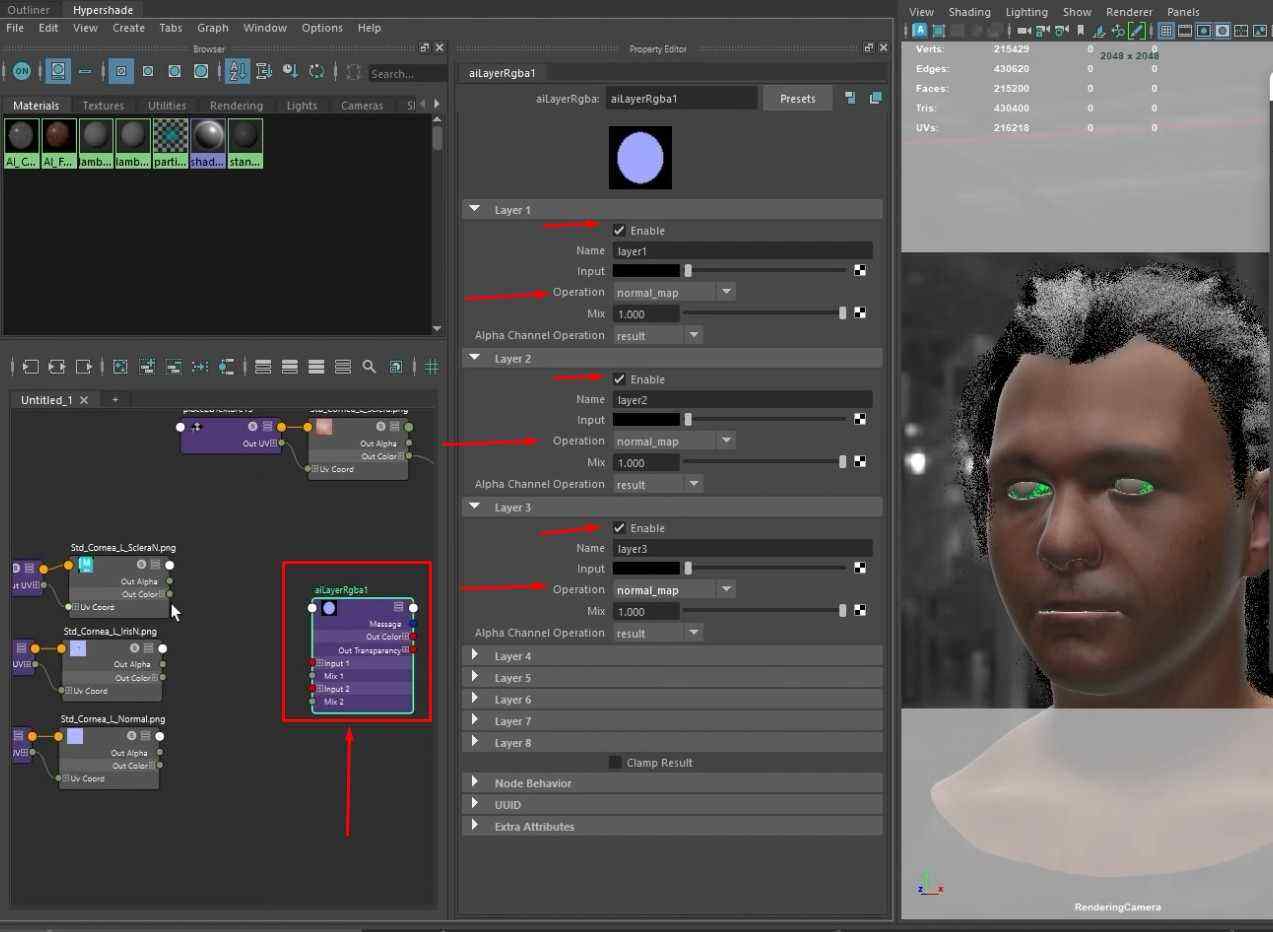
- Enable all 3 layers in the new node.
- Switch all Operations to normal_map.
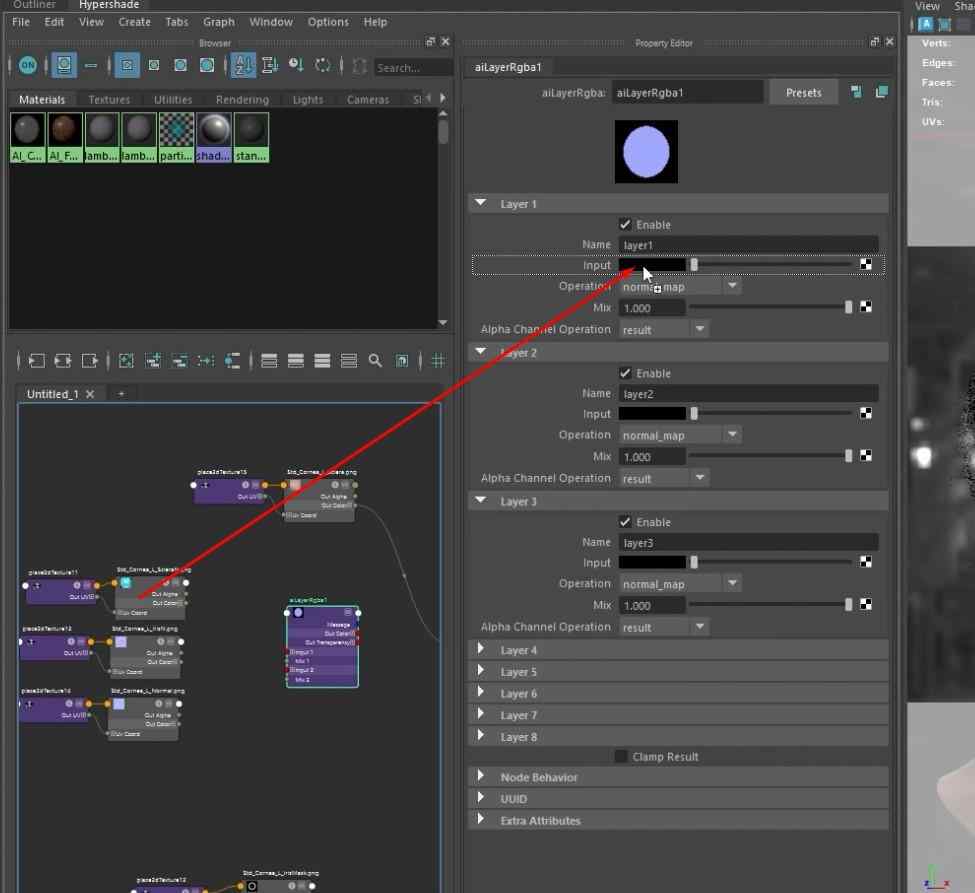
- Drag and drop each normal map node into its layer inside the Inputs.
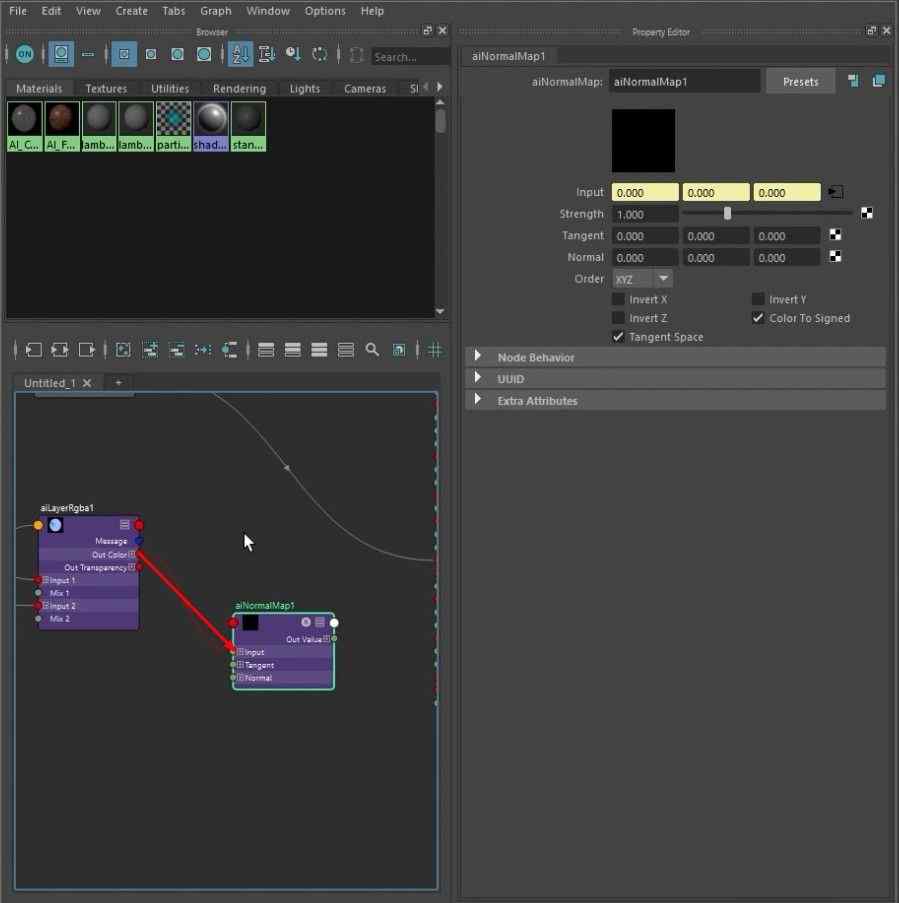
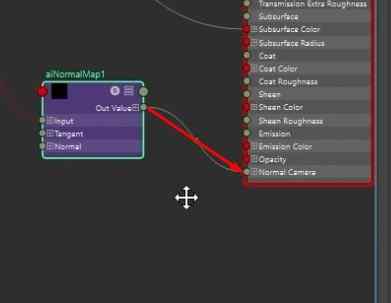
- Add an aiNormalMap node & connect the node to the Out Color from aiLayerRgba and then the Normal Camera of AI_Cornea.
5. Add Transparency
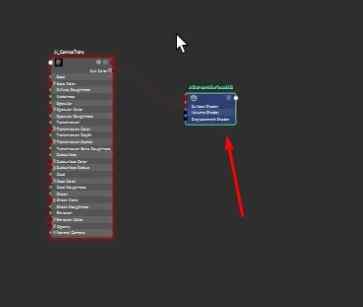
- Delete the blue node and Add an aiStandardSurface material.
- Rename the material to AI_CorneaTrans.
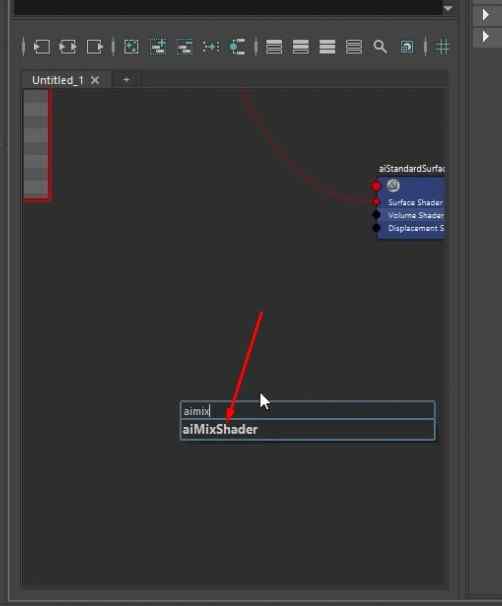
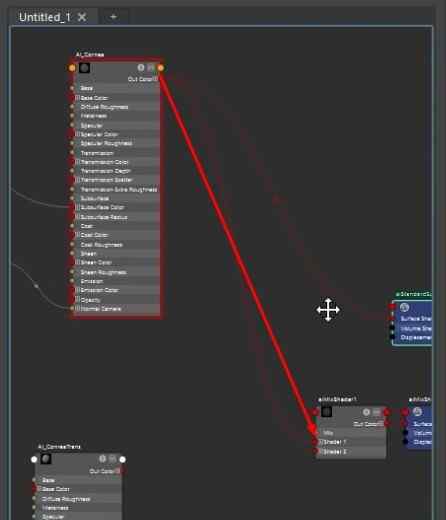
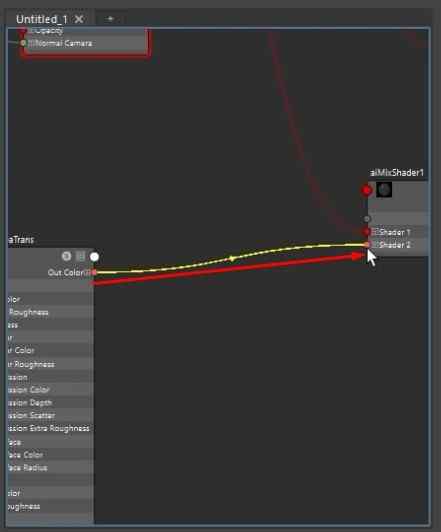
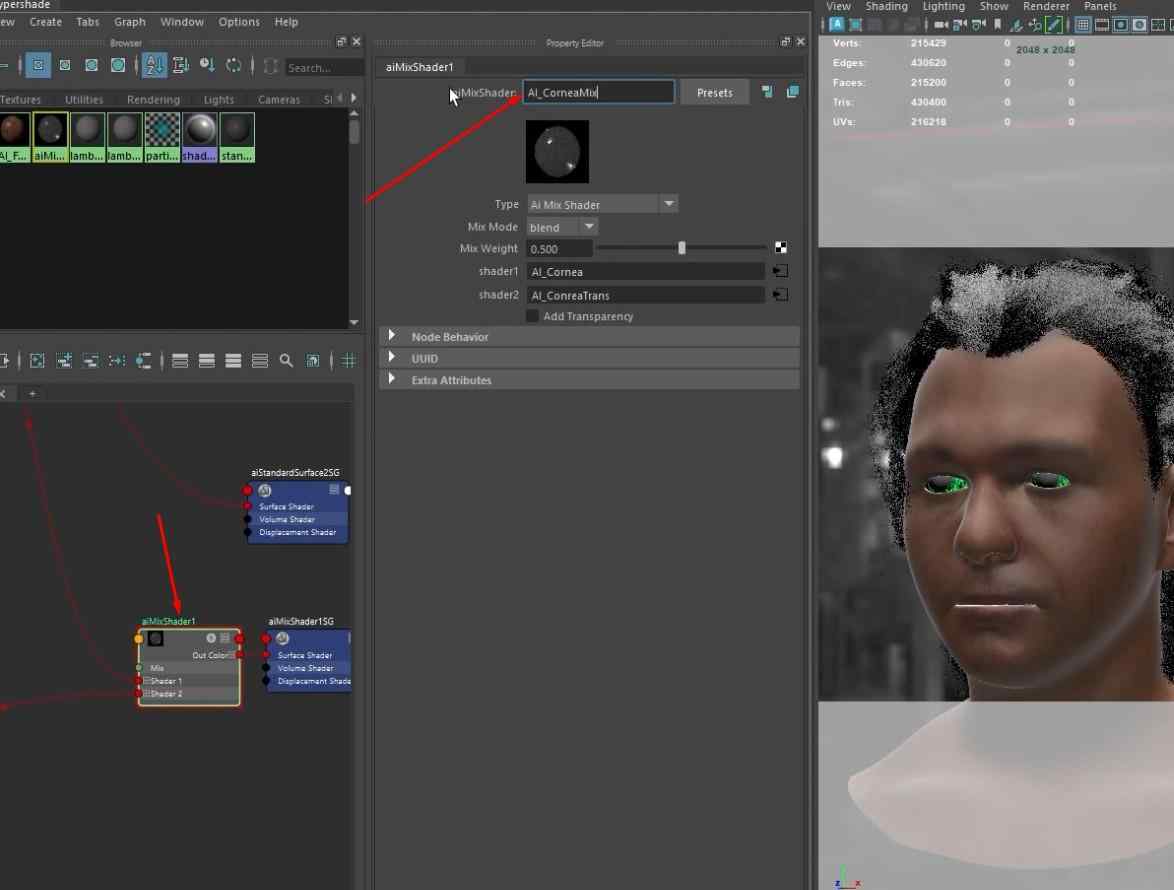
- Add an aiMixerShader and connect the Out Color from AI_Cornea and AI_CorneaTrans to Shader 1 and Shader 2, respectively.
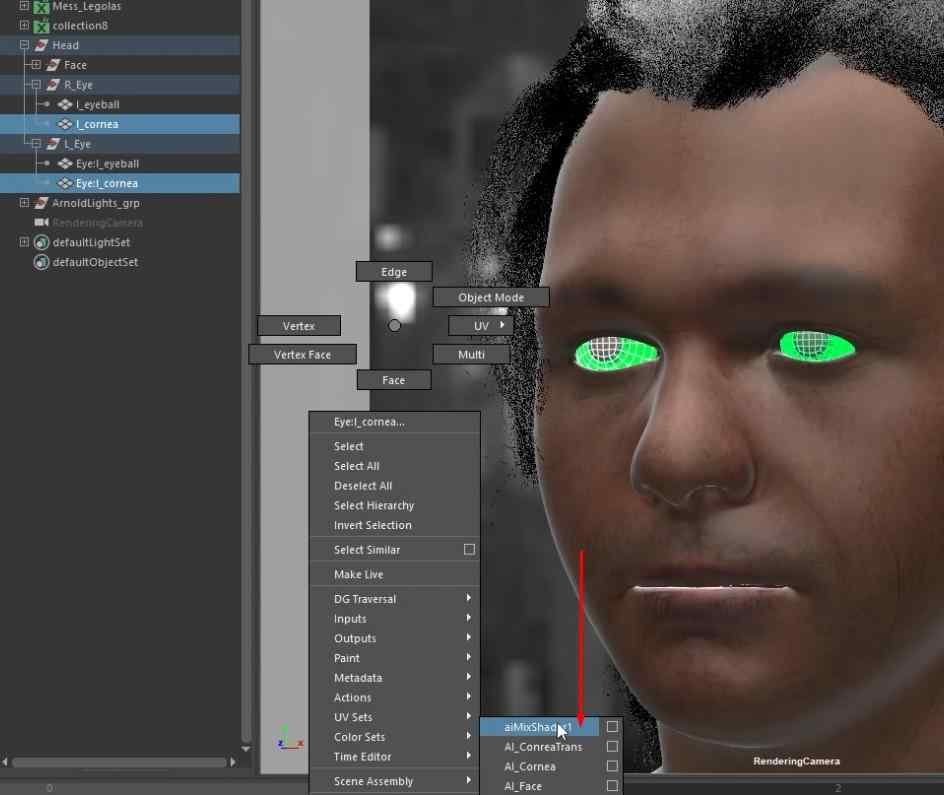
- Assign the aiMixerShader to the left and right cornea.
- Rename the aiMixerShader to AI_CorneaMix.
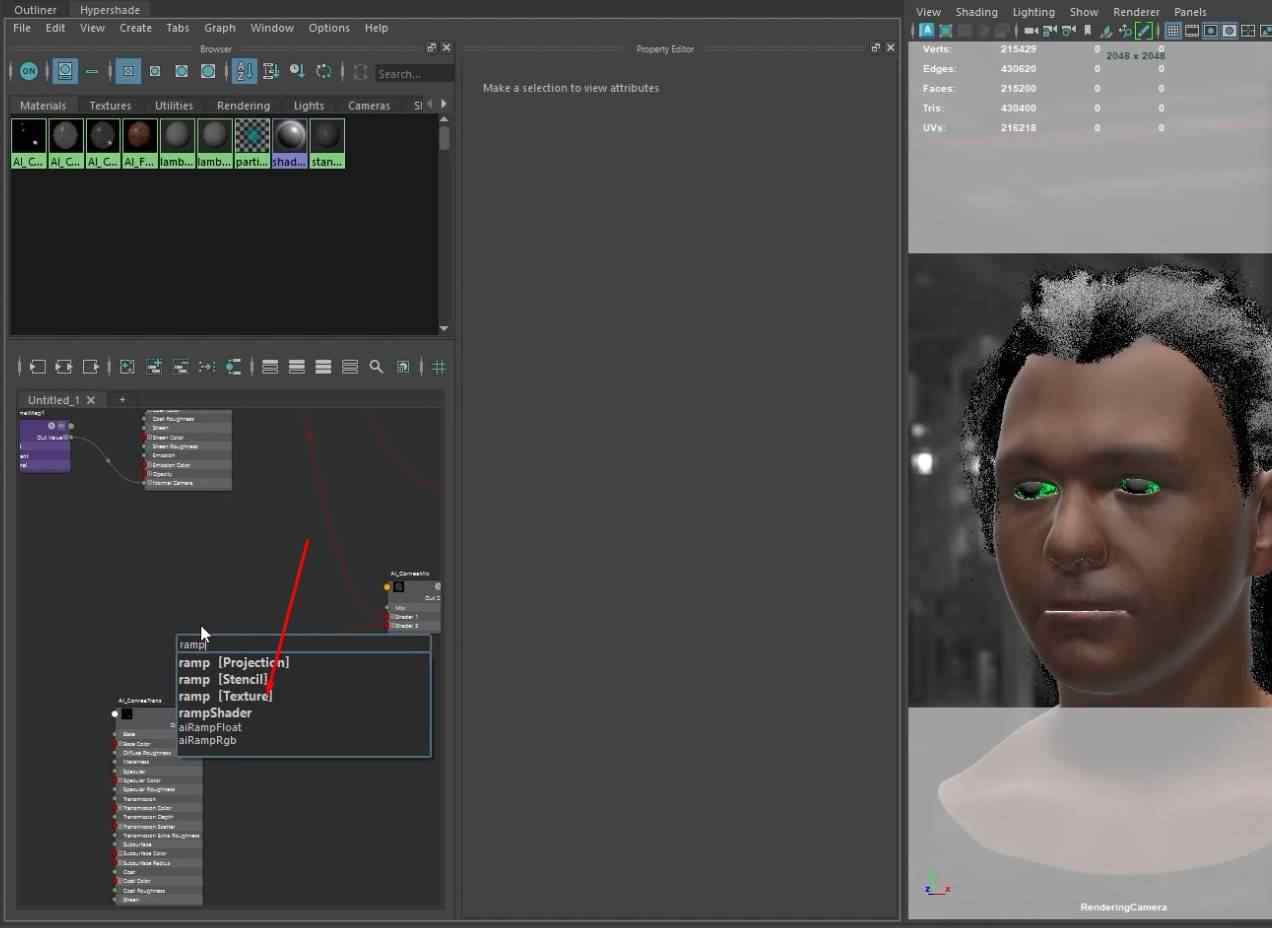
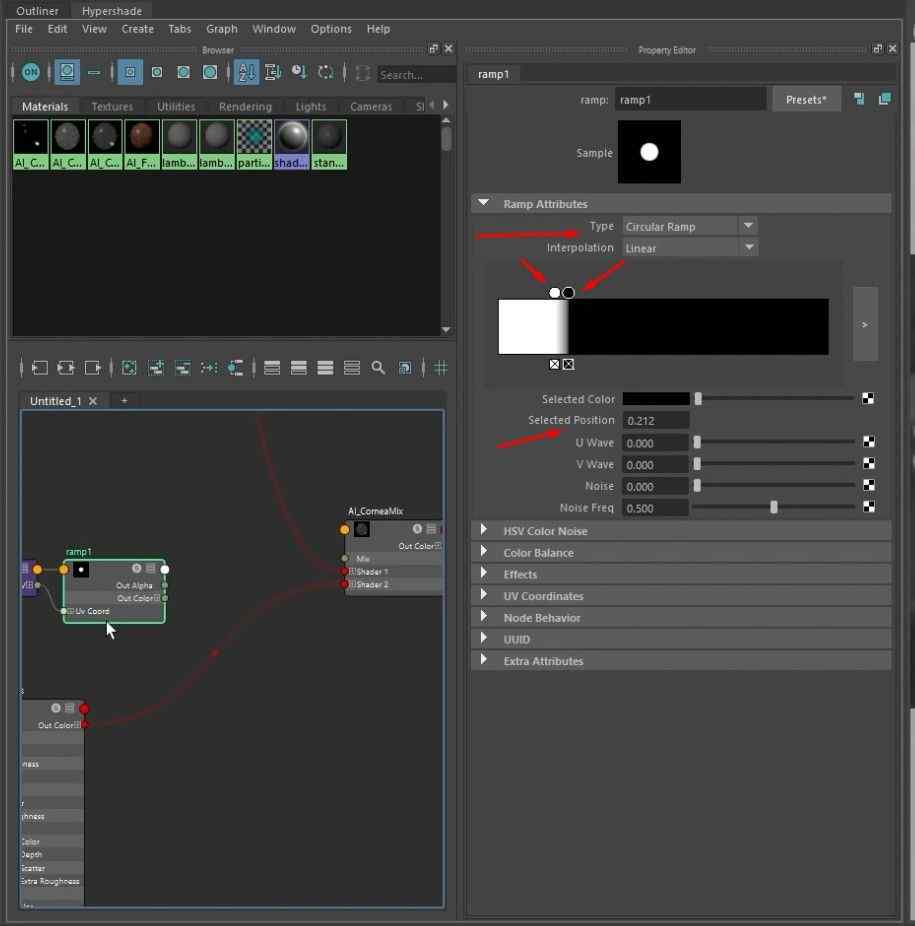
- Add a ramp node, change the Type to a Circular Ramp, and adjust the Scale Position.
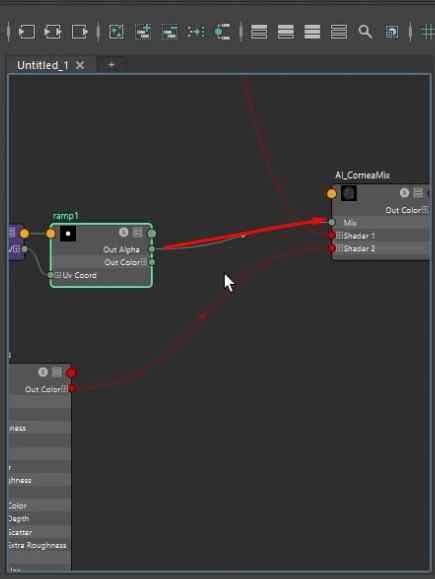
- Connect the ramp node’s Out Alpha to the Mix of AI_CorneaMix.
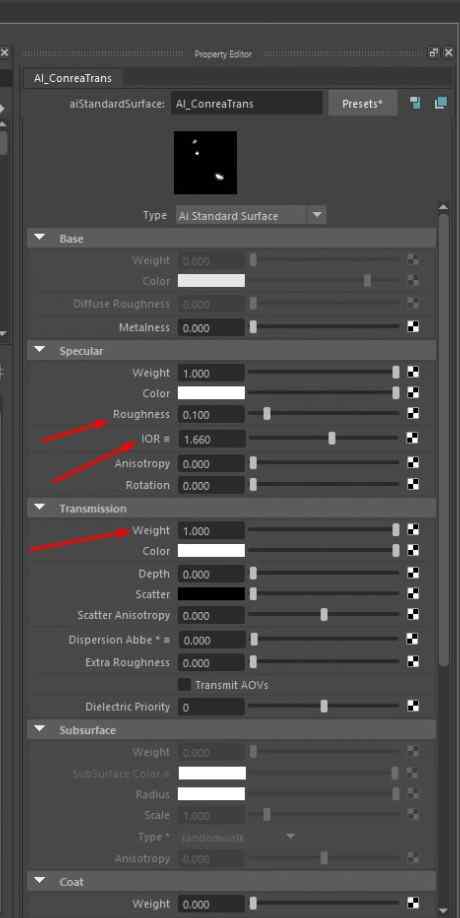
- Adjust the Roughness, IOR, and Transmission Weight values in AI_CorneaTrans.
Applying Texture Maps to the Eyeballs
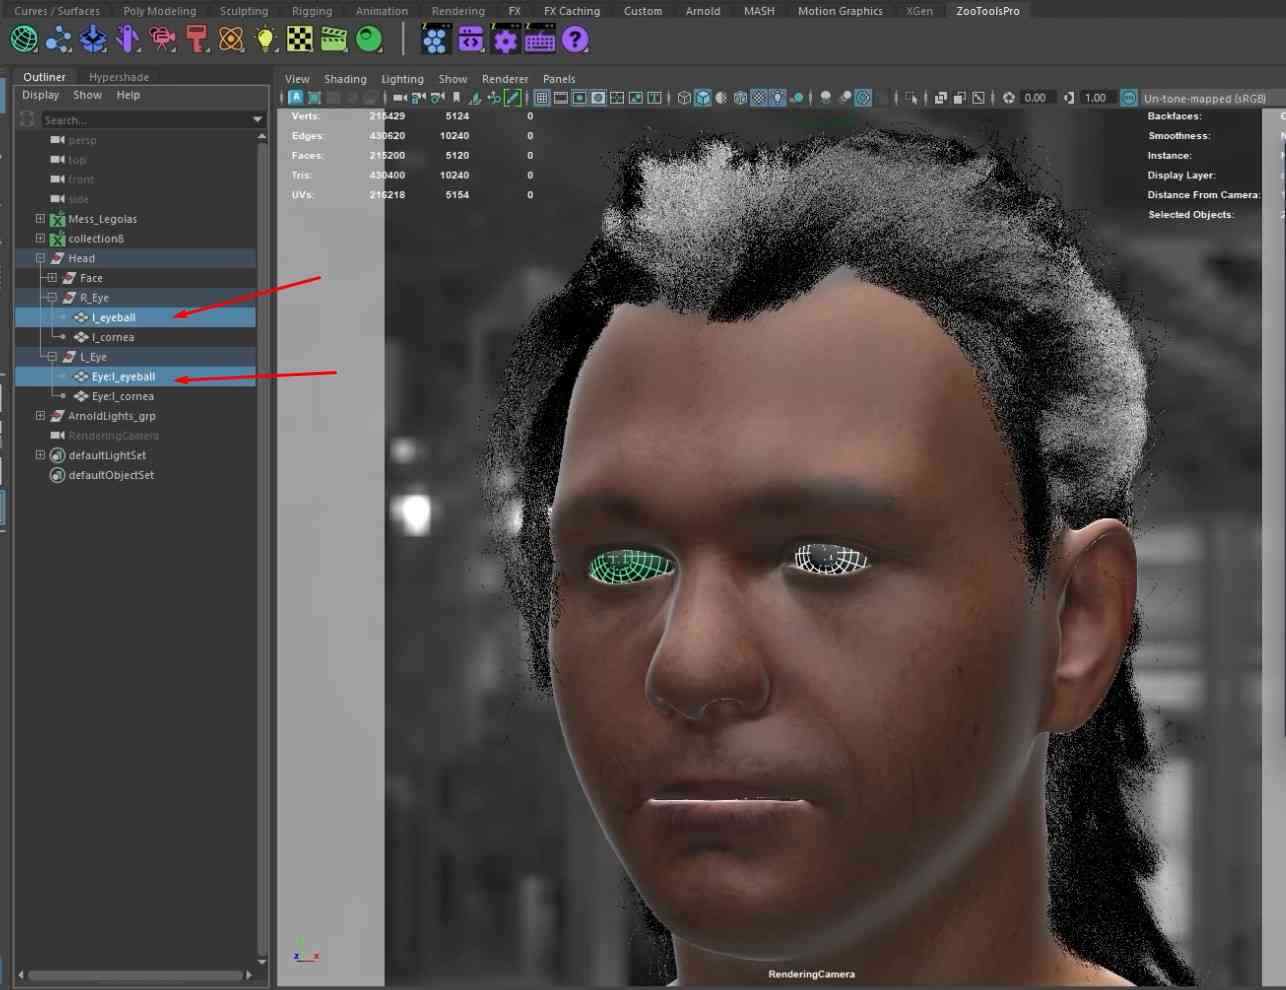
- Select the right and left eyeball from the outliner and assign a new aiStandardSurface material.
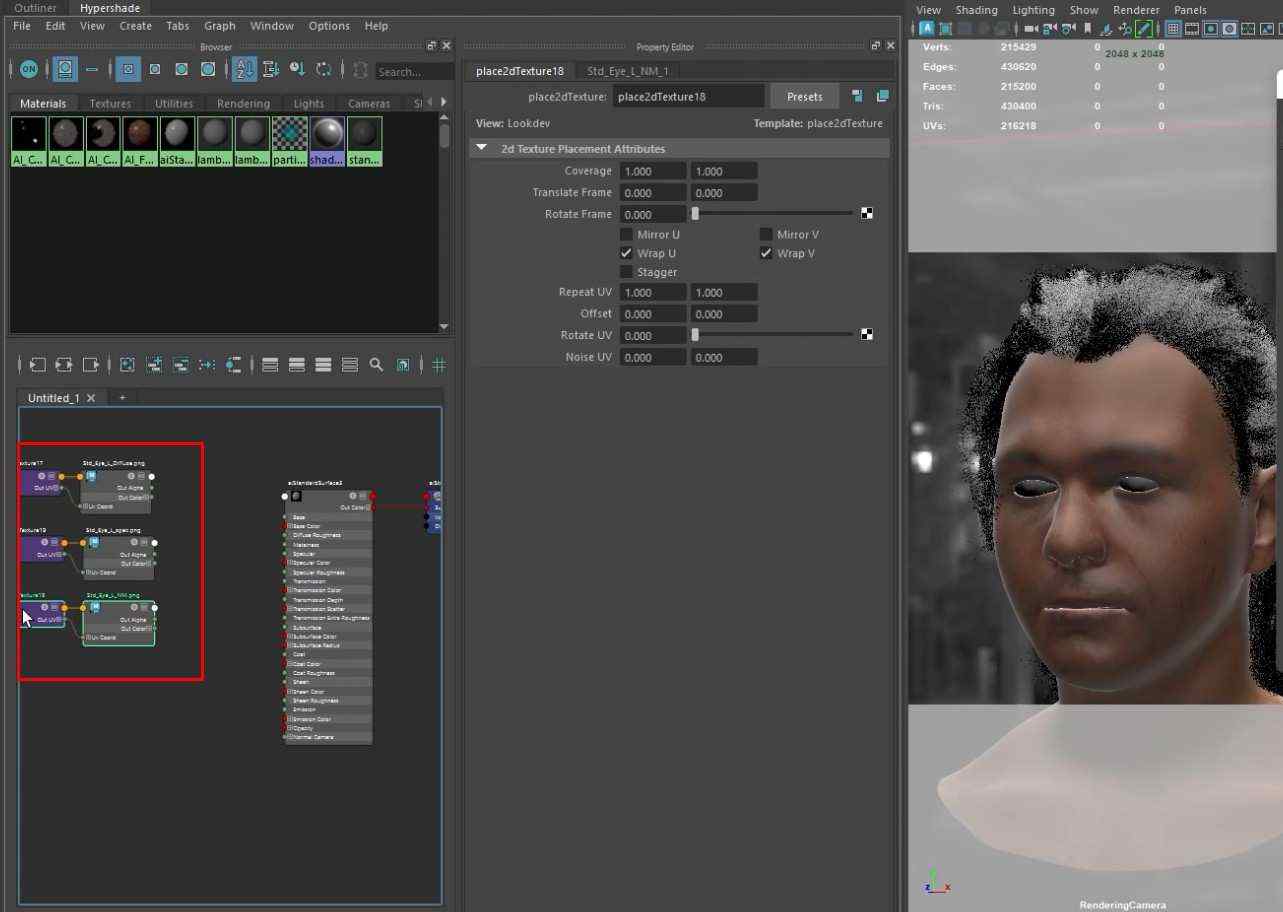
- In the graph, drag and drop the eyeball texture maps.
- Rename the texture to AI_Eyeball.
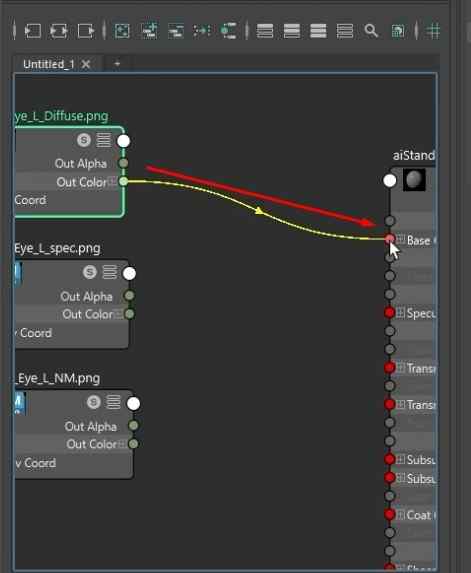
- Connect the Diffuse Out Color to the Base Color of the AI_Eyeball material node.
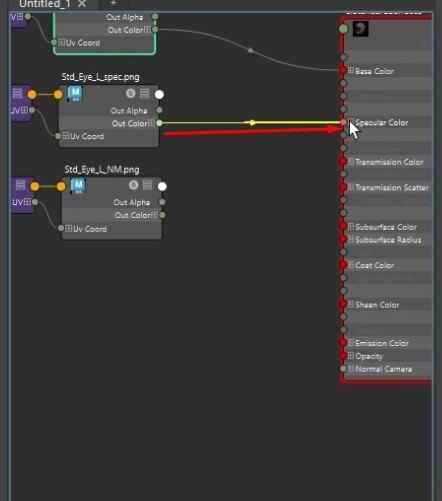
- Connect the Specular Out Color to the Specular Color of the AI_Eyeball material node.
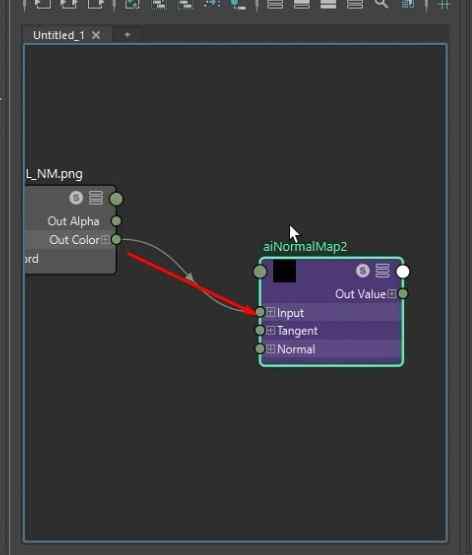
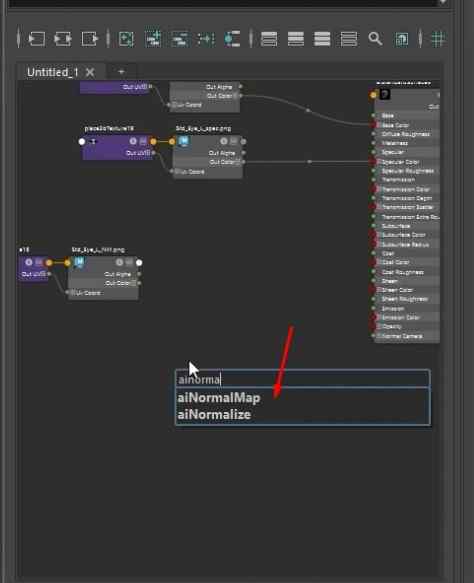
- With the normal map, add an aiNormalMap node, and connect the Out Color of the normal map to the Input of the aiNormalMap node.
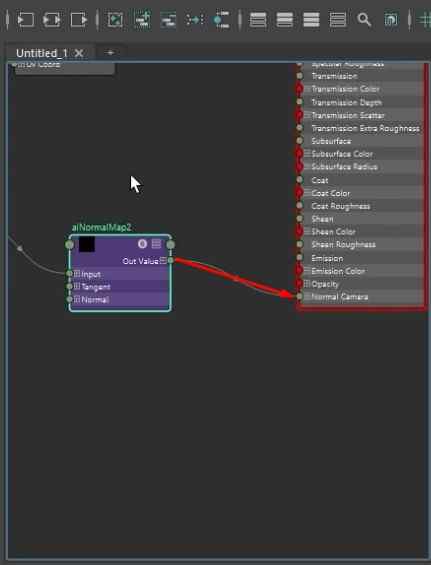
- Connect the Out Value of the aiNormalMap node to the Normal Camera of the AI_Eyeball material node.
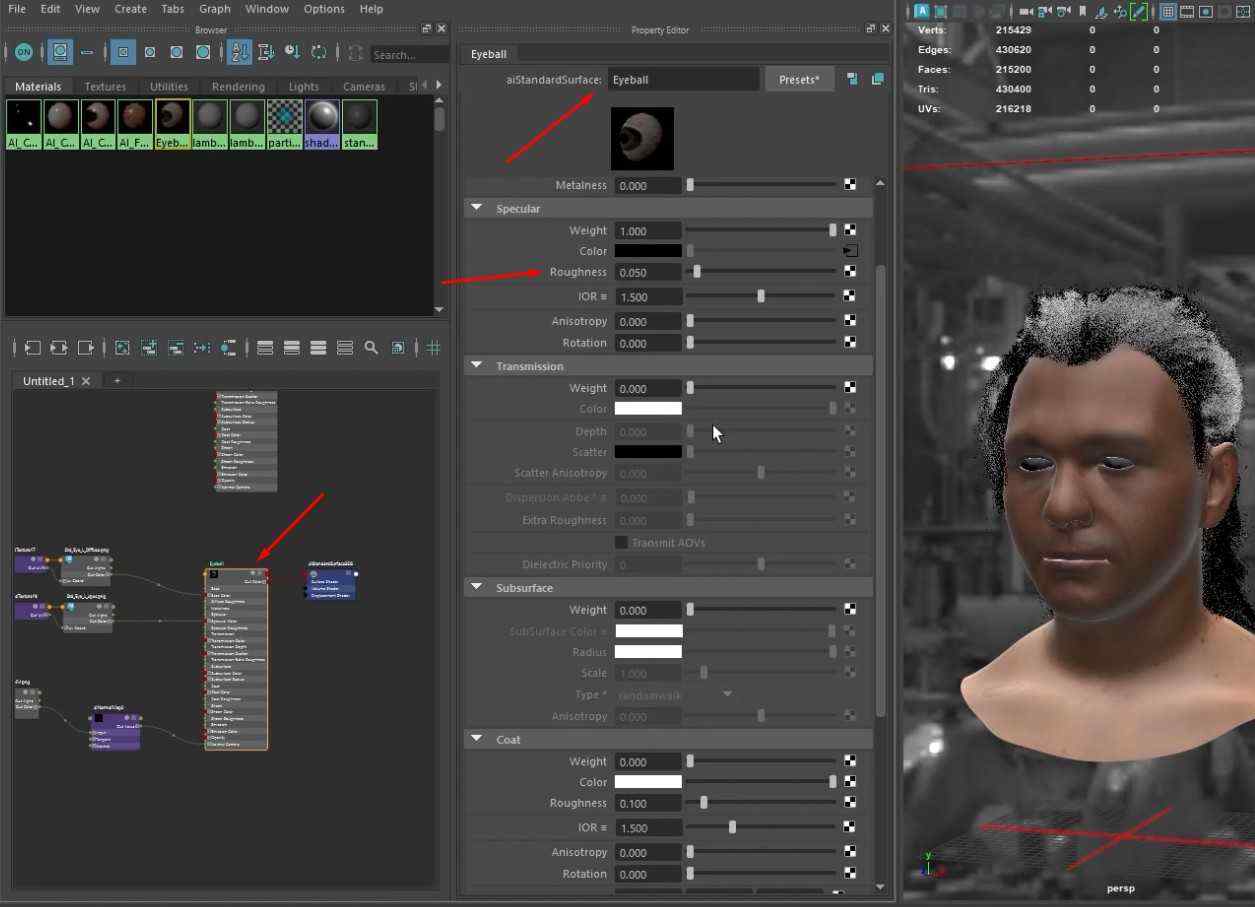
- Adjust the Roughness of the AI_Eyeball material node.
Adding a New Material to the Hair
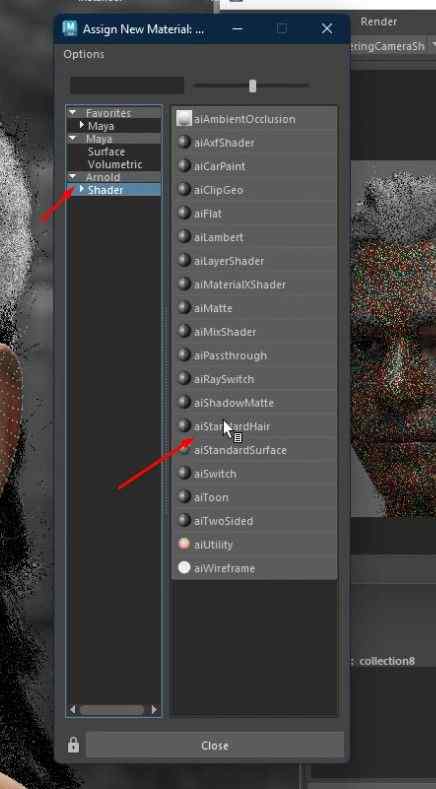
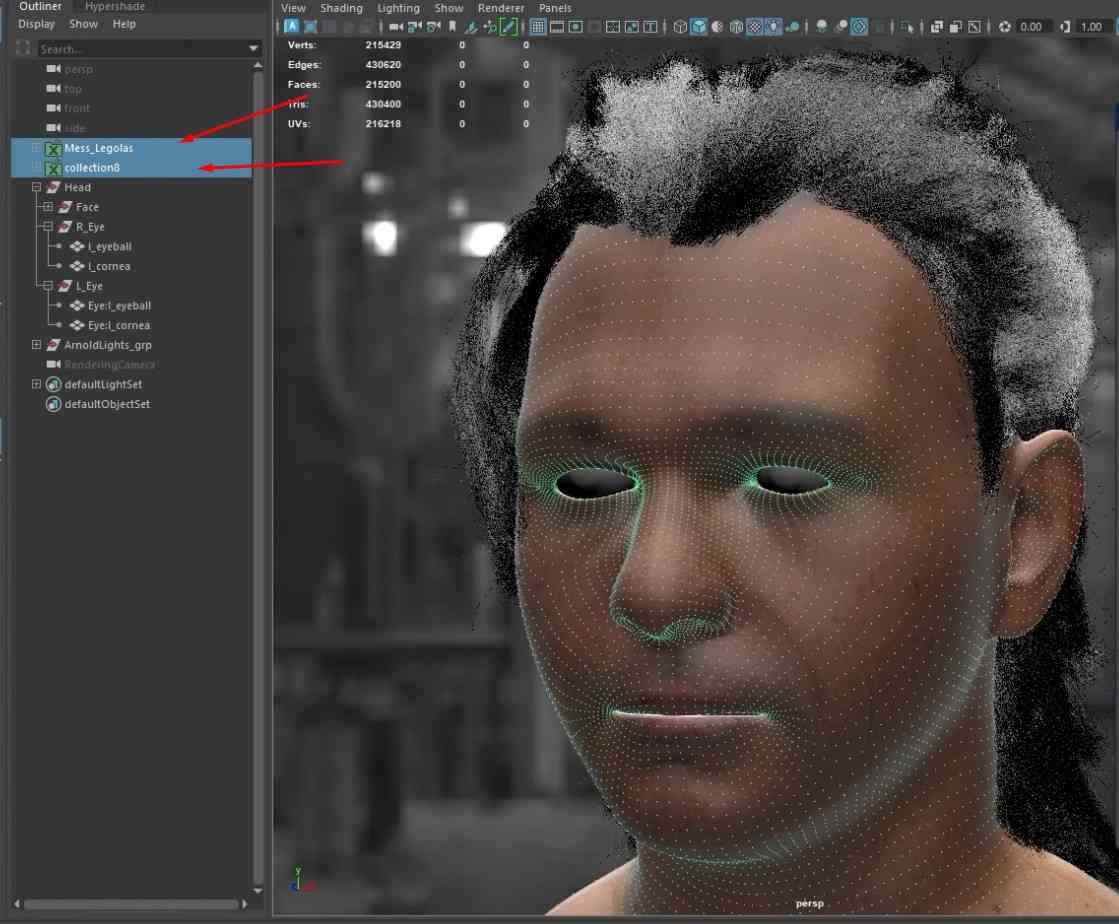
- Select the hair guides, hold right-click, and assign a new material.
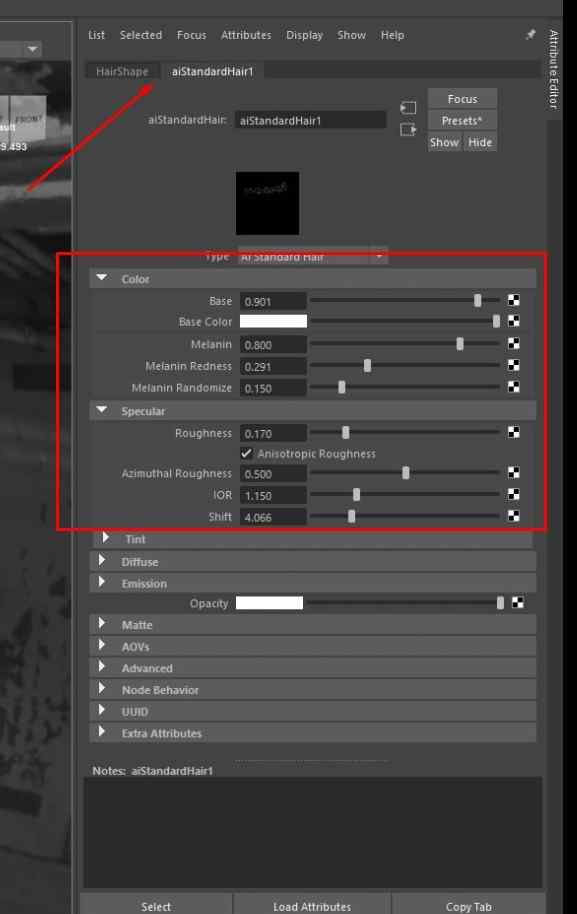
- Choose the aiStandardHair material.
- Edit the hair material’s properties in the Attribute Editor.
Conclusion: Craft Your Artistry
In this face rendering tutorial, we explored a way to obtain realistic 3D faces with the use of Maya and Arnold. As you embark on your character rigging journey, maintain a watch on the info. Focus on setting up effective lighting and digital camera angles, as they lay the basis for beautiful results.
When adjusting skin shading, don’t hesitate to test with subsurface scattering to capture the unique features of your man or woman. Remember, eyes are the windows to the soul—take it slow with cornea shaders and texture maps to evoke the desired feelings.
As you refine hair and other details, allow your creativity to go with the flow. Your unique touch will make your characters authentic and memorable.
Visit the academy programs section to find out what subjects are by the book—perfect in case you want to improve your expert capabilities. For folks who favor giving attention to one area, we provide a variety of 3D software courses; simply head to that segment. We have a specially built program for comprehensive Maya learning.
Learn advanced strategies from top enterprise figures and pick up guidelines that best insiders recognize with the aid of enrolling in some of the masterclasses we offer. Want to turn your ardor right into a career?
Create amazing matters: join us now and explore the sector of 3D modeling and animation, deliver your ideas to existence—and study lots alongside the manner!

