Marmoset Toolbag: Rendering and Shading 3D Models
Marmoset Toolbag is a full-featured, real-time rendering suite generally applied by 3D artists to create visually stunning props for games, films, and other digital media. Besides having an intuitive interface, Marmoset equips the artist with many features at their fingertips to represent their work with realistic materials, dynamic lighting, and high-quality rendering. The following tutorial covers exporting models from Maya and importing them into Marmoset, a crucial skill to achieve impressive 3D visuals.
Workflow for Prop Setup in Marmoset Toolbag
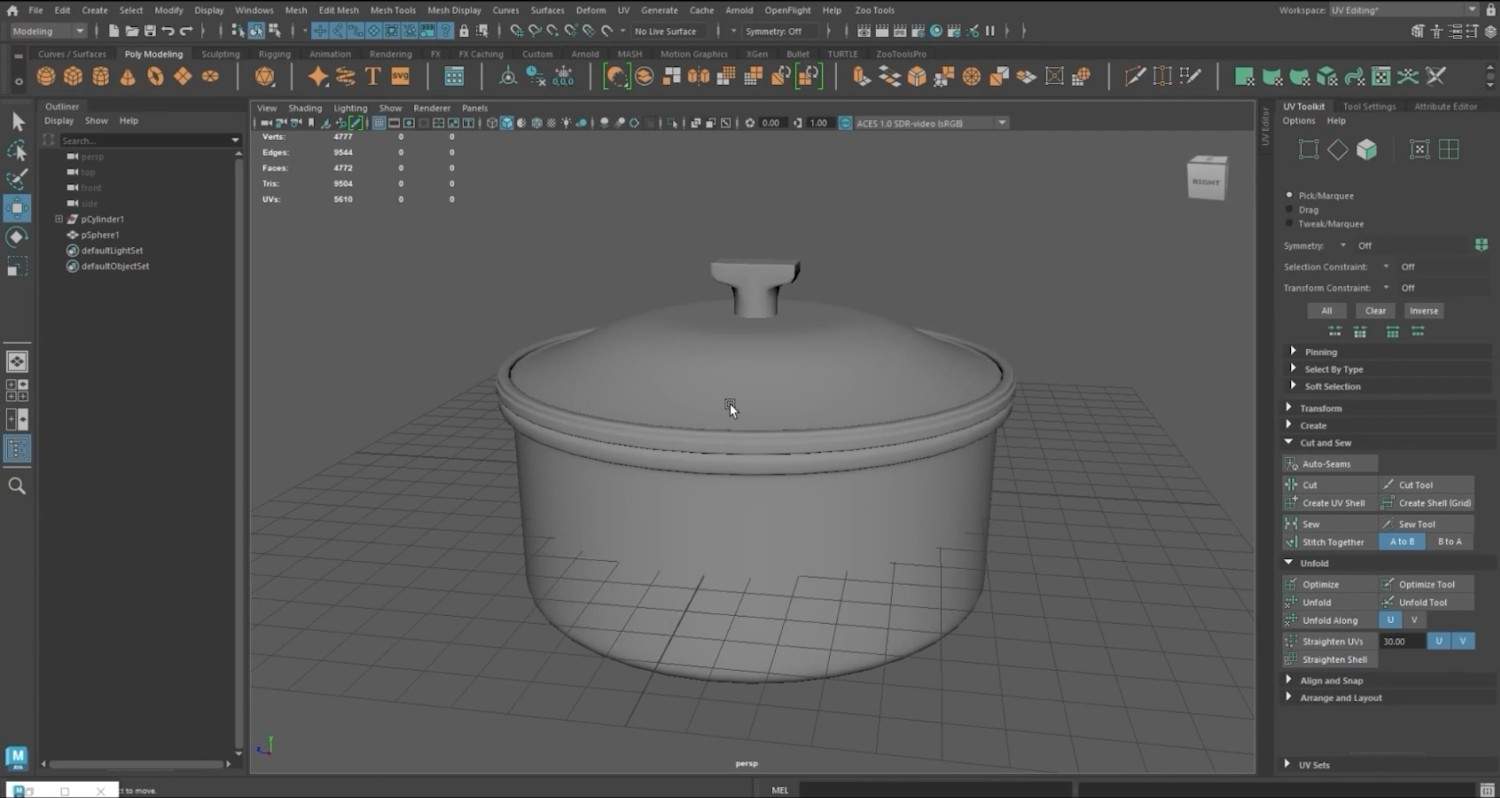
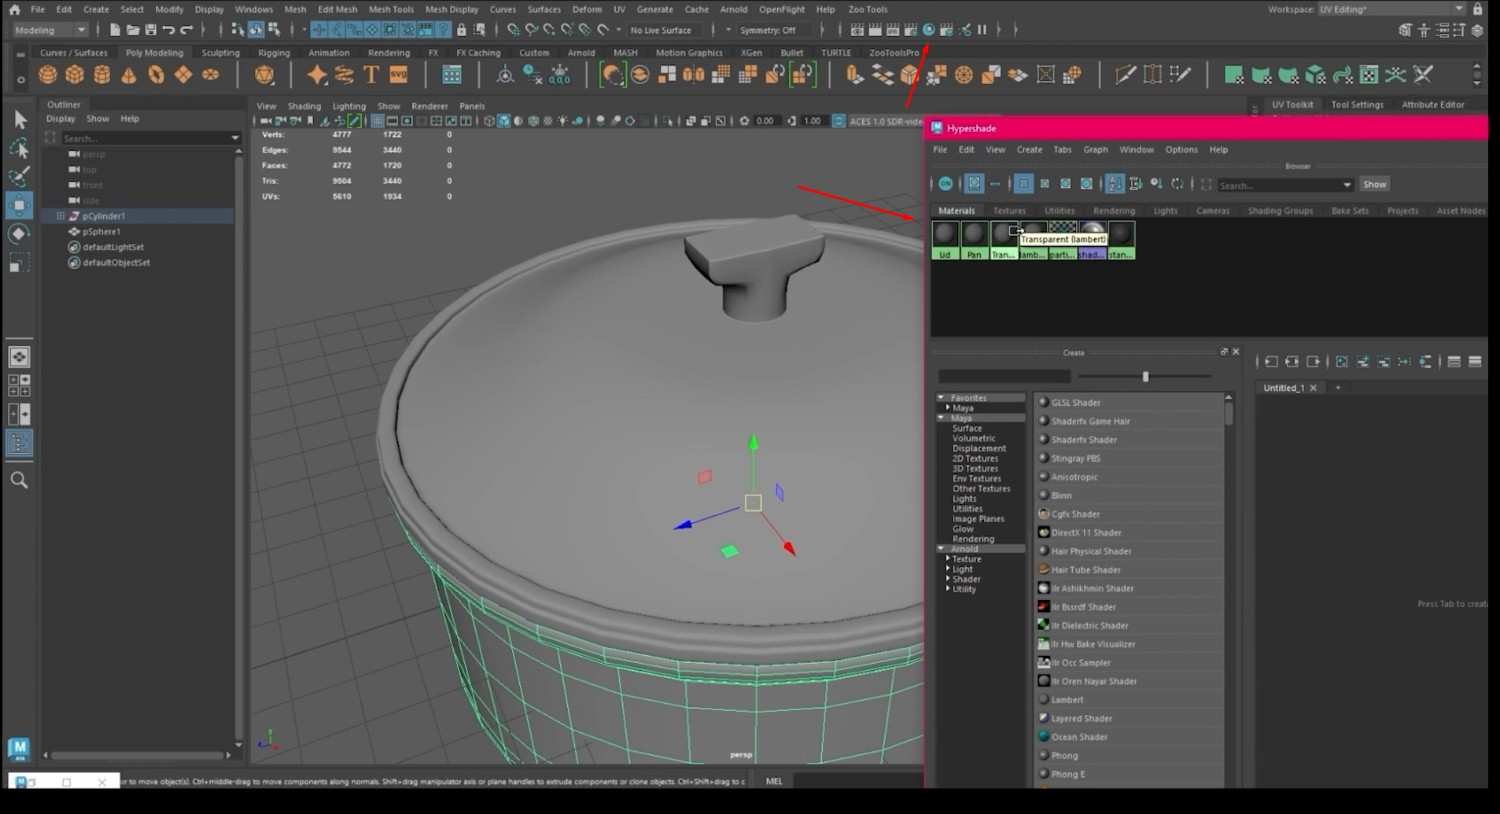
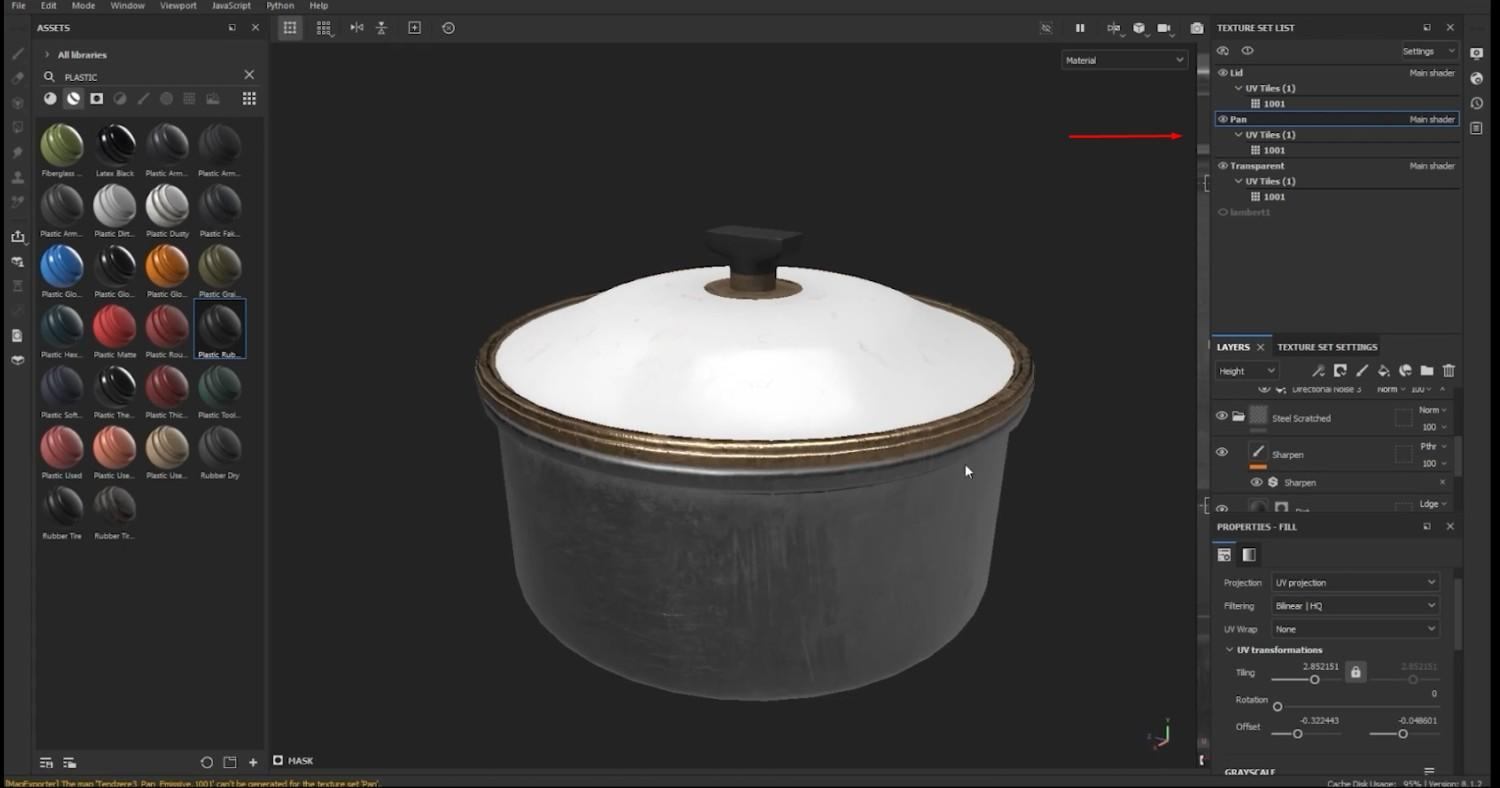
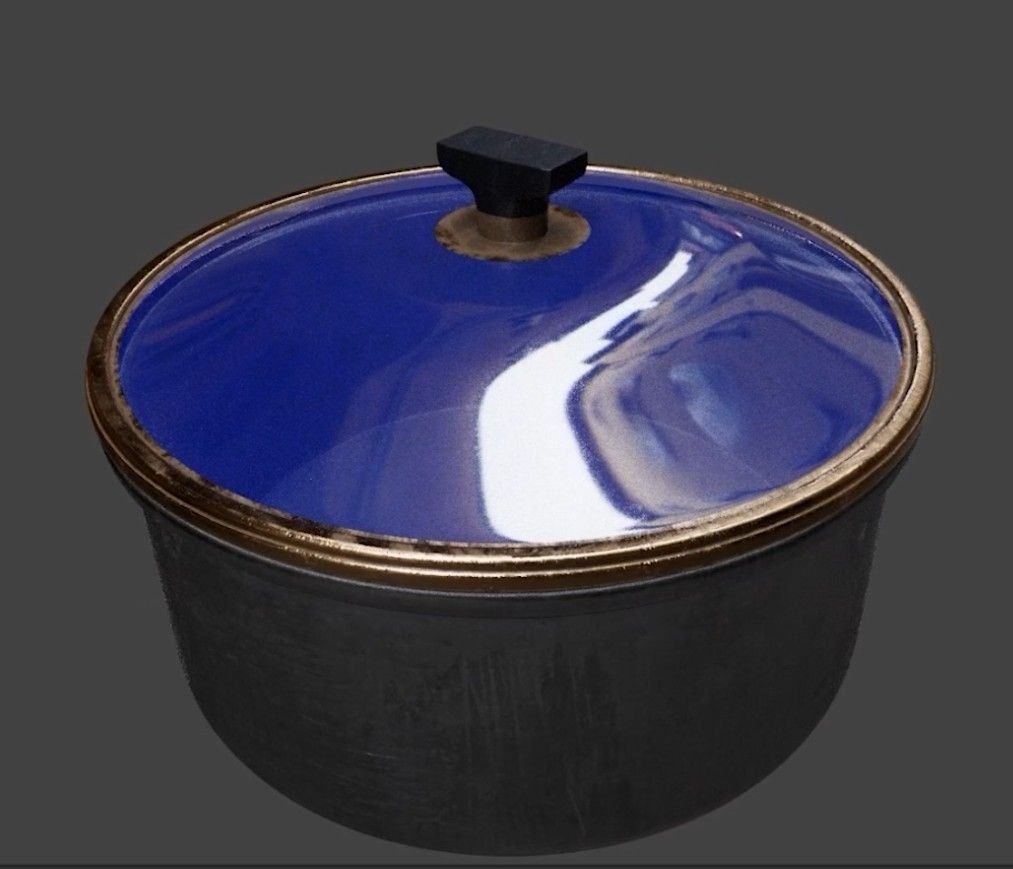
We’ll be working on a prop today and learning how to add Transparency and Reflection inside of Marmoset. It consists of several elements: a lid, a bottom, and the glass-all having their shaders, which can be seen in Hypershade inside Maya. Or even on Substance Painter, it can be viewed on the right side of the workspace.
Exporting Textures
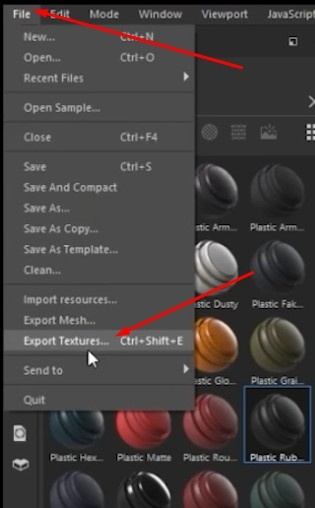
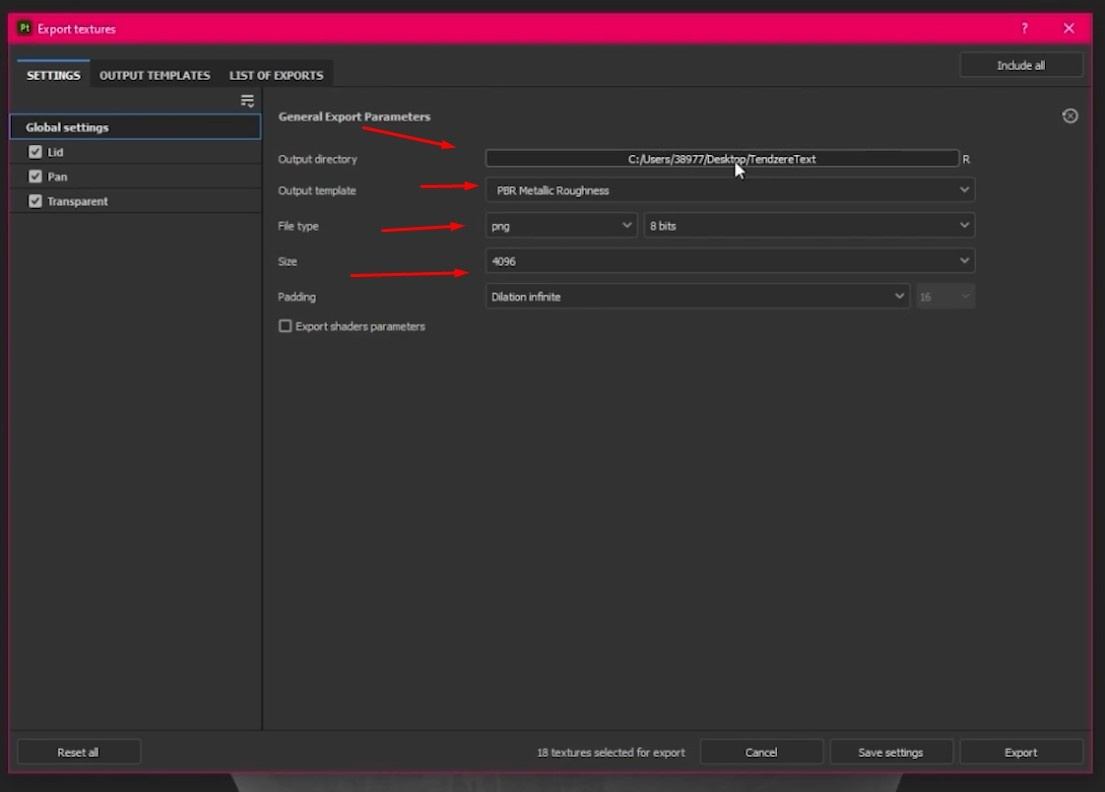
- Export the textures from Substance Painter, set a file type, size, and output template, and where you want the textures to be exported on your desktop.
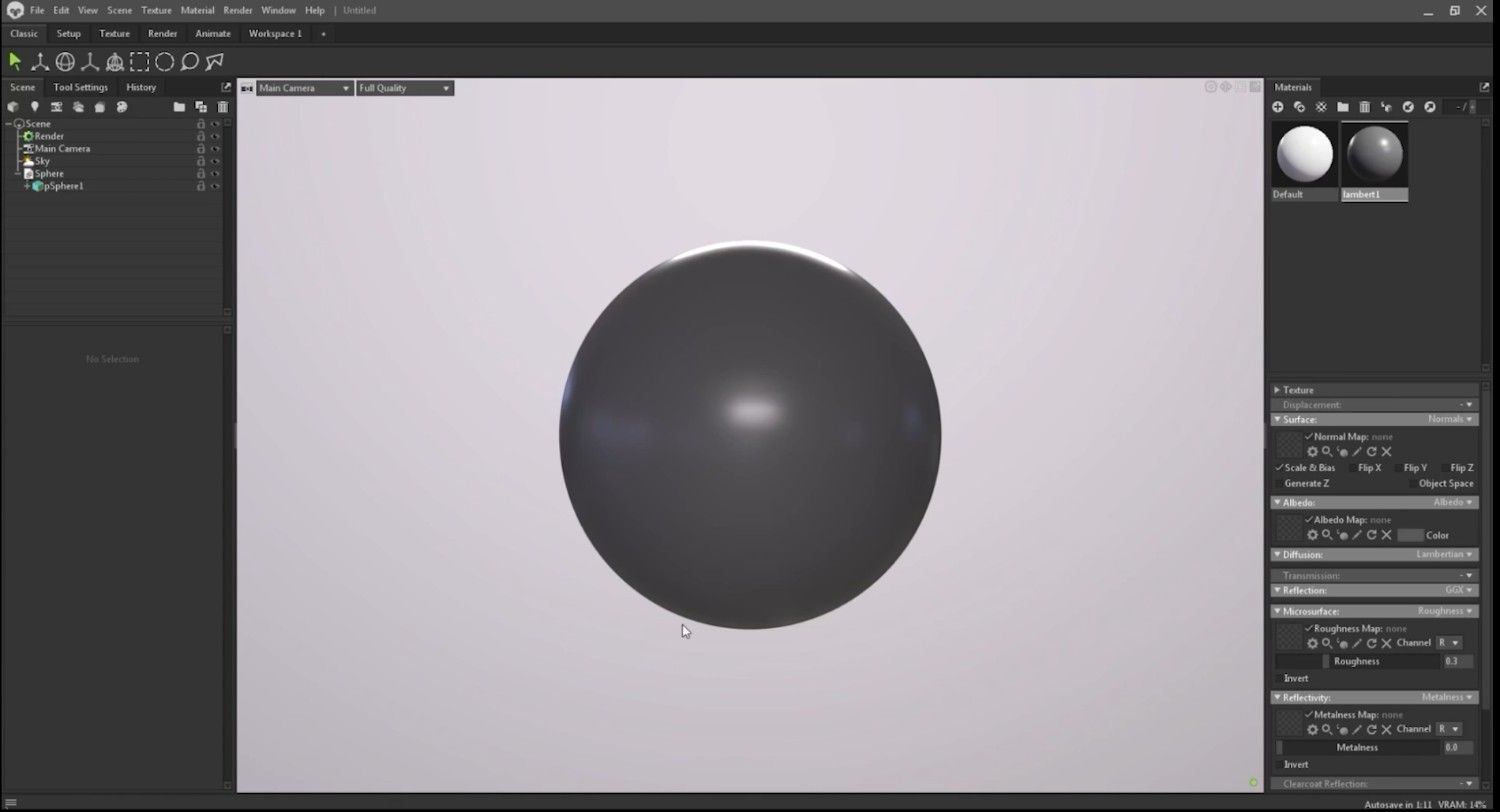
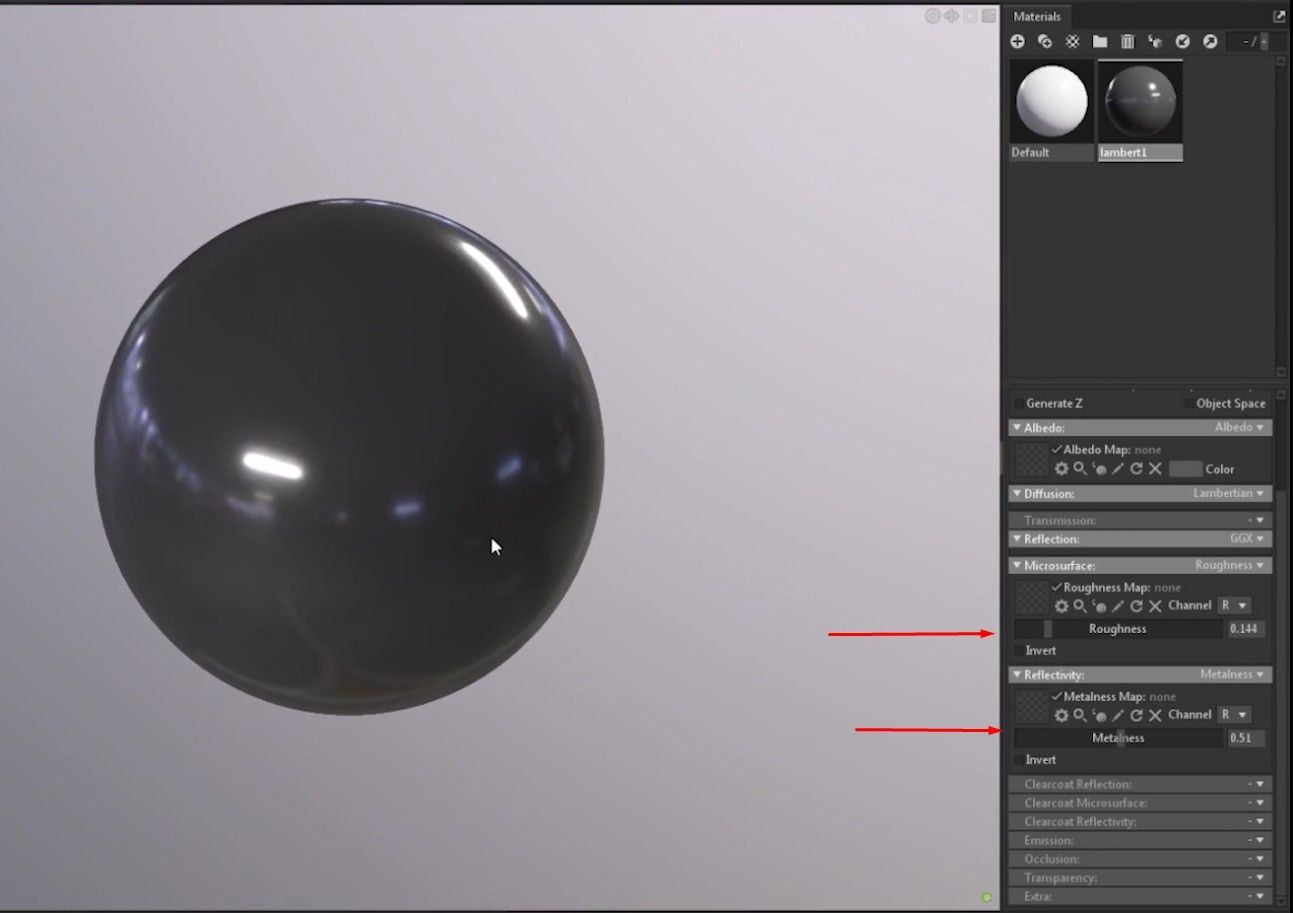
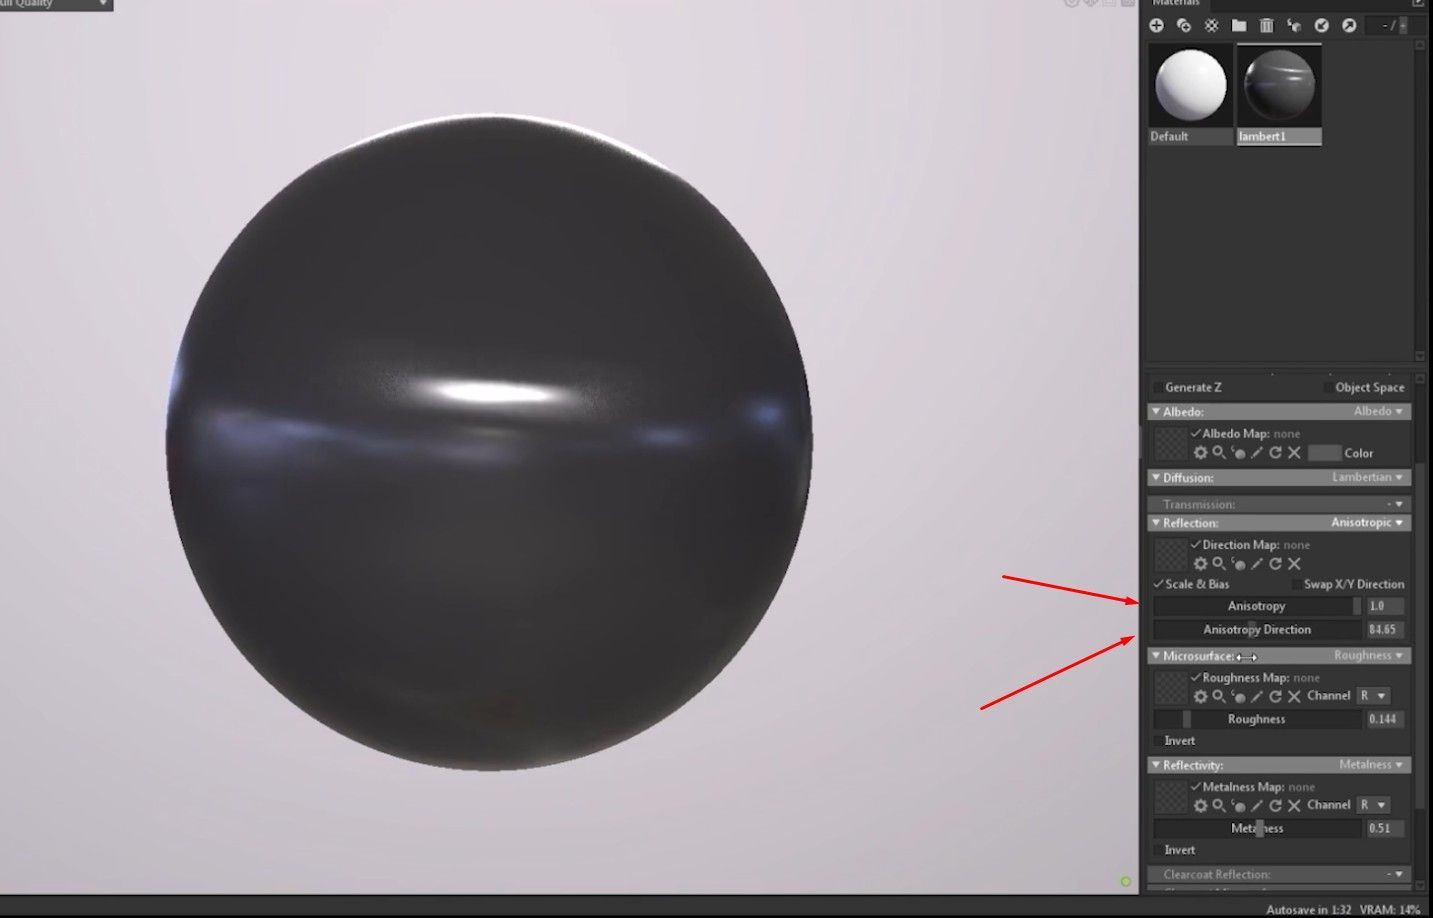
- Start with a basic sphere and bring down the roughness and metallic maps in order to make it shiny.
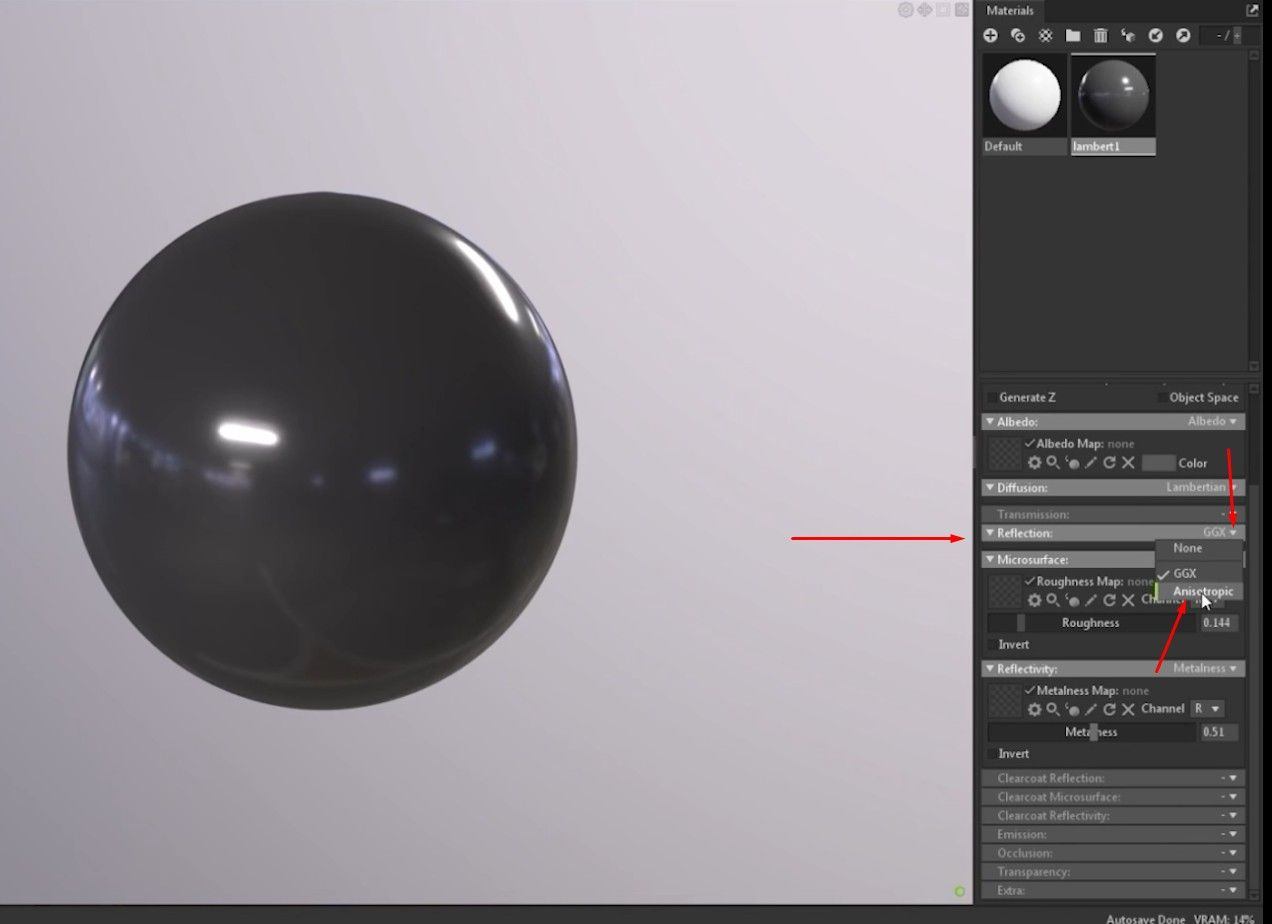
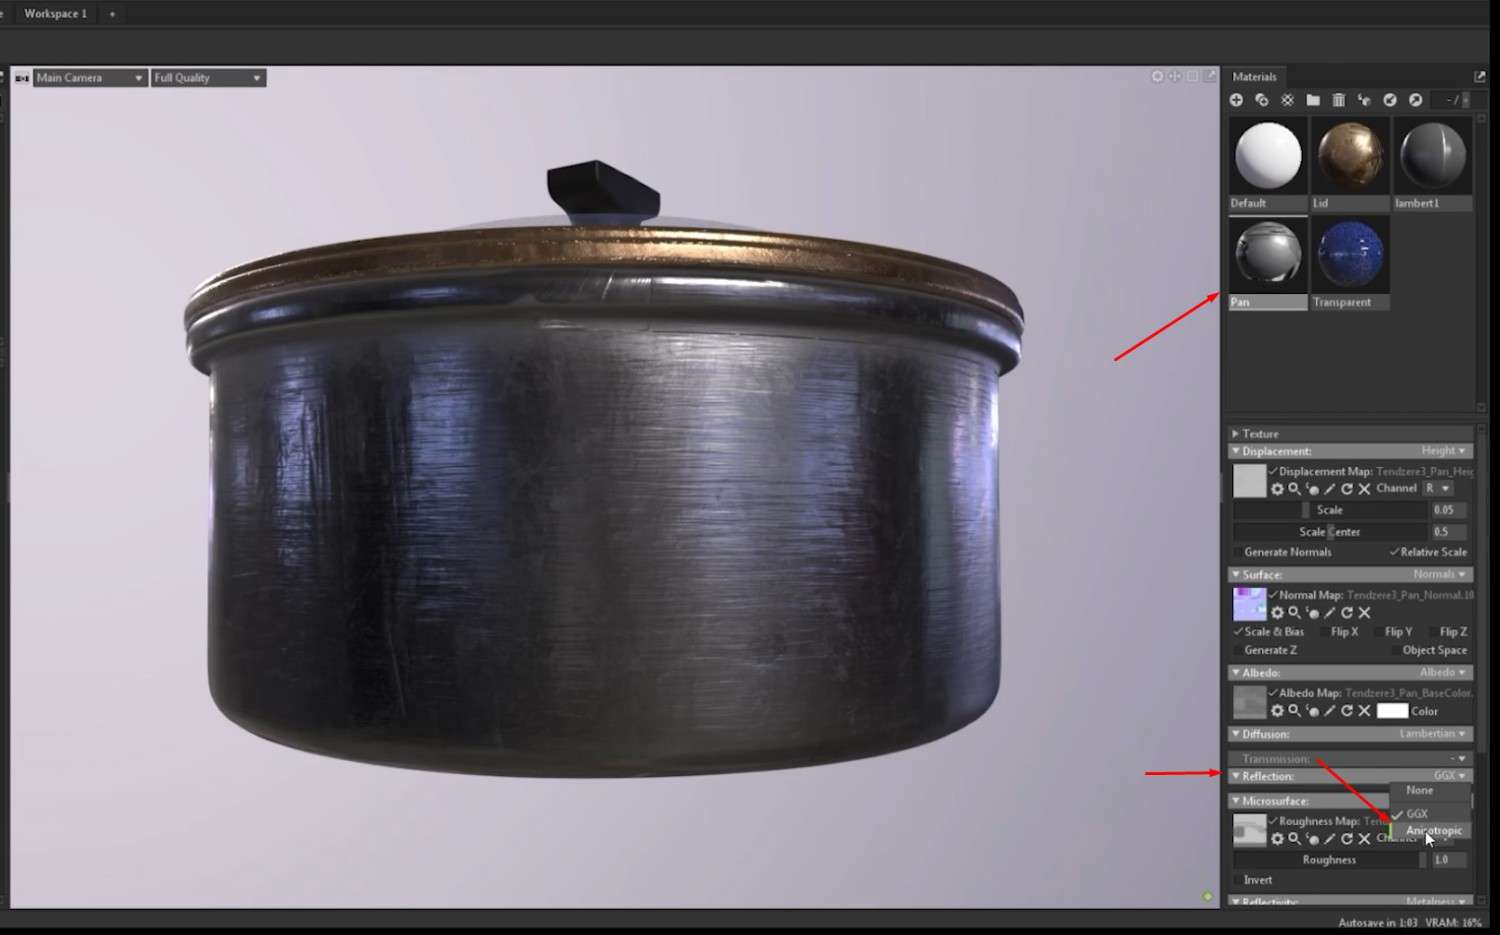
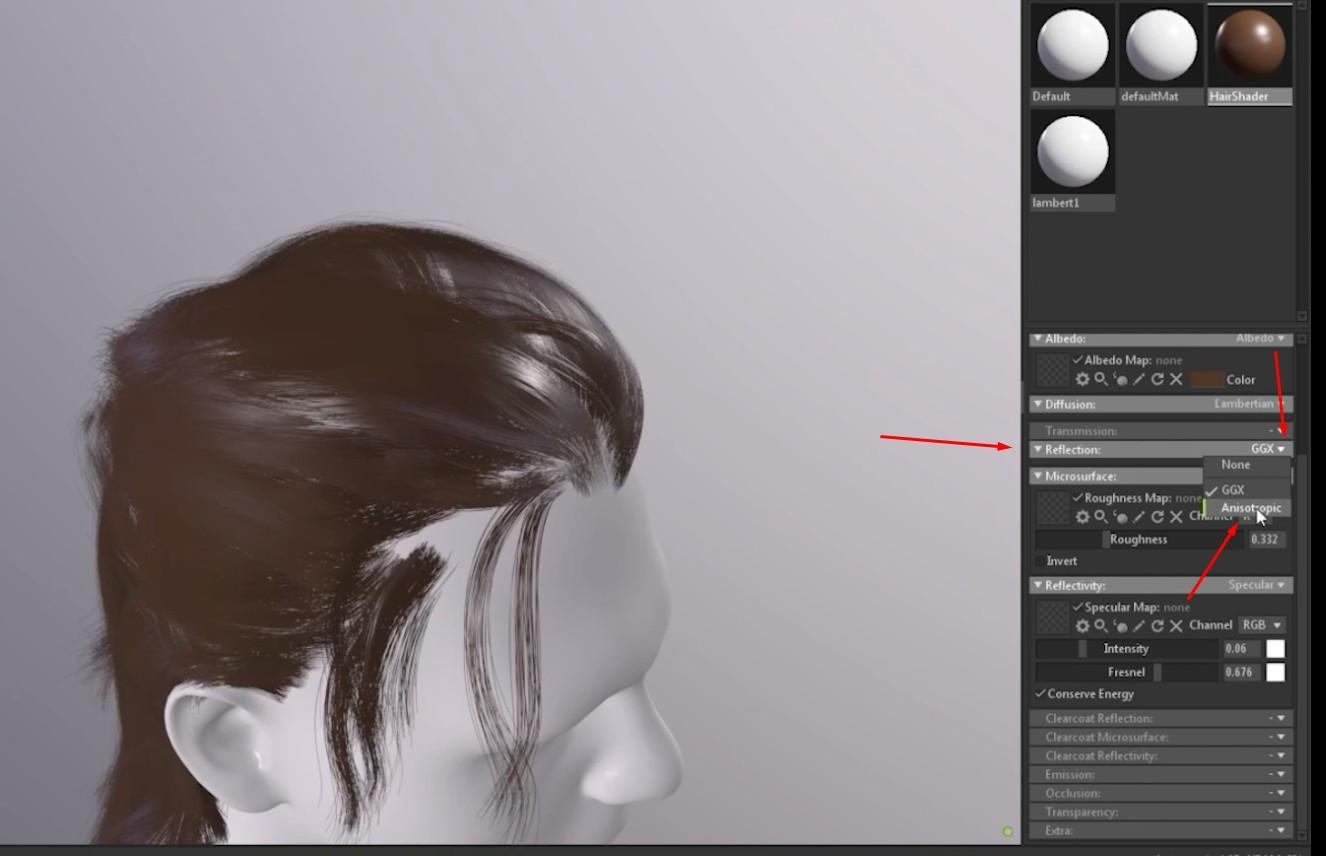
- Under the Reflection tab, click the arrow to the side; this will flip it from GGX to Anisotropic.
- GGX is a sphere-based reflection, while Anisotropic is directional.
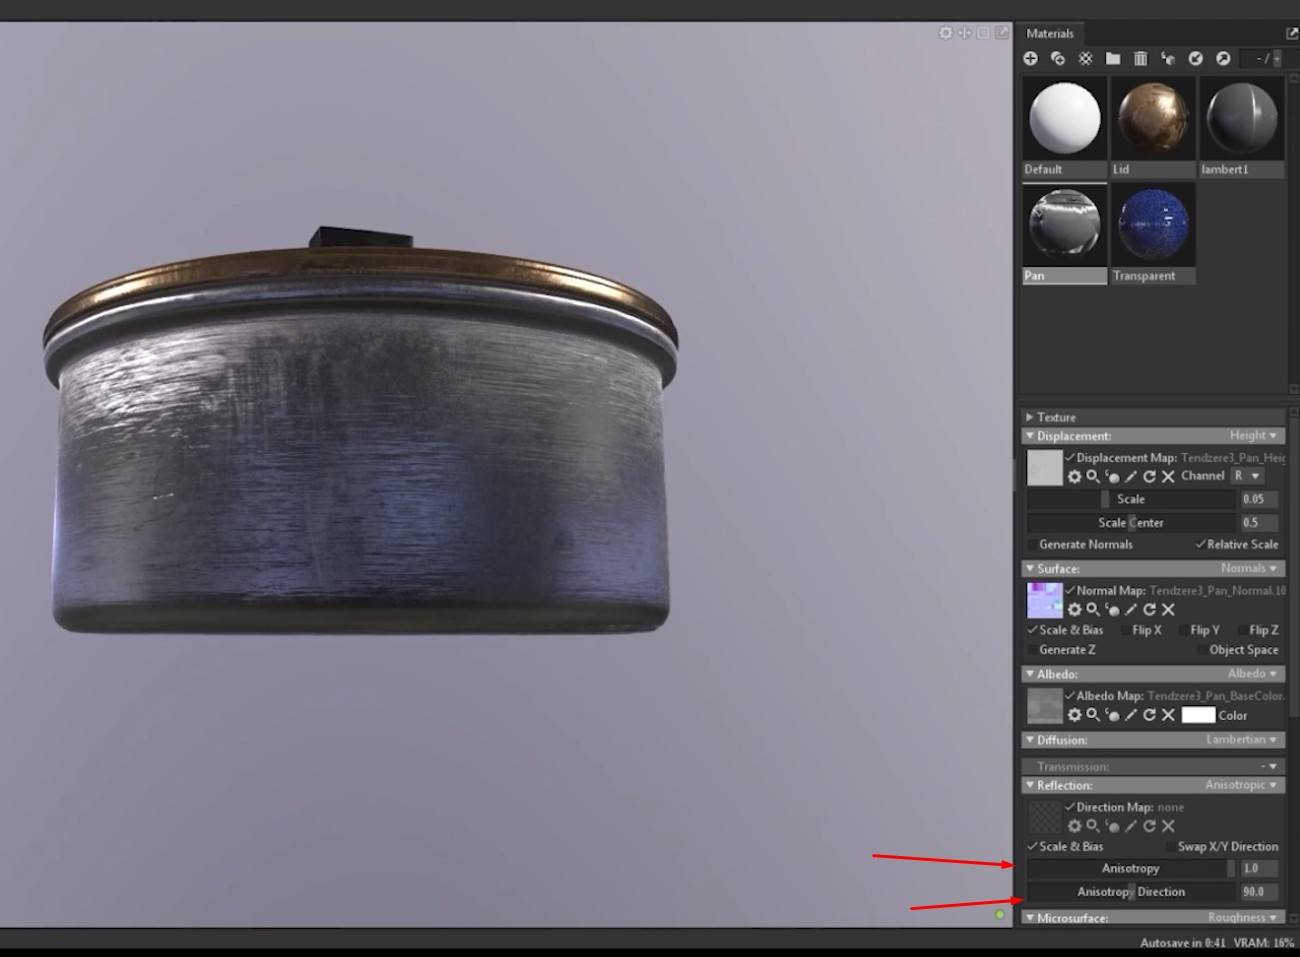
- We can change the Intensity and the Direction of the reflection in the settings.
Importing the Prop into Marmoset
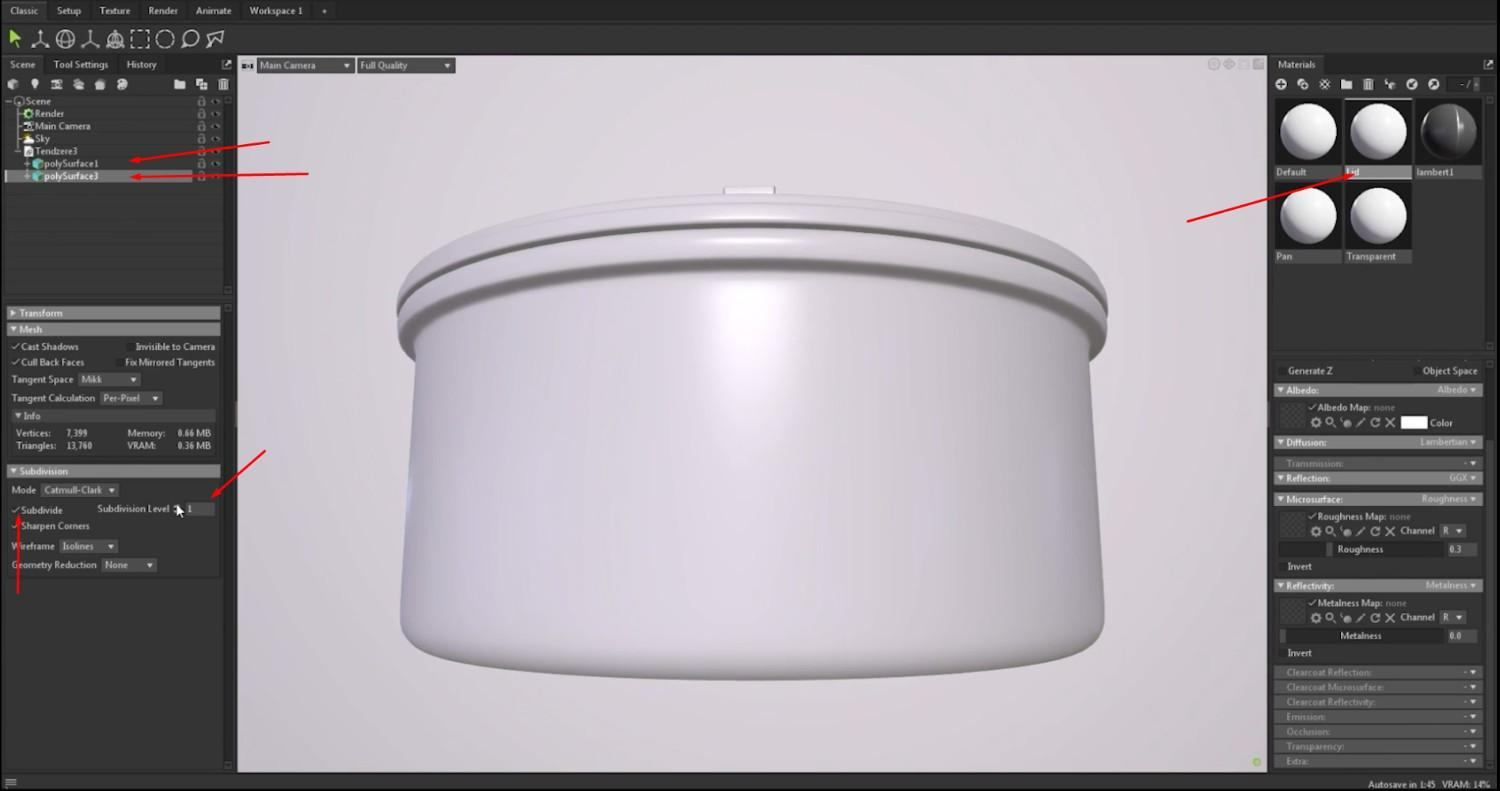
- When you import the pot into a new project, we can add more subdivisions on the lid to make it look more high-poly.
- Click on the static mesh and do this for both parts.
- Tick the Subdivide box inside the Subdivisions tab, and set the Subdivision Level to 2.
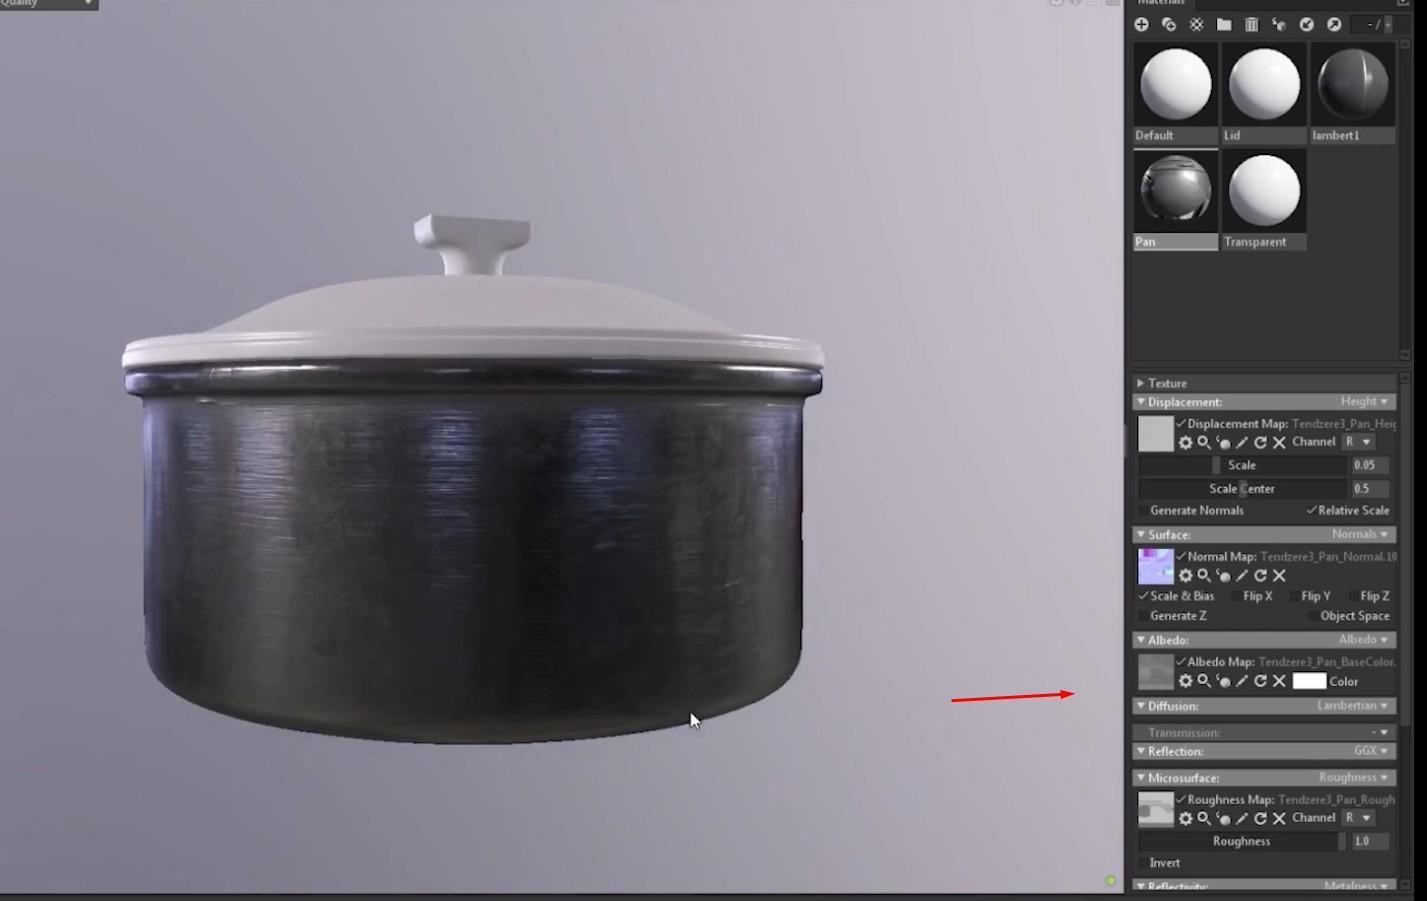
- Add the textures exported from Substance Painter inside each texture map in each material.
Adding Glass Shader
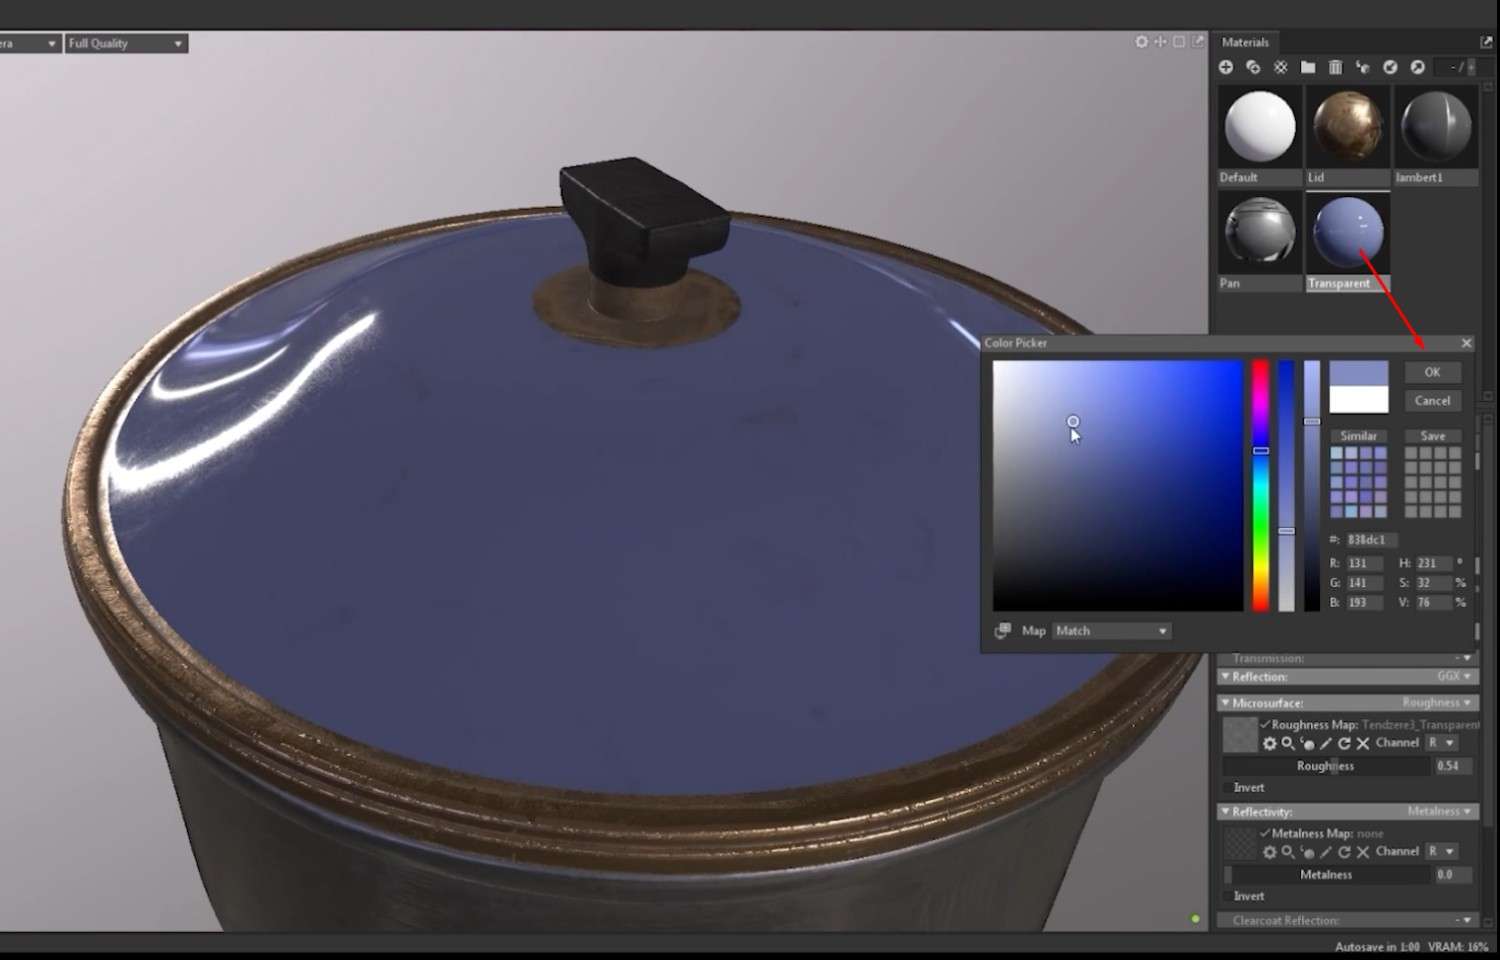
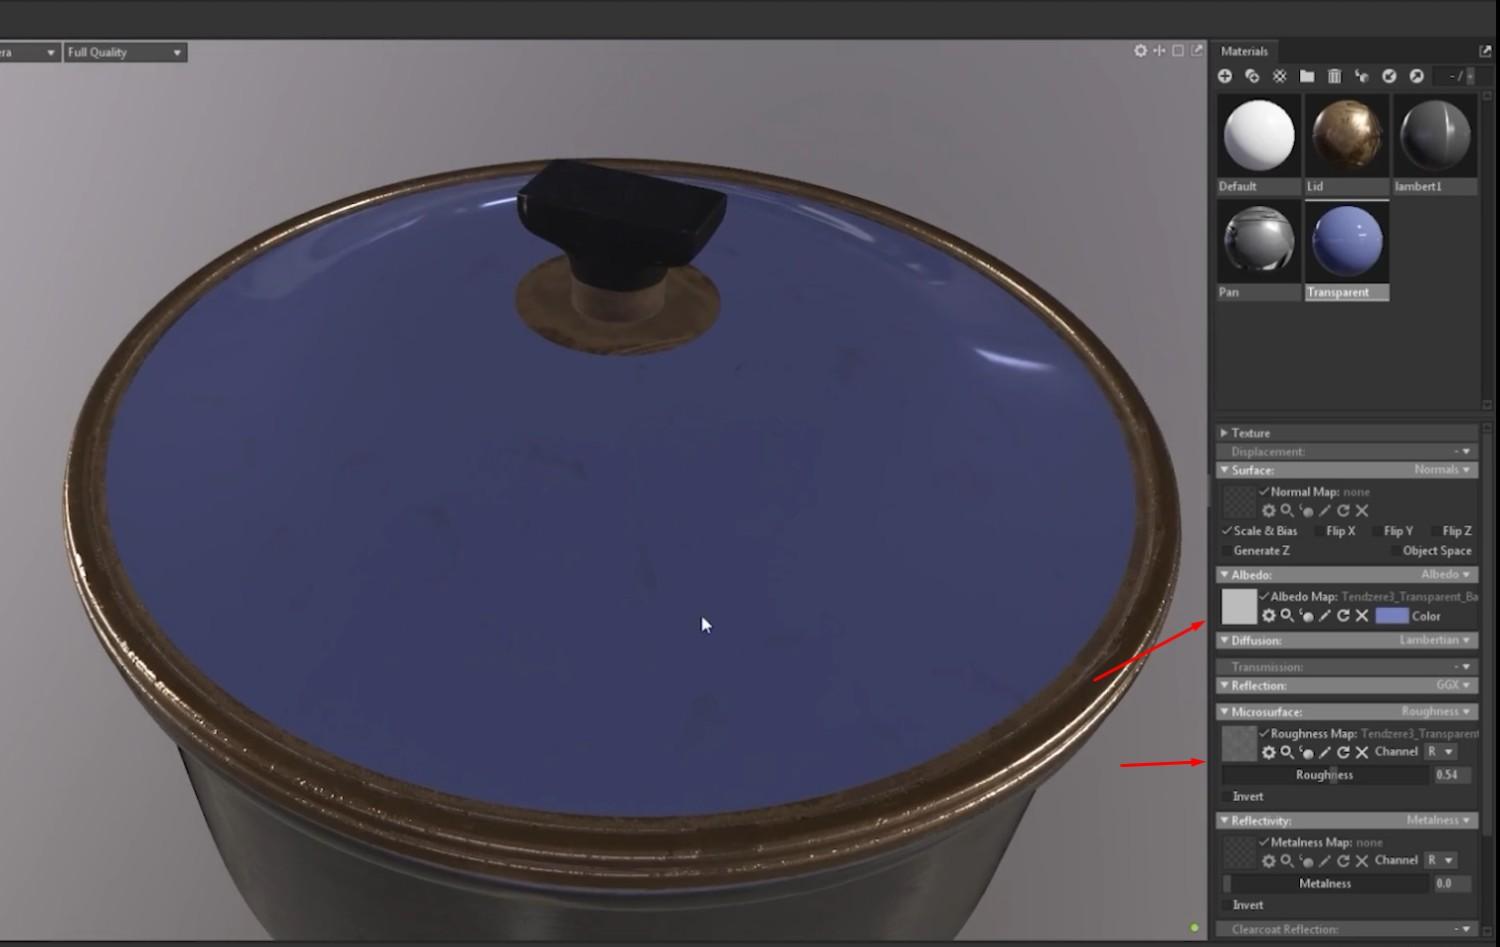
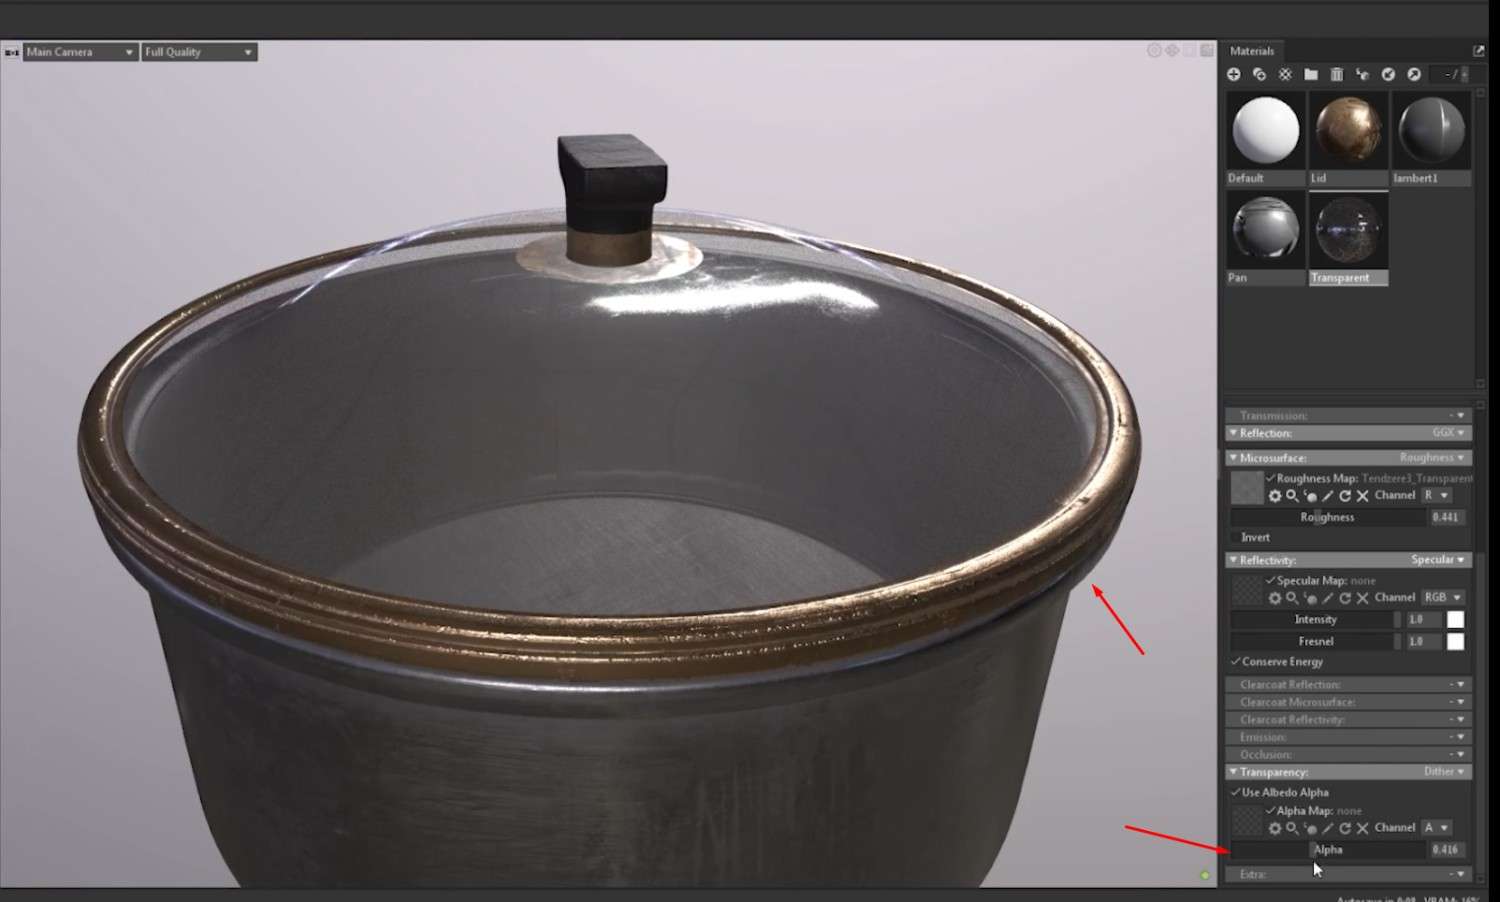
- When we reach the glass of the pot, add the roughness and base color map as normal, then change the base color to blue so that the glass has a blue tint to it.
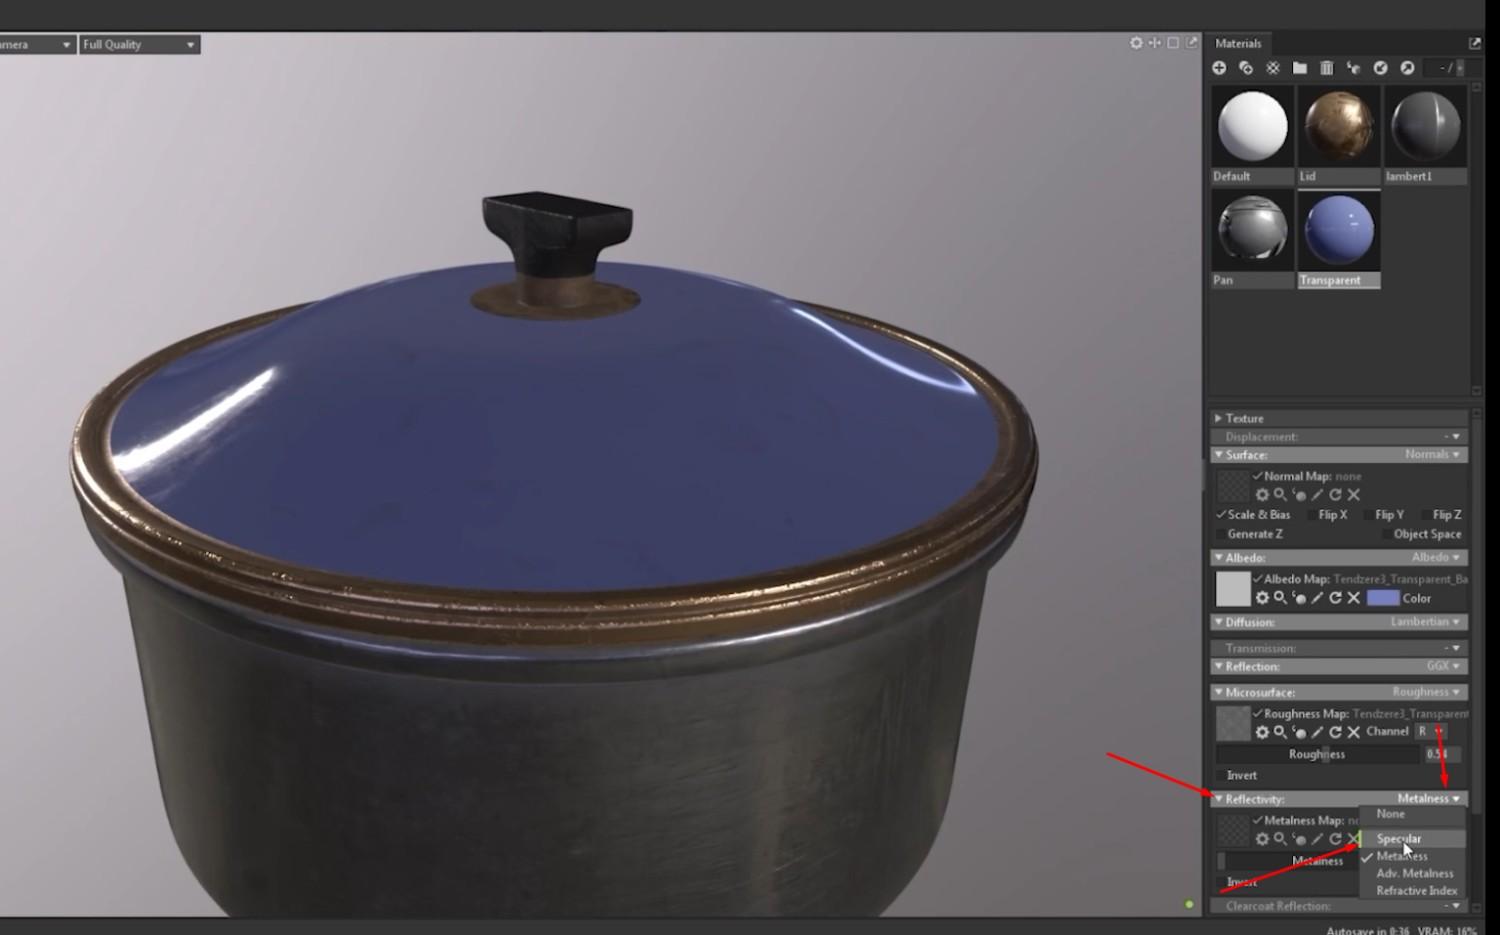
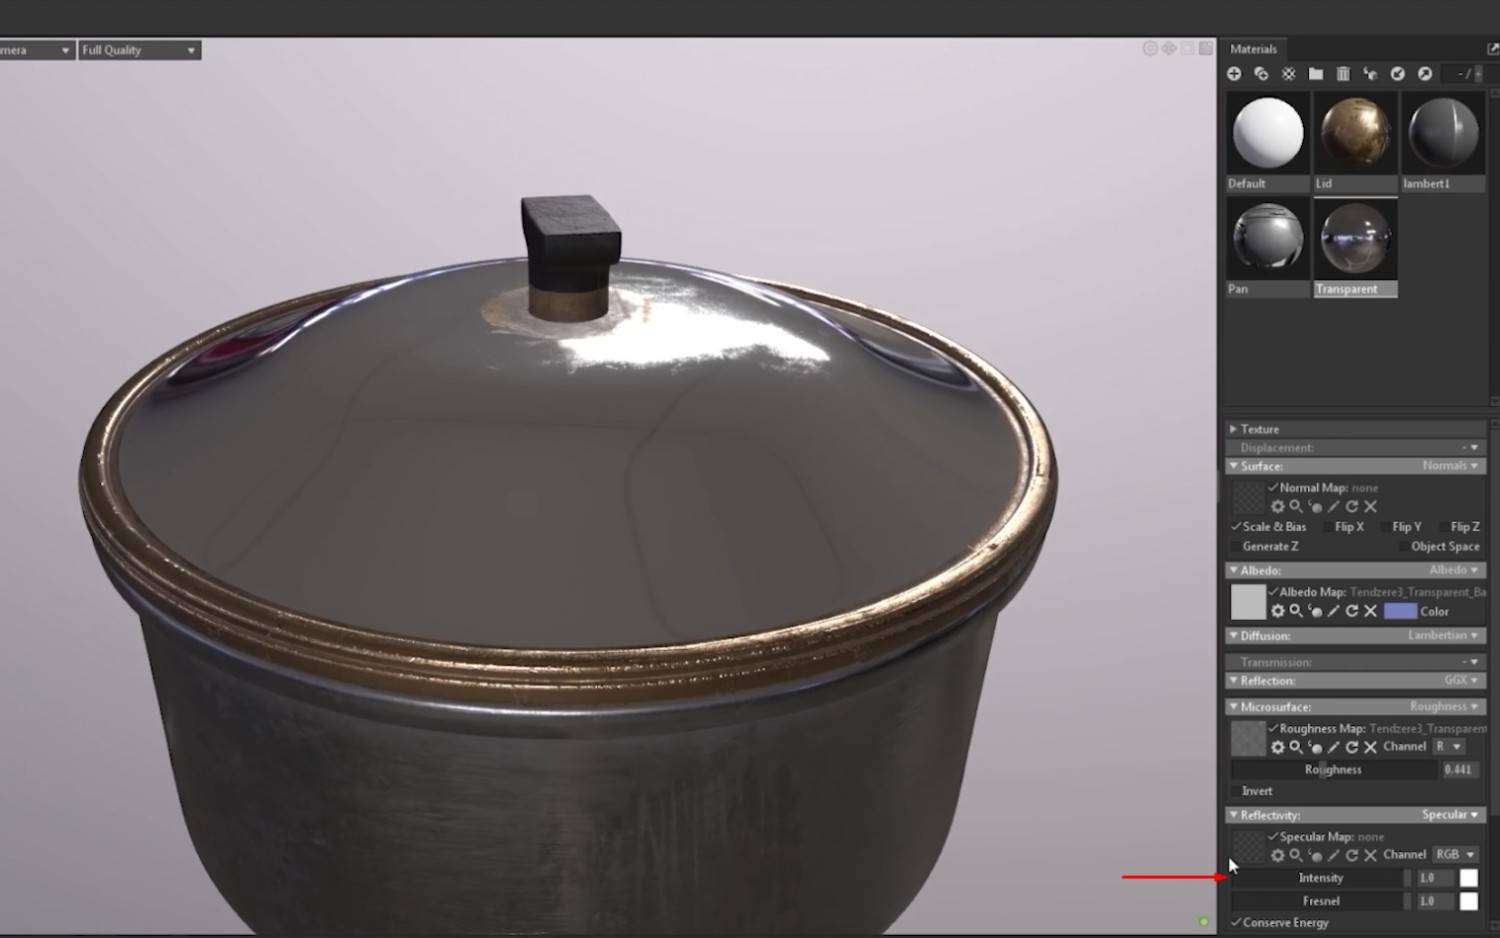
- To make the glass look like glass, in Reflectivity, click the small arrow on the right and select the Specular option.
- Increase the intensity of the Specular to make it shiny.
Reflection Settings
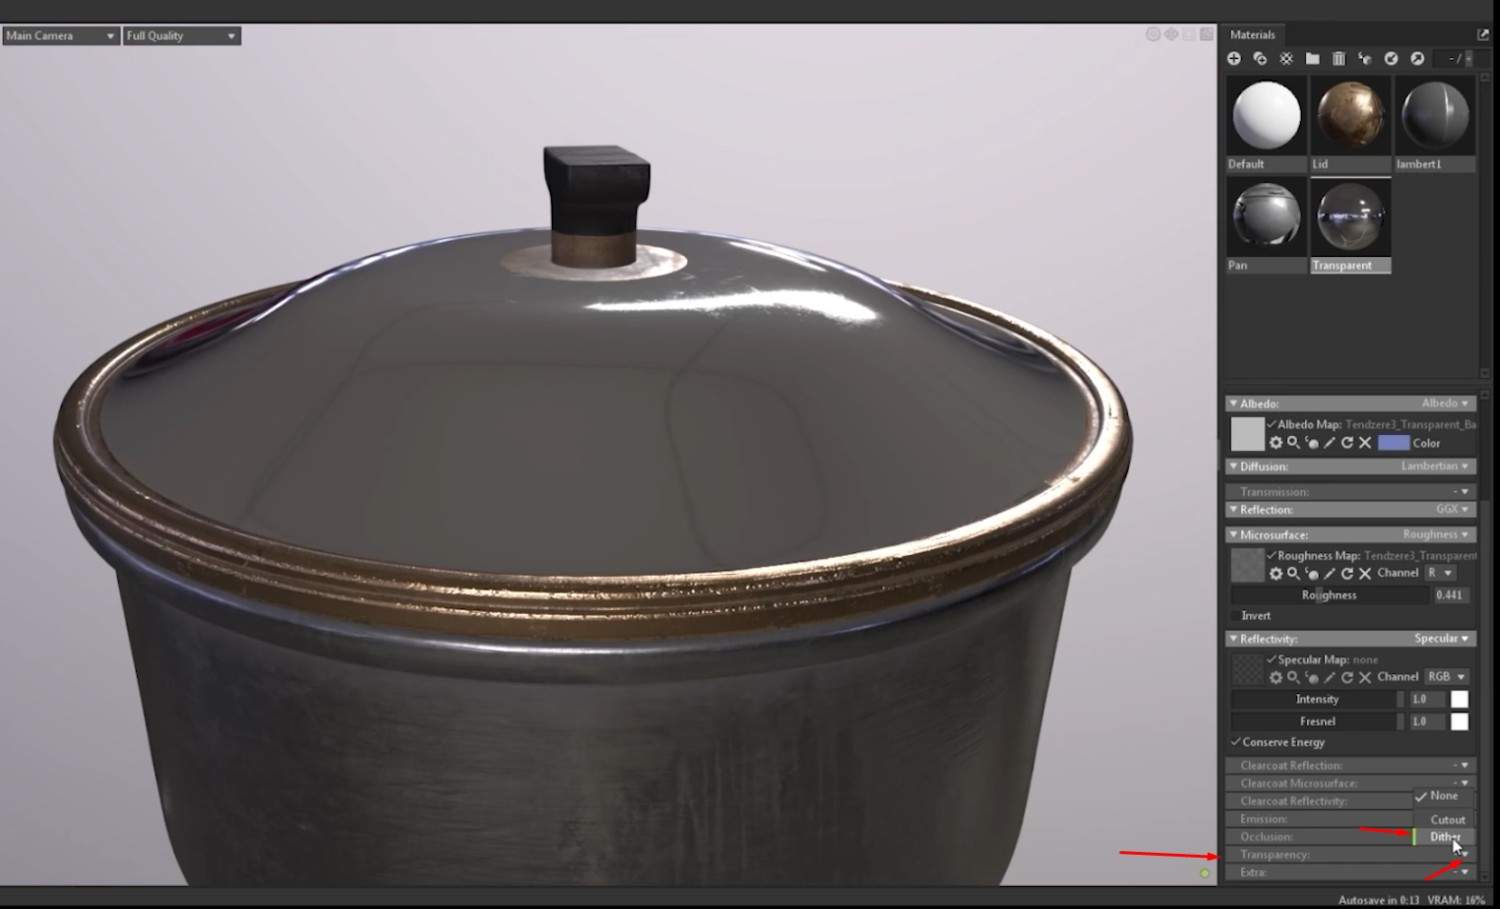
- To make the glass transparent, find the Transparency map, click the arrow on the side, and select Dither.
- Decrease the Alpha scale to make it transparent.
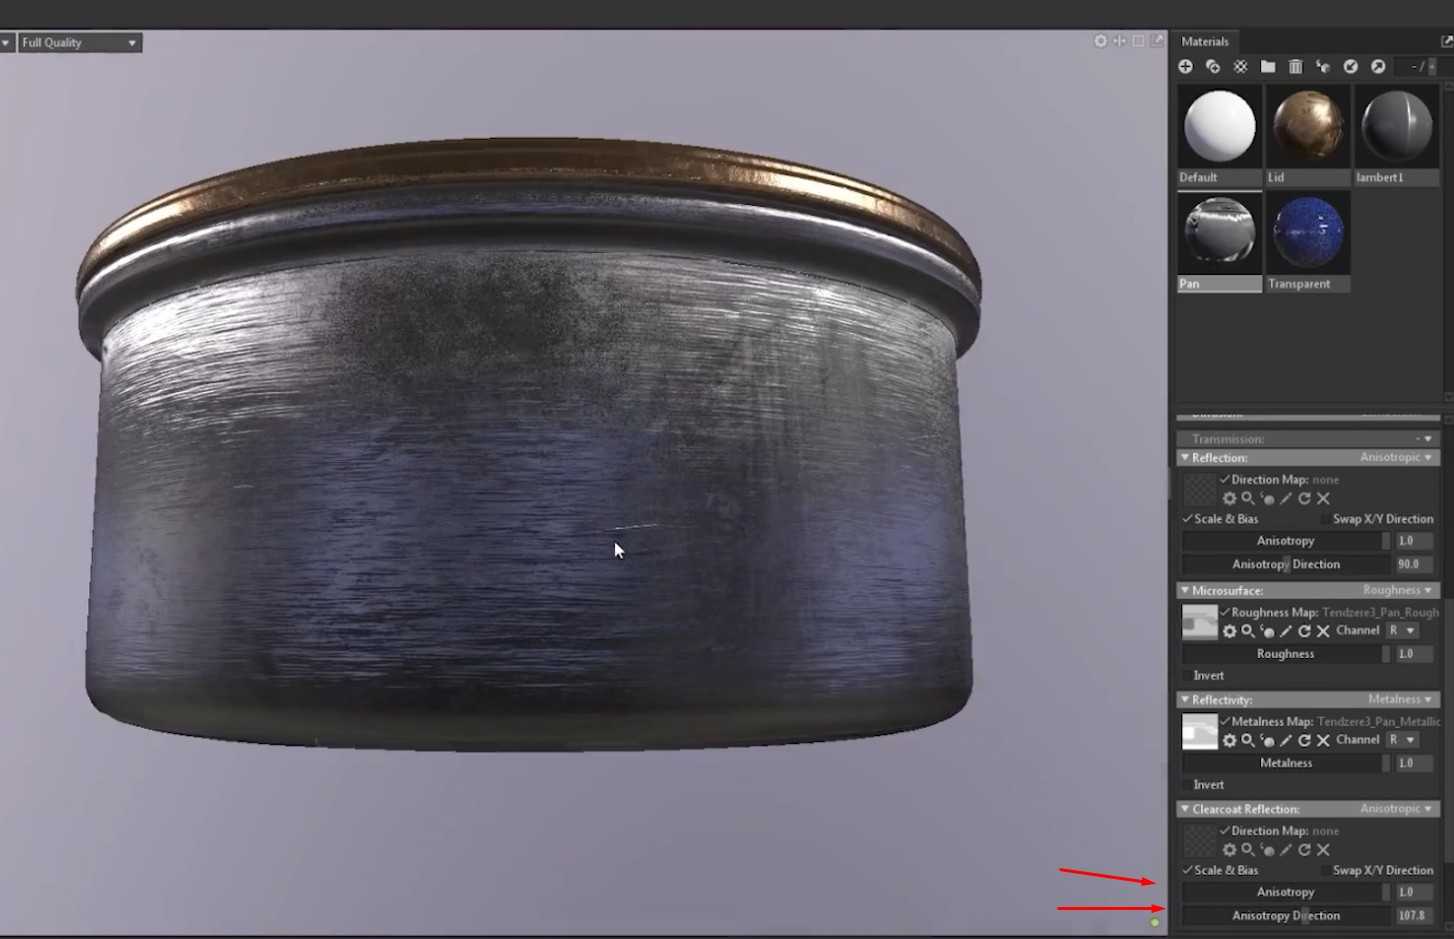
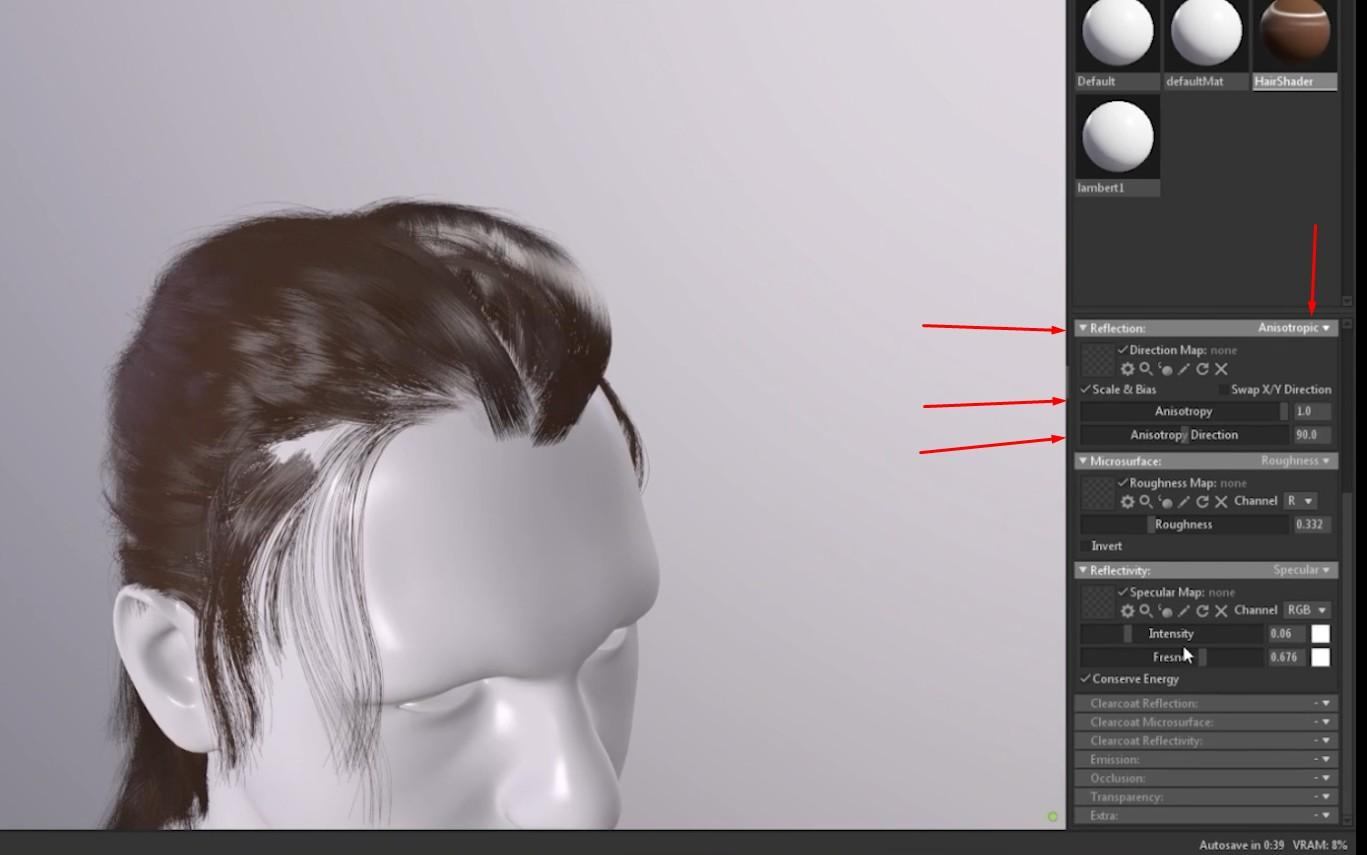
- On the pan shader, go into the Reflection tab, click the arrow on the side, and click the Anisotropic option.
- Increase the Anisotropic intensity and the Anisotropic Direction.
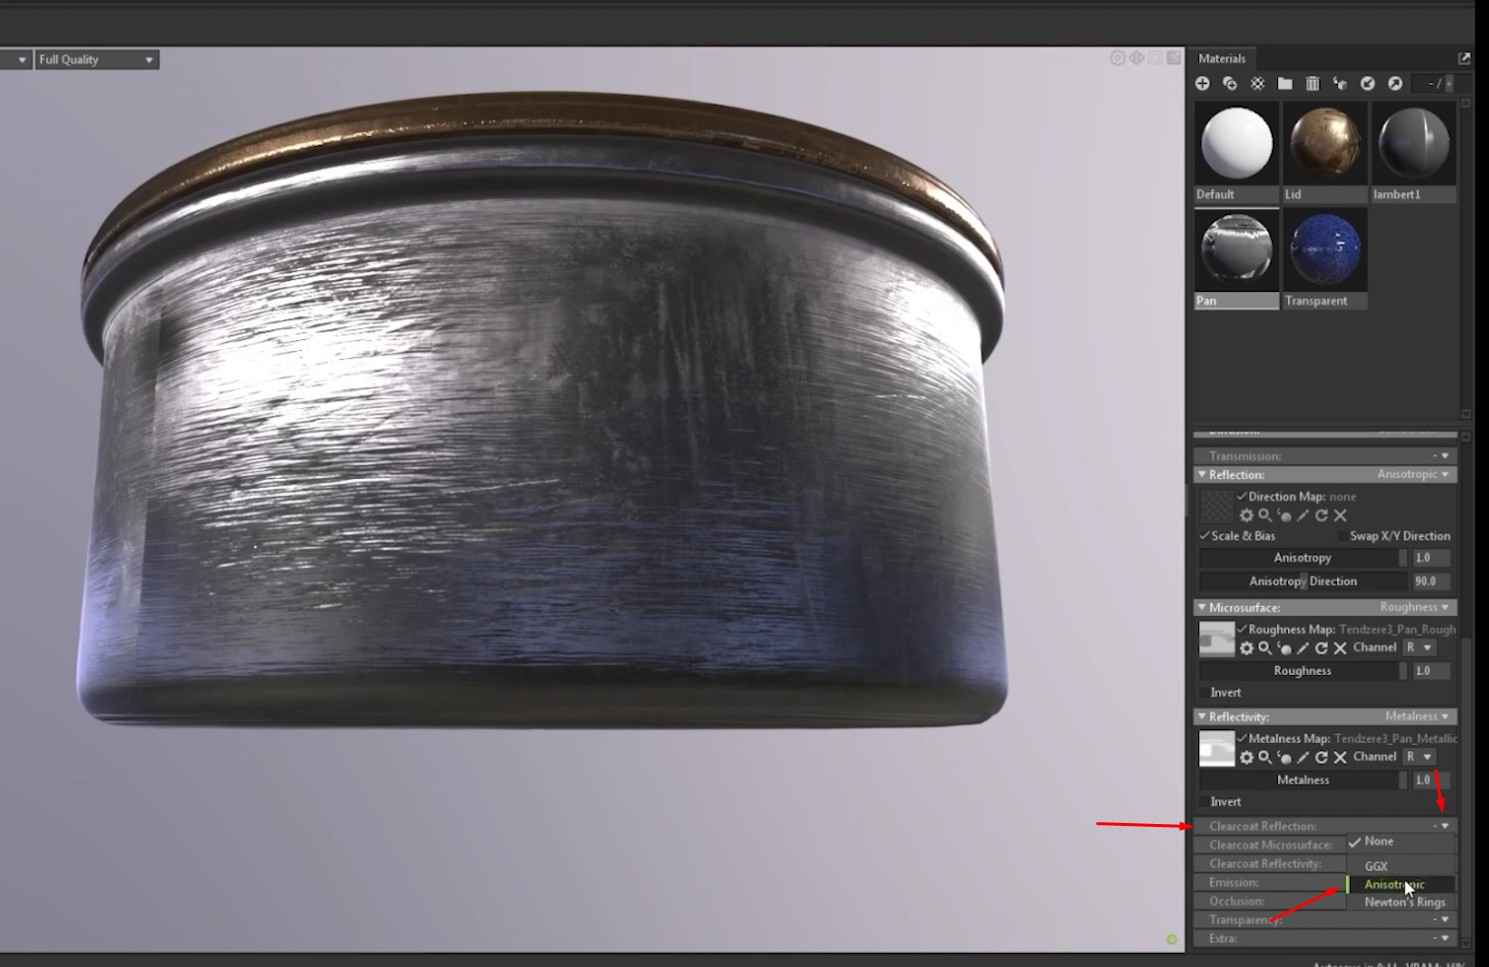
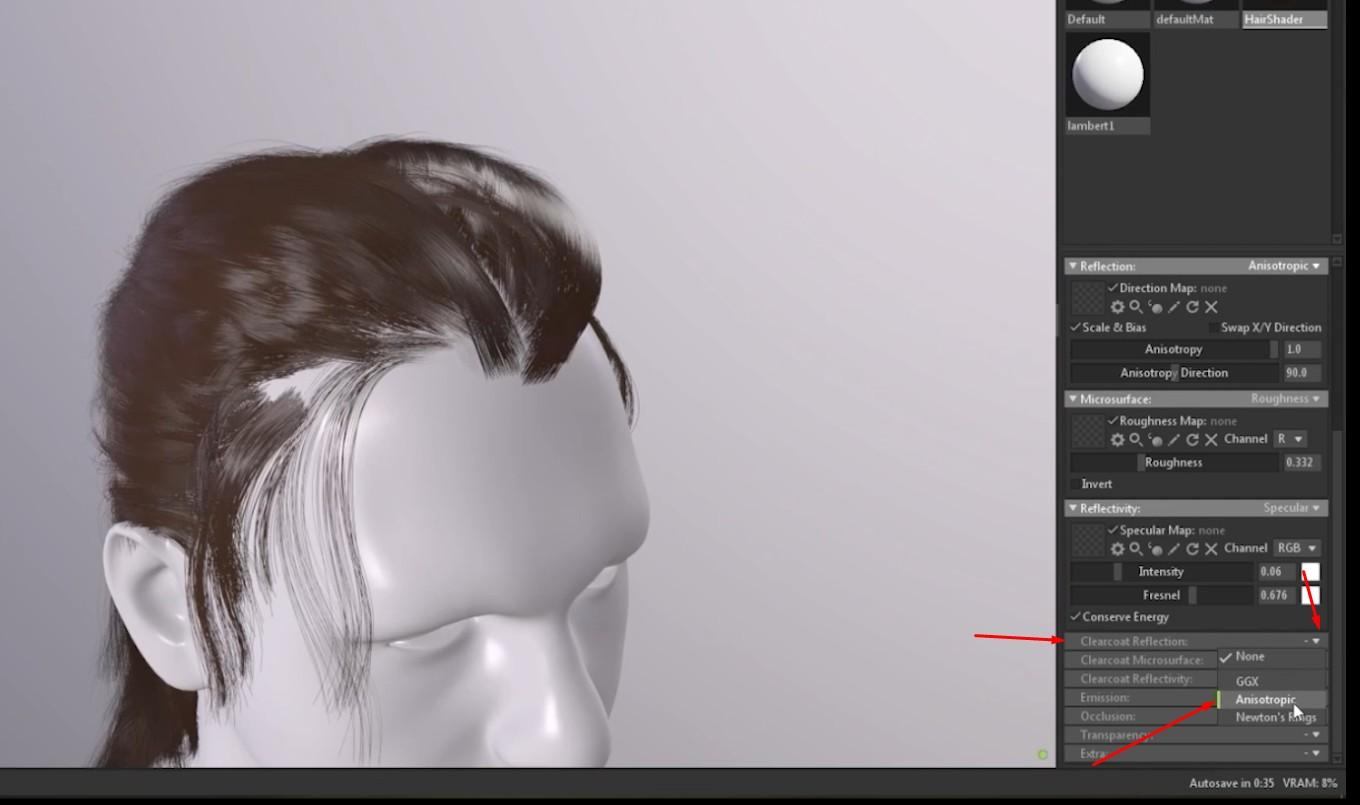
- In the Clearcoat Reflection tab, click the arrow on the side and click the Anisotropic option.
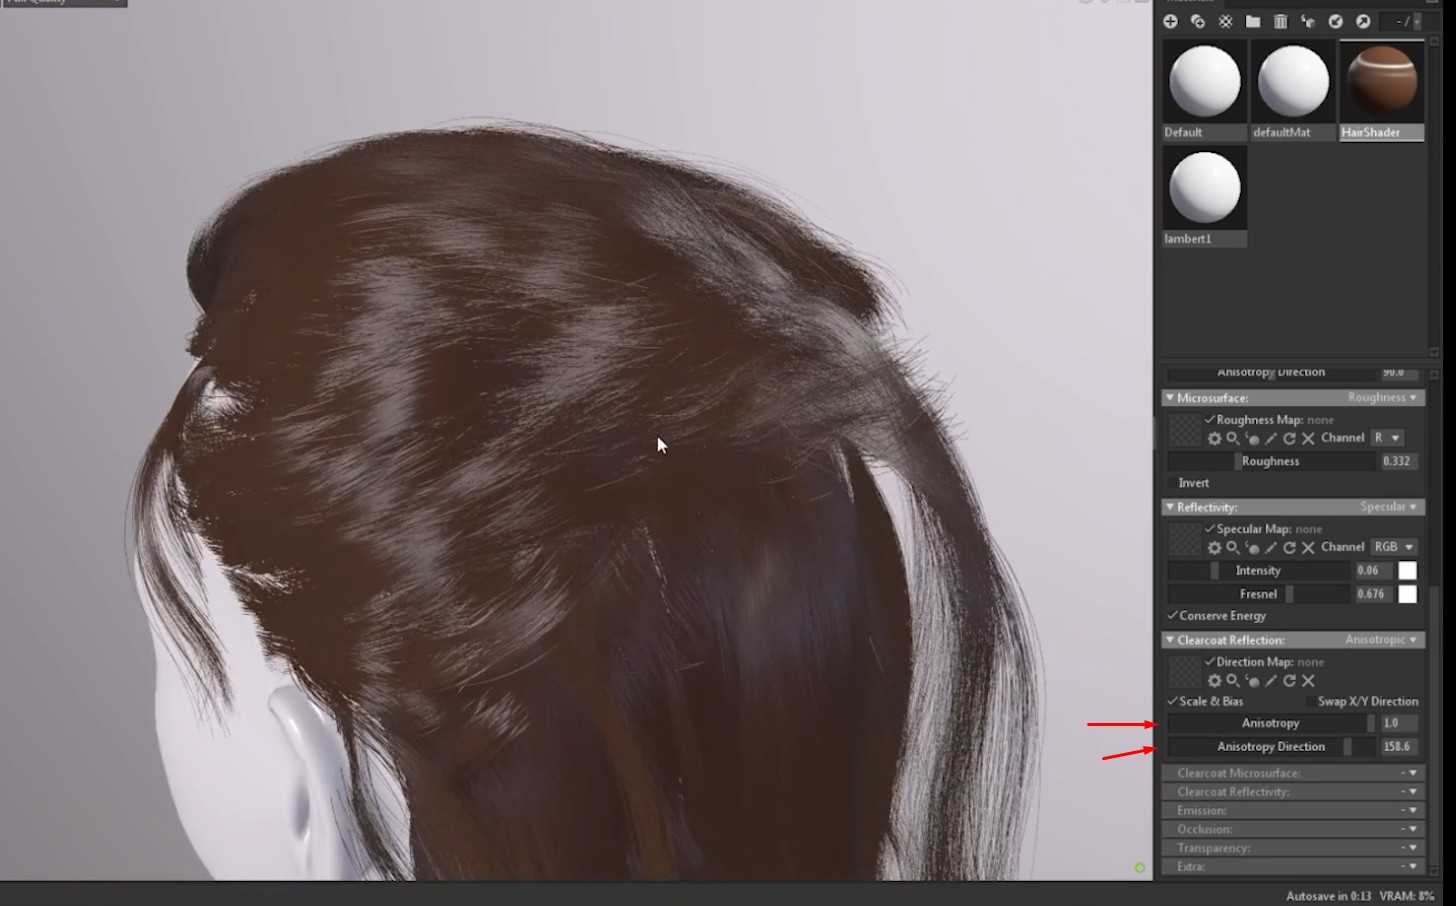
- Same as before, increase the Anisotropic intensity and the Anisotropic Direction.
- The end result is a high-quality 3D prop in Marmoset with realistic textures, reflections, and transparent glass, creating a polished and professional render.
Exporting and Rendering Hair in Marmoset
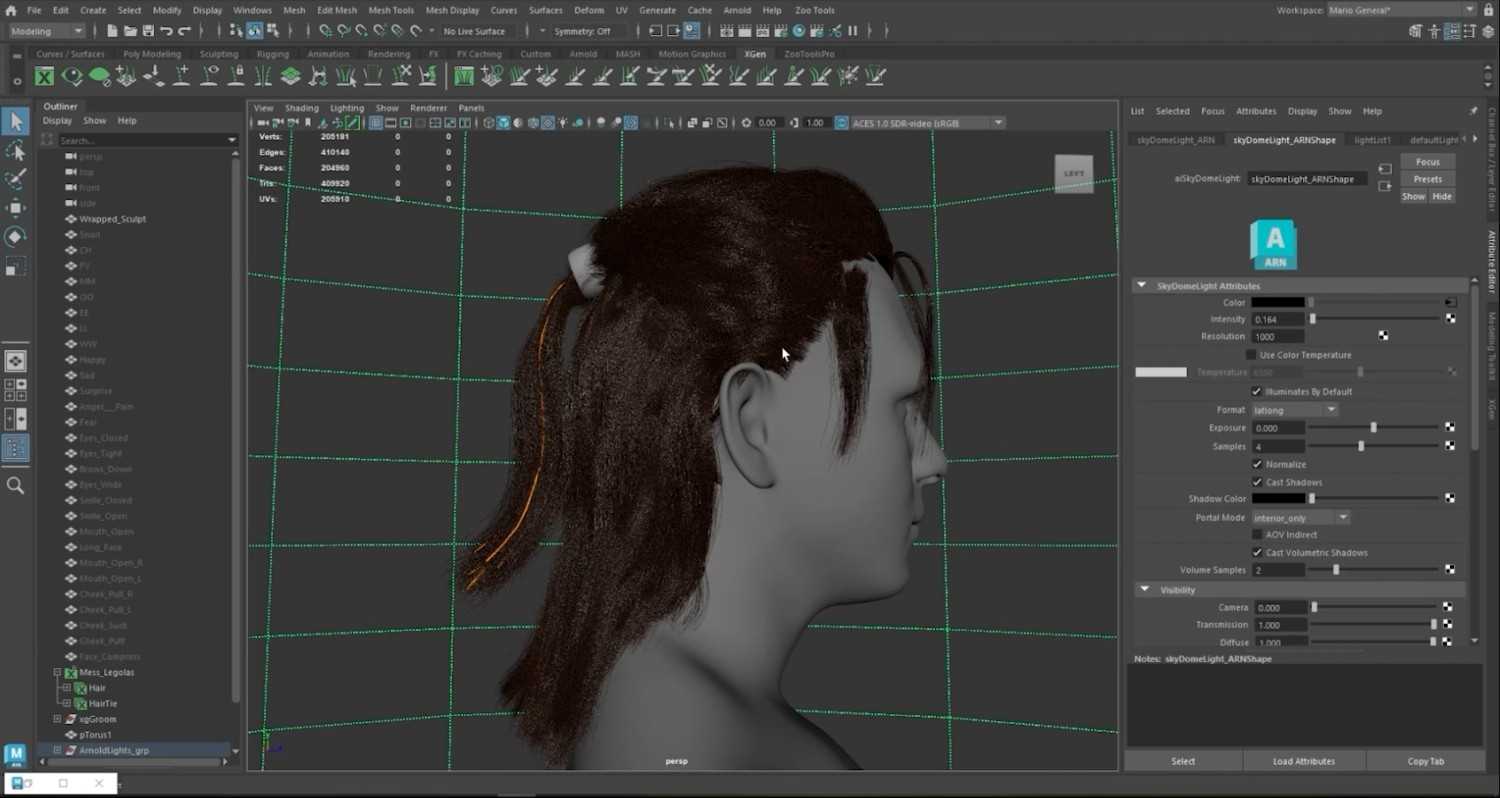
Hair Setup in Maya
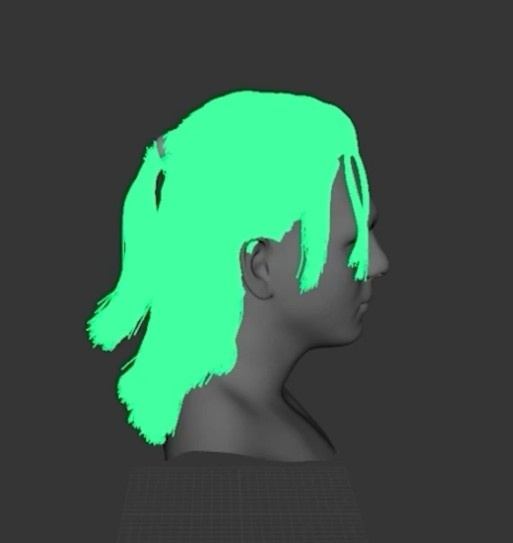
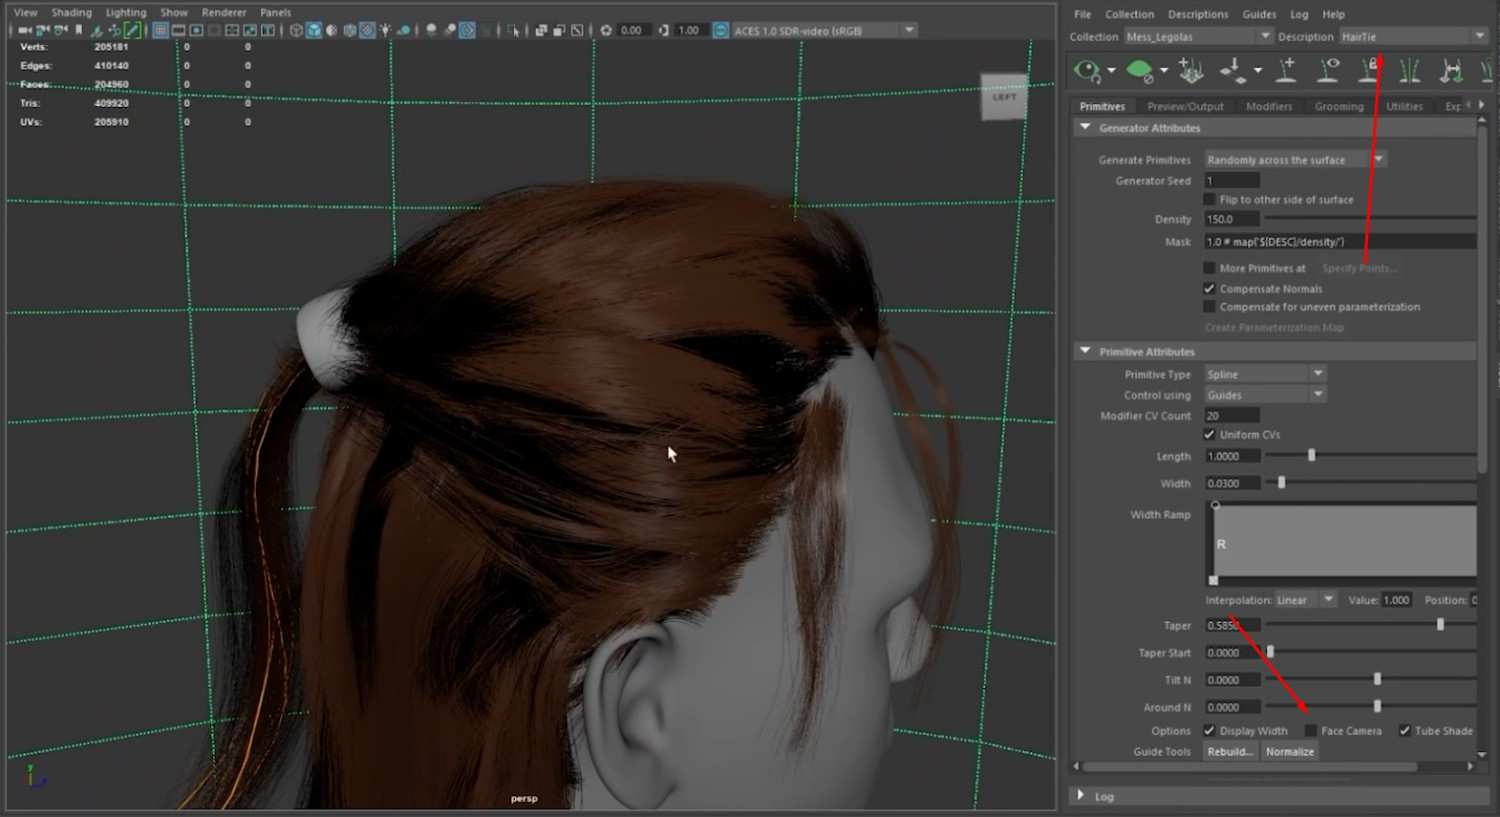
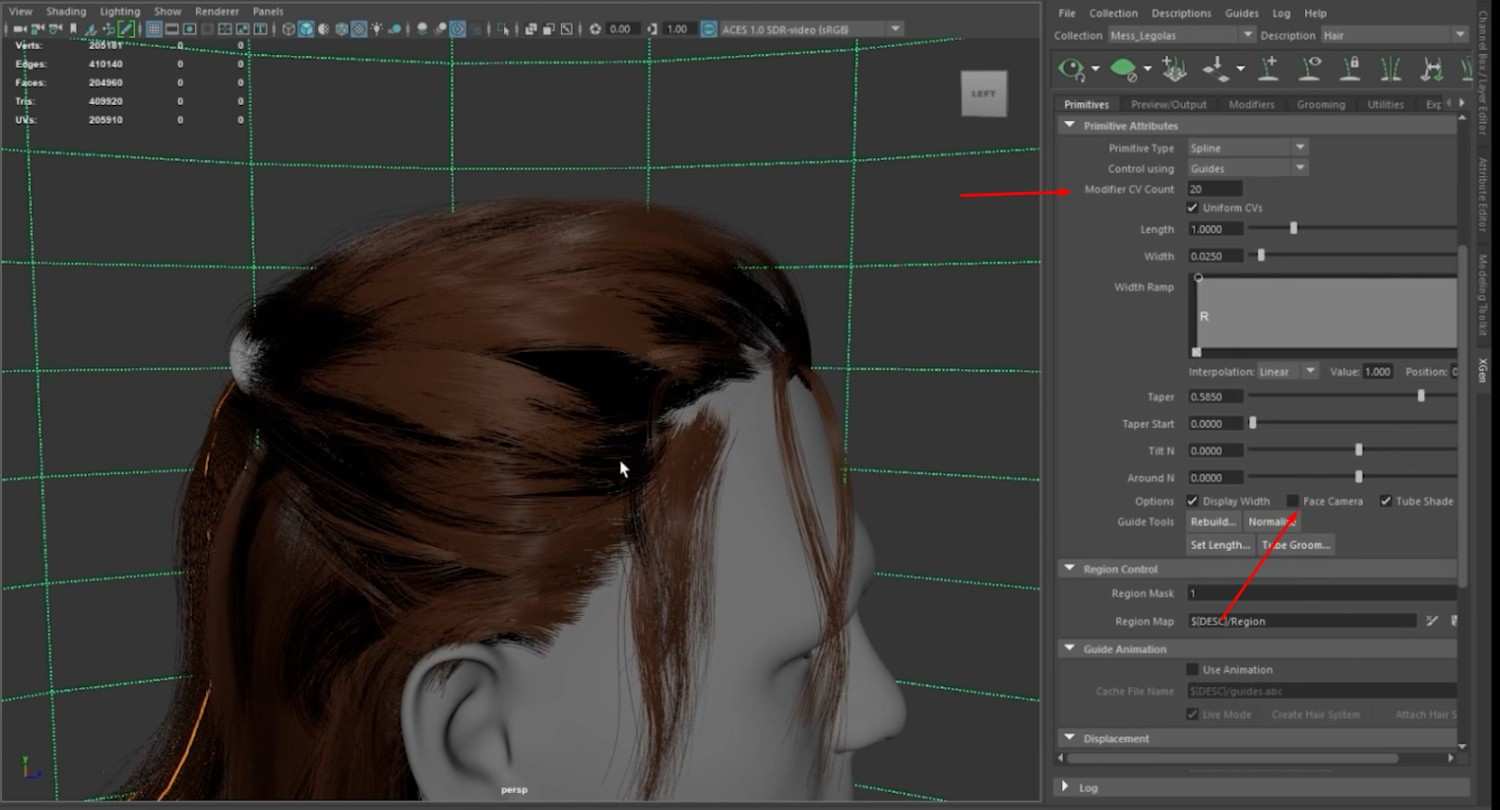
- Before exporting the hair, make some last-minute changes to it by adding more CV Counts to increase the number of strands, and un-tick the Face Camera box inside the Primitive Attributes tab.
- If the hair has multiple Descriptions, make sure to un-tick the Face Camera box in those Descriptions as well.
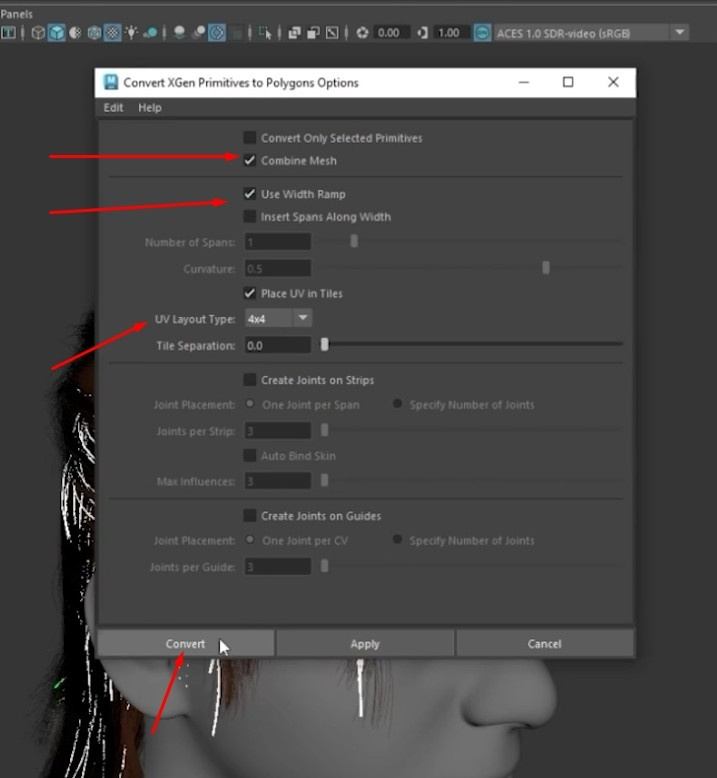
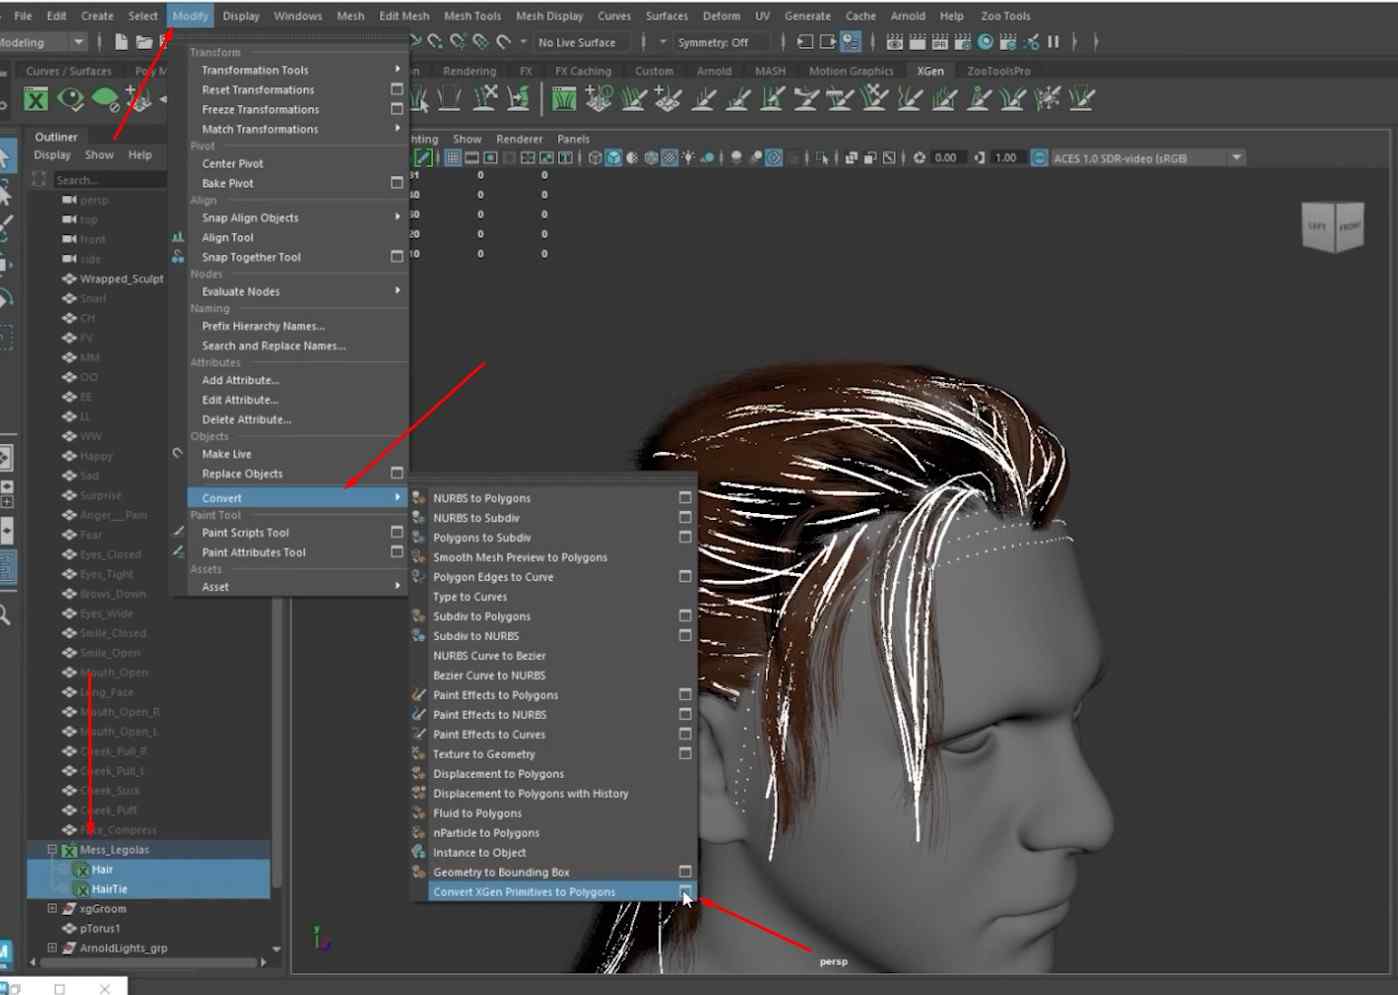
- Select all the guides, open the Modify tab, hover over Convert, find the Convert XGen Primitives to Polygons action, and click on the menu icon next to it.
- Make sure Combine Meshes is on, as well as Use Width Ramp, change the UV Layout Type to 4×4, and click Convert.
- Now that the hair is a mesh, select it and export it as an FBX file.
Importing Hair in Marmoset
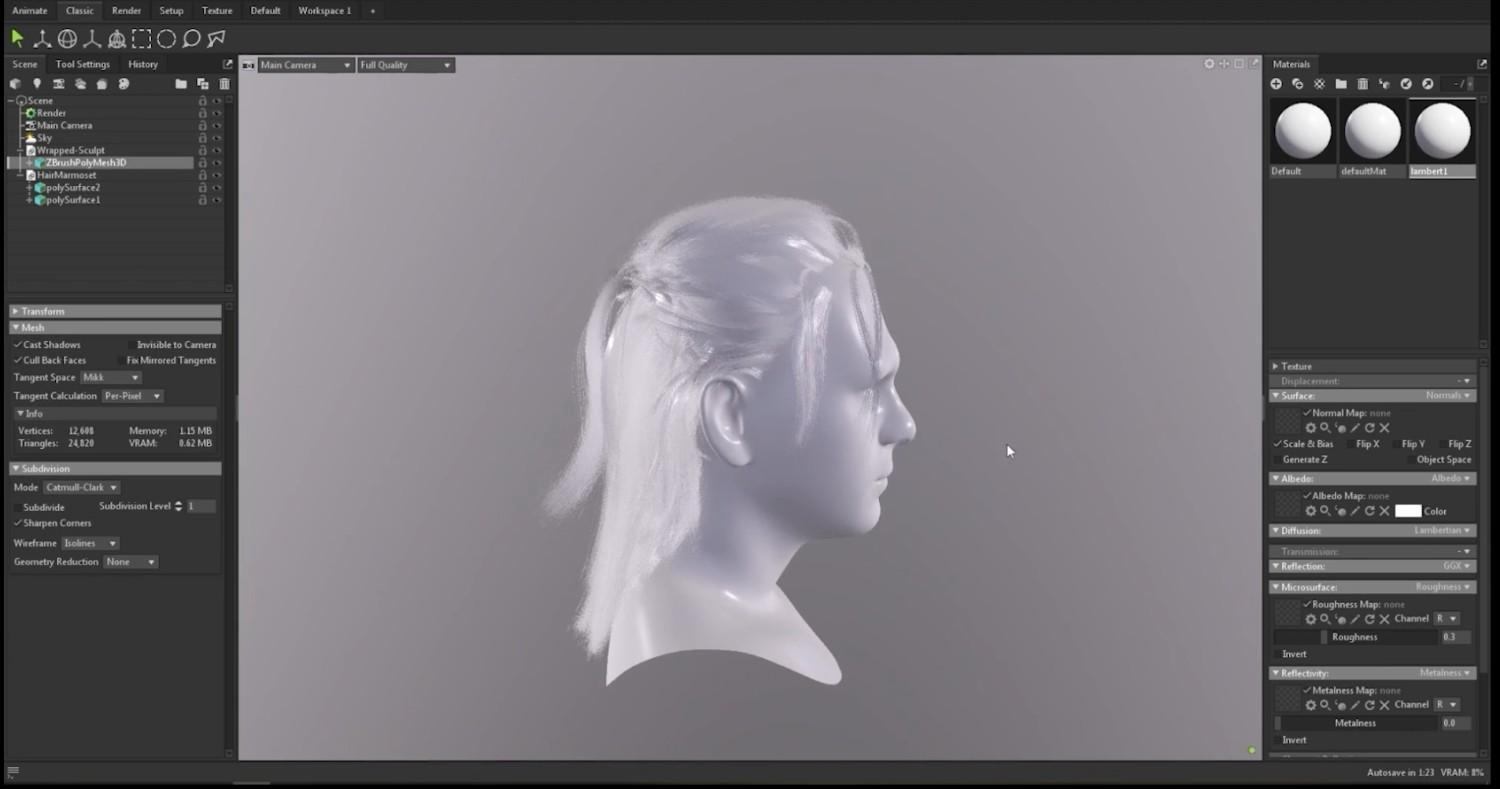
- In Marmoset, import the Head FBX file, and afterward, drag and drop the Hair FBX file inside the current Marmoset Project.
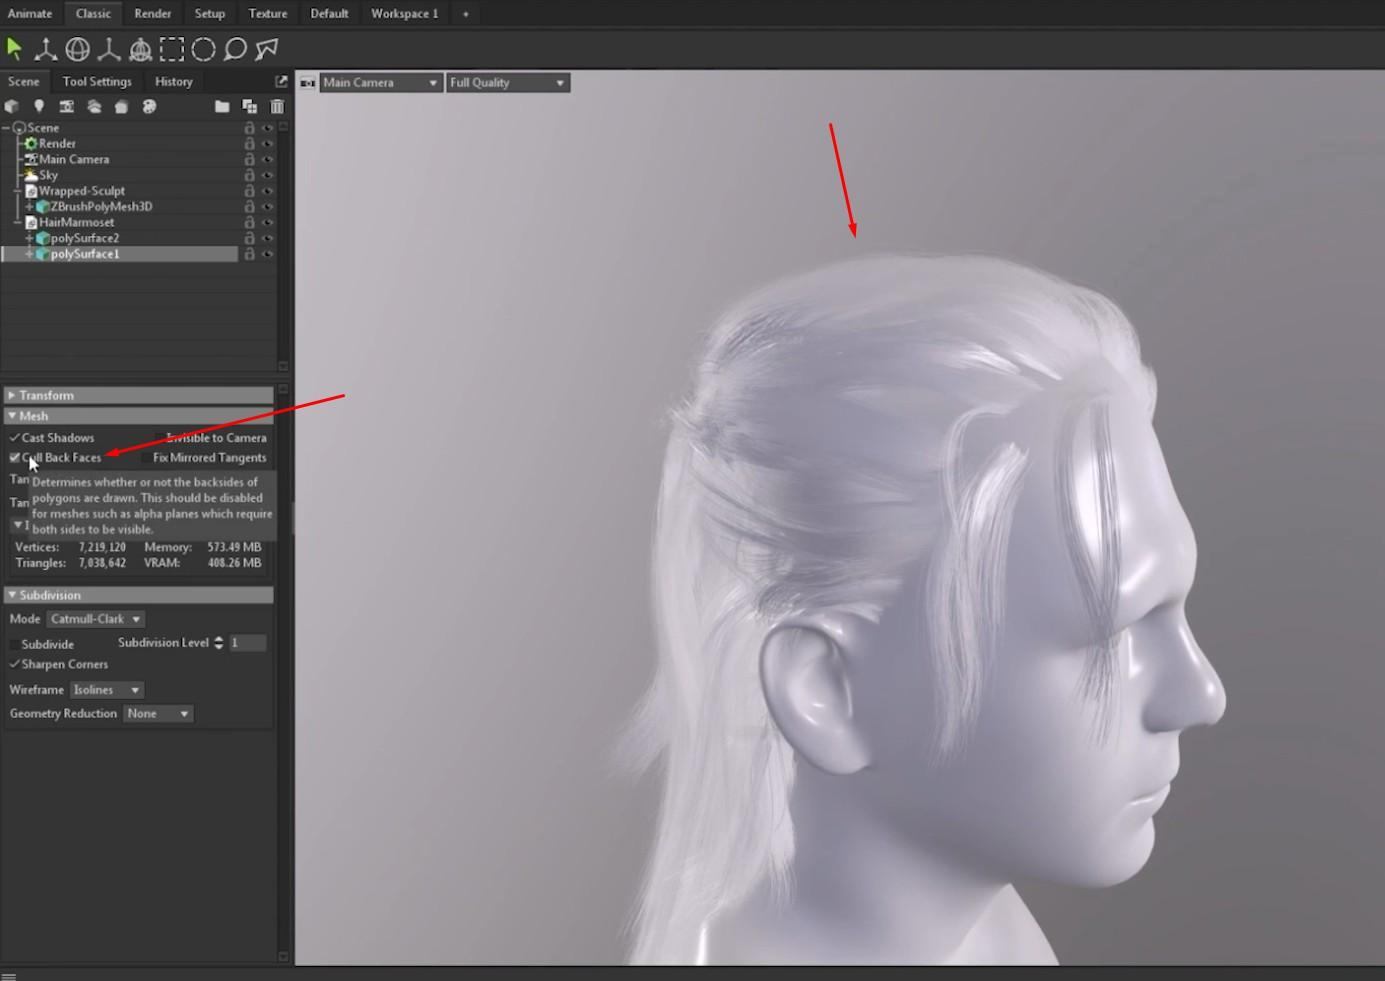
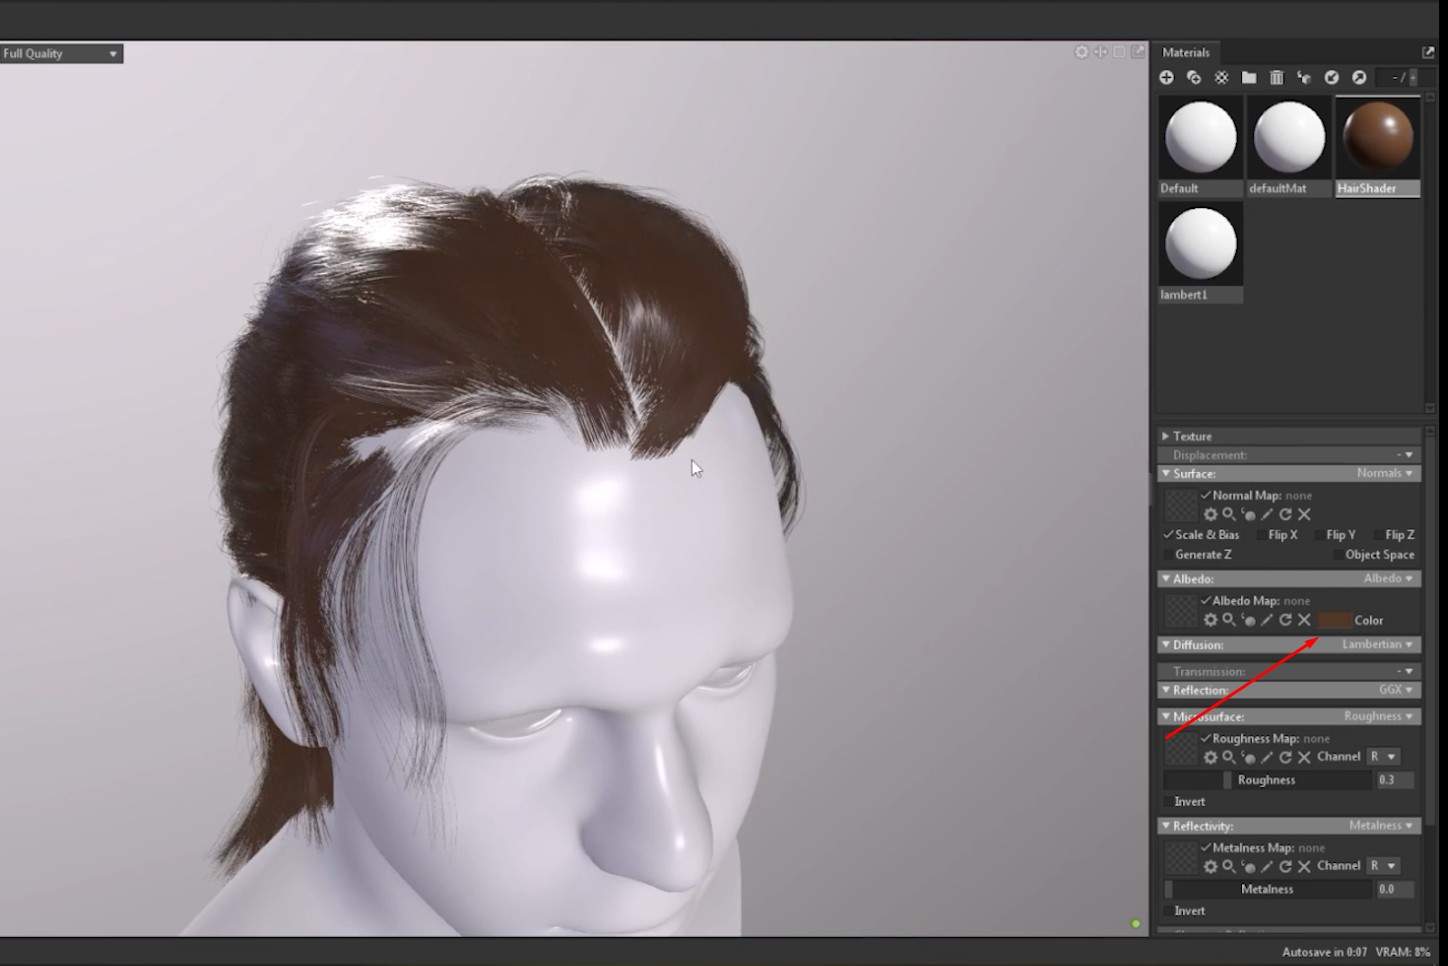
- The Hair will look like it has bald spots on it and a lot of missing hair strands. To fix this, click on the hair mesh and un-tick the Cull Back Faces to reveal all of the hair.
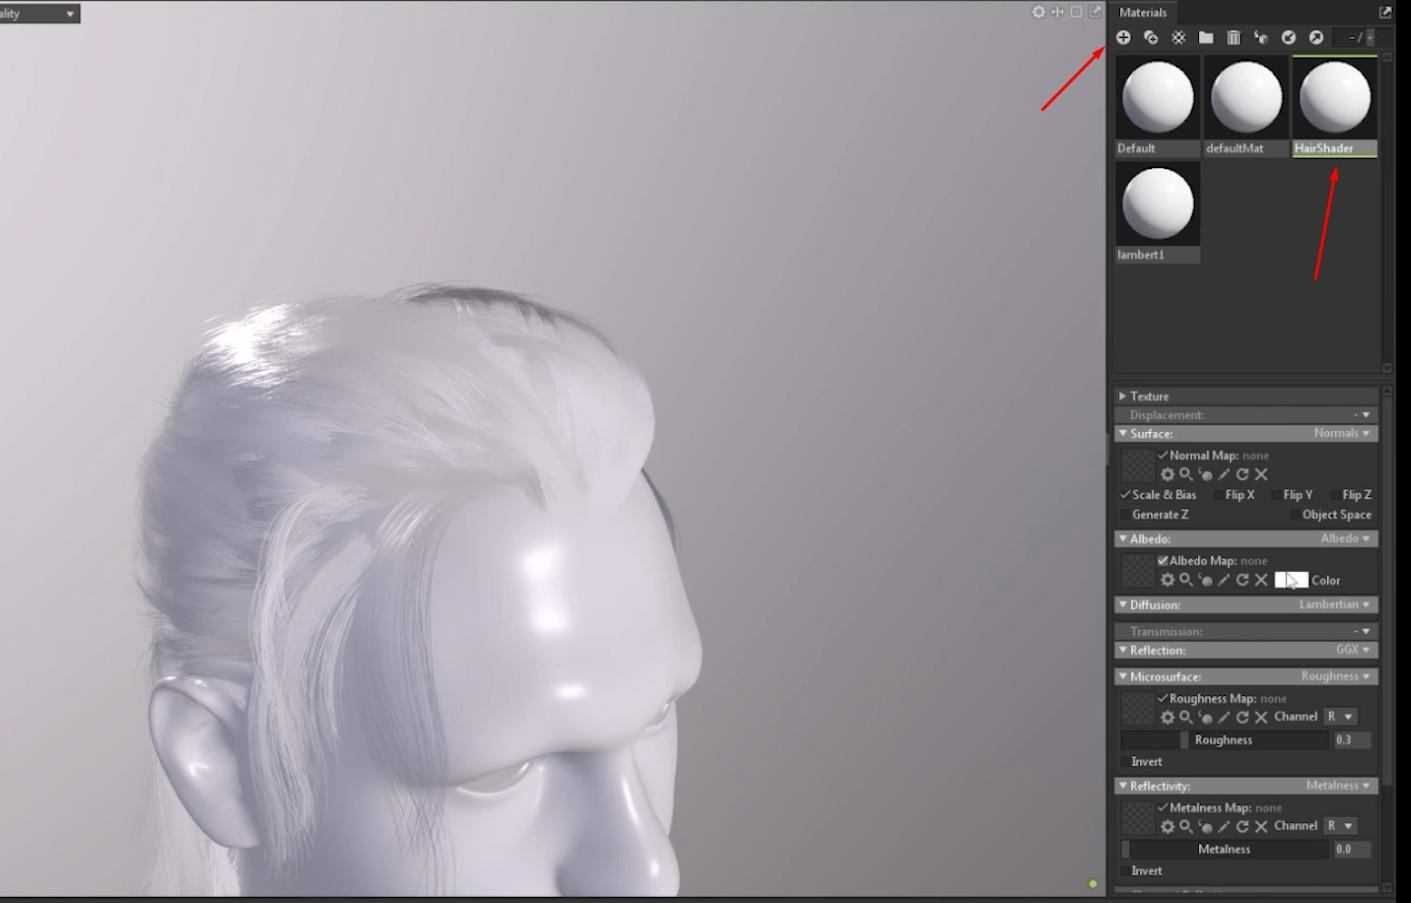
- Make a new material by clicking the plus icon below the Materials tab and rename it.
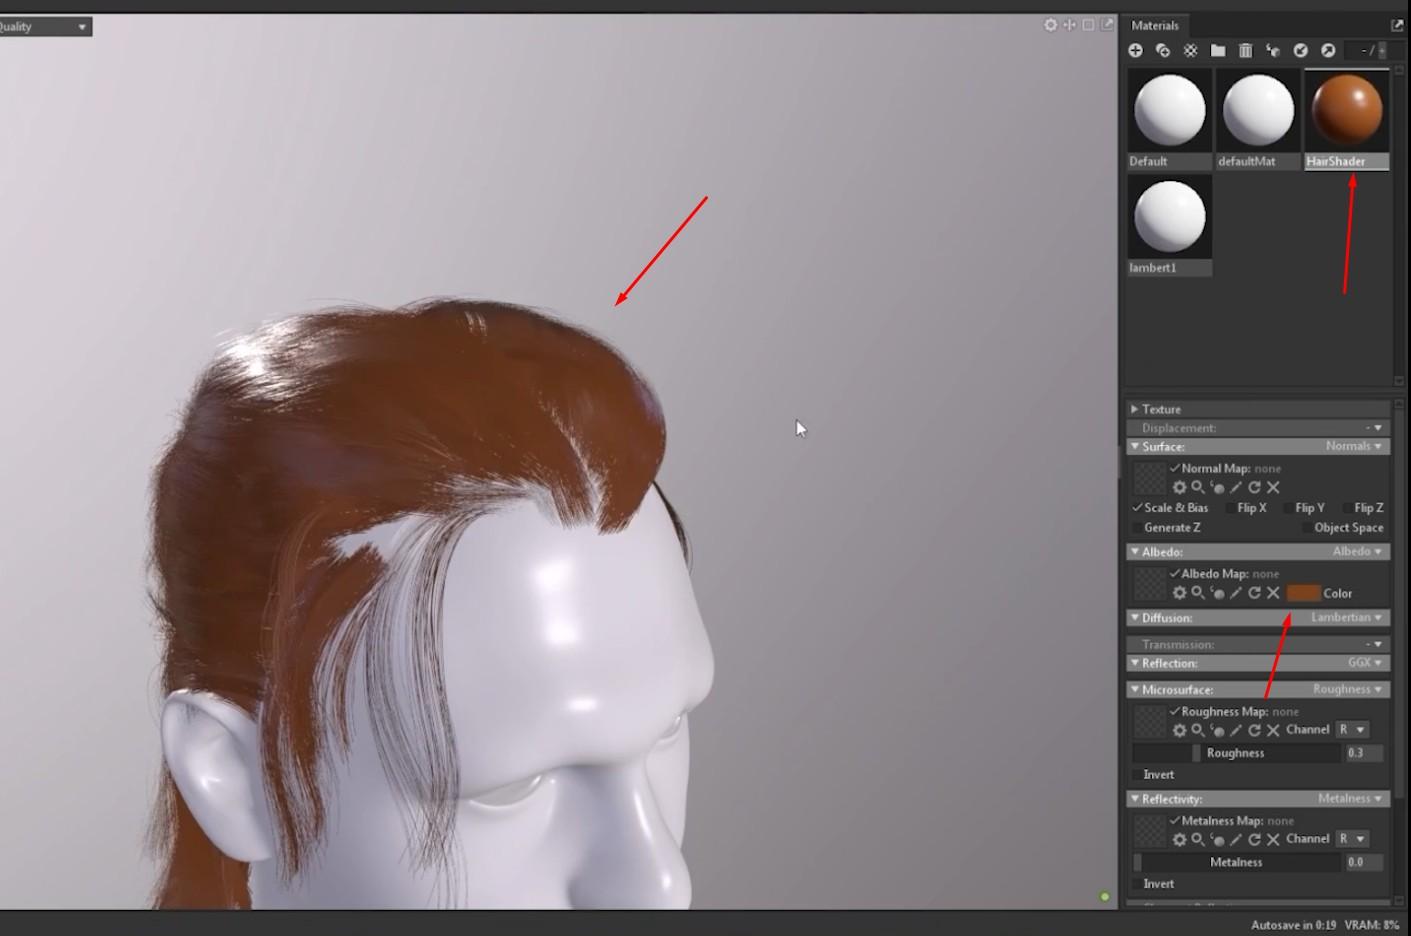
- Change the Base Color of the new material and drop it on the hair mesh.
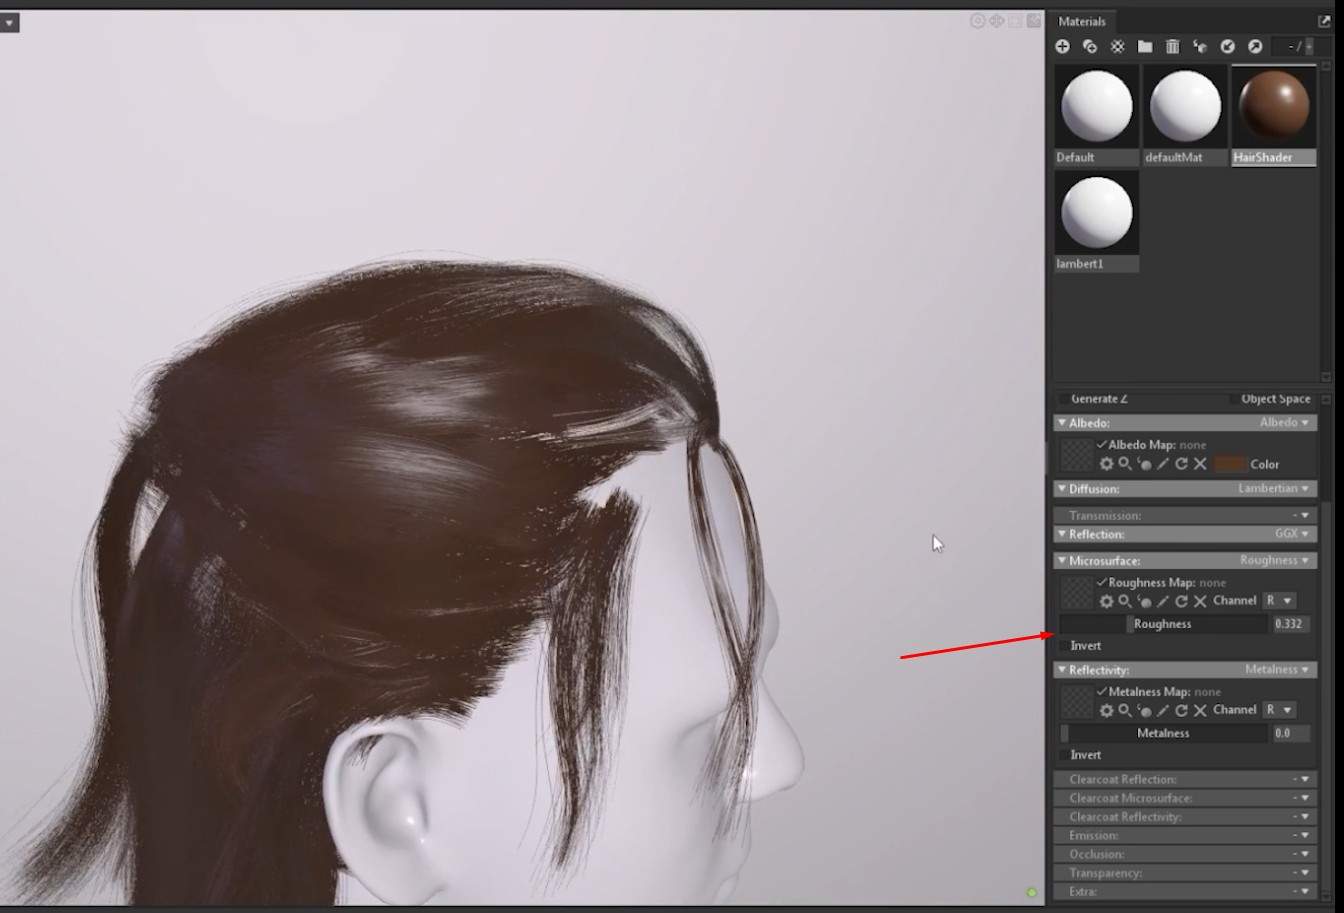
- Lower the Roughness so it’s not as shiny of hair, and you can always adjust the color if this isn’t a color you like.
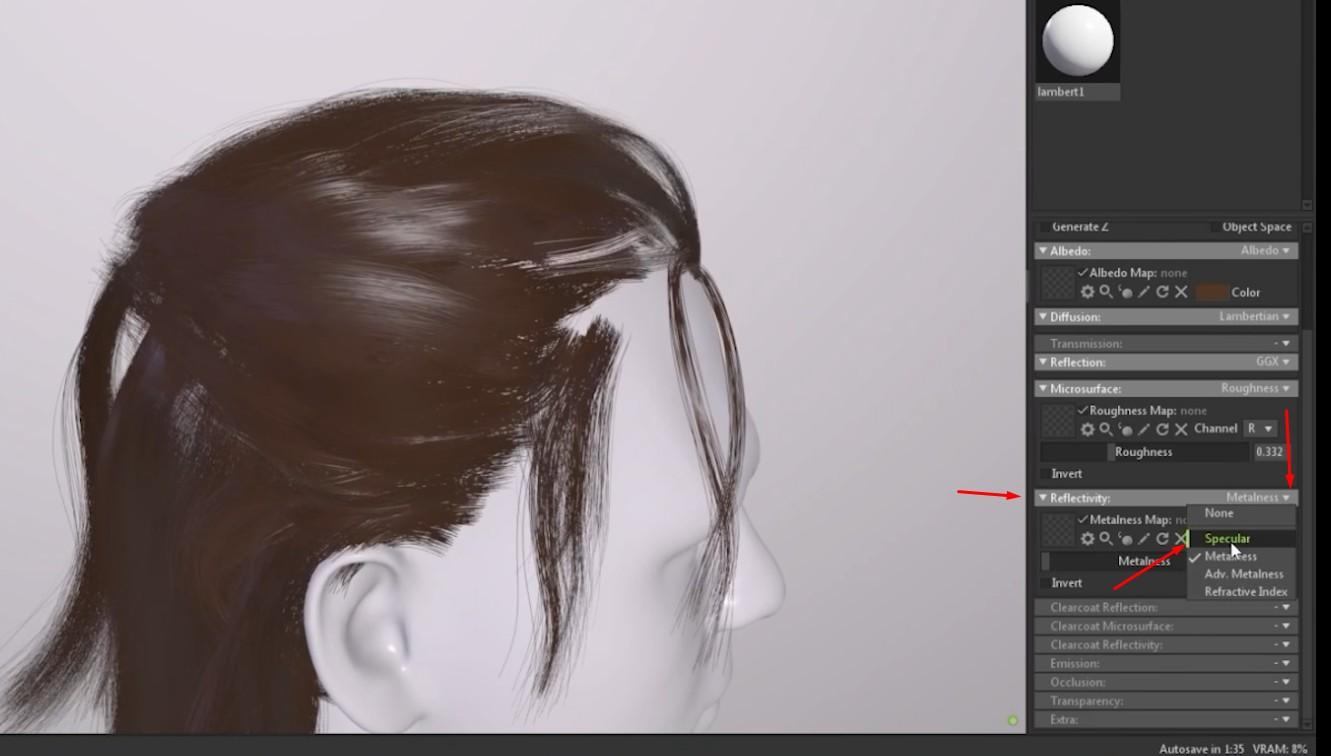
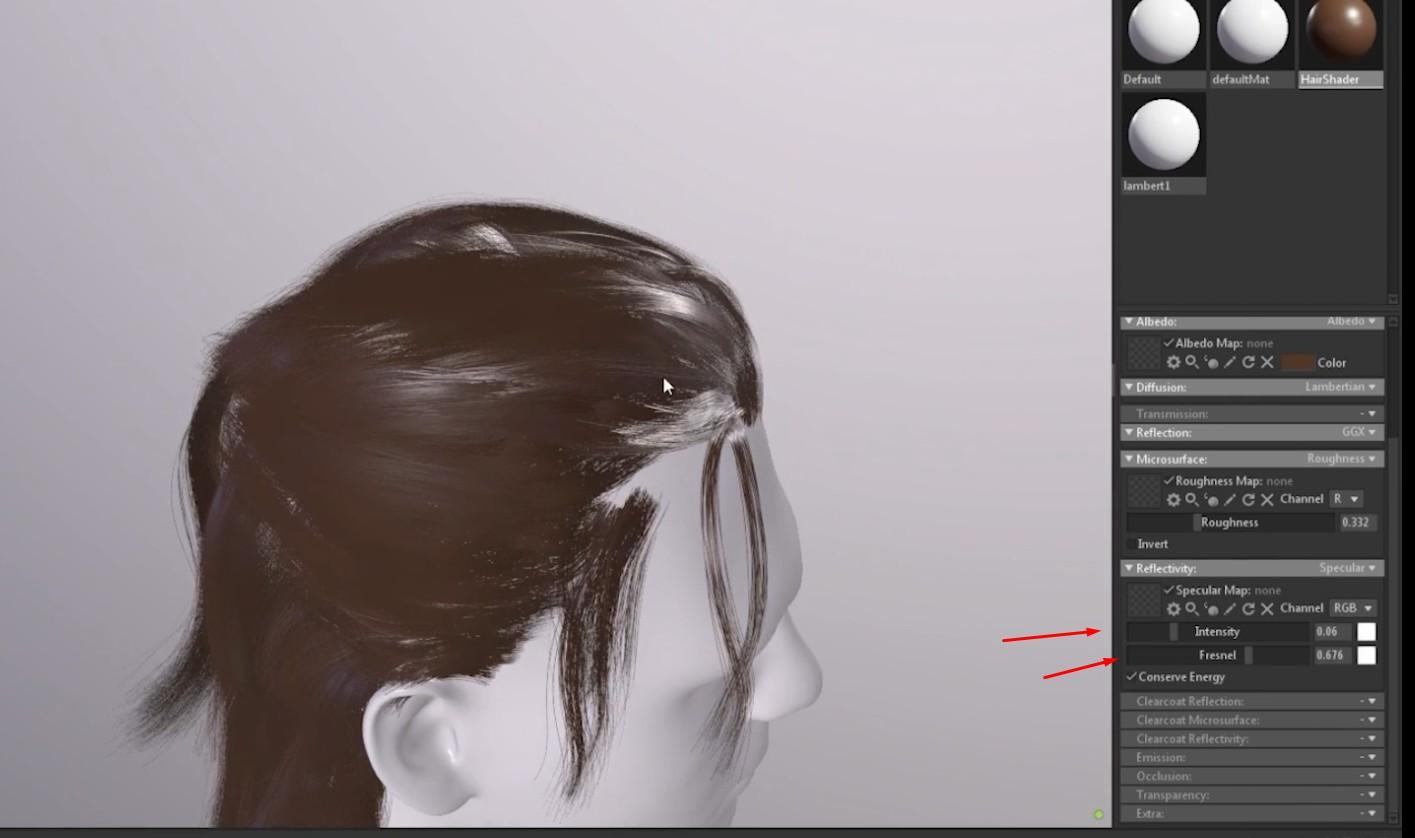
- In the Reflectivity tab, add Specular and adjust the Intensity and Fresnel sliders, and add Anisotropic and adjust the Anisotropy and Anisotropy Direction sliders.
Final Steps to Rendering Hair In Marmoset
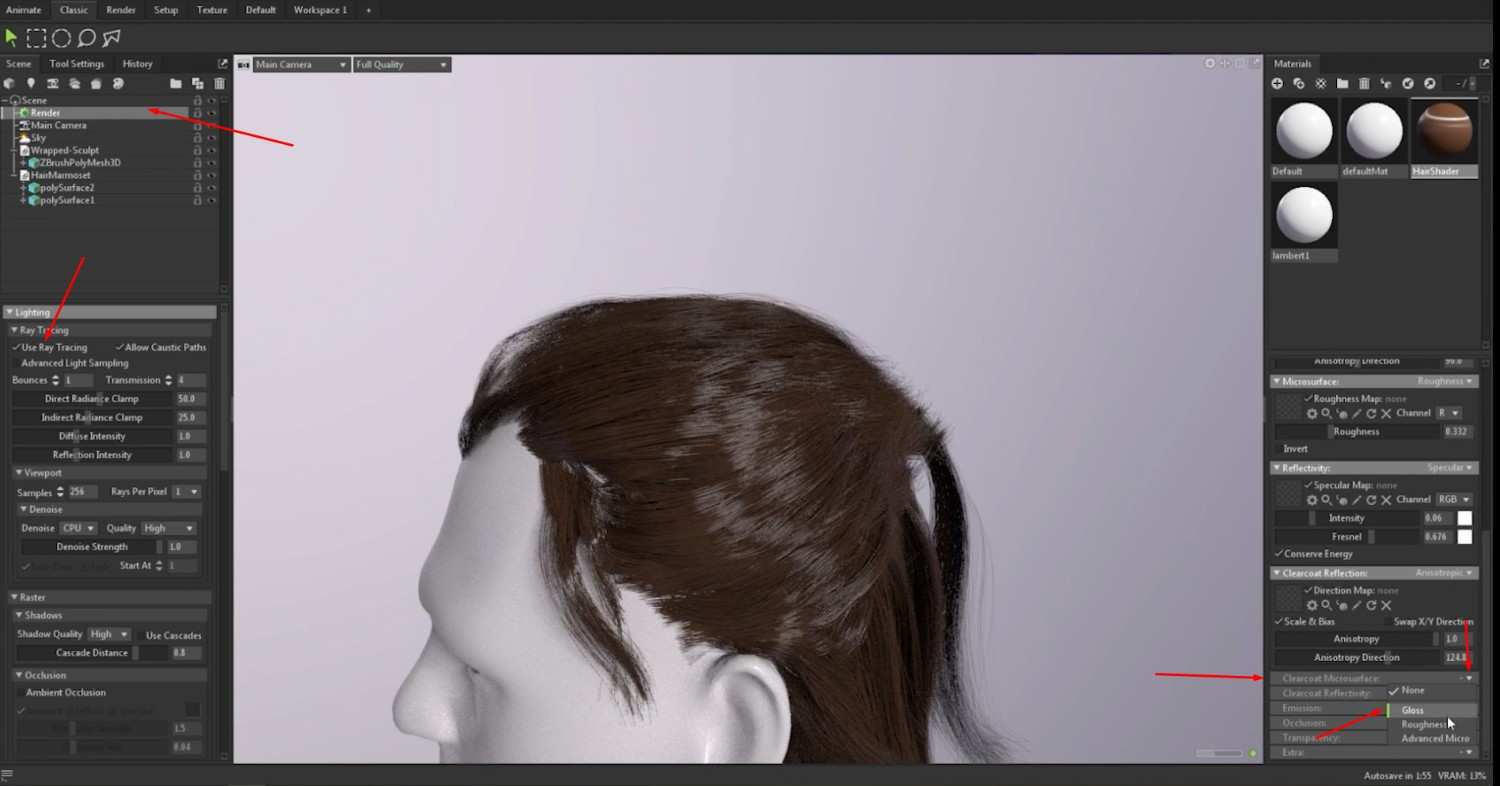
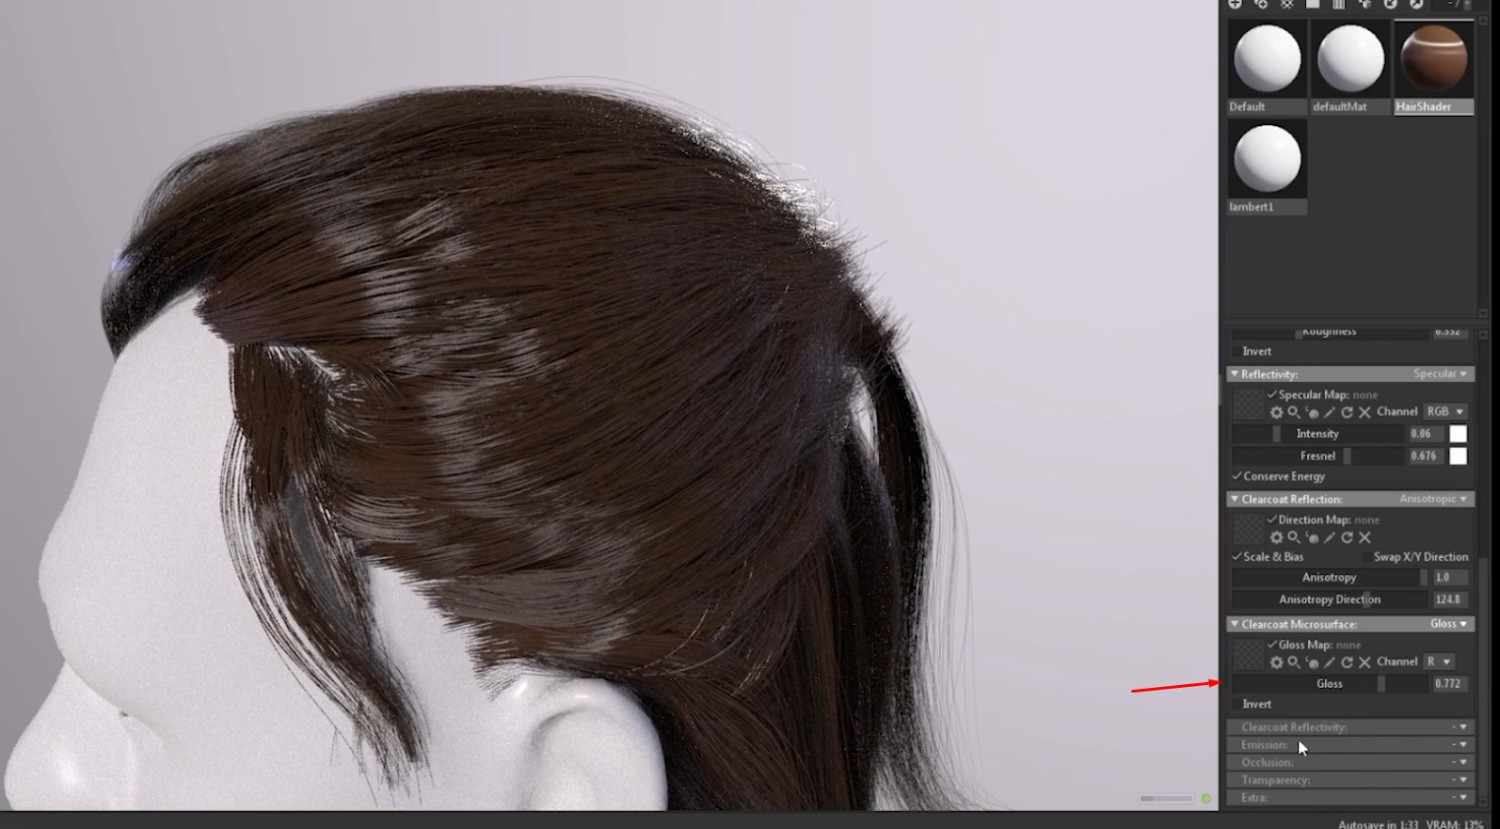
- In the Clearcoat Microsurface tab, add Gloss and adjust the intensity.
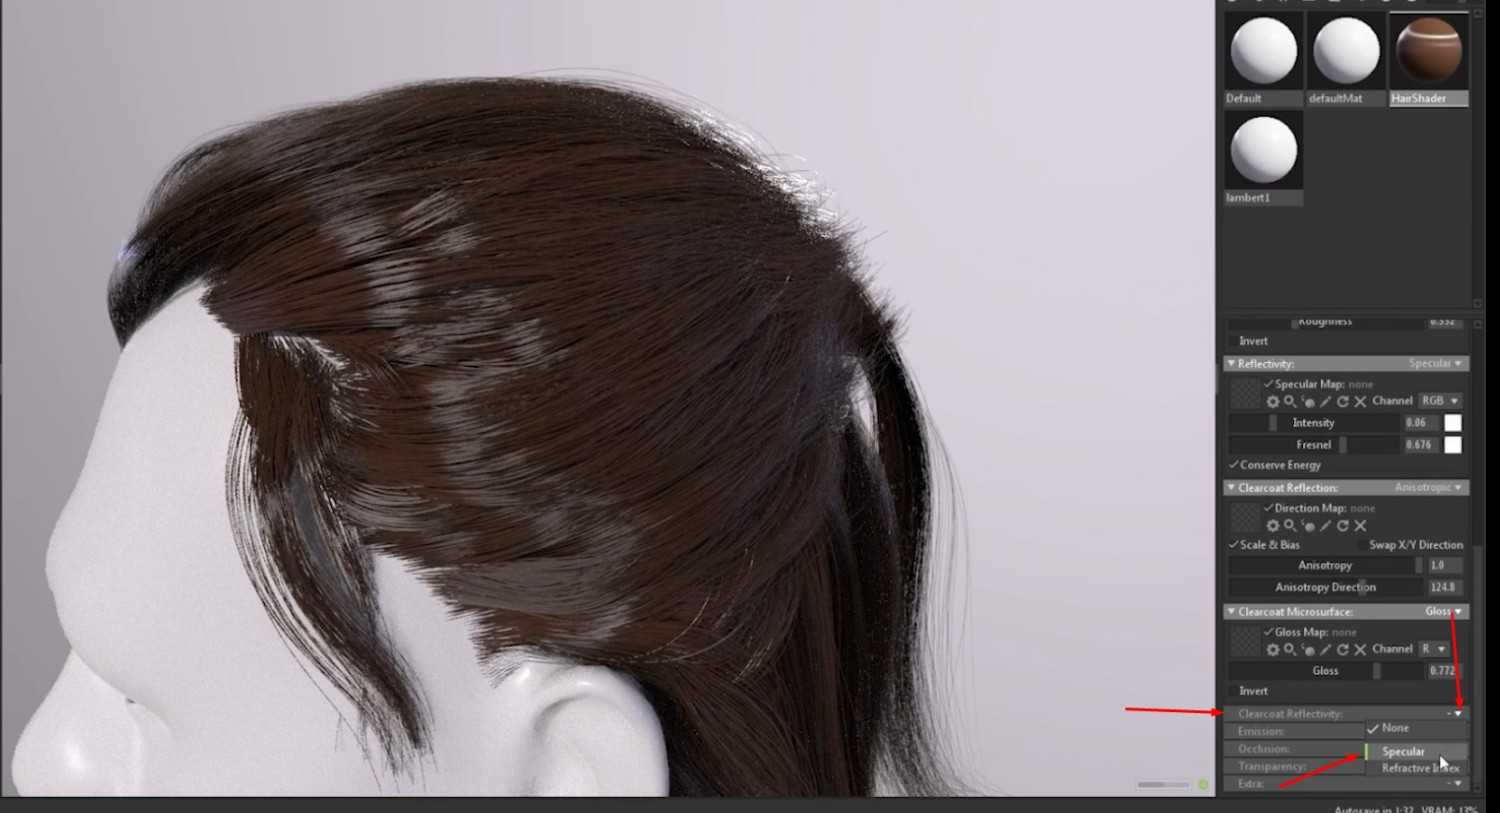
- In the Clearcoat Reflectivity tab, add Specular and adjust the intensity.
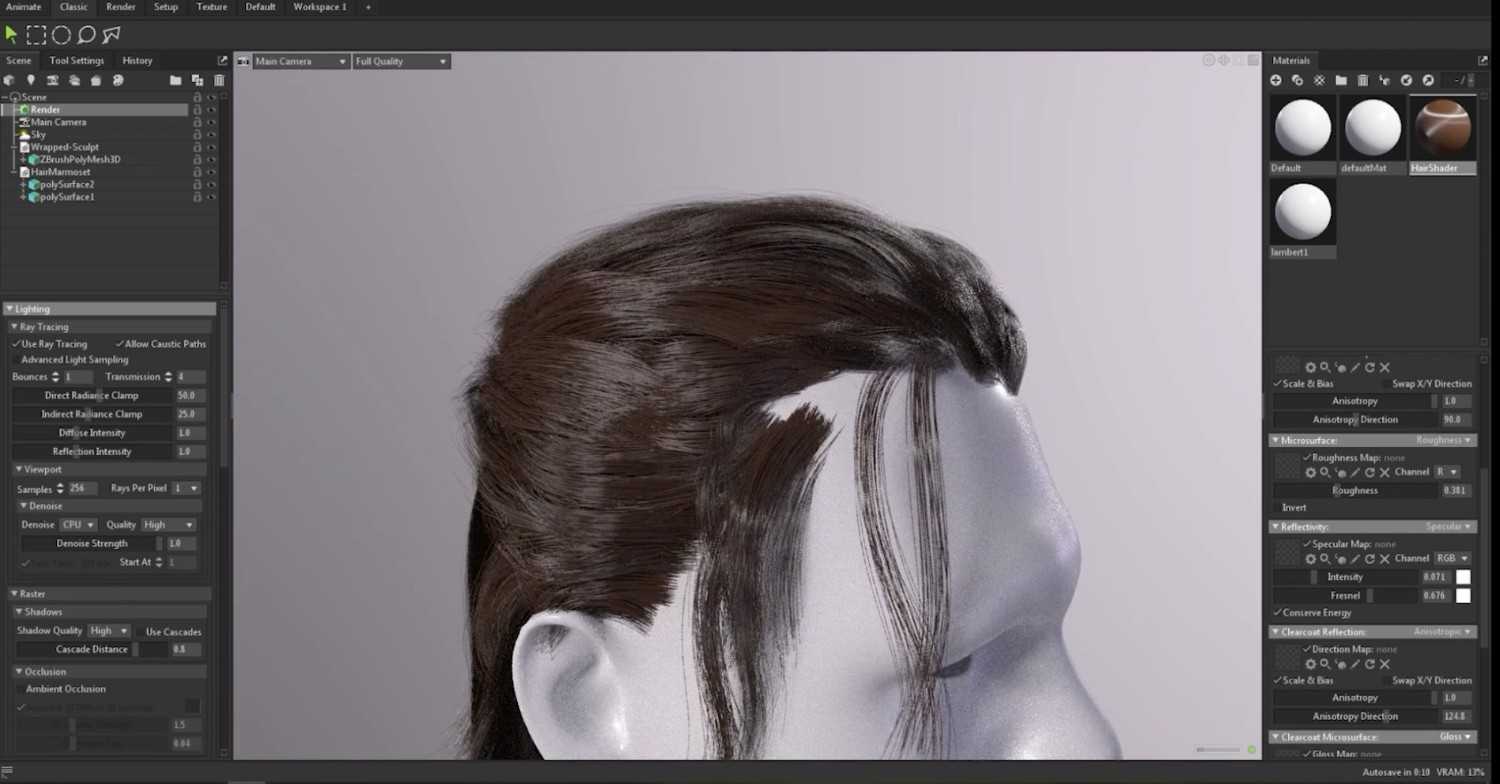
- When everything is set, you should adjust the sliders that you don’t like, turn the ray tracing on, and render the hair.
- Output is a well-shaded and rendered prop and hair in Marmoset.
Conclusion: Realism Accomplished in Marmoset Toolbag
What you did here was learn how to effectively make shaders and render your 3D model in Marmoset Toolbag, props, or hair. From exporting textures in Maya and Substance Painter to fine-tuning of materials like glass and hair, this tutorial led you through a step-by-step process of bringing realistic reflections, transparency, and shading effects to your model.
With such techniques, you are now in a position where you have the keys to enhance the visual feel of the models. By using the powerful options that Marmoset offers when it comes to rendering and enabling your own ability to adjust textures and reflections, you’ll continue to develop the ability to render stunning, polished results in your 3D projects.
If you are excited about this career path, our academy offers just the right direction. Whether it is starting your skills or taking them one notch ahead, our wide training programs give a great foundation. The specialized software courses also include Maya, ZBrush, and Substance Painter-all designed to offer mastery of industry-standard tools. Expert-led masterclasses take advanced techniques deeper into depth, equipping you with what the top studios look for.
Want to take that next step? Book in your free consultation with one of our team members today and discuss your best path in regard to courses and training to achieve your career goals!

