Marvelous Designer Introduction: Learn Movement & UI Basics
🟡 In this Marvelous Designer introduction, software for 3D clothes simulation, you will learn about its interface and controls (including how to use the 3D View and 2D Window), and then start creating garments!
🟡 You will be shown through 2 exercises how to produce and simulate clothing, modify characteristics, stitch pieces together, and use background images as reference. Pattern-making is shown using the polygonal tool.
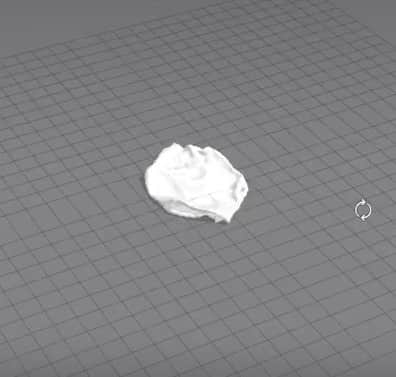
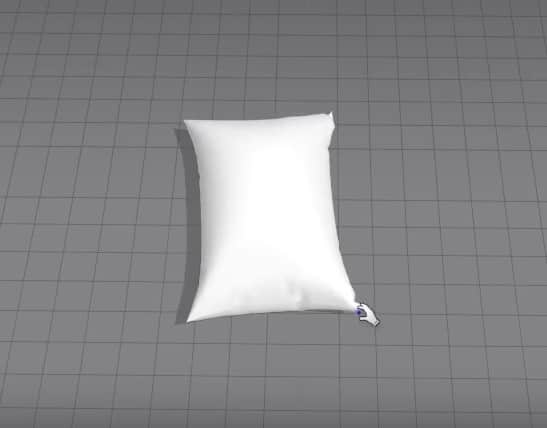
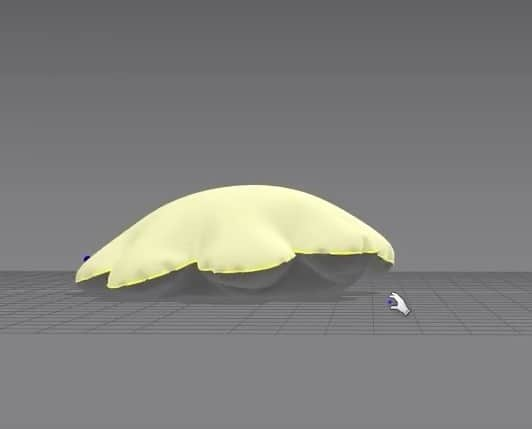
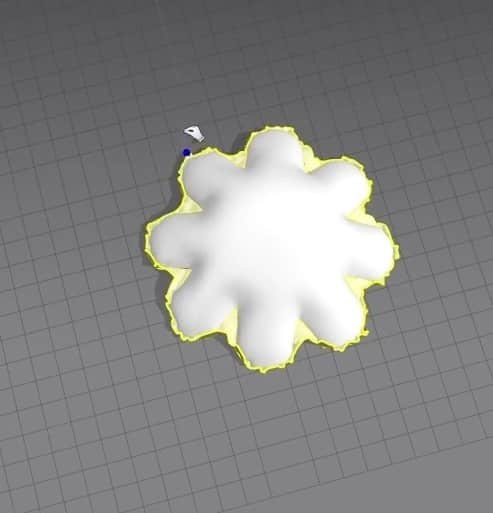
🟡 Additionally, you will learn how to unfold, clone patterns, and correct common problems–such as normals–is covered in depth. The Marvelous Designer Introduction tutorial is suitable for newcomers also, and one such user might choose to do the exercise with the pillow below.
Marvelous Designer Introduction: Workflow
Interface and Navigation
Marvelous Designer has controls for navigation; however, Maya users will be pleased to know they can switch to Maya mode of controls.
To set this:
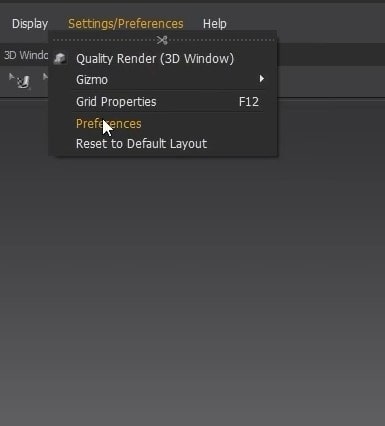
- Open the Settings/Preferences tab, and click on Preferences.
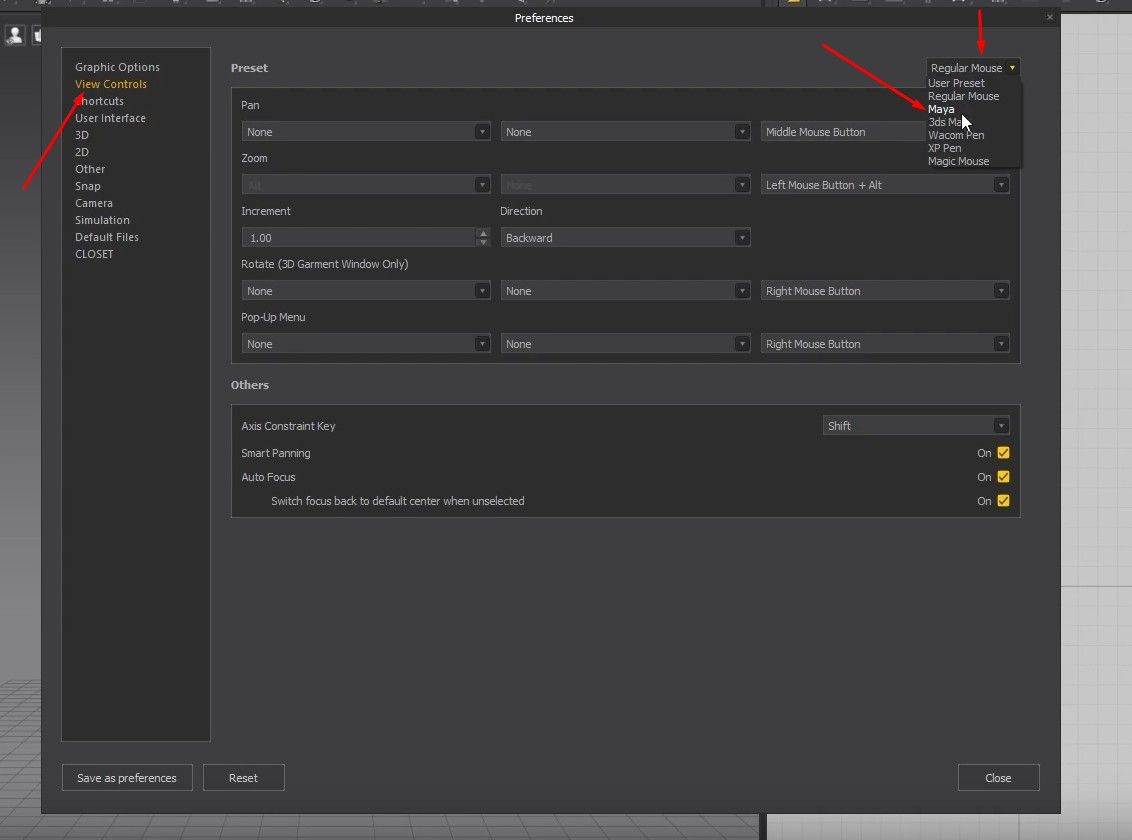
- Click on the View Controls options in the new Window, change it from Regular Mode to Maya, and close it.
Now, the movement controls are the same as in Autodesk Maya.
- Holding Alt + Left Click will rotate the camera.
- Holding the Alt + Middle Mouse Button allows you to move around the Space.
- Holding Alt + Right click Zooms the camera in and out. This can also be done by using the scroll wheel.
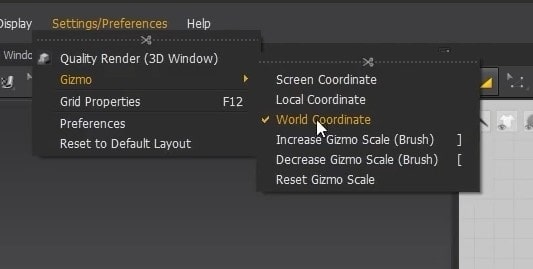
- The last thing we want to do in the Settings is check if the Gizmo is set to World Coordinate.
Interface Overview
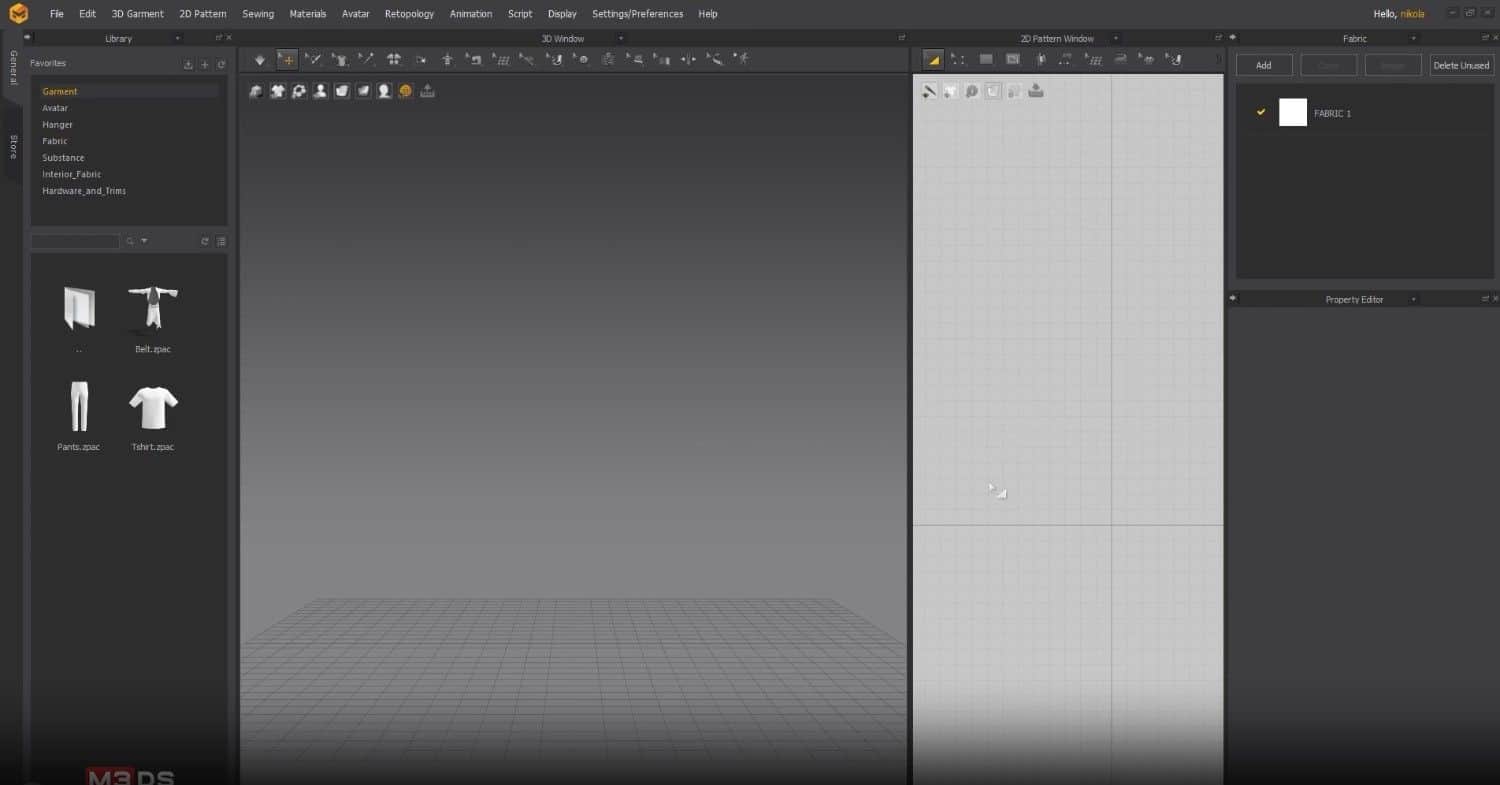
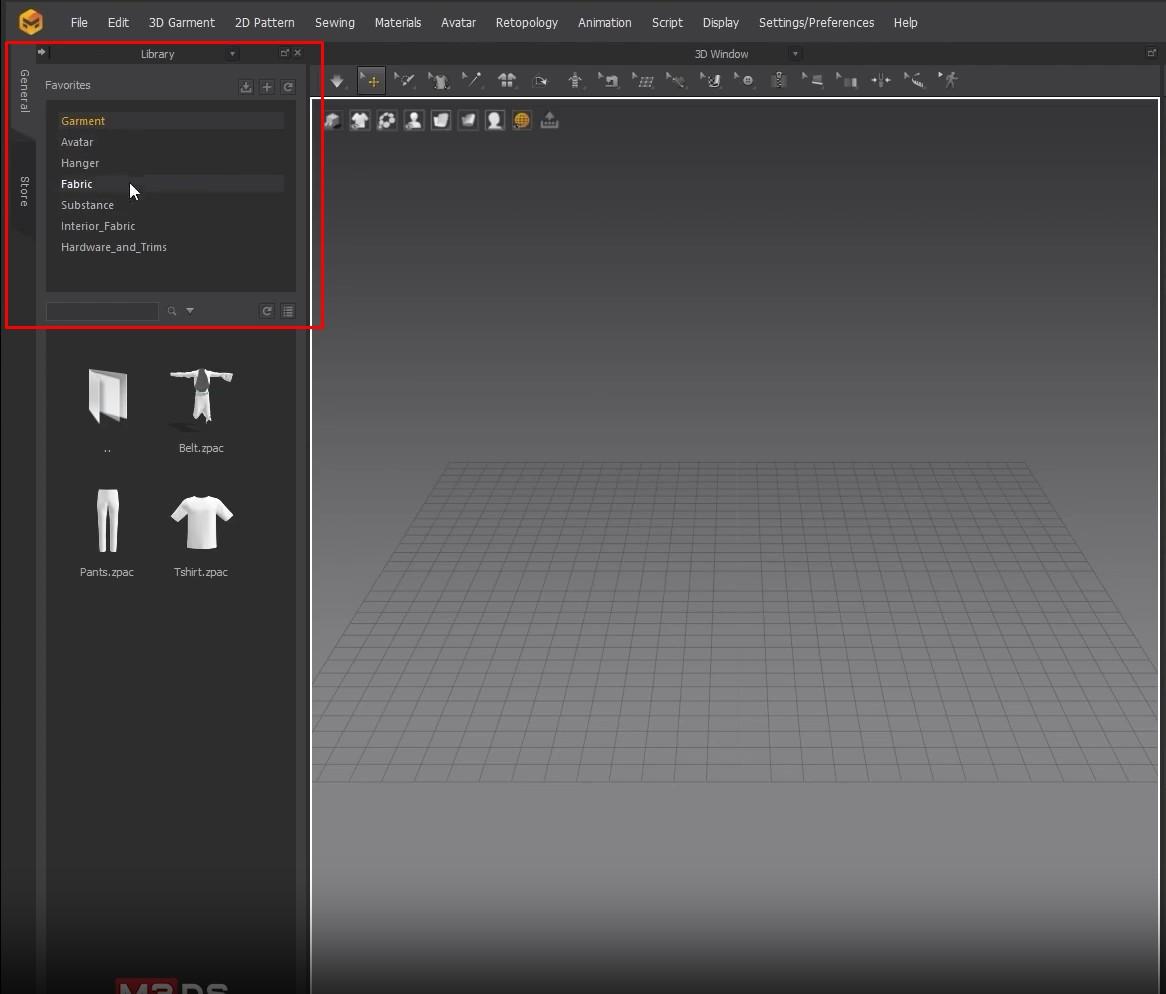
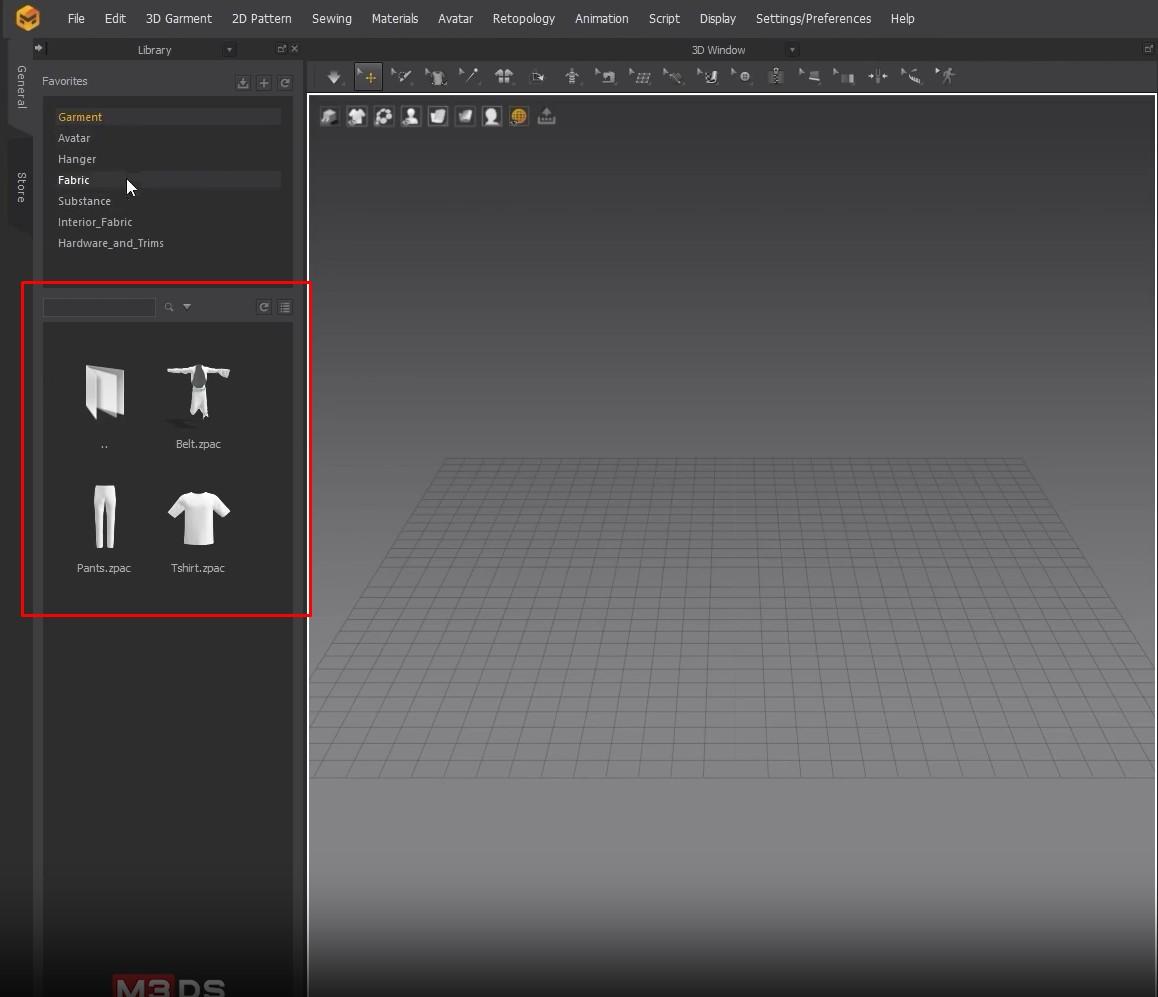
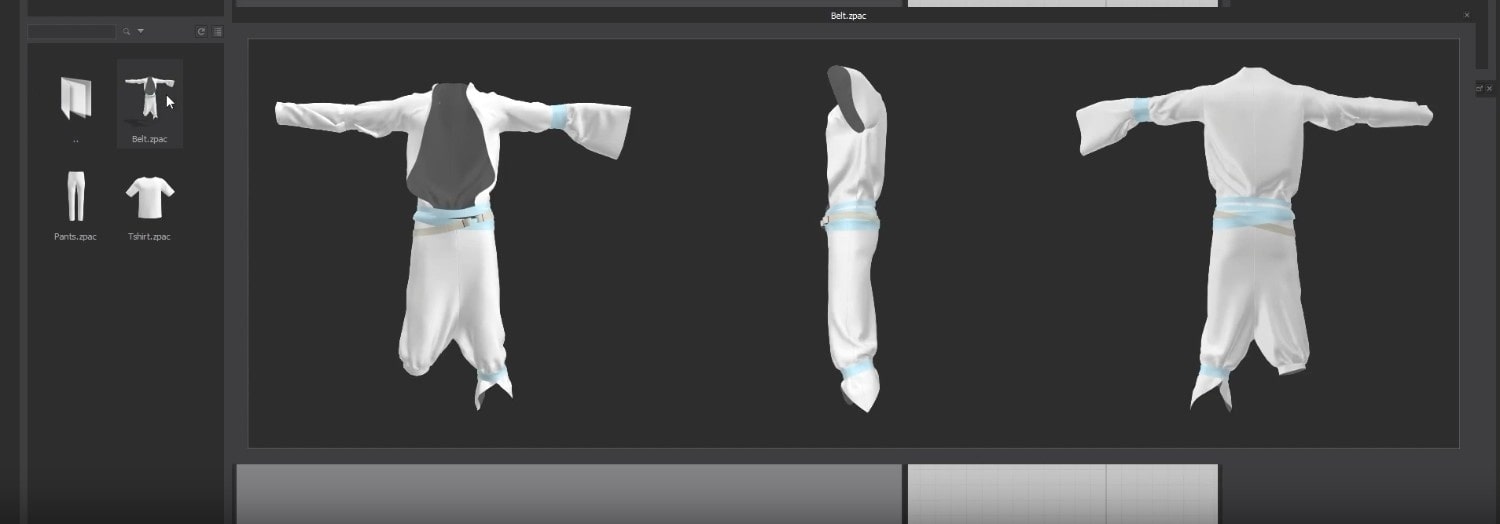
- On the left side is a Sub-menu for garments, avatars, hangers, fabric, etc. Below is the menu from previous garments we’ve worked on and premade Marvelous clothes like pants and shirts.
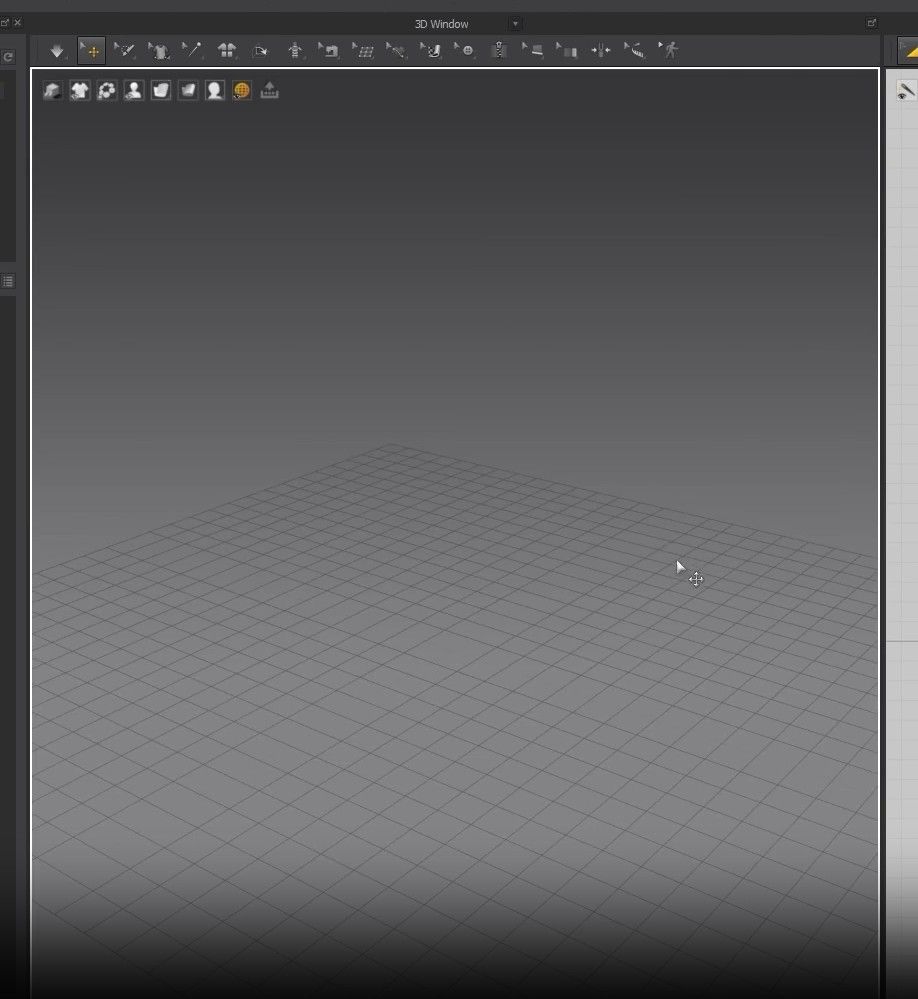
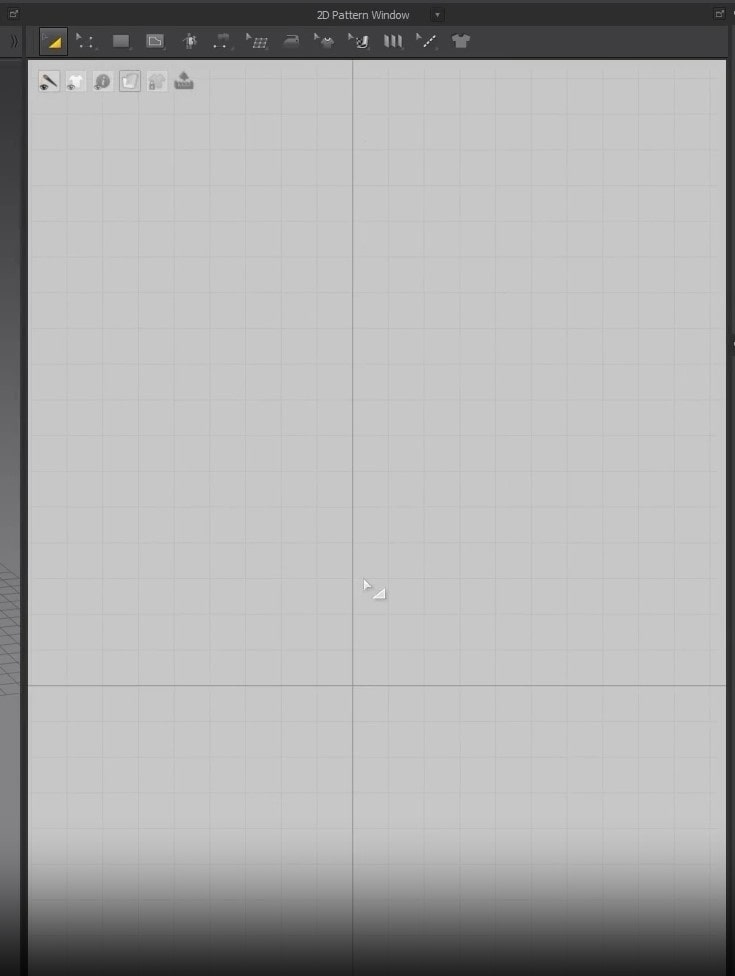
- The Window in the middle is the 3D View where we’ll work. The next Window is the 2D View, where the garment patterns will be.
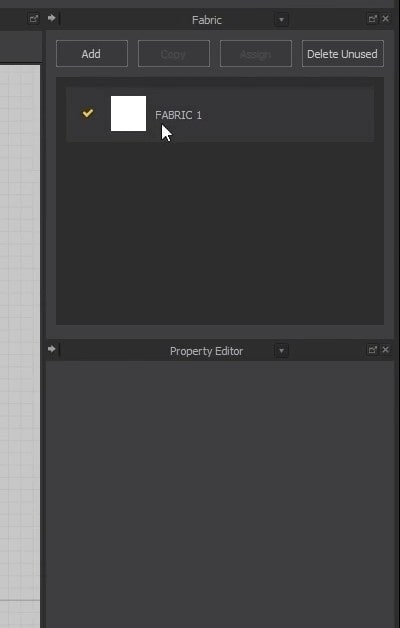
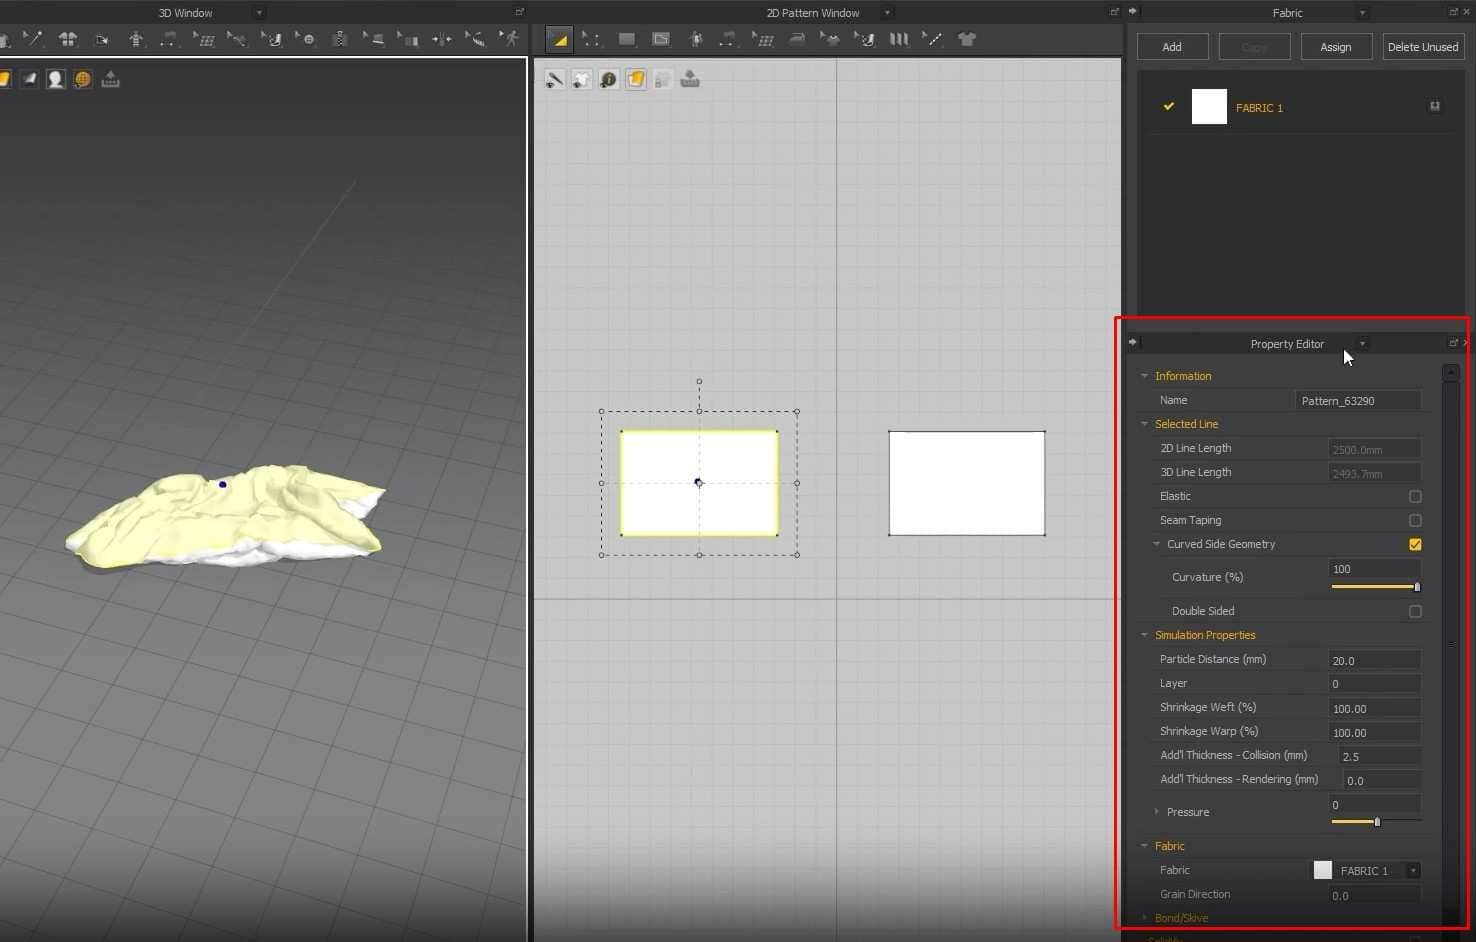
The fabric window is on the right side. We can add different types of fabric in material and or color there. Below the Fabric window is the Properties Editor. In there, we can change the property of each fabric.
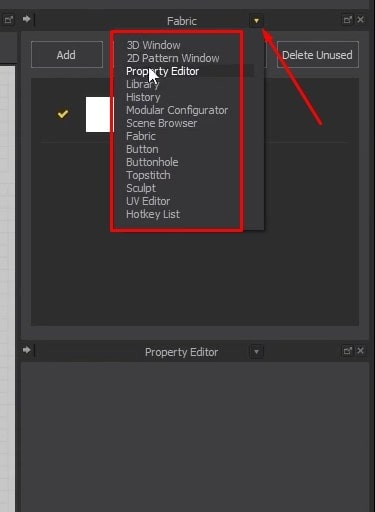
- Next to the Fabric window, there is an arrow drop-down button. From there, we can change windows from the drop-down. For now, we will not focus on them.
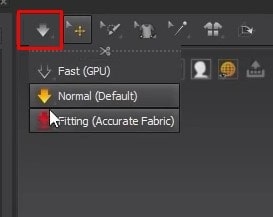
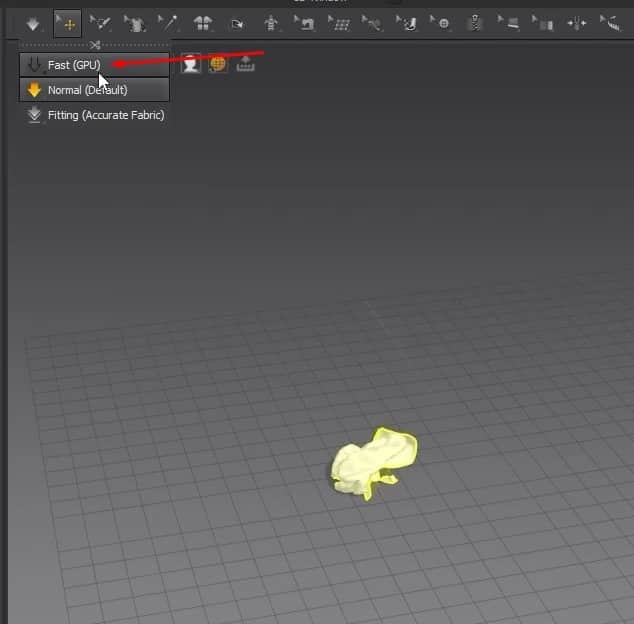
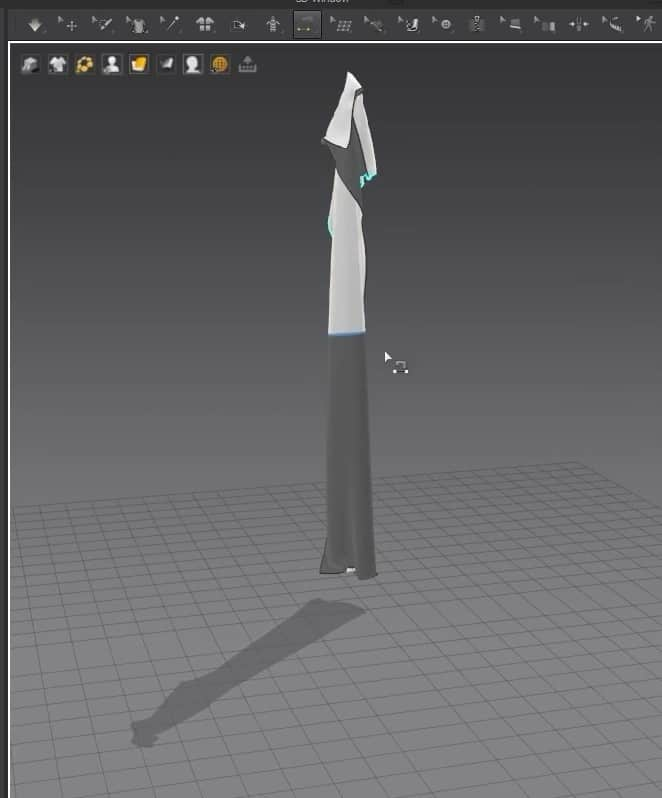
- Next up is the toolbar above the 3D View. The first tool is for the Cloth Simulations. A keyboard shortcut for the cloth simulation is the Space bar.
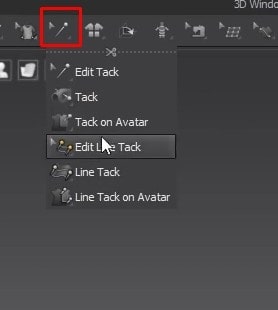
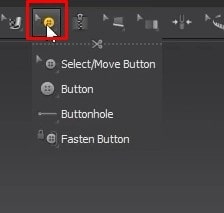
- Another tool we’ll be using a lot is the Tacks tool. There is a button and zipper tool that we’ll look at later in this tutorial and learn how to use them. An exciting tool among all of them is the Sewing tool. The tool has different ways to sew a garment together.
- Above the 2D View is a toolbar with tools only for the patterns. Those tools are for selecting the points and edges of the garments and transforming and moving them.
2D and 3D Window Interaction
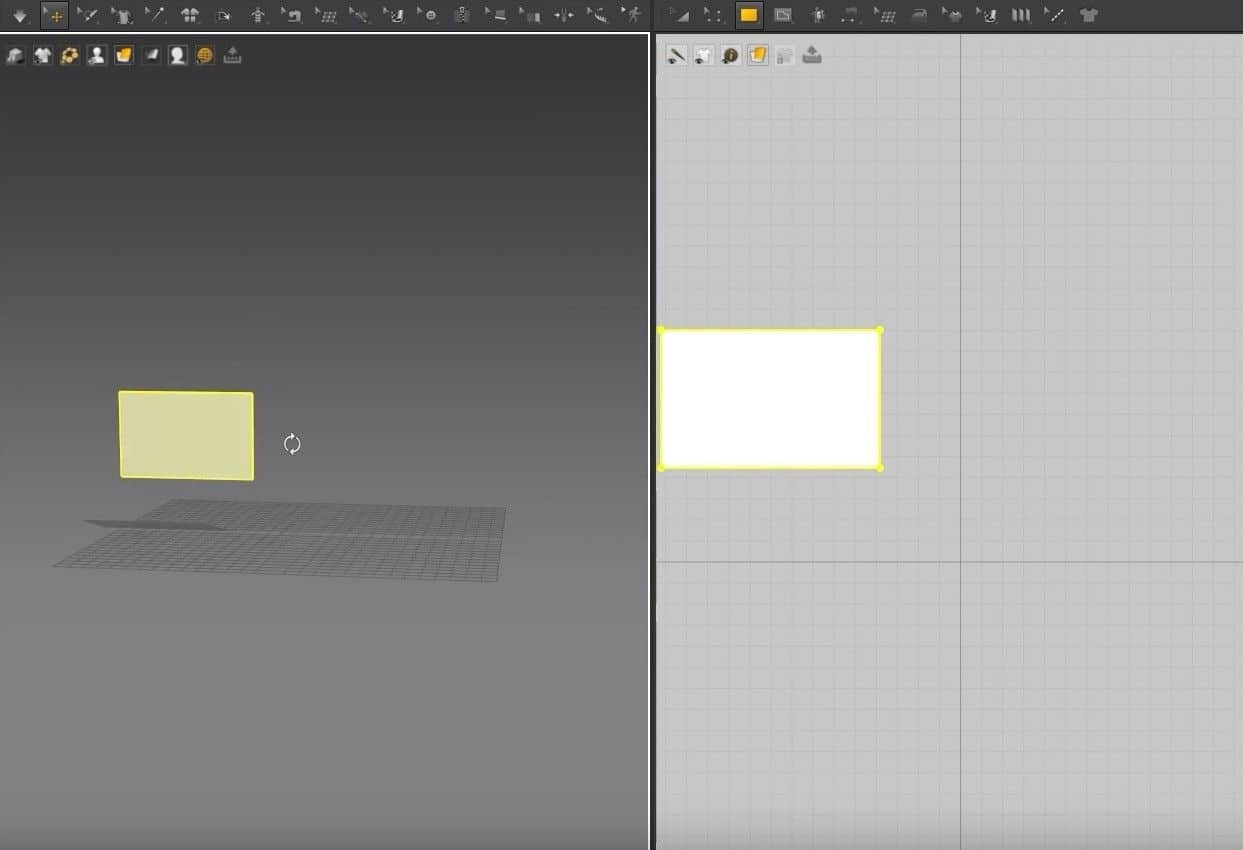
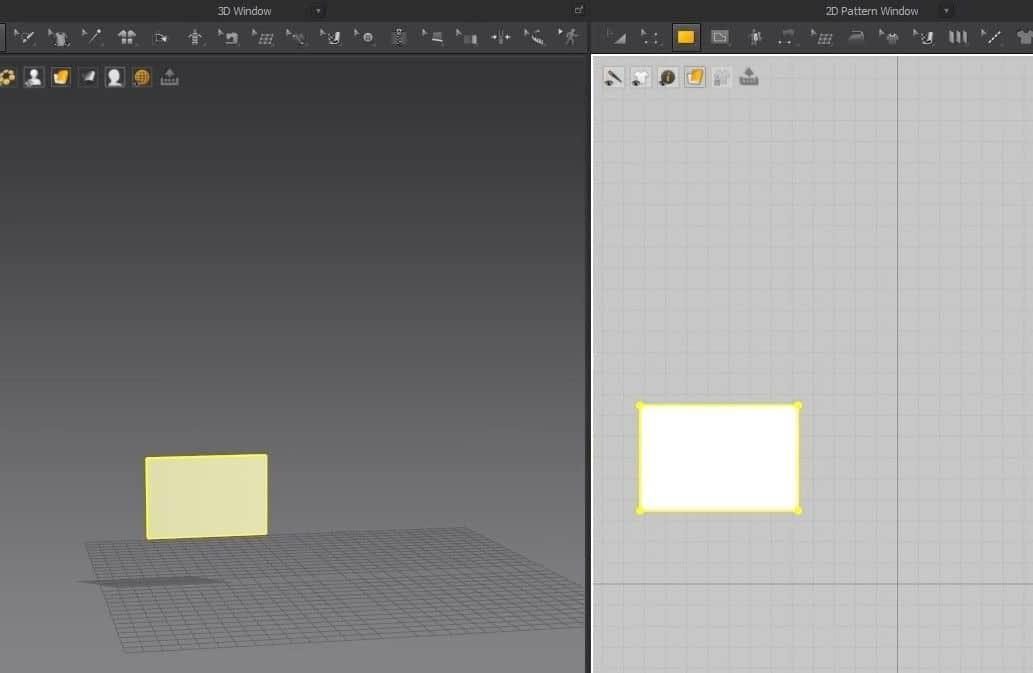
The 2D workspace is locked in with the 3D one. Anything we place in the 2D View gets added in the 3D Window. But, if we move anything in the 2D View, it doesn’t move in the 3D Window. This means that the translations and movement of the garments are separate for each Window.
To move in the 2D Space, we only need to hold the Alt + Middle Mouse button. Zooming in the 2D Space is the same as in the 3D one.
Creating a New Garment
To create something, we need to start in the 2D Window first.
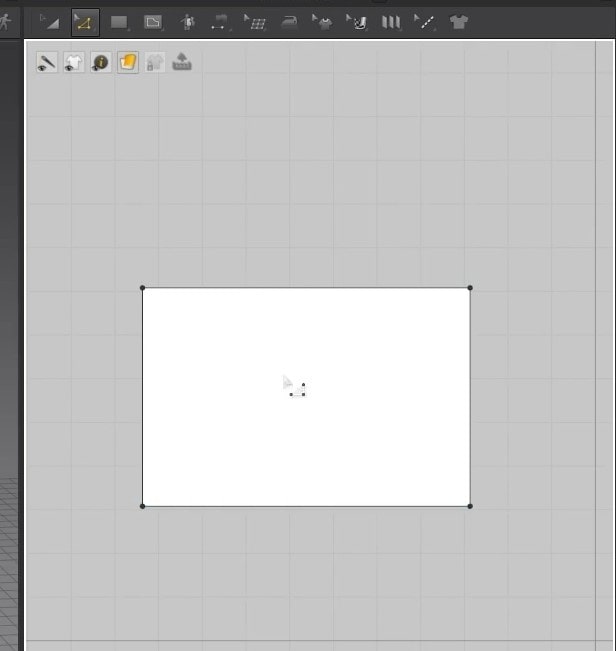
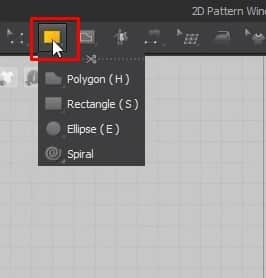
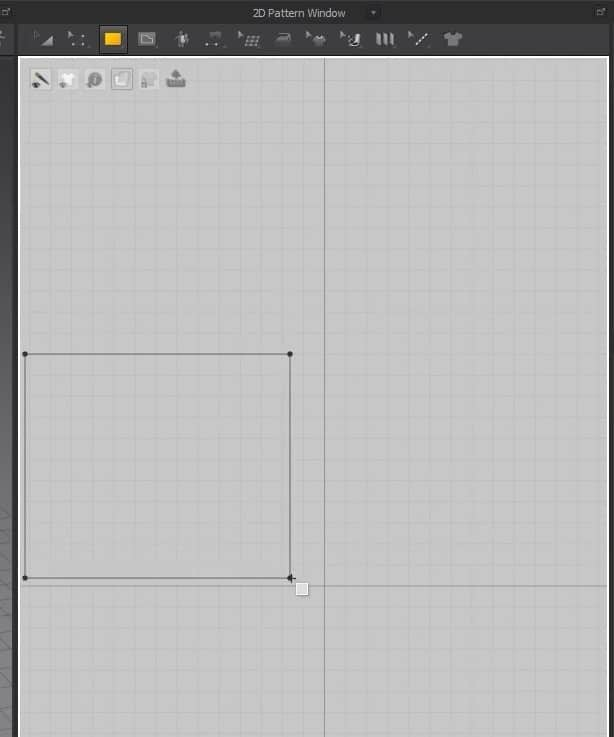
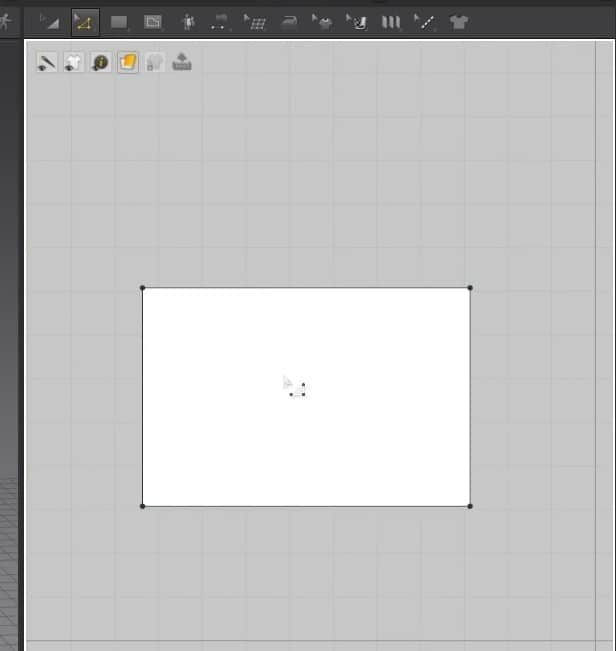
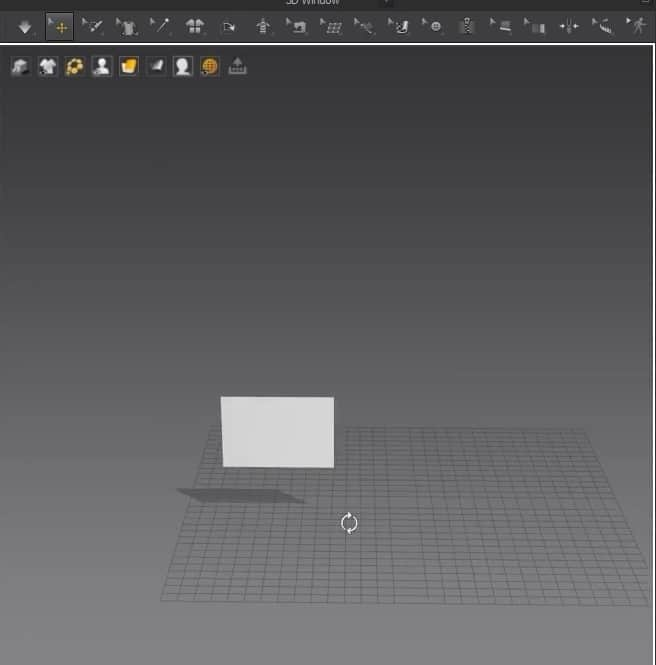
- Select the Rectangle creation tool, hold, and drag on the 2D Window to create the cloth size.
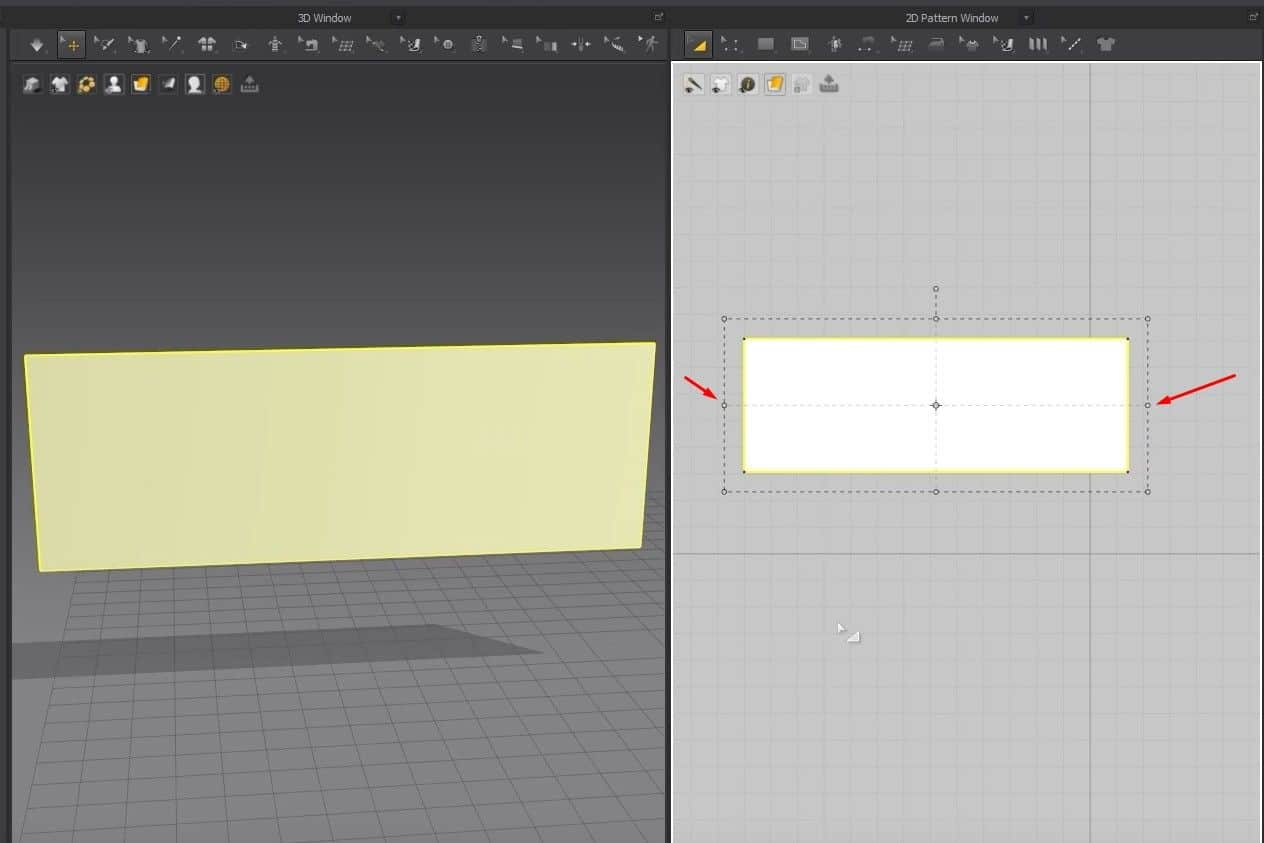
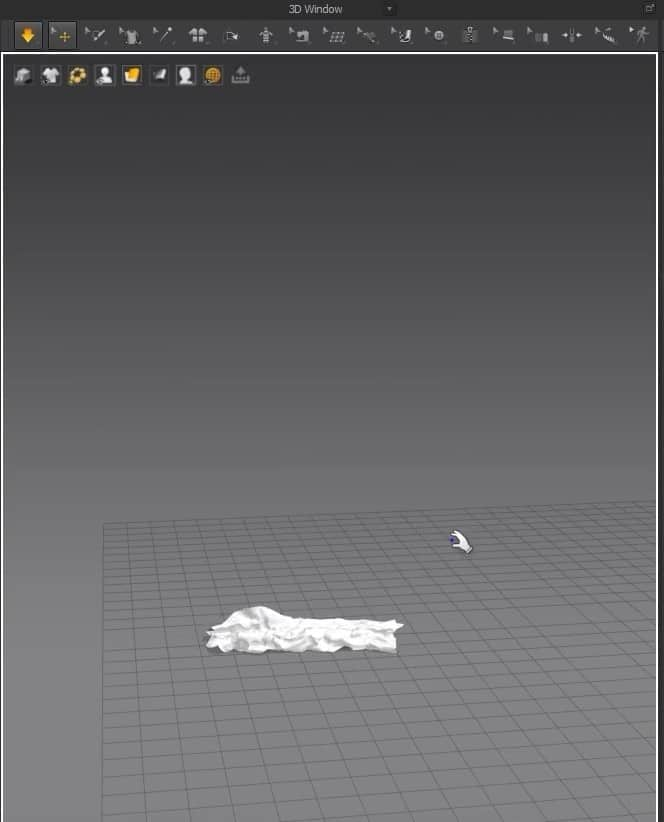
- Once you let go of the mouse button, the cloth will appear in the 3D Window, and the pattern will fill up in the 2D Window.
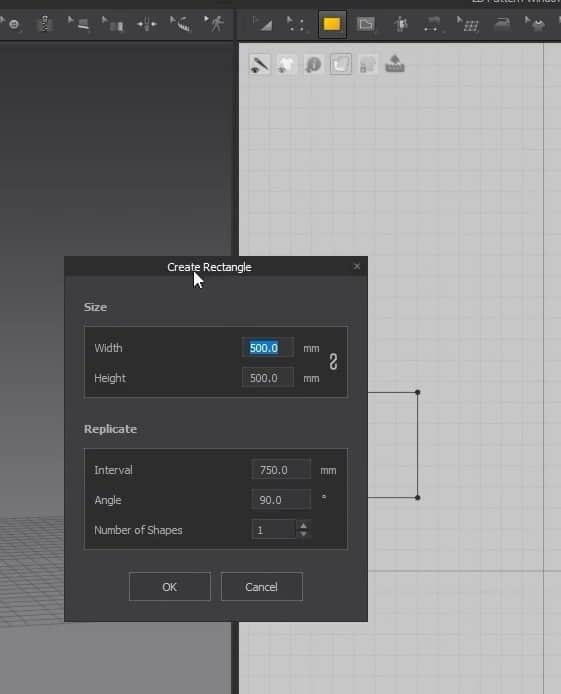
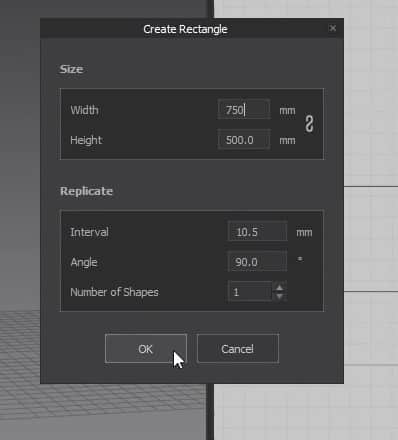
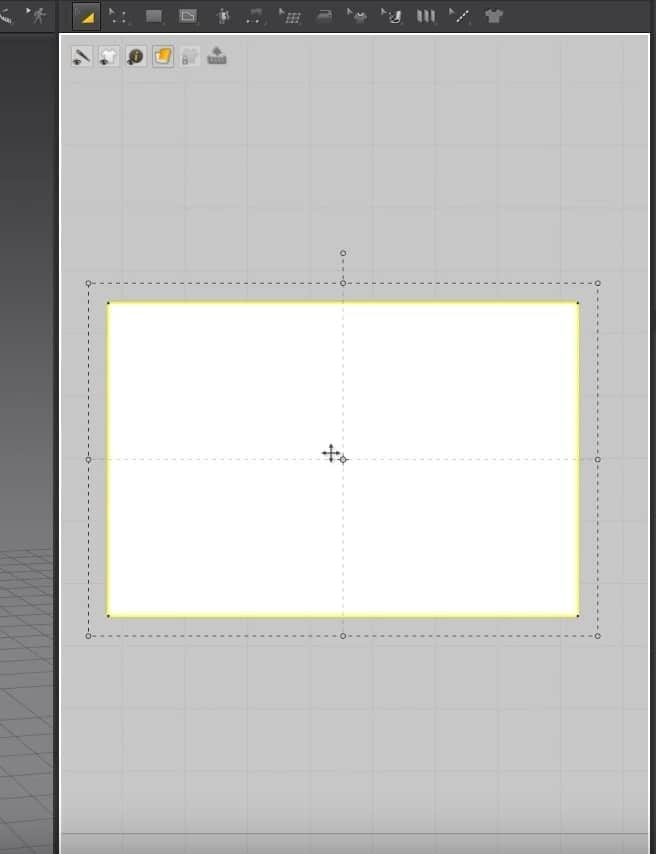
Another way to use this tool is to click on the 2D graph, and a new window will open. In this Window, you can change the size of the cloth more precisely. After setting the size, press the OK button to create the cloth. Like before, the pattern will fill up in the 2D graph and appear in the 3D Window.
Moving and Editing the Garment
- Clicking A on the keyboard will activate the Move Tool for the 2D Window. To move the pattern in the graph, click and drag it anywhere in the 2D Space.
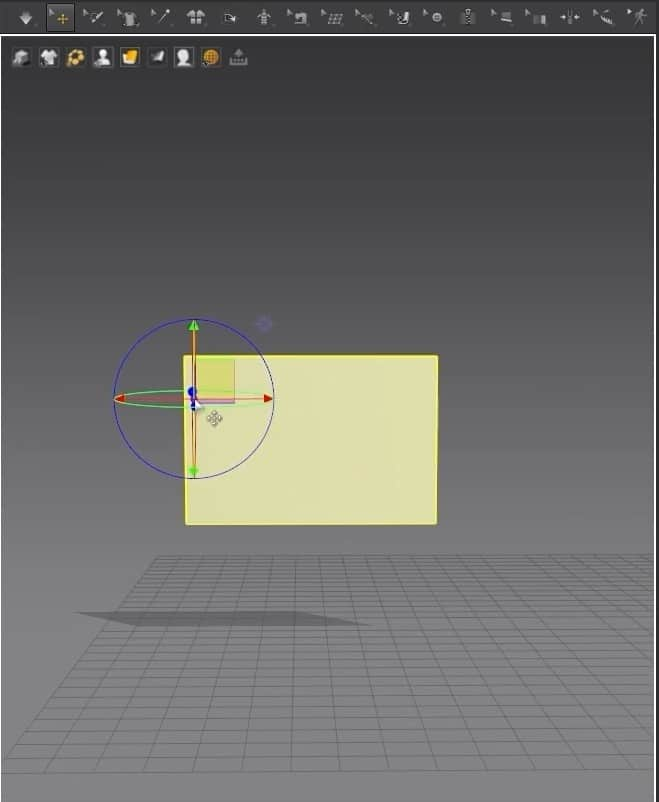
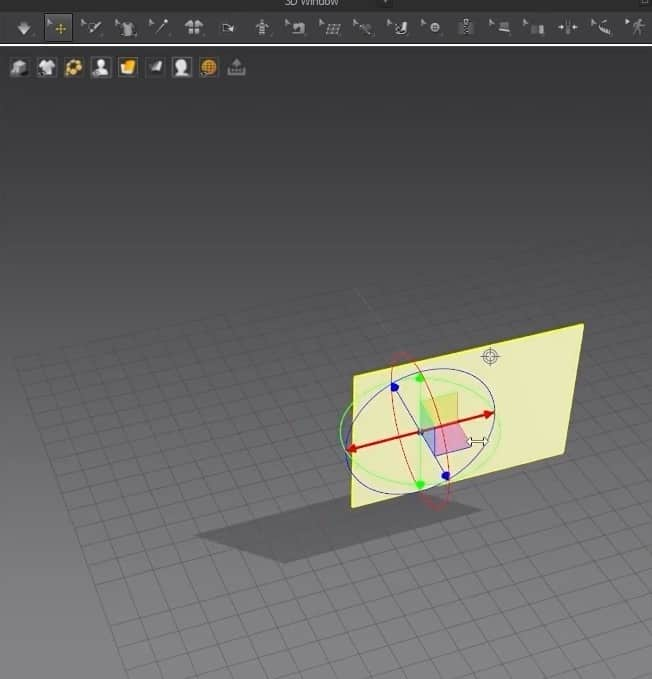
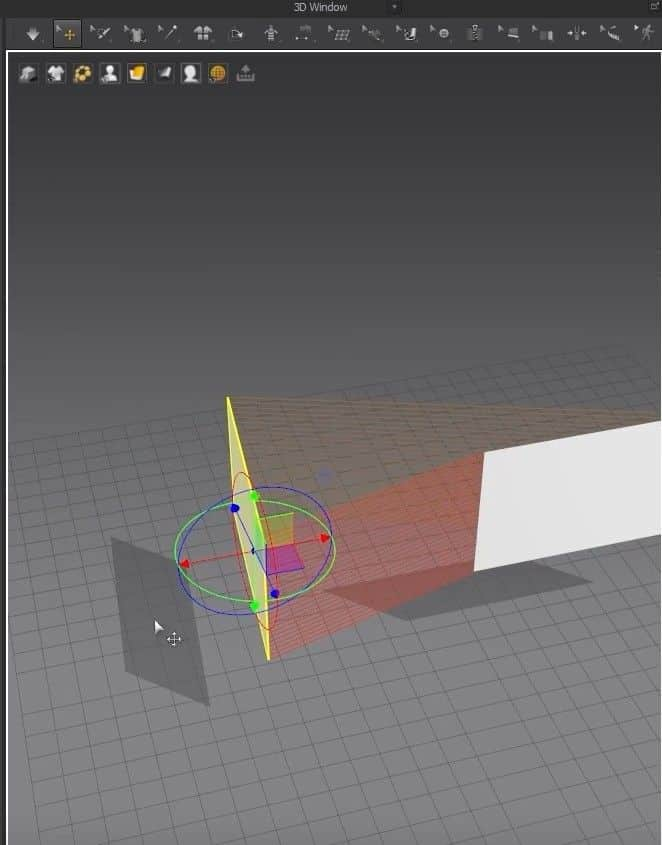
- For the 3D Window, just by clicking on the cloth, a gizmo tool will appear anywhere we’ve clicked. We can move the fabric to the 3D space by moving the gizmo tool’s axis.
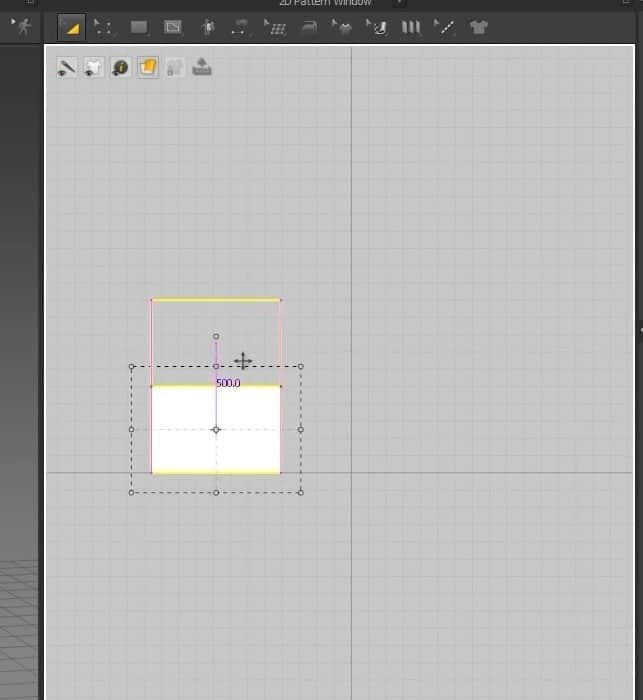
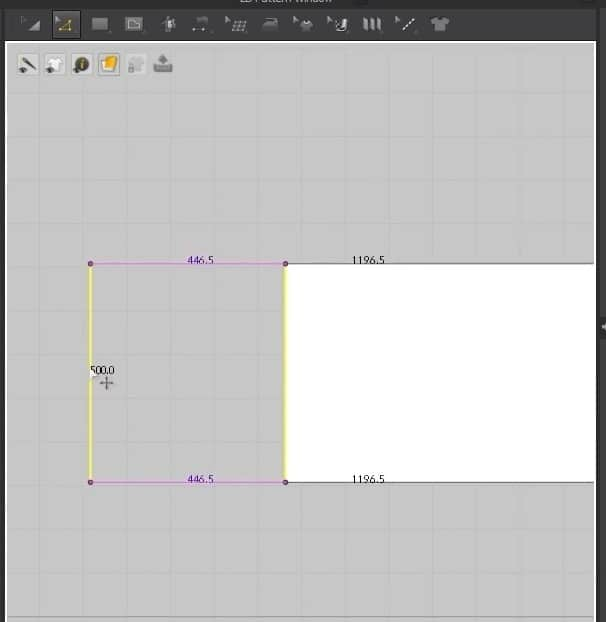
- With the same tool in the 2D Window, dragging the endpoints will make the pattern broader or longer depending on which points you are dragging.
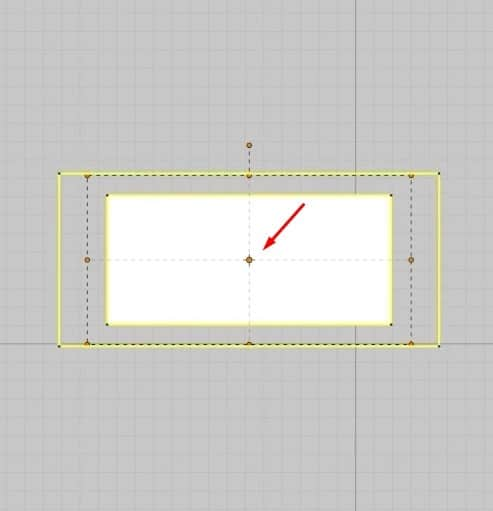
- If we double-click on the middle point while the tool is active, we can scale the points equally depending on which pattern we are scaling.
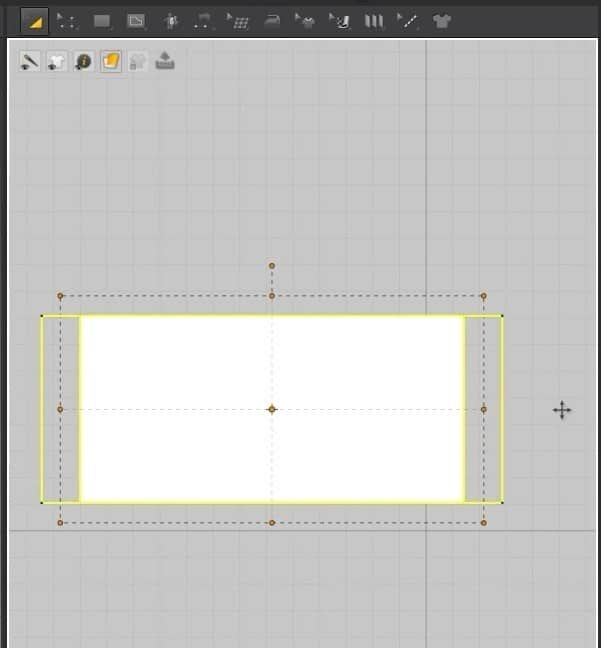
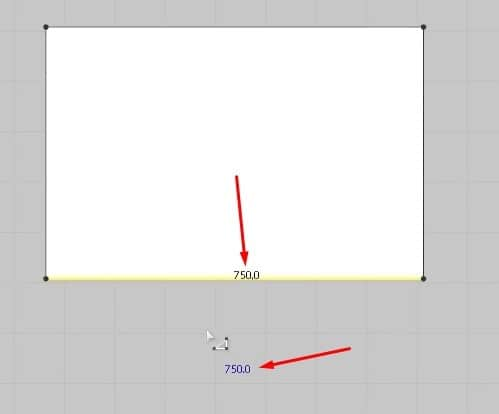
- Clicking Z on the keyboard will activate the edge tool. With this tool, we can move the edges of the pattern in the 2D graph. We can also see the edge size selected with the tool on the edge of the cursor itself.
- Sow the top and bottom edges of the cloth by clicking N in the 3D Window. When we run the simulation, we can see that the cloth is facing the right way and is also sown correctly.
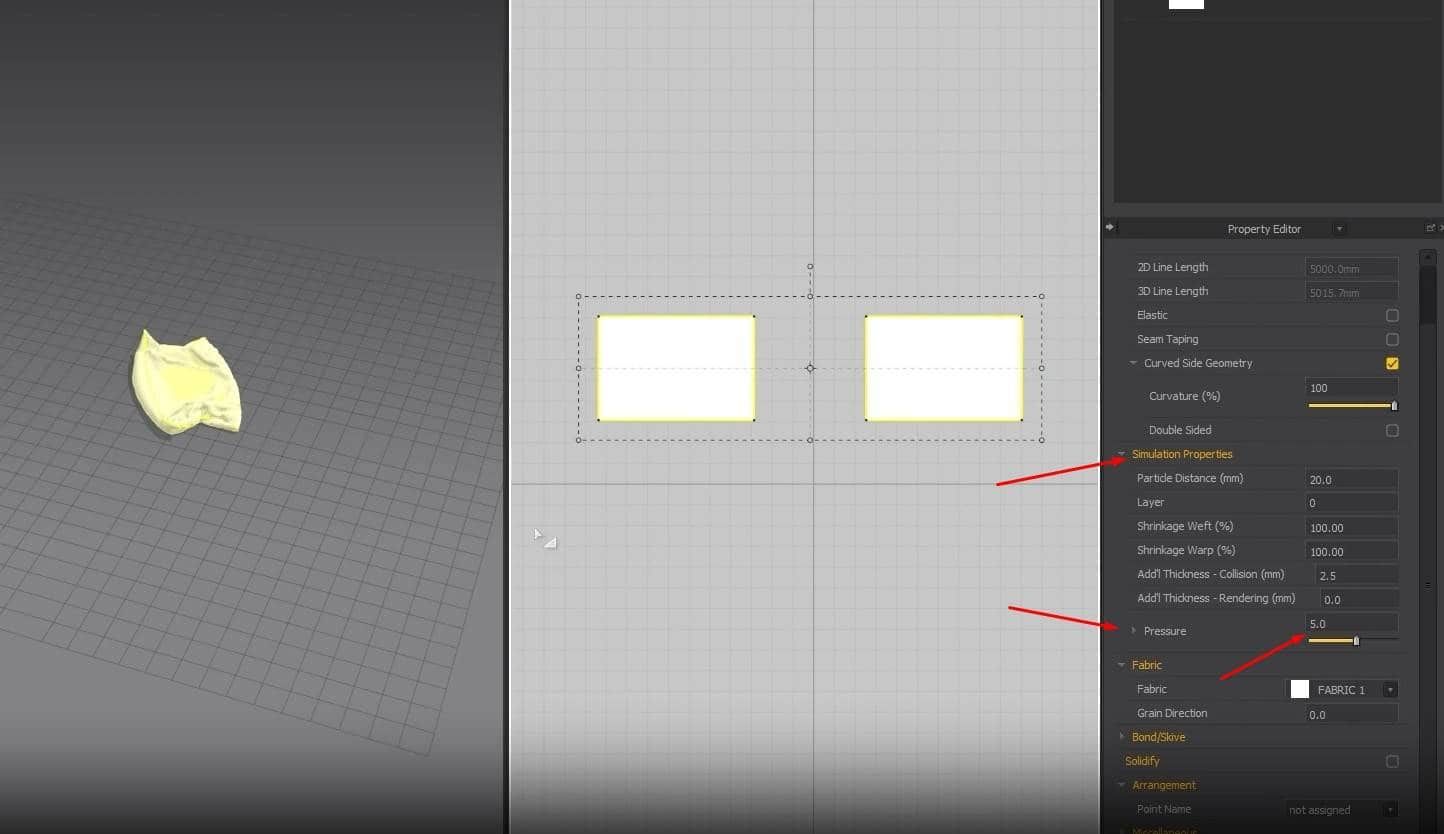
- One minor issue we’re running into is that the cloth is deflated instead of full and fluffy like a pillow. To change that, when we select one pattern in the Property Editor, we set the Pressure to 5 in the Simulation Properties. Please do the same thing for the other pattern; otherwise, when we run the simulation, the cloth isn’t going to turn into a pillow.
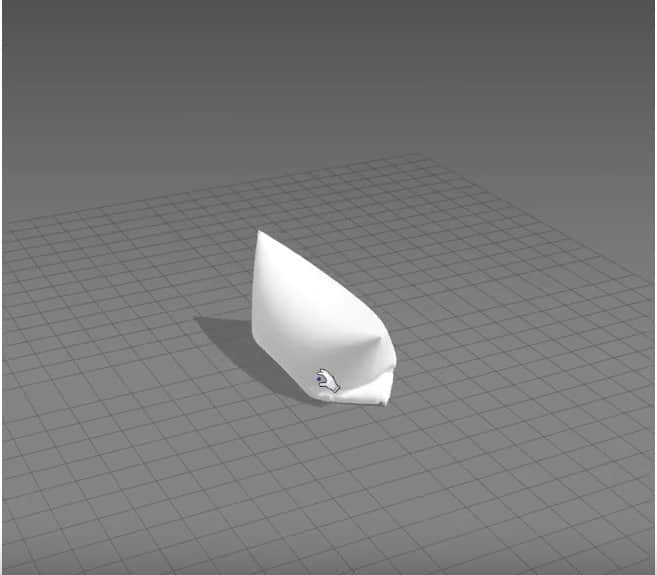
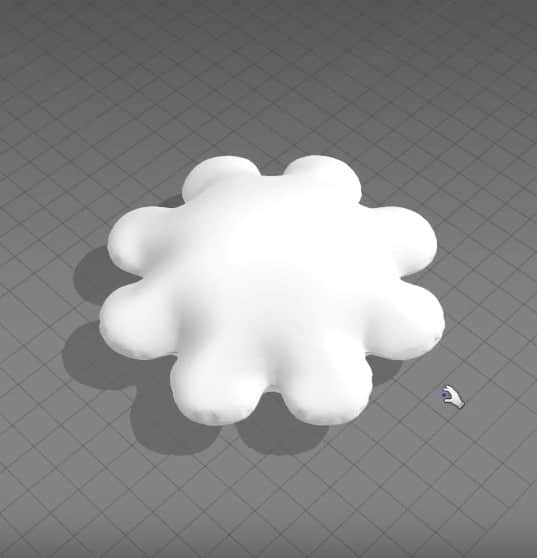
After setting everything up, run the simulation again, and you should get a pillow.
Marvelous Designer Introduction: Pillow Exercises
Marvelous Designer is a powerful 3D software tool designed to create realistic clothing simulations. This comprehensive tutorial will introduce you to the basics of Marvelous Designer, from navigating its interface to designing and simulating intricate garments.
Key Topics Covered:
- Interface and Navigation:
- I understand 3D views and 2D Windows.
- They are learning essential movement controls and shortcuts.
- Garment Creation and Simulation:
- Creating patterns using the polygon tool.
- I am adjusting fabric properties like stiffness, drape, and thickness.
- Sewing patterns together to form garments.
- Simulating garment behavior under different conditions.
- Advanced Techniques:
- Unfolding and cloning patterns for complex designs.
- I am fixing everyday issues to ensure accurate garment appearance.
- Use background images for realistic reference.
Project Example: Creating a Simple Pillow
To solidify your understanding, we will guide you through creating a simple pillow using Marvelous Designer. This project will demonstrate the core concepts and techniques covered in the tutorial.
By the end of this tutorial, you will have a solid foundation in Marvelous Designer and be equipped to create your own stunning 3D clothing simulations.
Pillow Exercise 1
For our first exercise, we’ll be making a pillow.
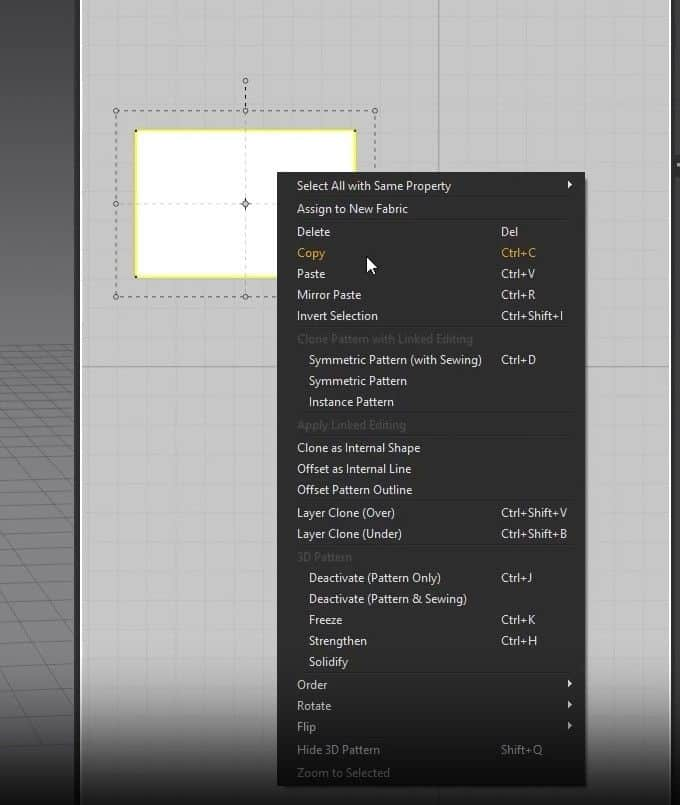
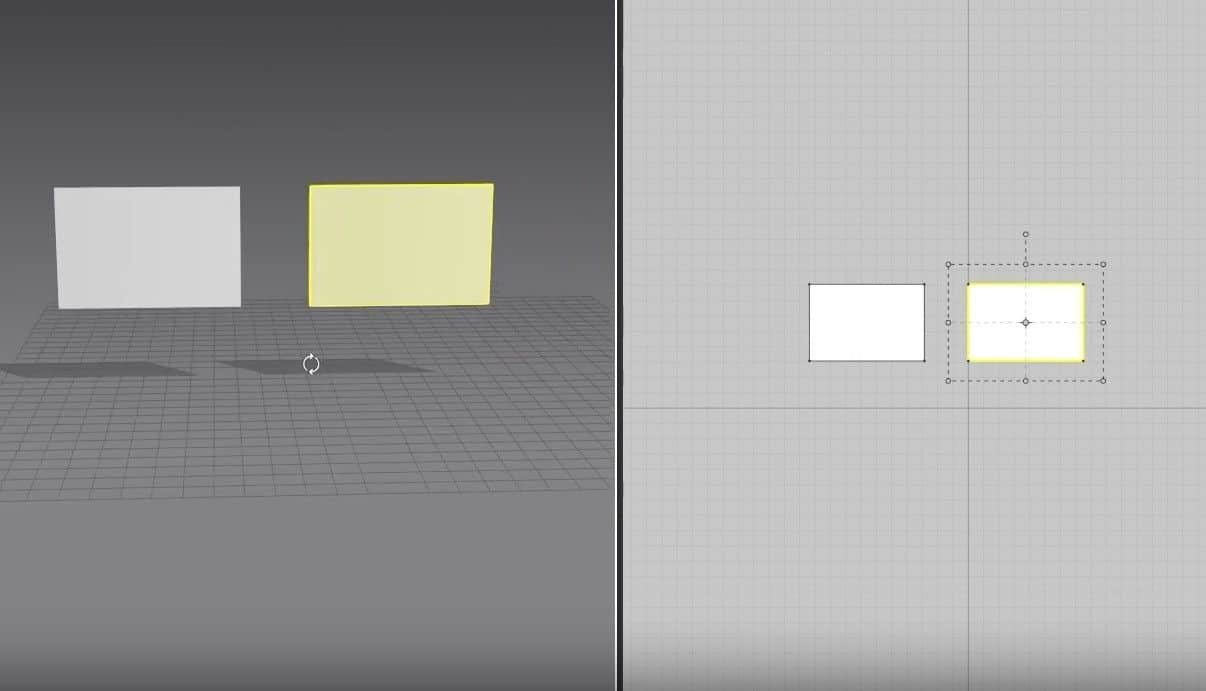
- From the rectangle before, select it and copy and paste it into the 2D graph. You can copy and paste it through the keyboard shortcuts, Ctrl + C for copy and Ctrl + V to paste, or do it the manual way by right-clicking on the pattern, clicking on a copy, then right-clicking on the Space in the graph, then clicking on paste.
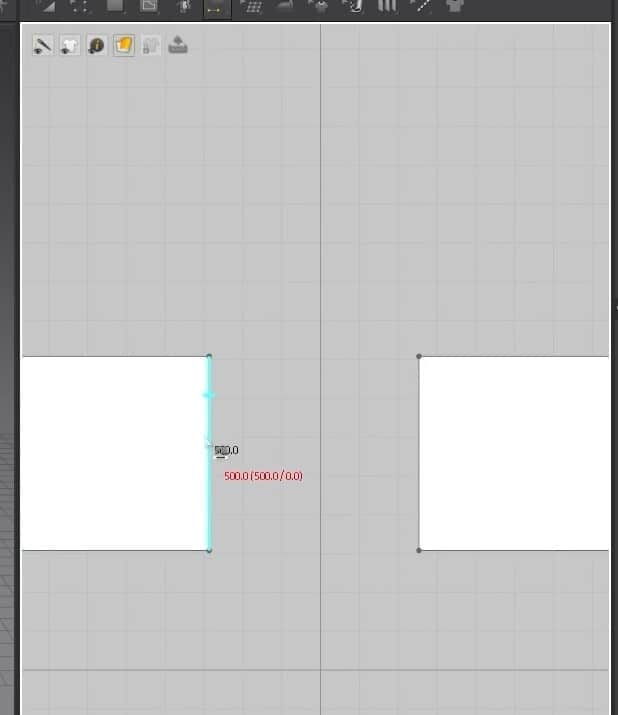
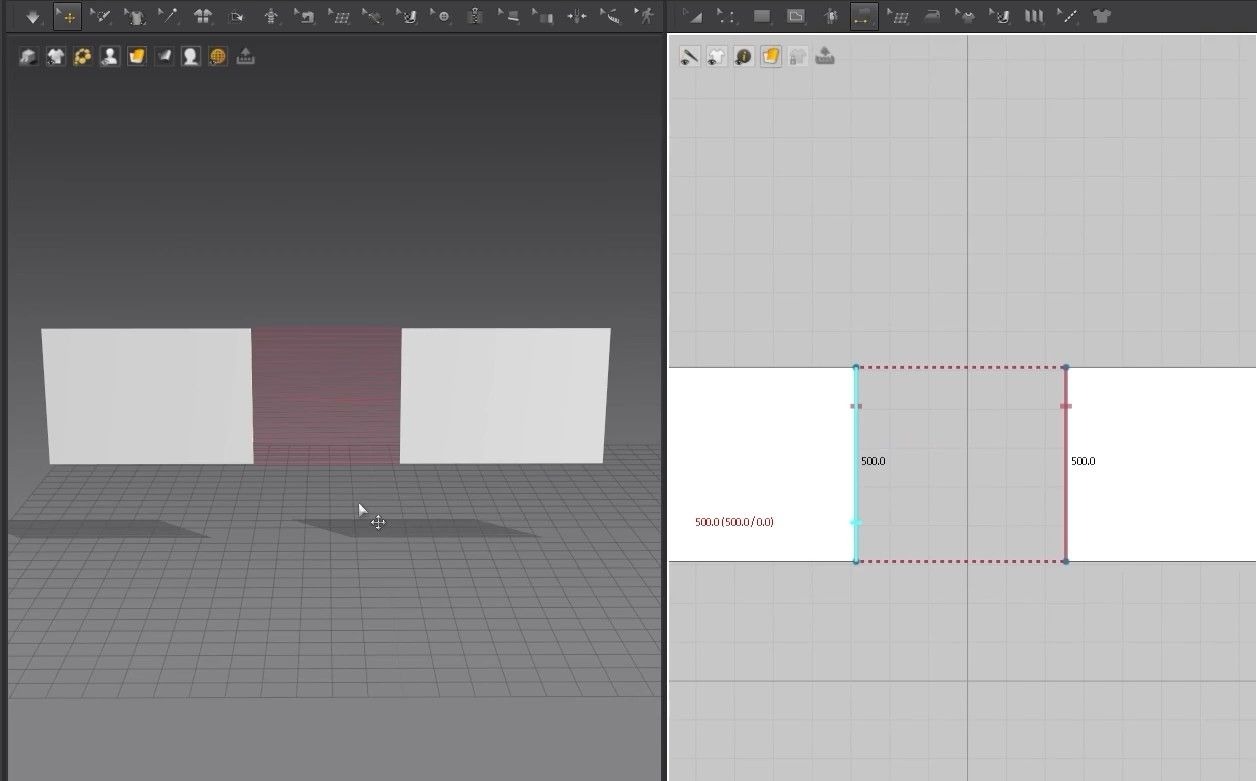
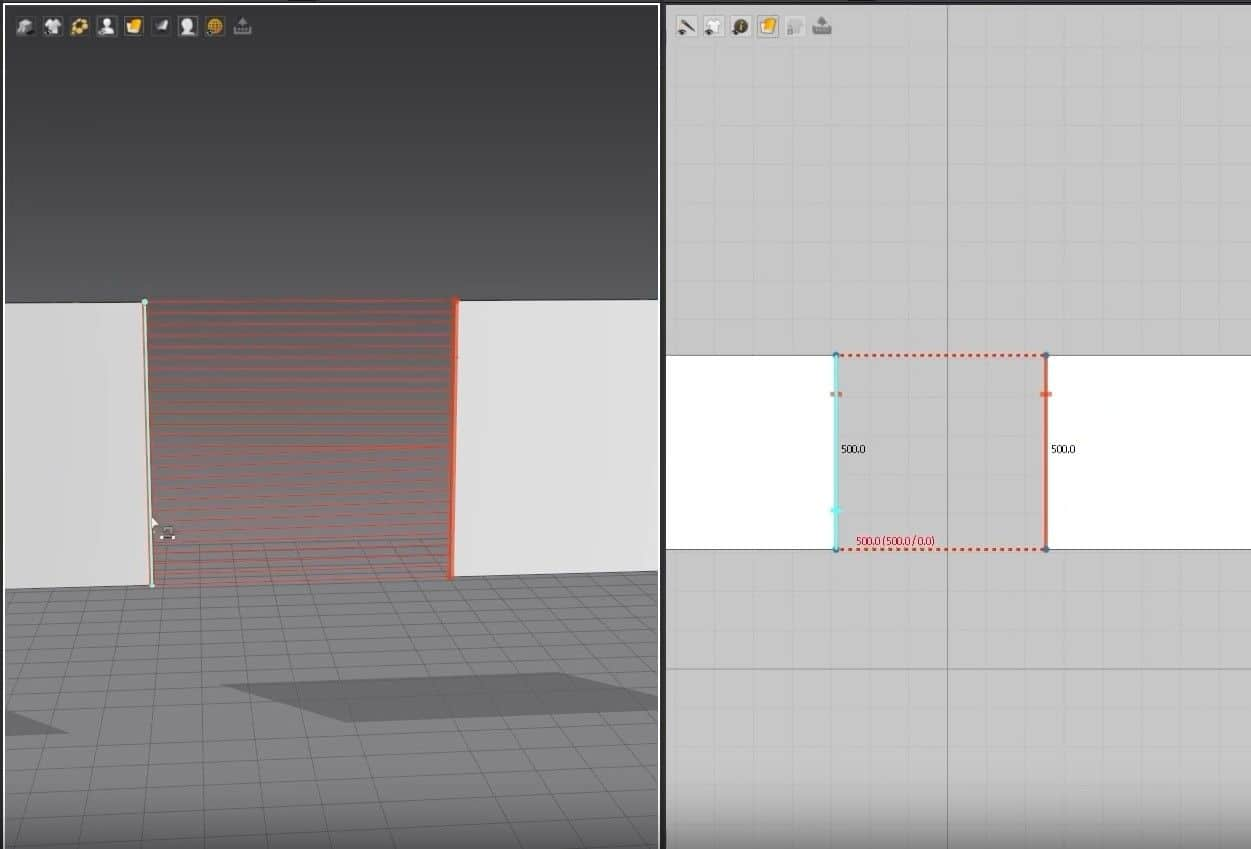
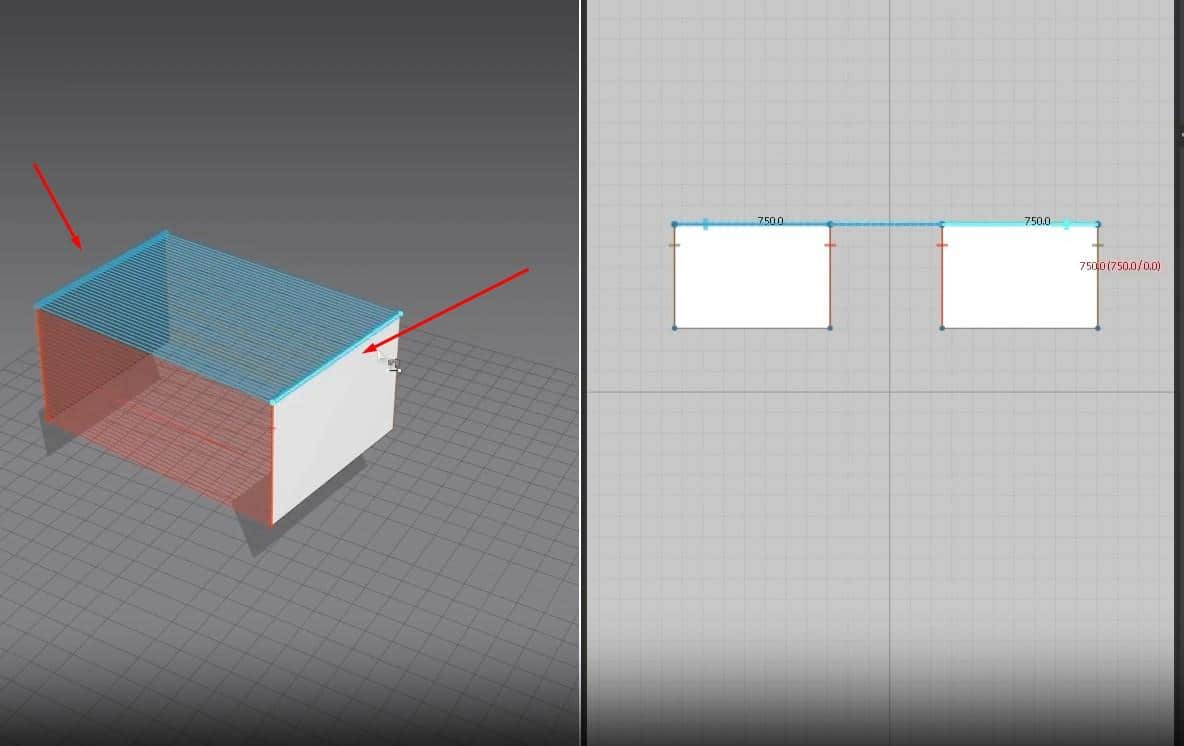
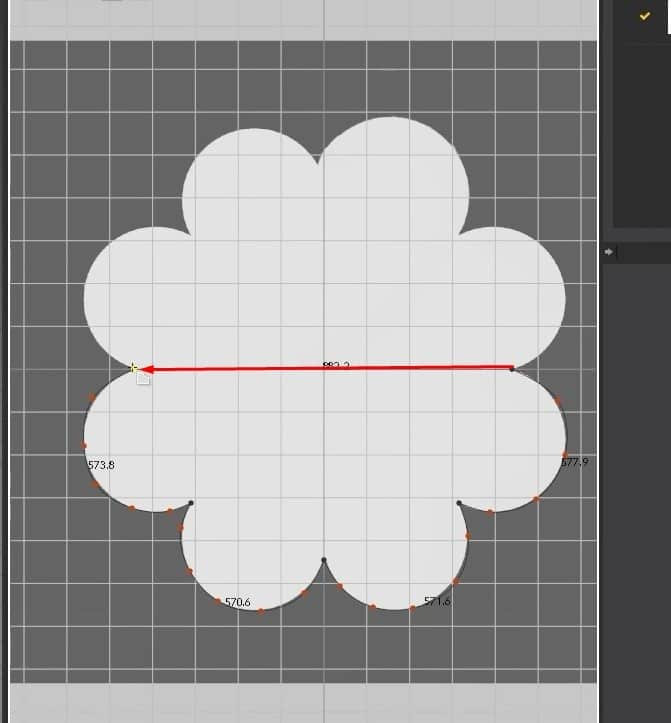
- Once we have an exact copy of the pattern, click on N to activate the Sewing tool. When the sewing tool is active, hovering over an edge on the pattern will highlight it blue and give us the measurements for the edge. The cursor will also turn into a sewing machine icon instead of an arrow.
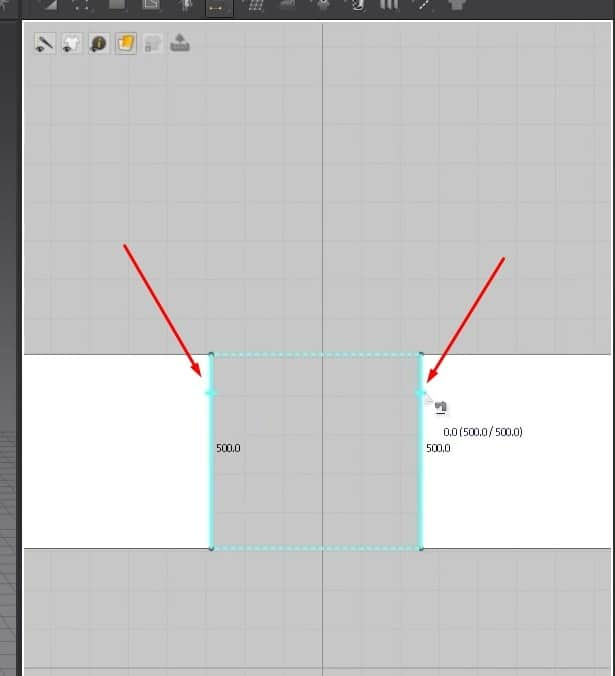
- To sew two patterns together, click on one edge at the top or bottom; it is essential to click in the same spot for the opposite edge. If you click the top of the edge on the left side, you must click on the top on the Right.
- In the 3D Window, we can see red lines going from one edge to the other like stitches. When we activate the simulation, the two clothes will get stitched together. To undo the simulation, click on Ctrl + Z.
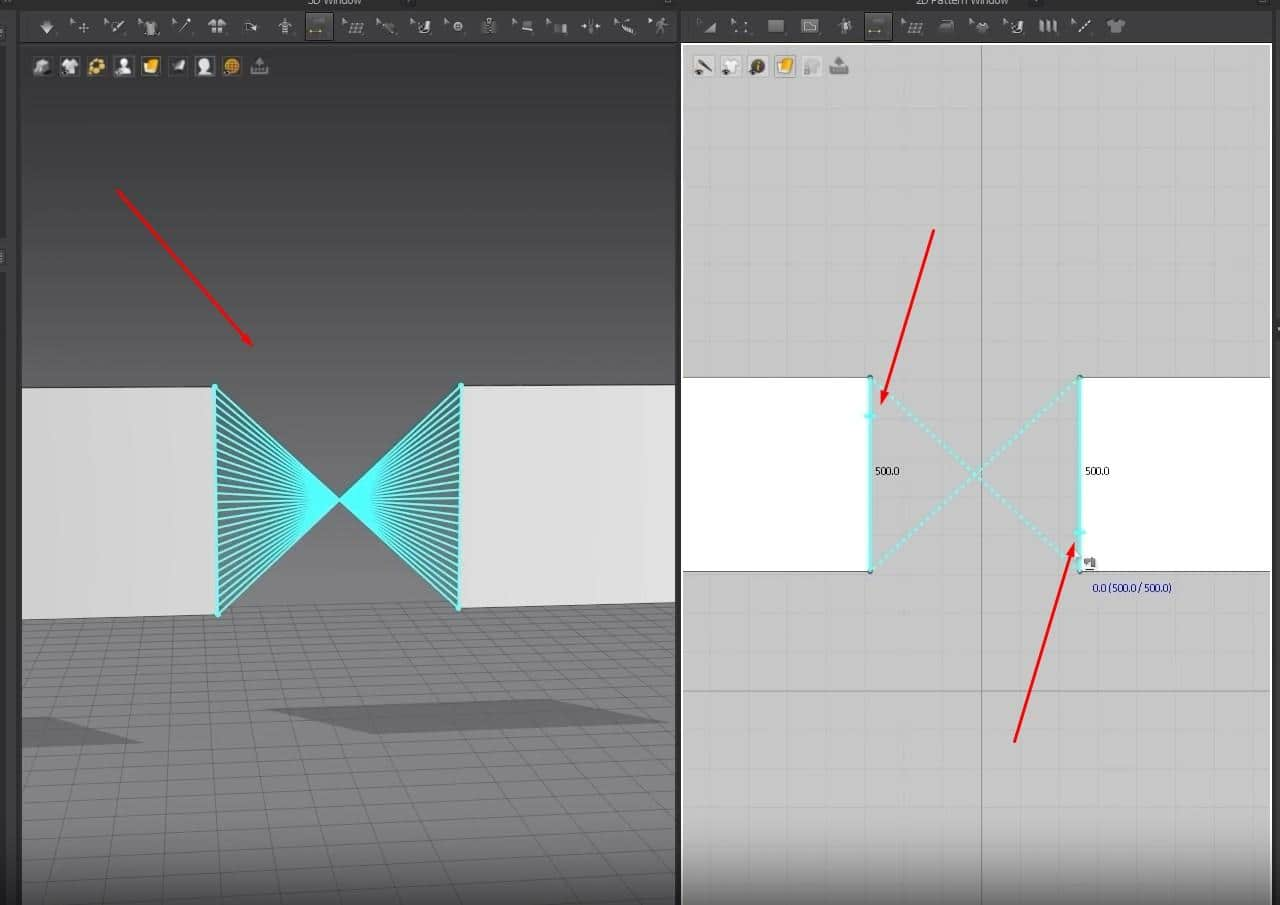
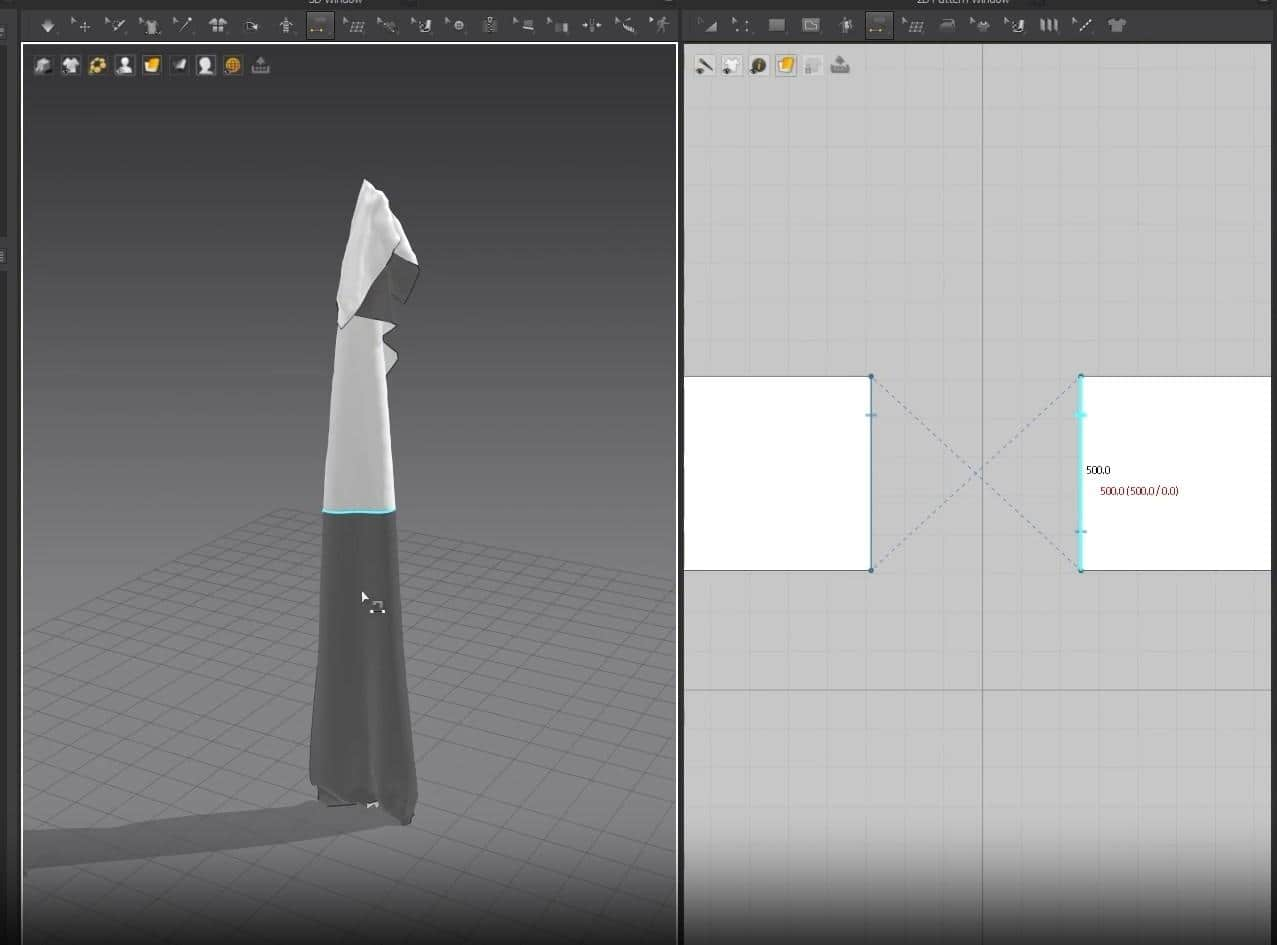
- If you click on the wrong side of the edge when sewing the patterns, the red lines won’t be straight but cross over each other. When we sew patterns like this, the clothes will be sown on different sides. One cloth will face the front, while the other will face the back. This will cause an issue if you’re using a material with patterns or a different type of fabric, which will be noticeable when it is flipped on the wrong side.
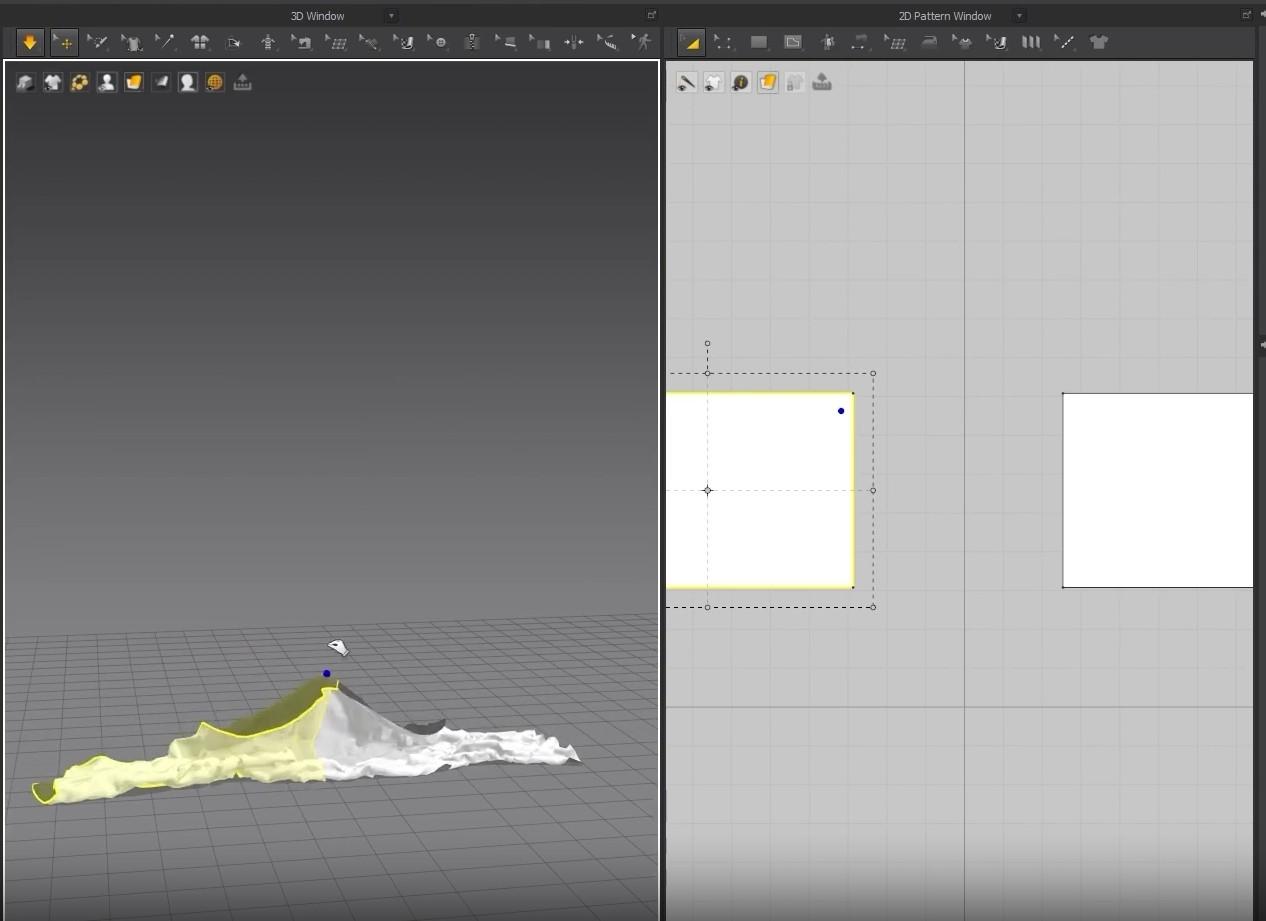
- We can stop a simulation even holding the fabric.
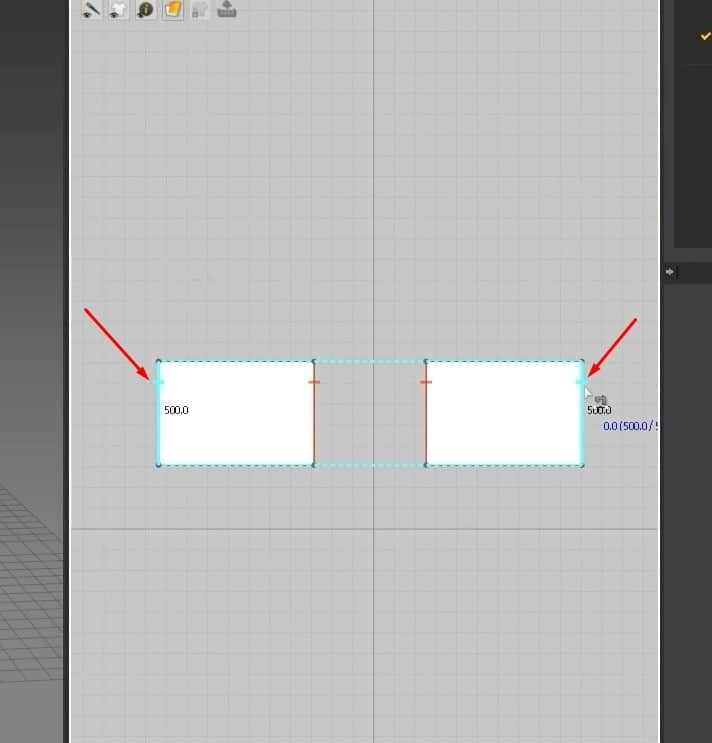
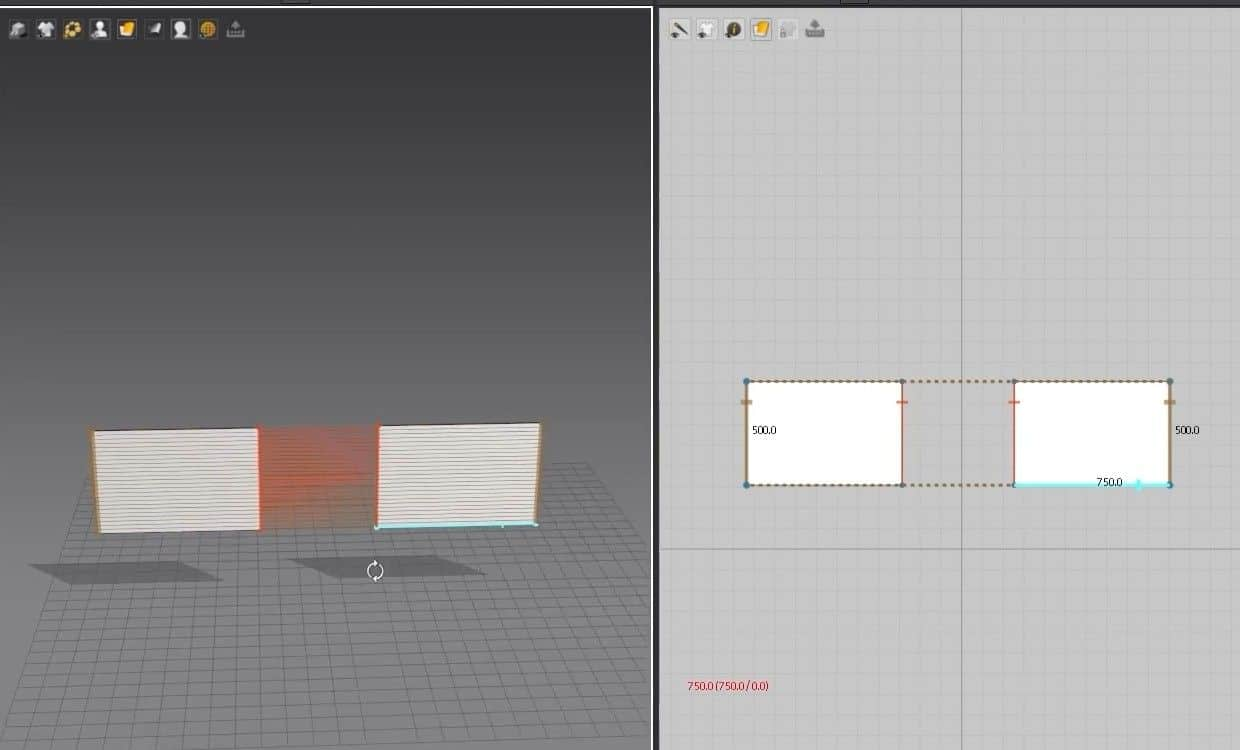
- We are going back to making the pillow. With the sewing tool, sow the left and right outer edges.
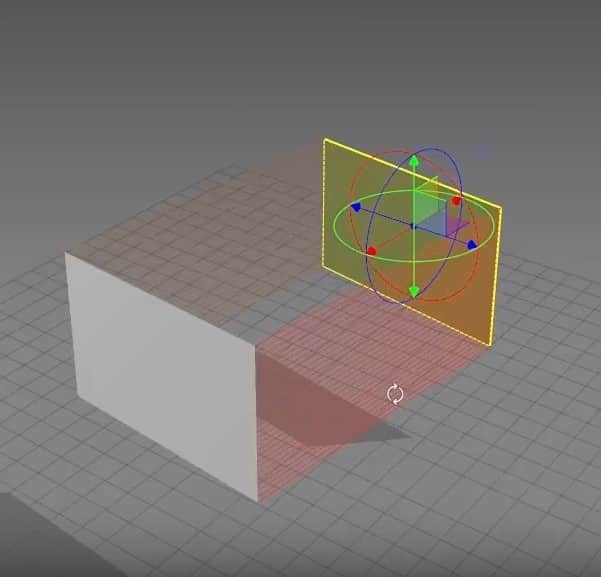
- In the 3D Window, click Q to activate the move tool. Click on the cloth and rotate them to face each other. Now we can see how the pillow will be sown better.
- To see the image better underneath the pattern, activate the Translucent Surface. We can see that some parts of the pattern didn’t turn out correctly to the image in the back.
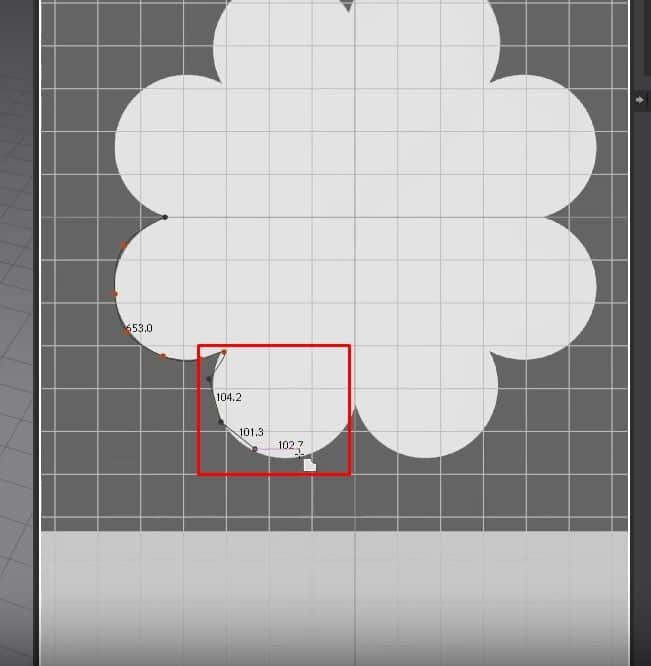
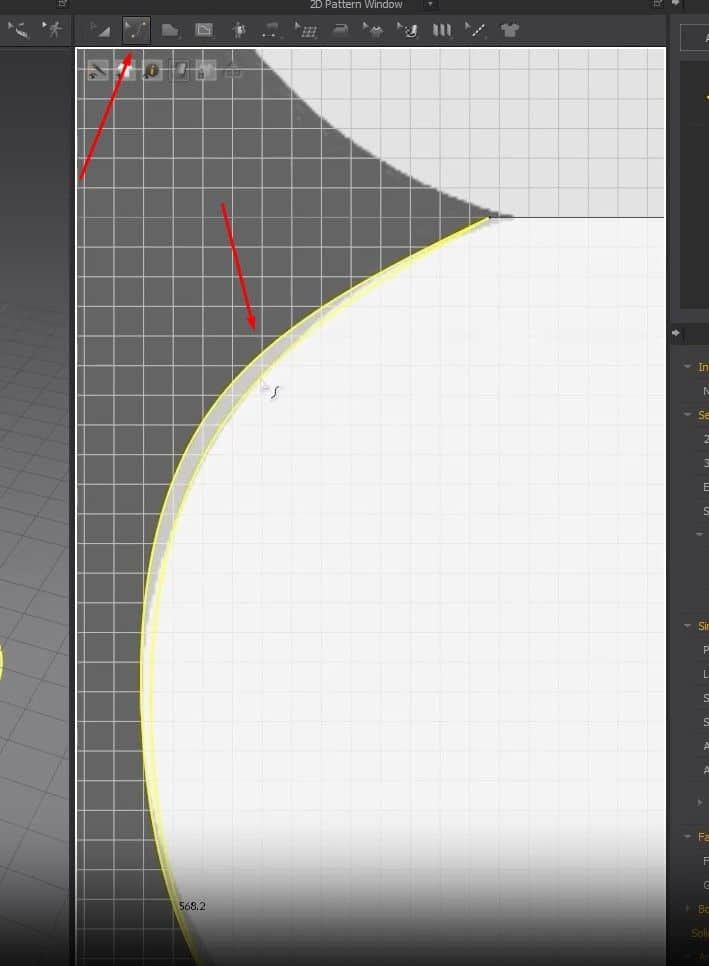
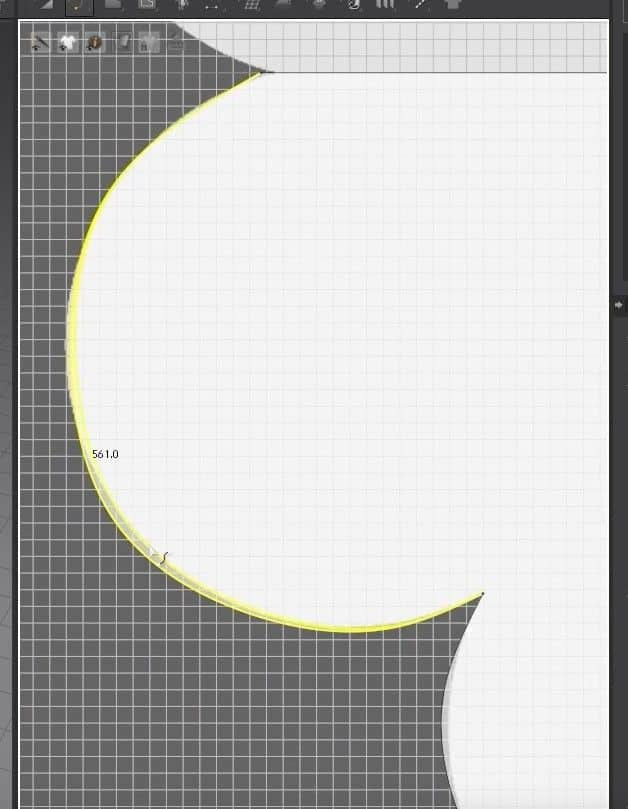
- To fix this, click on the C key to activate the tool we need to fix the edges. Click and drag the edge into place with this tool according to the image in the background.
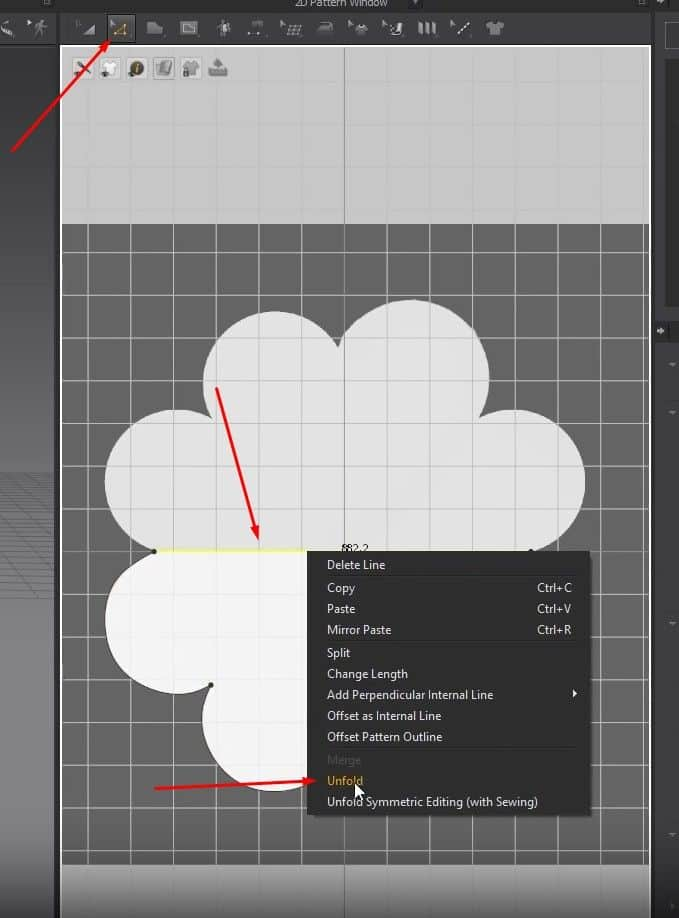
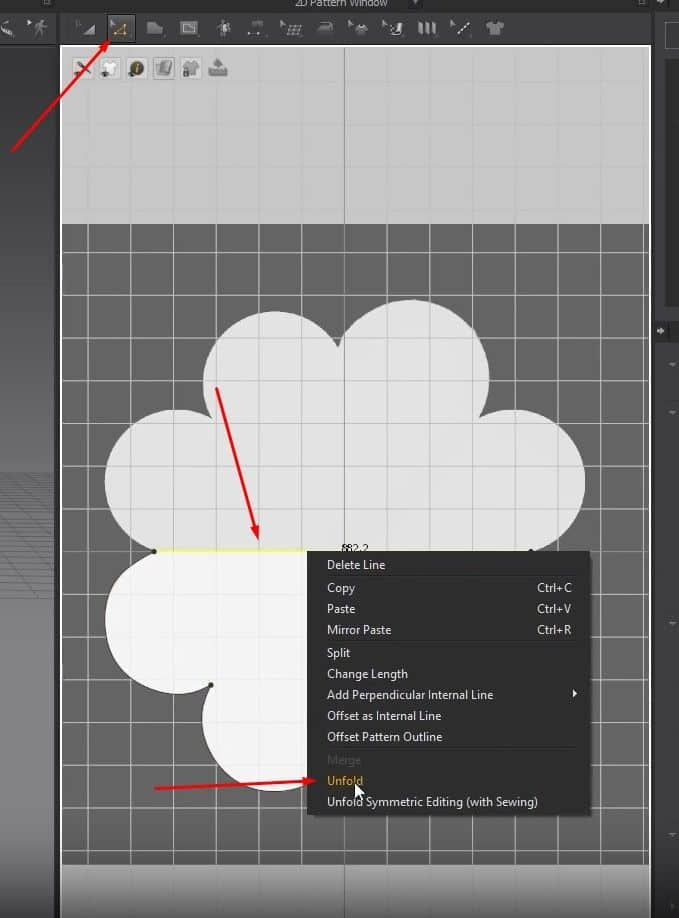
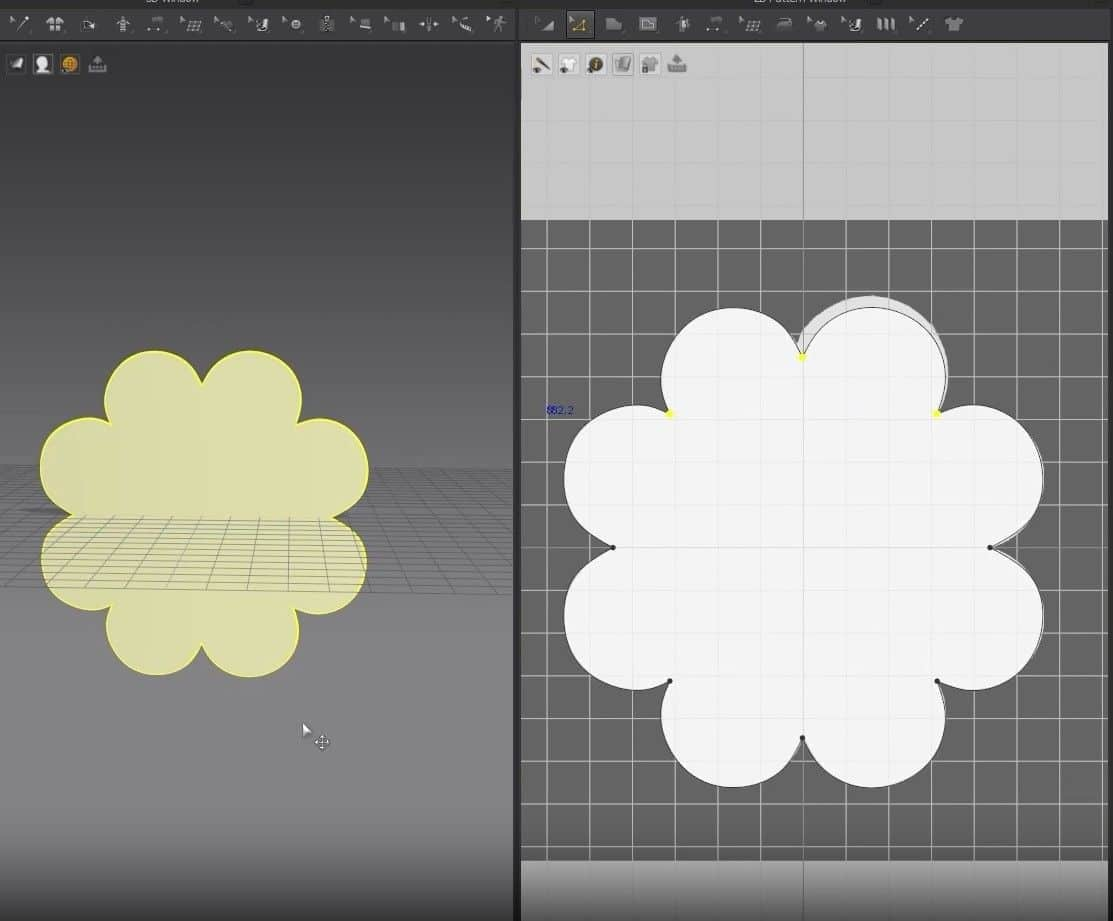
- After fixing the edges, click Z, right-click the top edge, and click on Unfold. Now the pattern is mirrored on the other side.
Pillow Exercise 2
Deleting Patterns and Adding Background Images
- Delete the patterns in the 2D Window using the select tool (A), then press Delete on your keyboard.
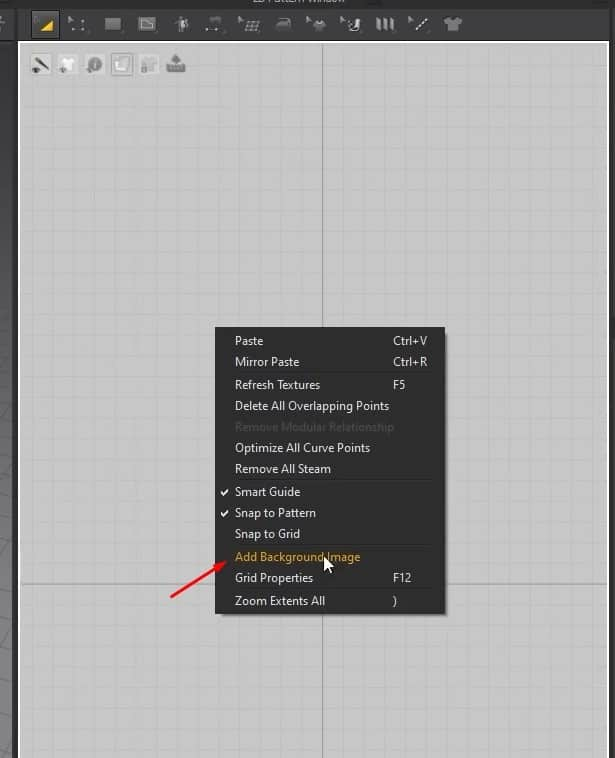
- We’ll add an image pattern in the 2D Window for the next exercise. To do that, right-click on the 2D graph, and click on Add Background Image.
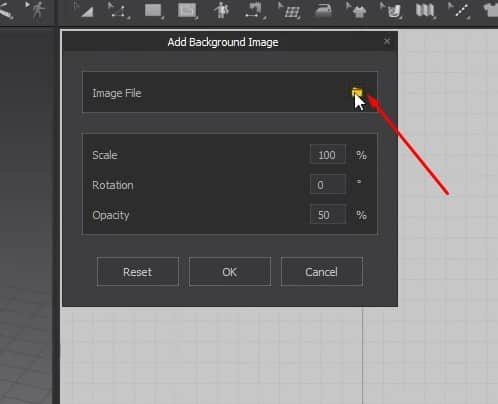
- In the new Window, click on the folder icon next to the Image File, and select the image from your computer.
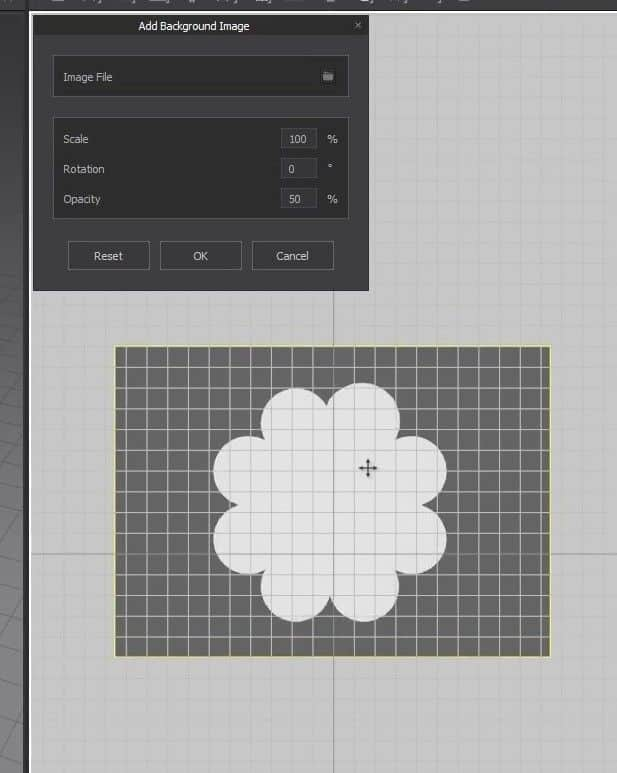
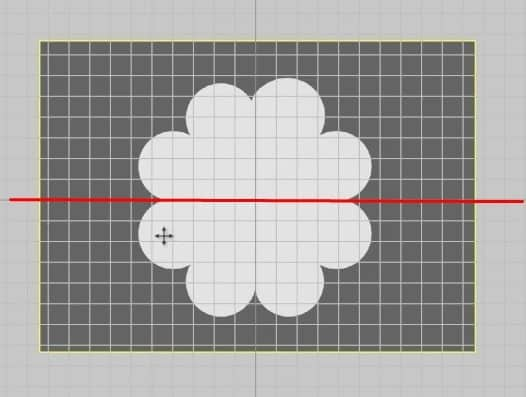
- We can scale and move the image pattern around the graph during this phase. Place the image pattern on the graph where the horizontal line splits the pattern flawlessly in half.
When we press the OK button from the new Window, we won’t be able to select or move the image pattern at all unless we right-click again and again on Add Background Image to make new changes to the image.
Creating a Pattern Based on the Image
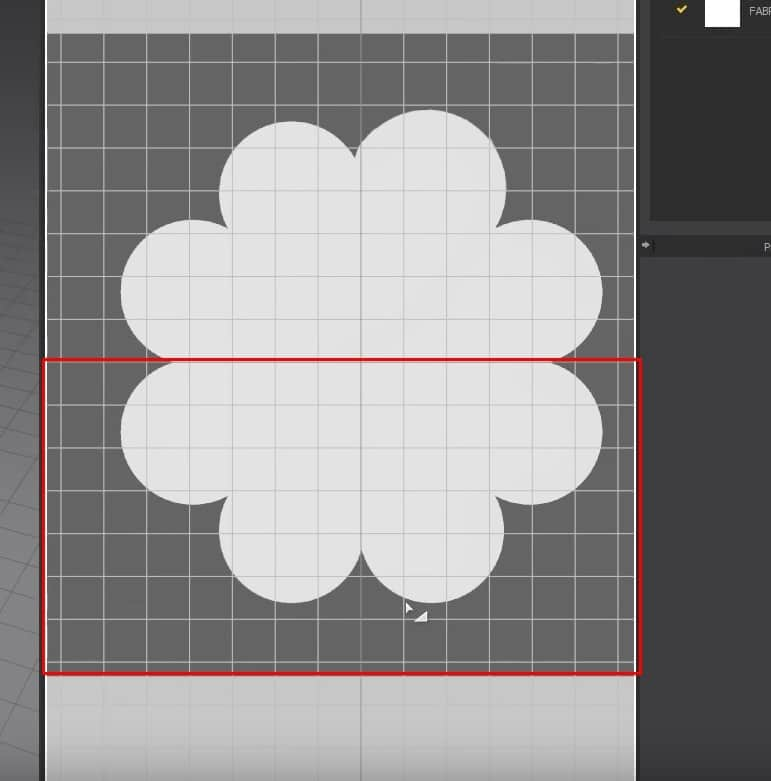
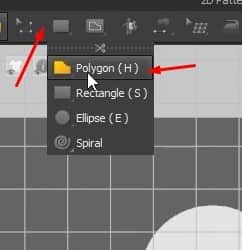
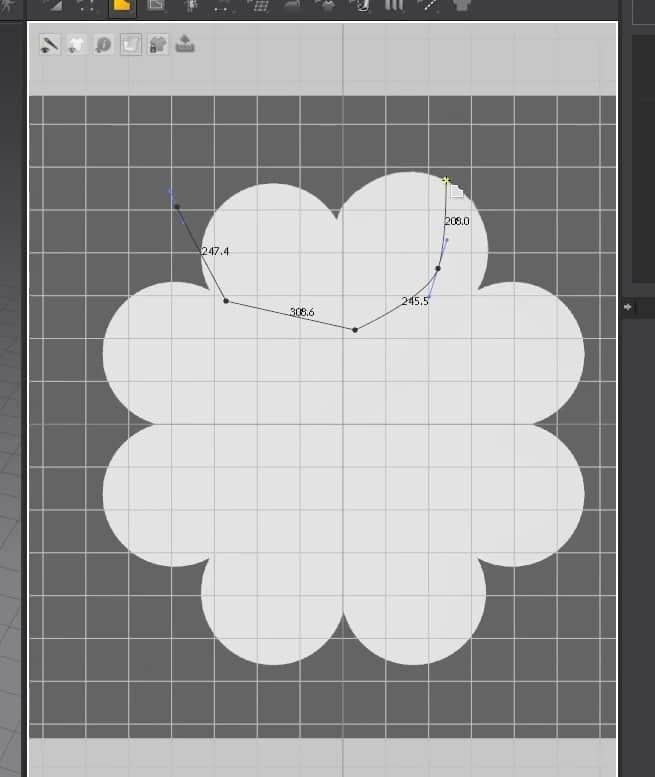
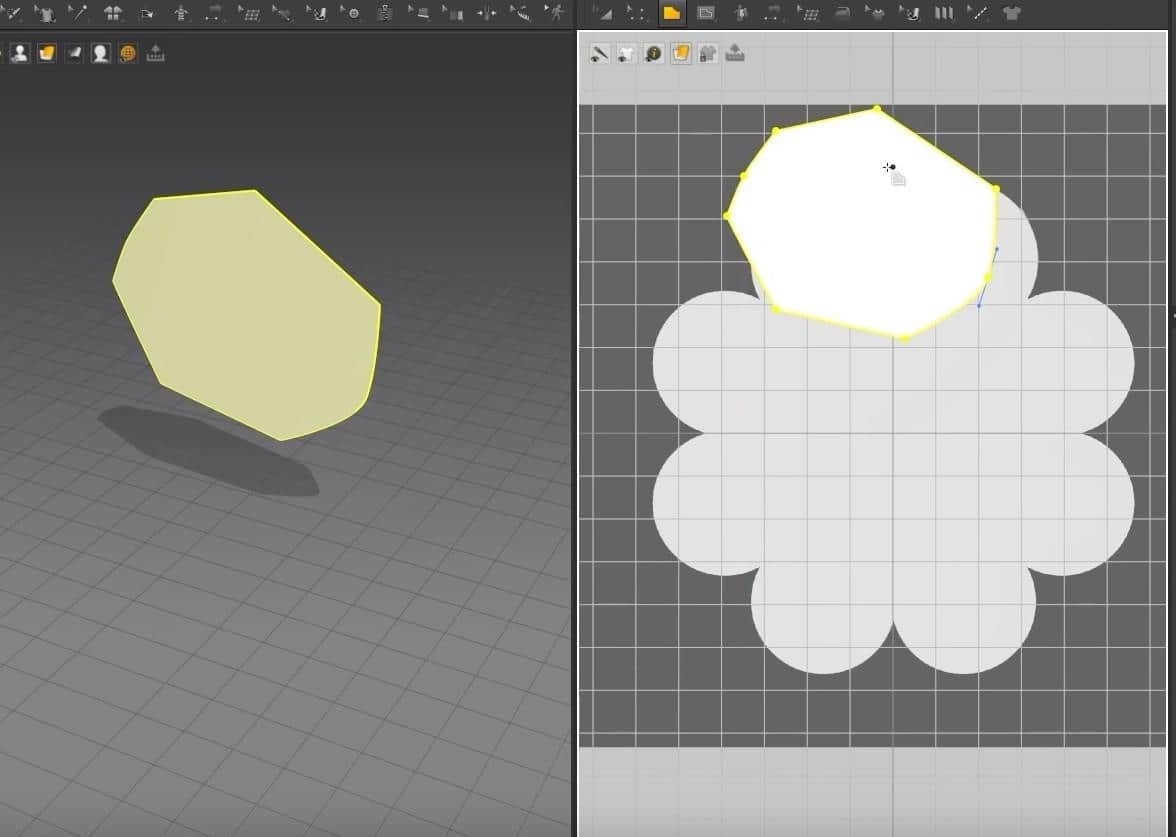
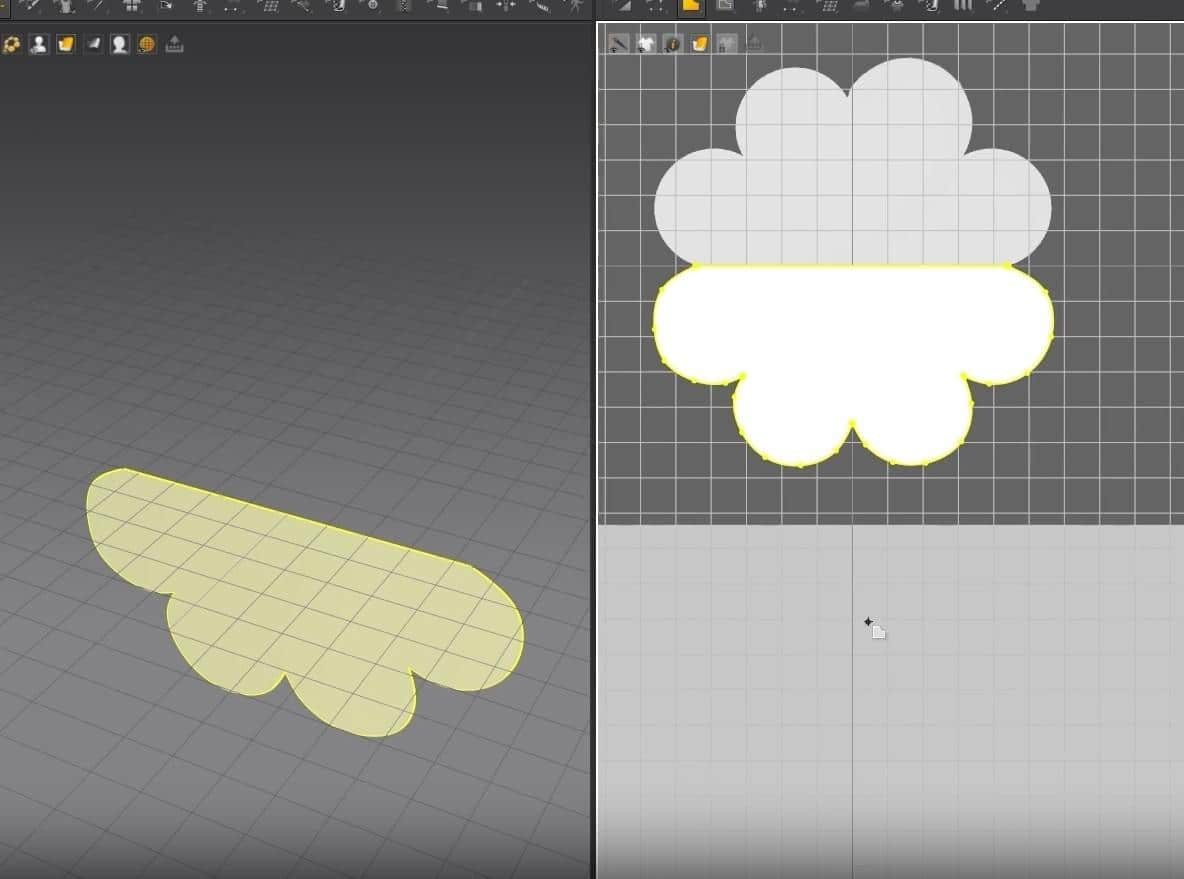
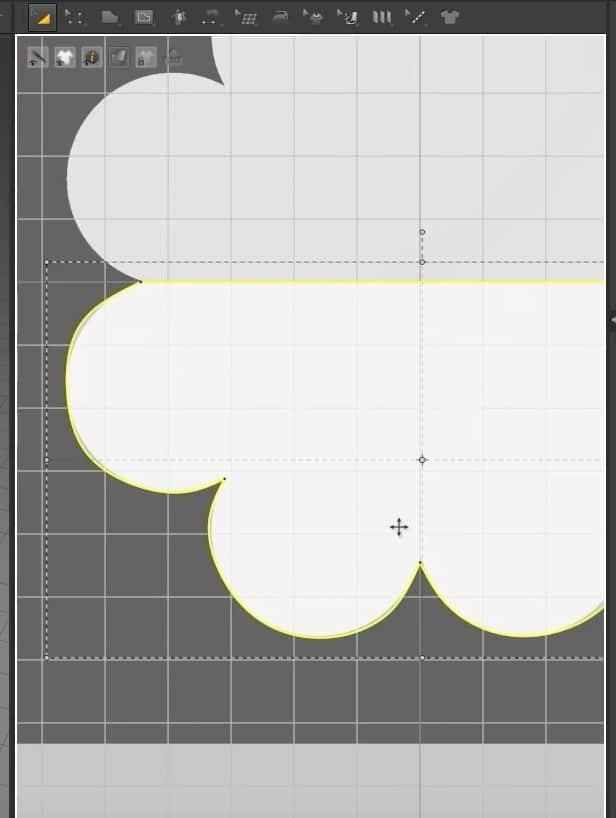
- After properly placing the image pattern on the graph, it is time to move on to the next step. The next step is drawing out half of the bottom pattern using the Polygon tool.
- Clicking on the 2D graph adds points, creating a pattern when the points are closed. To curve the points, when clicking hold Alt. Do this always because if you let go even once, the line between the points won’t curve.
- Create the entire bottom half of the pattern, making sure the points are closed to create the pattern.
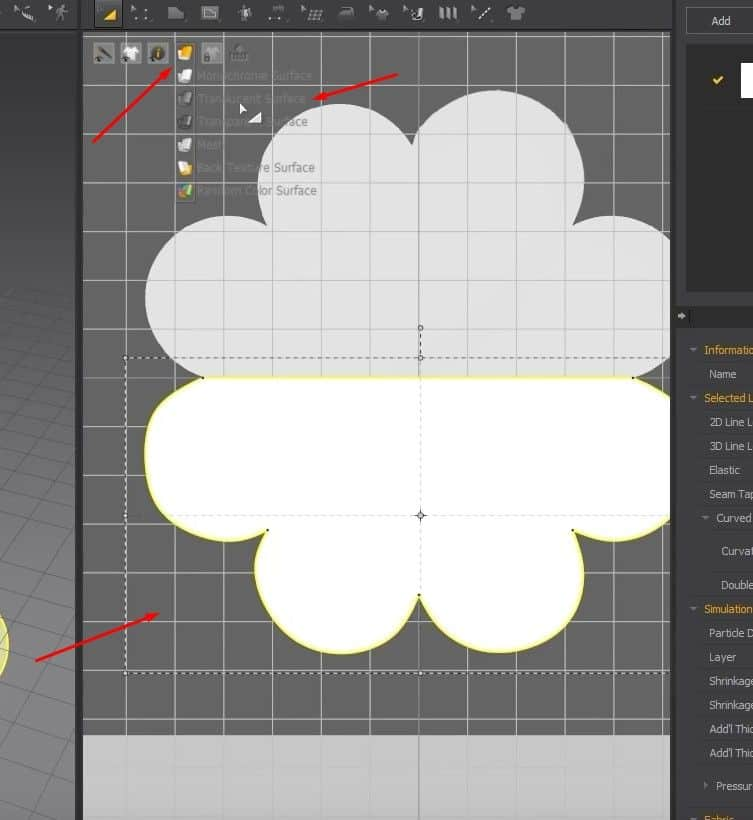
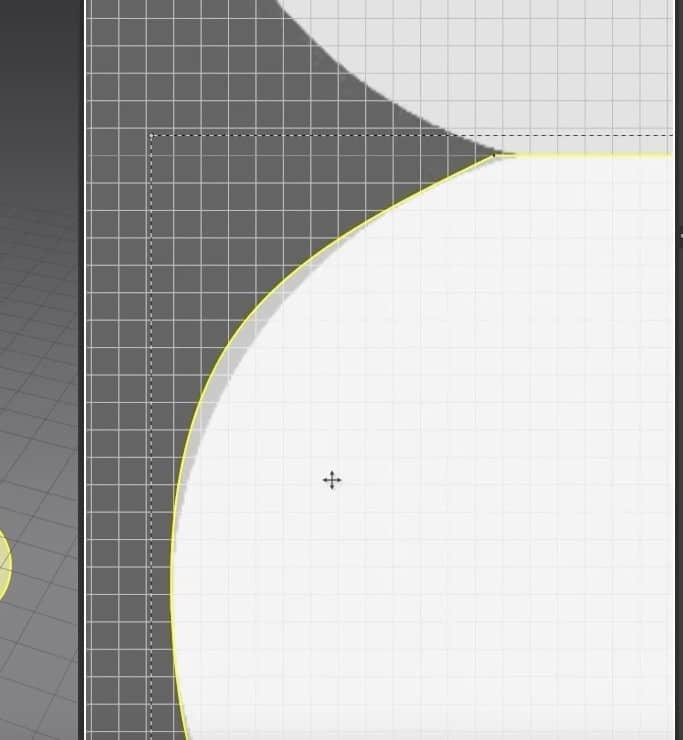
- To see the image better underneath the pattern, activate the Translucent Surface. We can see that some parts of the pattern didn’t turn out correctly to the image in the back.
- To fix this, click on the C key to activate the tool we need to fix the edges. Click and drag the edge into place with this tool according to the image in the background.
Creating a Second Pattern and Sewing
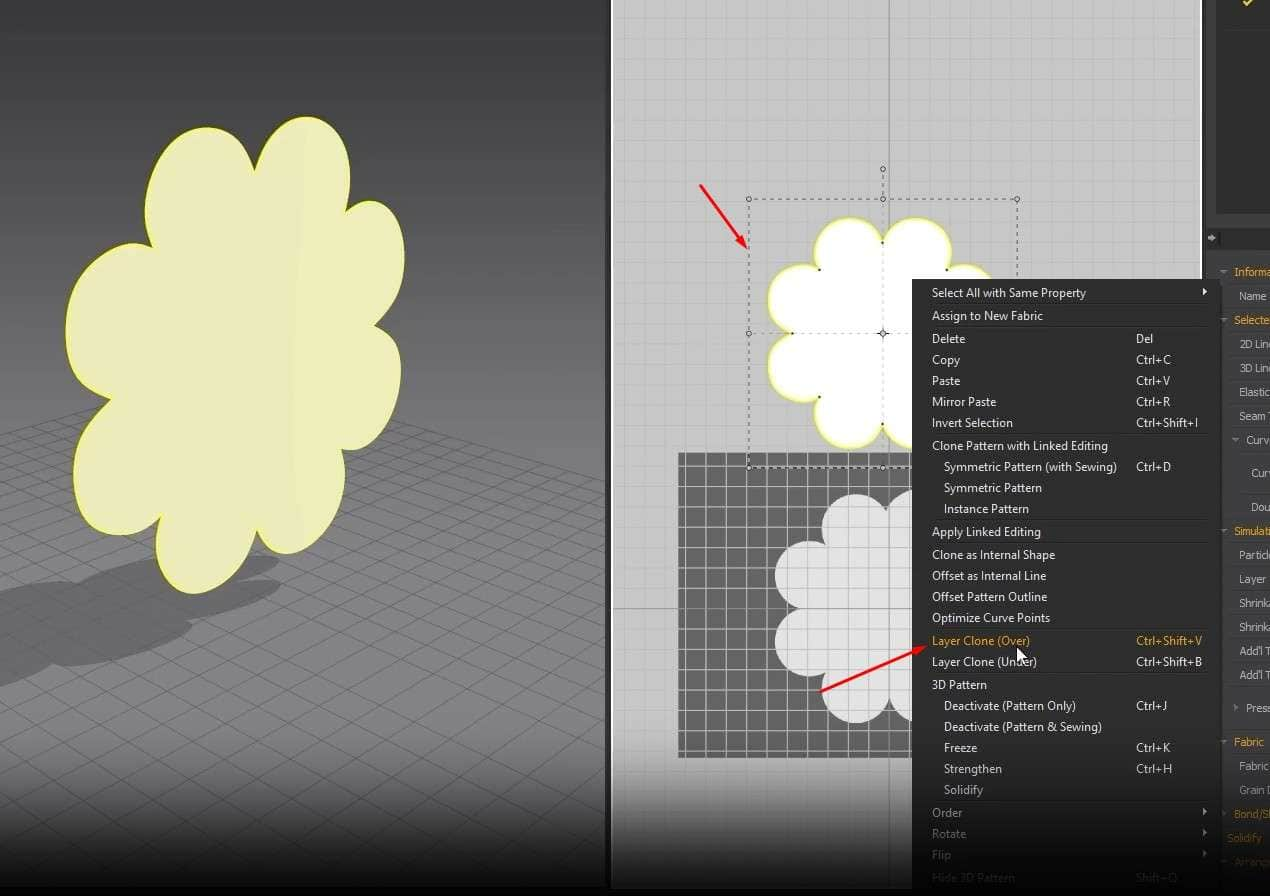
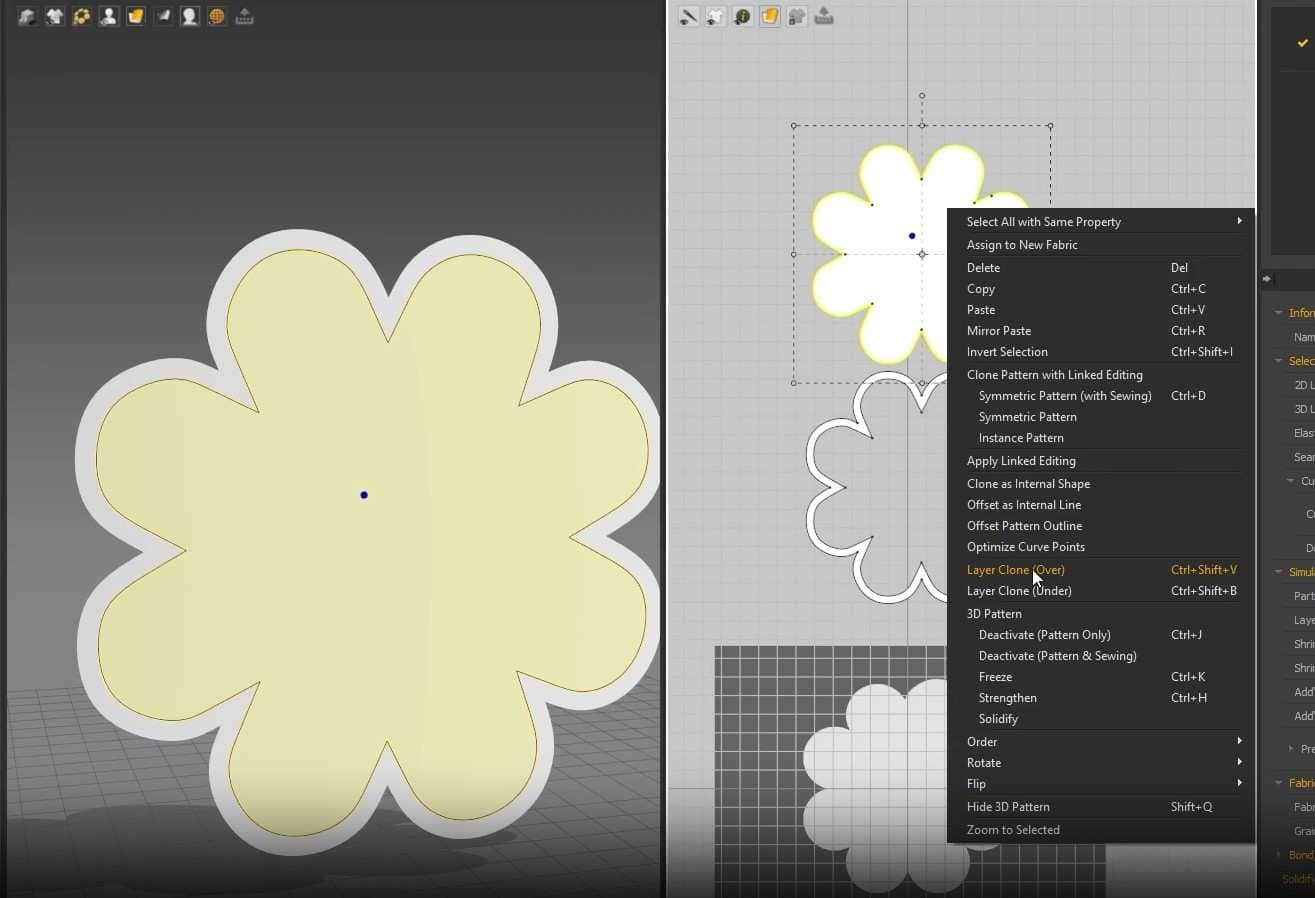
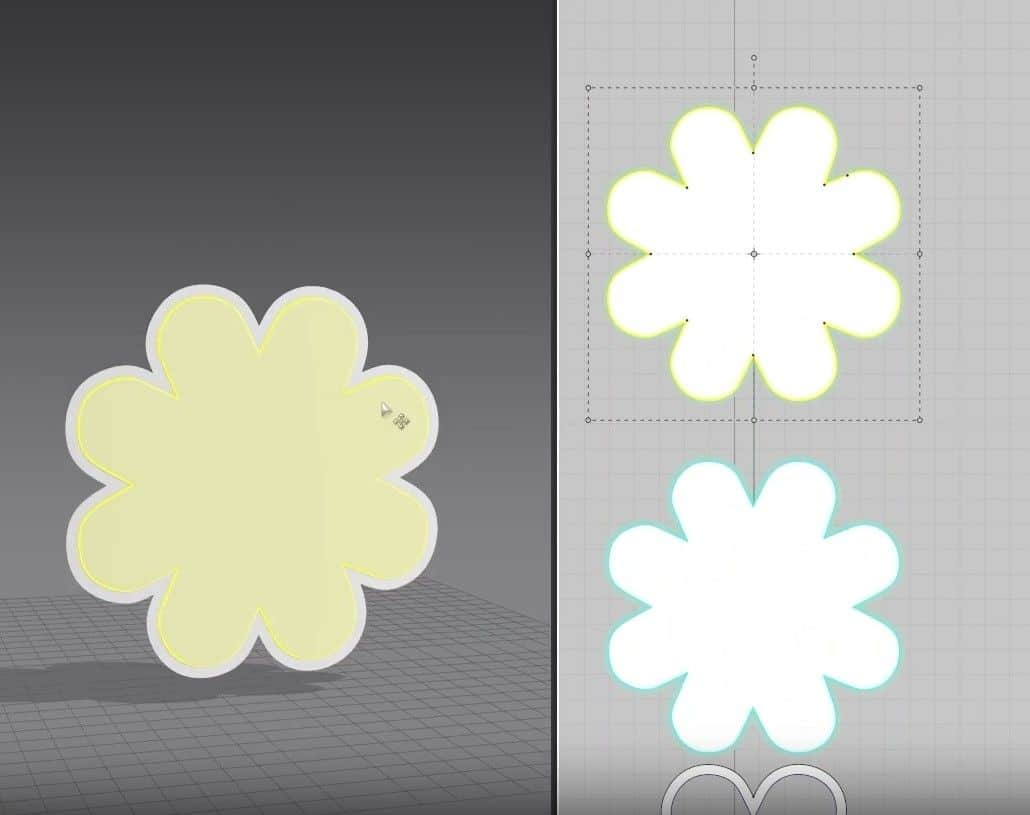
- We can create a copy of the pattern in the 2D graph that will also be sown to the first pattern with just one click. Right-click the pattern in the 2D Window, and click Layer Clone (Over). Click above the pattern to make the second one.
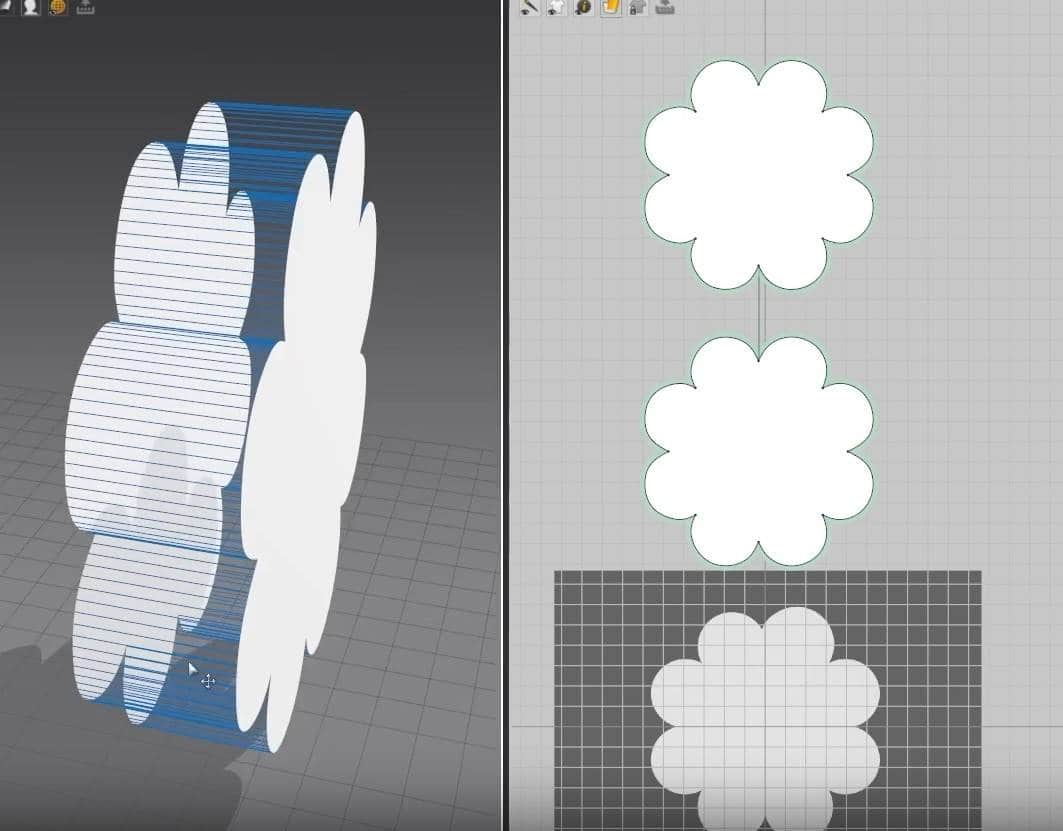
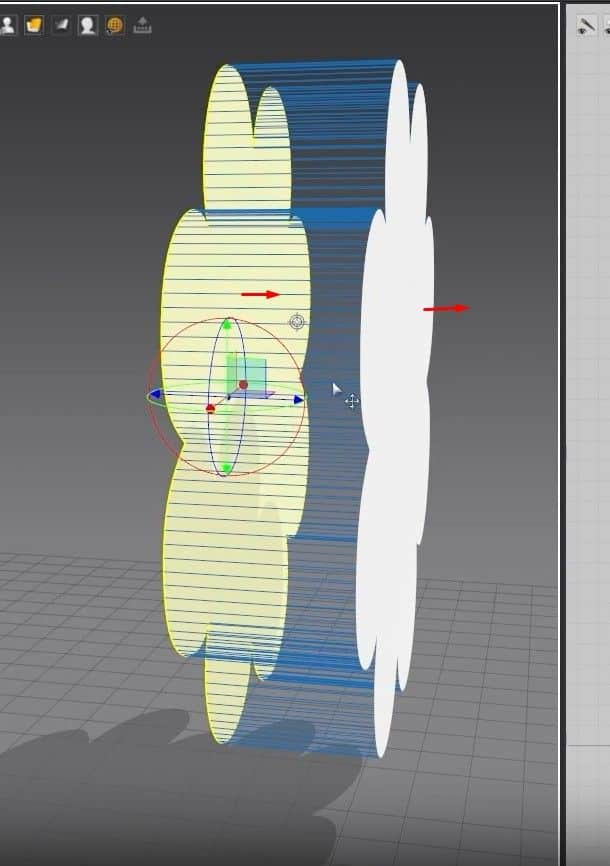
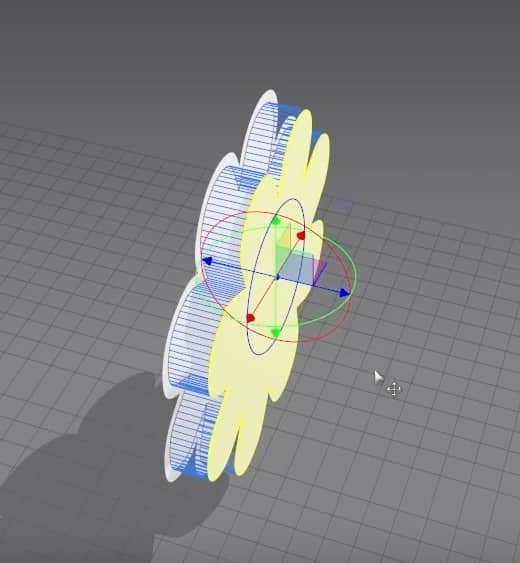
- In the 3D Window, we can see two patterns next to each other. Move the front one with the Gizmo to reveal that they are indeed sown together.
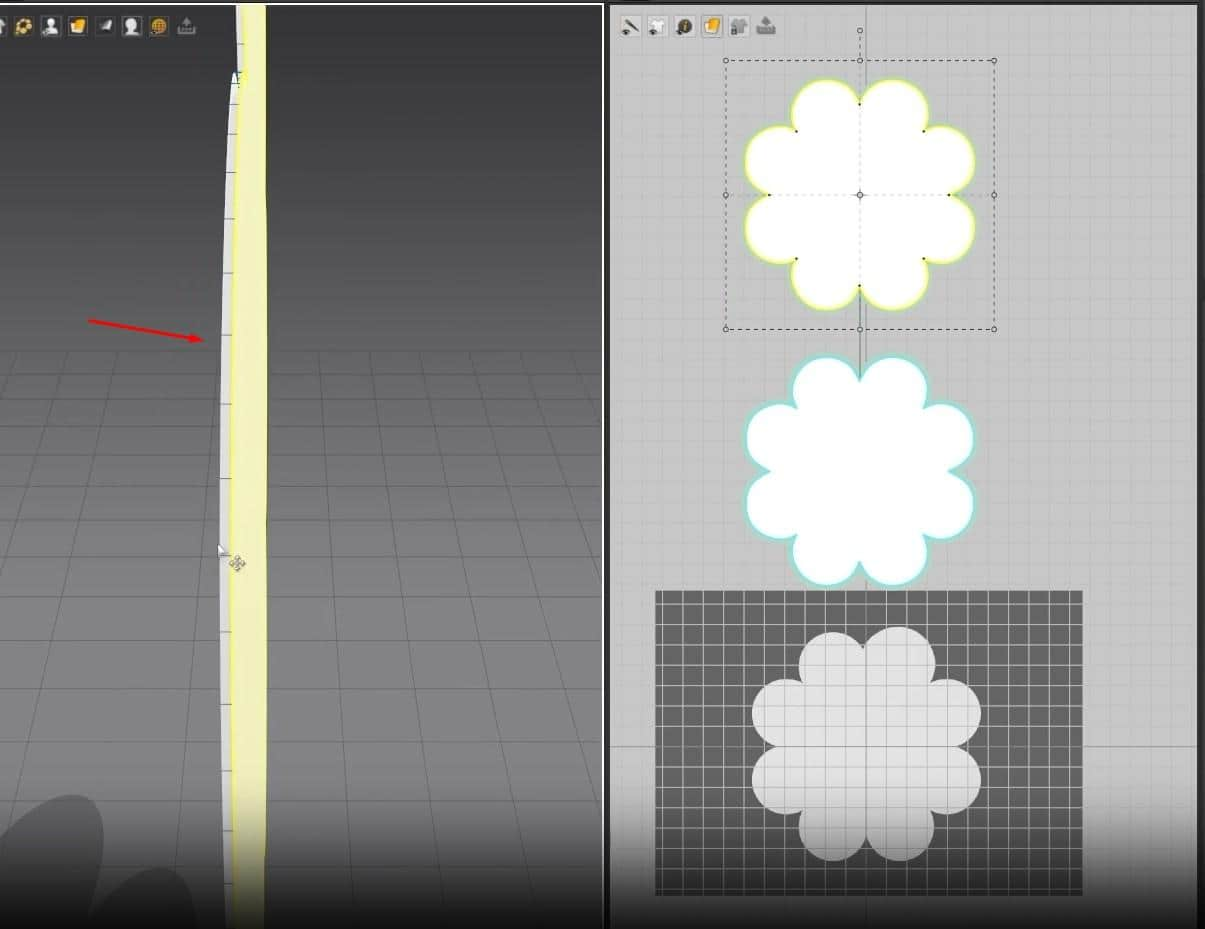
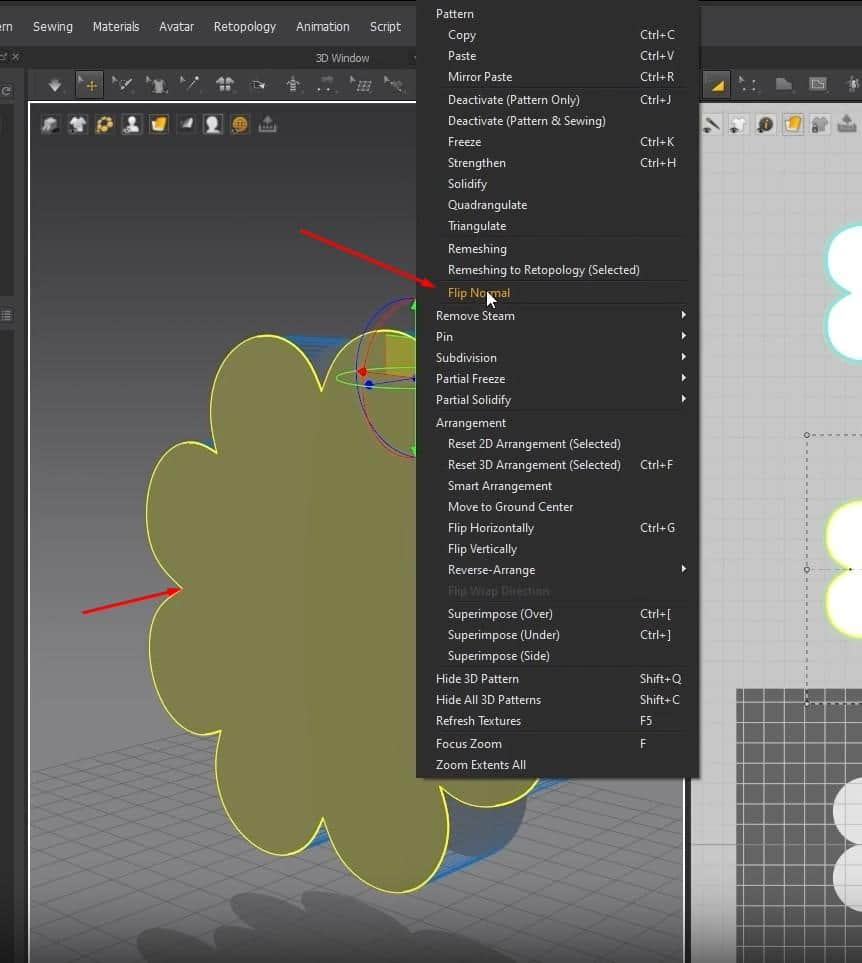
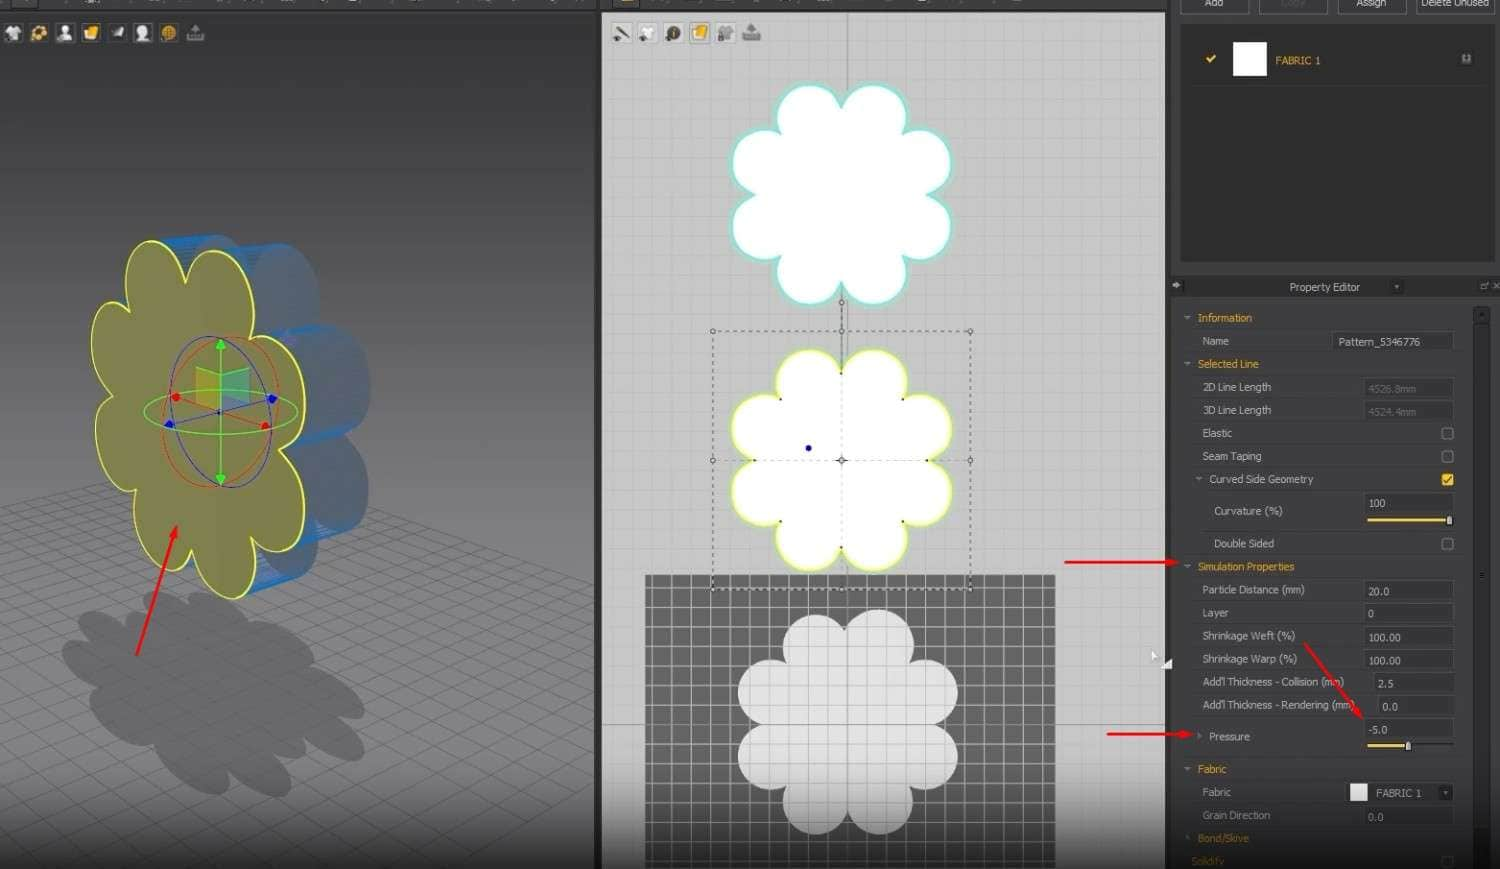
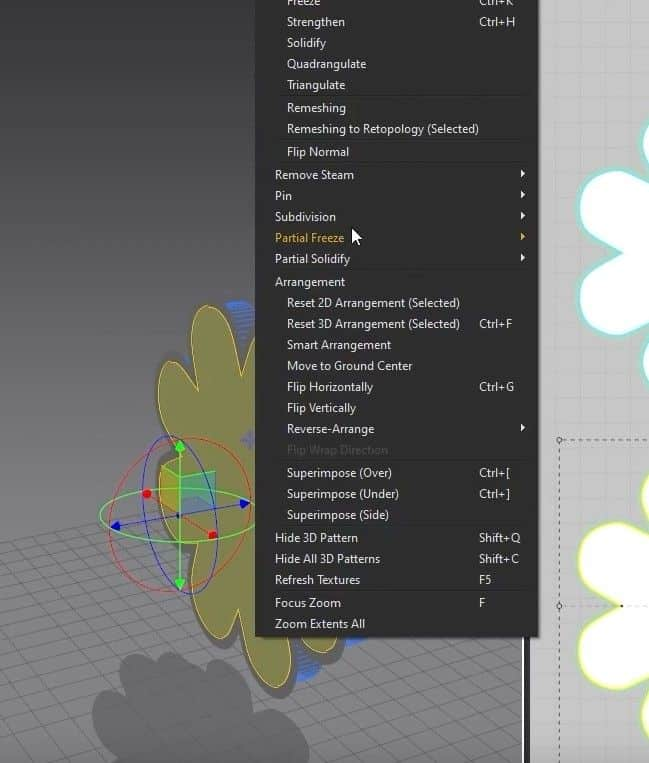
- One issue, though, the pattern in the back is facing the wrong side. To fix this, click A for the select tool, right-click on the back pattern in the 3D Space, and click on Flip Normal. Doing this will fix the way the pattern is facing.
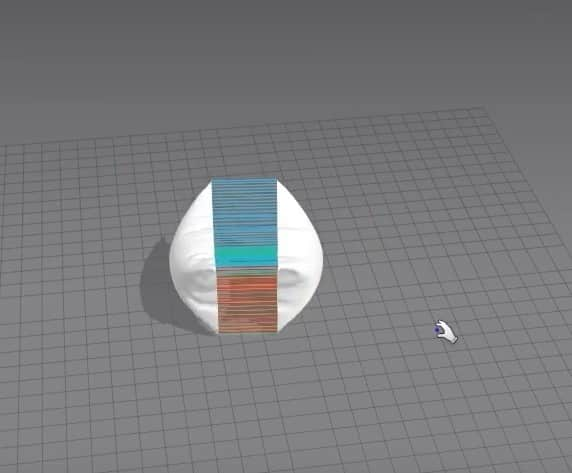
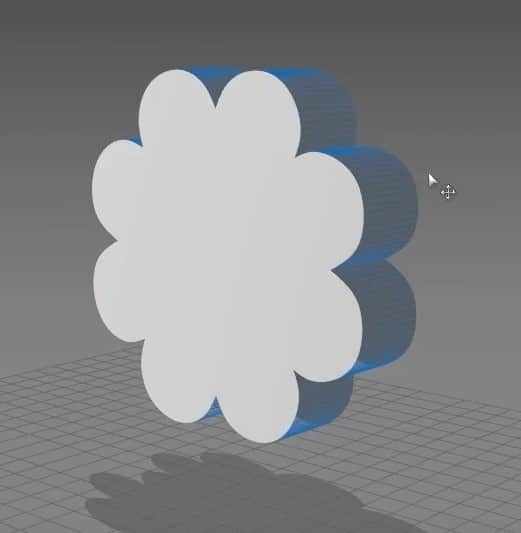
- When we run the simulation, we get an interesting-looking pillow. Change the Pressure in the Property Editor to 5 if your pillow isn’t fluffy. If the back pattern were facing the wrong way, the pillow would’ve not fluffed up.
- One way to prevent this without Flipping the Normal is to set the Pressure tp -5 on the pattern with the unflipped normals, so when the simulation is run, the two values cancel each other out, and the pillow fluffs up.
Additional Exercise: Creating a Pocket
- For another exercise, delete the second pattern. Select it, double-click the center dot, and scale it a bit.
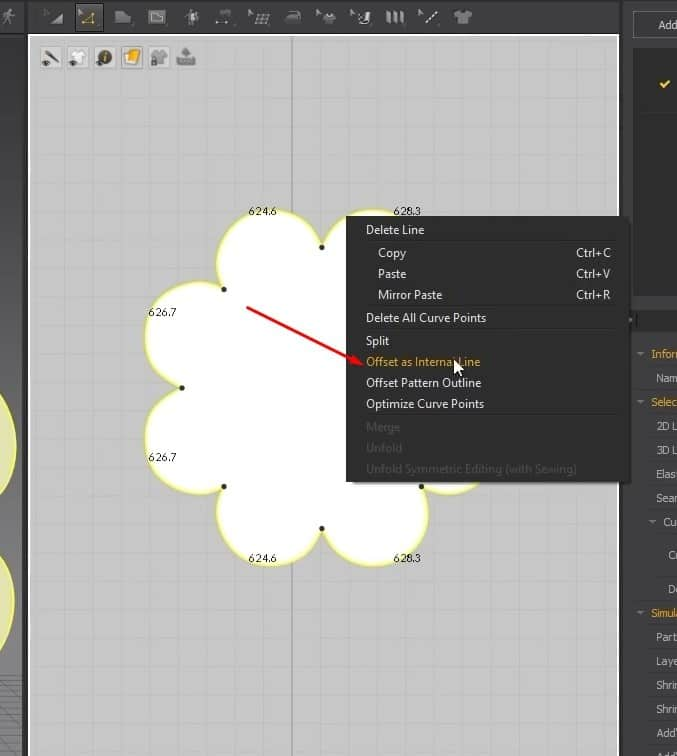
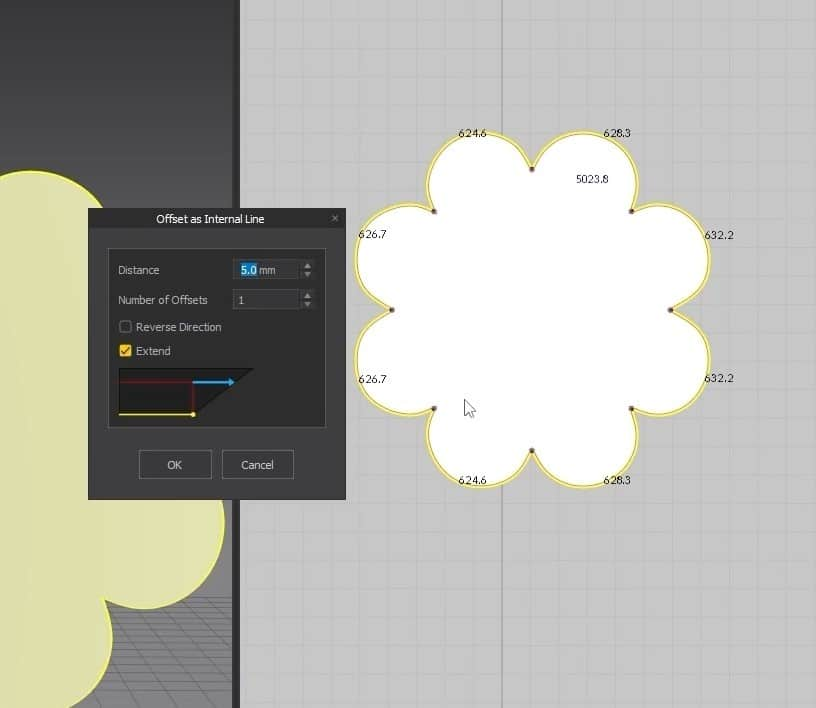
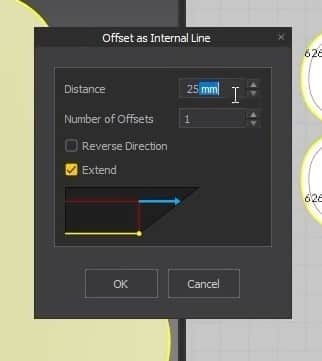
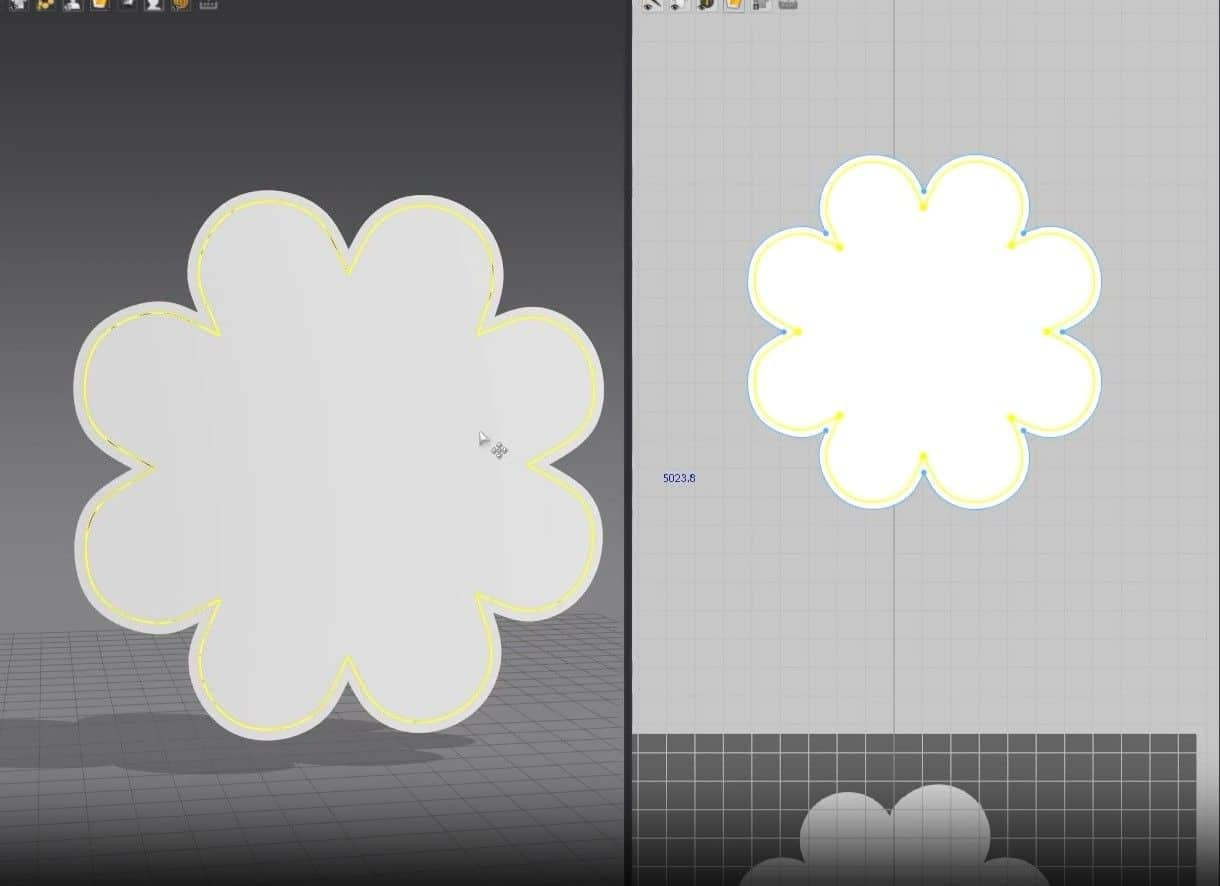
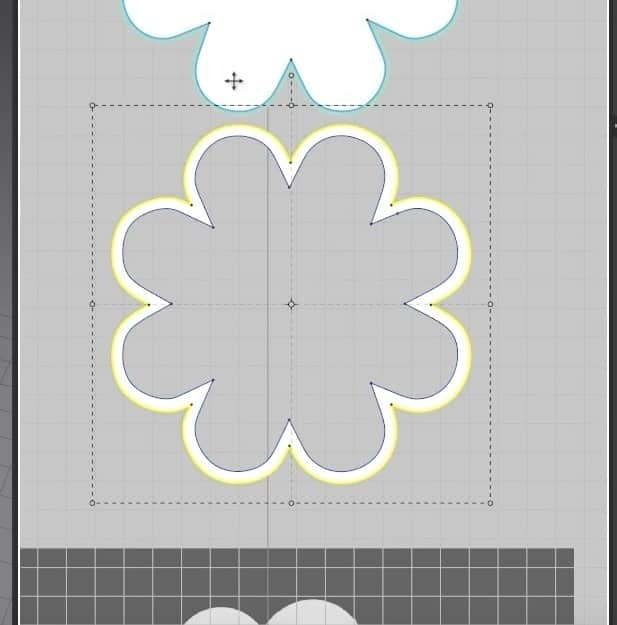
- Click Z, select all the edges, and click Offset as Internal Line. Set the Distance to 40 mm in the new menu and press OK. This will create an inner edge in the pattern.
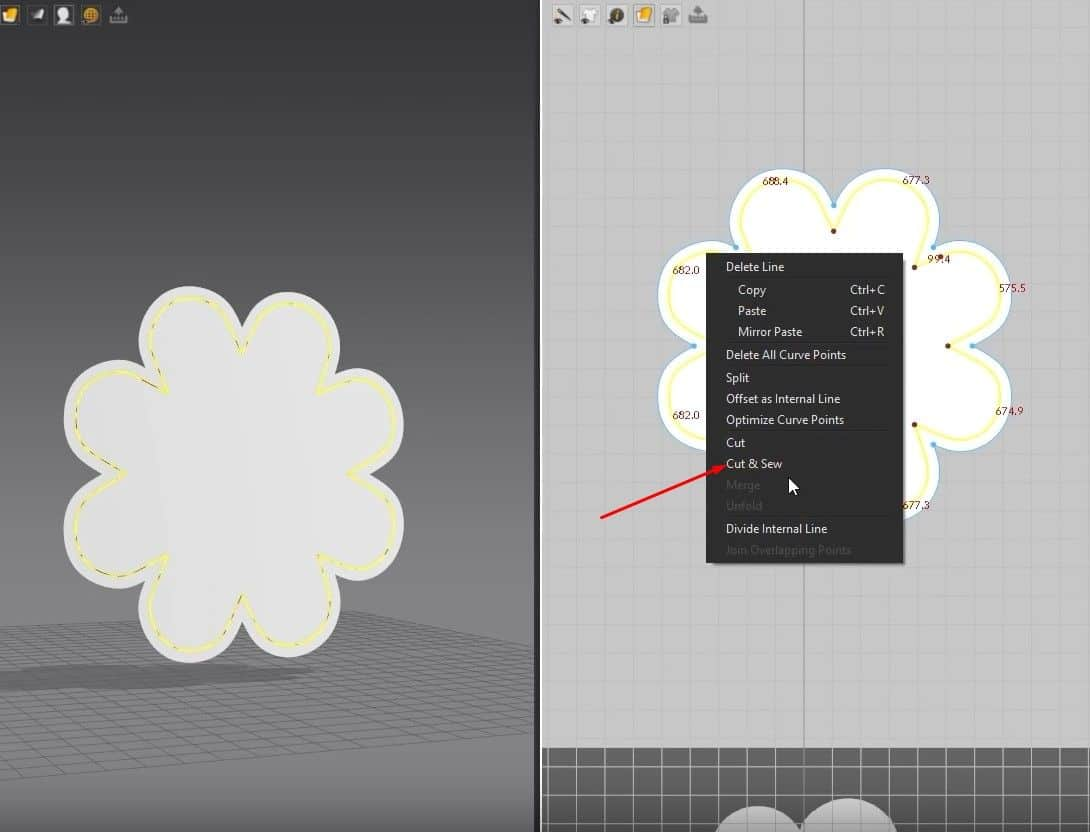
- Select the inside edge, right-click it, and click on Cut & Sew. This will separate the pattern into two pieces that are sown together.
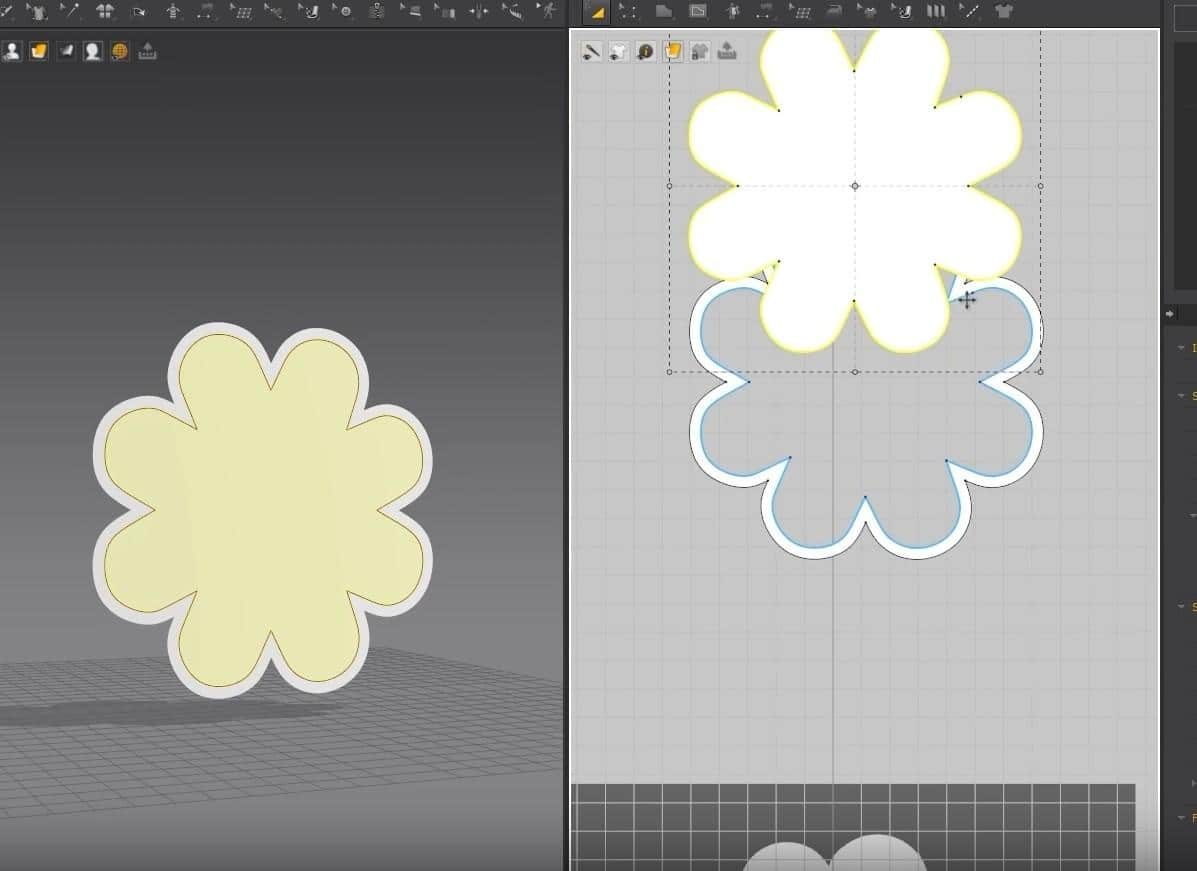
- Select the inner pattern, right-click it, and click on Layer Clone (Over).
- Select the new pattern in the 3D Space, move it out, and flip the normals.
- When we run the simulation, the pillow will have a nice outside cloth.
- To make the cloth bigger:
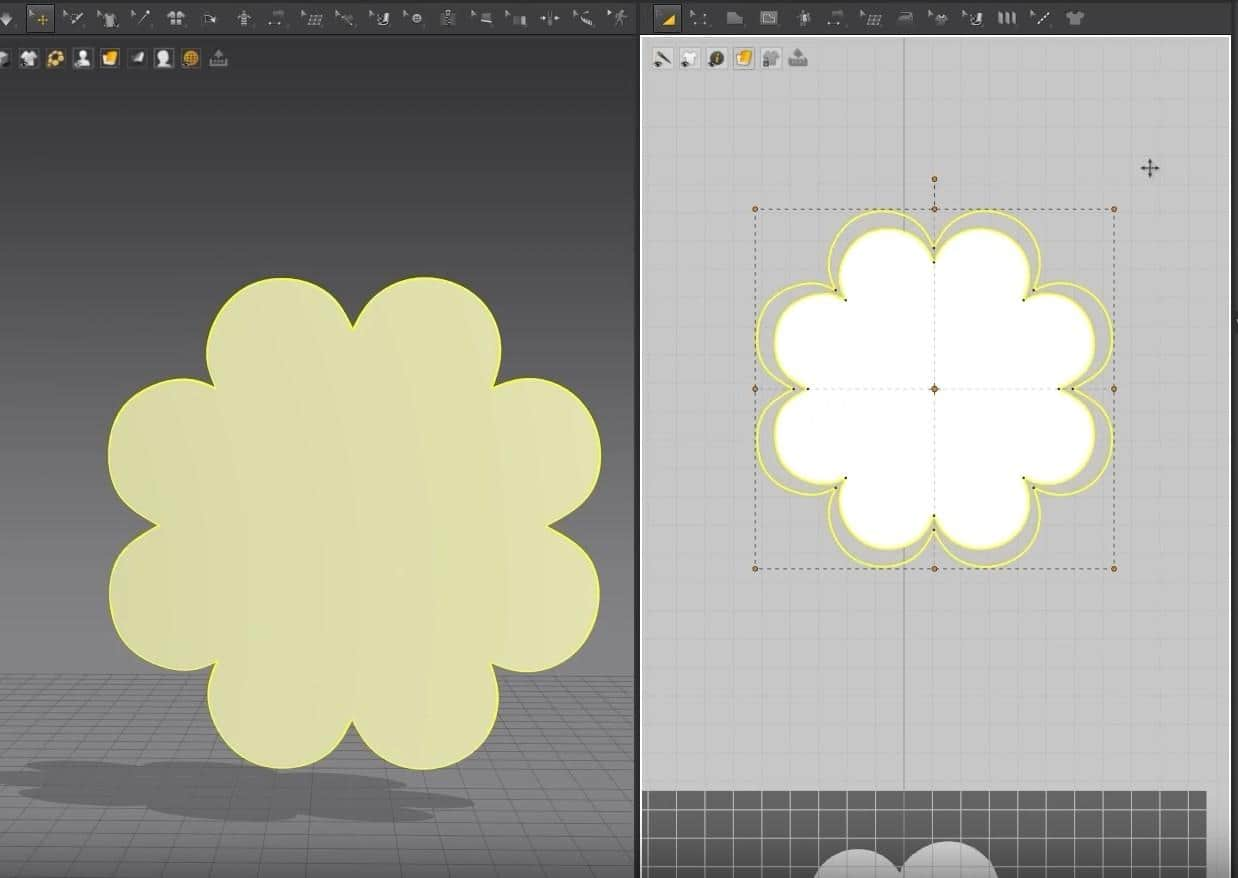
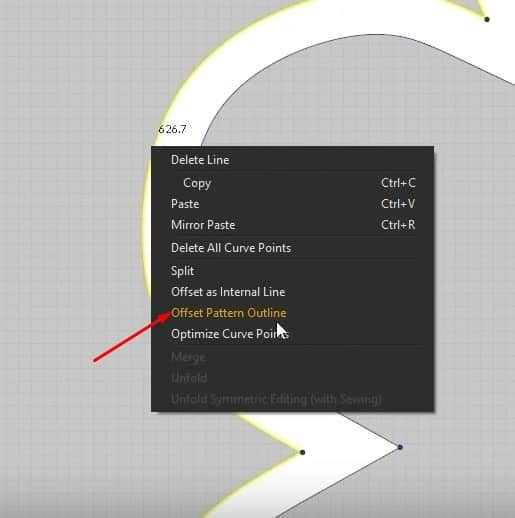
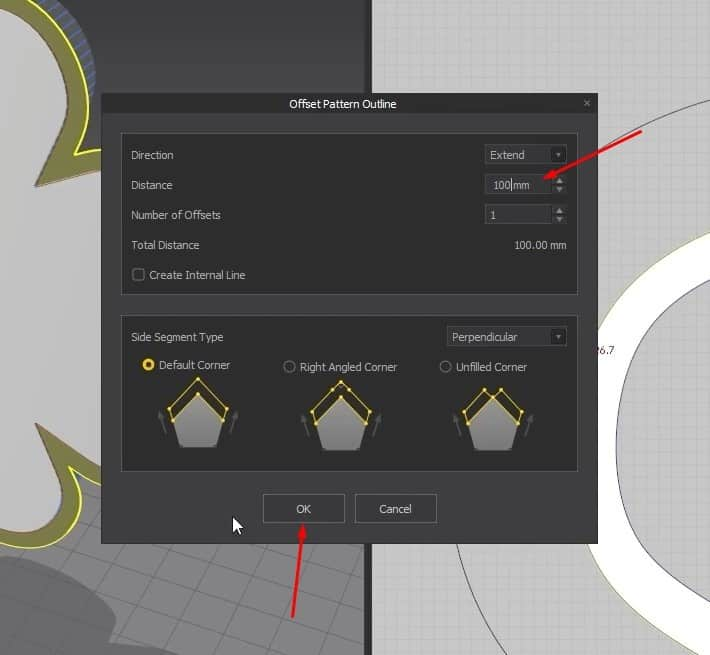
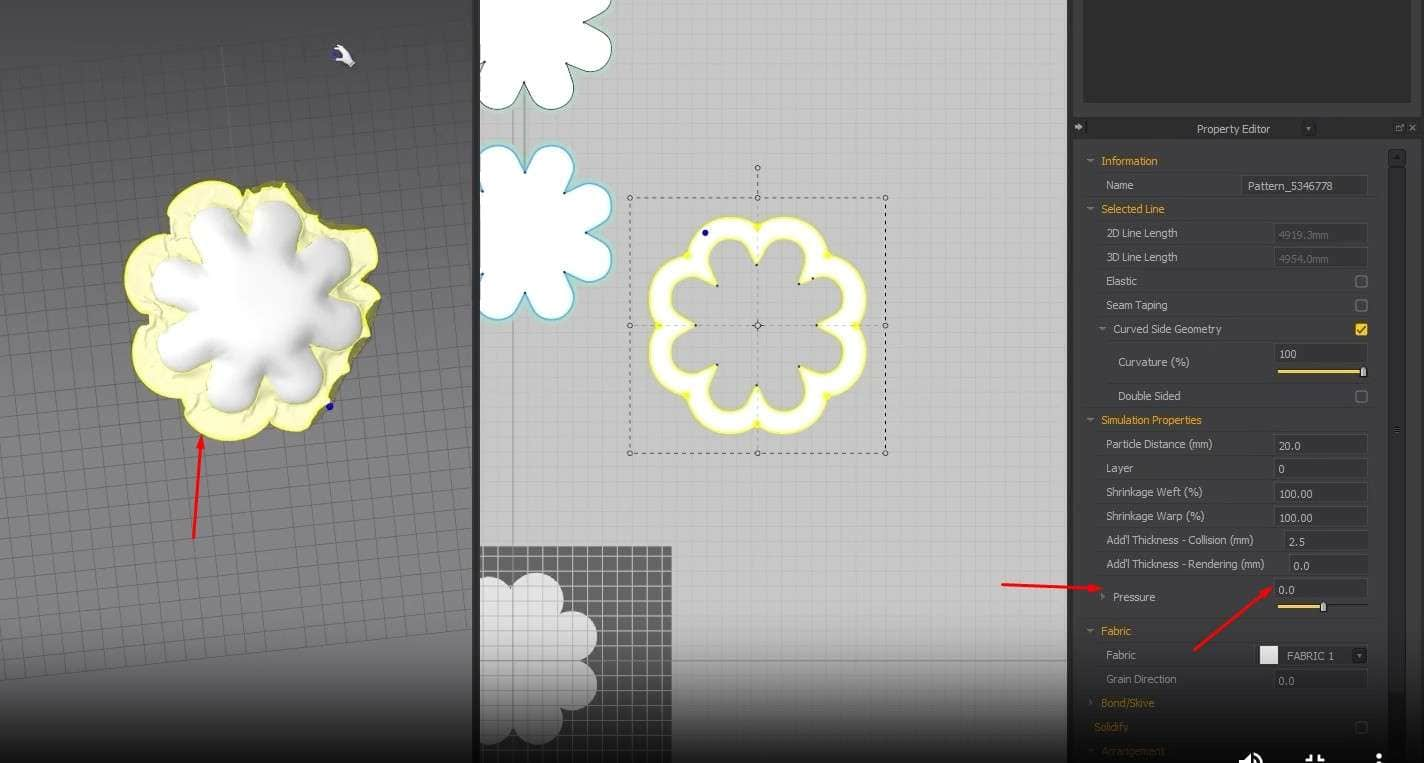
- Select the outside edges, right-click it, and select Offset Pattern Outline.
- Set the Distance in the new Window to 100mm, then press OK.
Set the Pressure for that pattern to 0 to get a better simulation.
Conclusion: Master 3D Clothing Simulations Today
Hopefully, this Marvelous Designer Introduction exercise makes things clearer for you. By mastering the techniques outlined in this comprehensive guide, you’ve taken a significant step toward creating realistic and visually stunning 3D clothing simulations. Marvelous Designer’s capabilities empower you to bring your fabric designs to life, enriching your 3D projects with intricate details and dynamic movement.
As you continue to explore the world of 3D artistry, consider expanding your horizons into the realm of real-time 3D. The demand for talented artists in this field is soaring, driven by the increasing popularity of virtual production in film, television, and gaming.
If you want to learn and discover more about Marvelous Designer, don’t miss out our related articles Marvelous Designer Dress: Step-by-Step Creation Guide and Marvelous Designer Shirt and Pants: Expert Design Techniques
Ready to embark on a career in real time 3D? Our expert-led academy programs offer a comprehensive curriculum designed to equip you with the skills needed to excel in this exciting industry. Whether you’re seeking a foundational understanding or specialized expertise, our courses cater to all levels of experience. Don’t miss out on the Masterclasses with industry experts for the best practices and advice in the niche.
Don’t miss out on this opportunity to shape the future of digital storytelling. Visit our academy programs section to learn more about our offerings and how to enroll. Are you already certain? Apply today and begin fulfilling your dream.

