Master Materials in 3D Design and Modelling Instances
Creating Master Materials and Instances in Unreal Engine 5
🟡This guide details how to set up parameters for creating master materials in 3d design and material instances in Unreal Engine.
🟡We explore how to set up parameters for controlling base color, normal maps, ambient occlusion, roughness, metallic, and even emissive maps regarding master materials in 3d design.
🟡Learn doing this, and it becomes possible to make your materials dynamic, which is helpful if you plan on developing a videogame!
Master Materials in 3D Design & Creation Workflow
Setup:
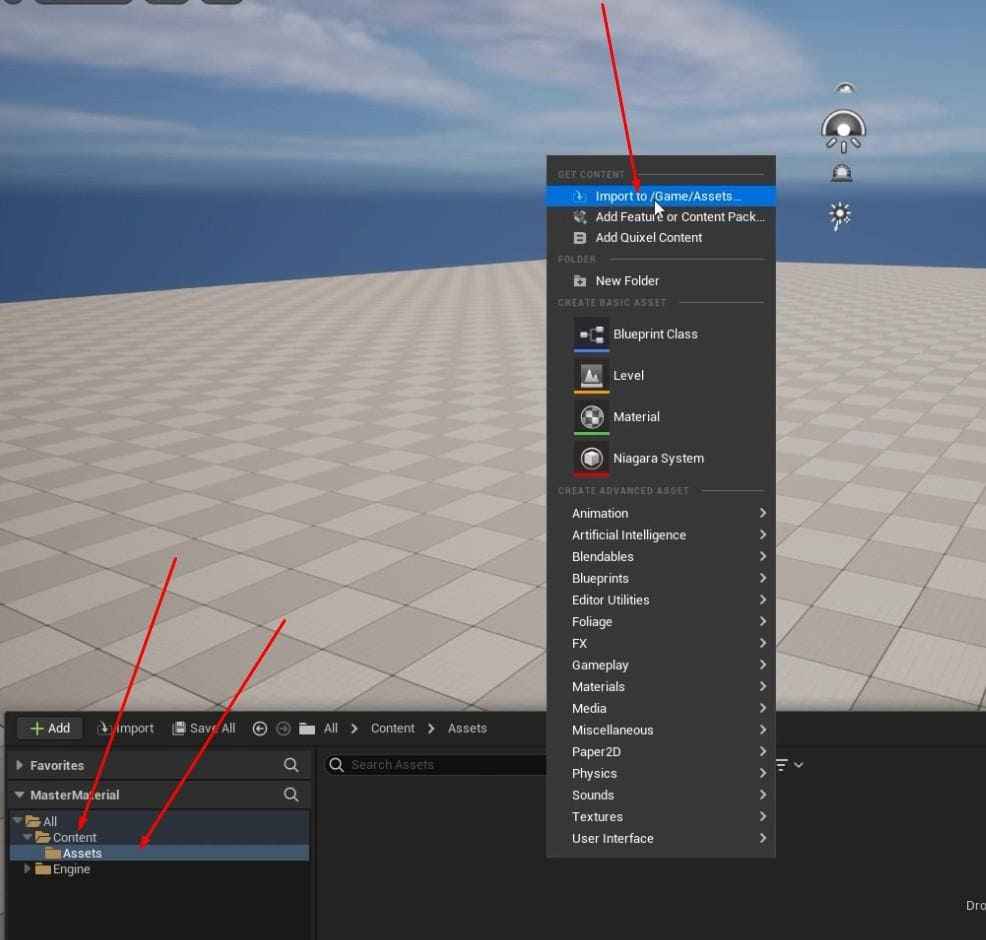
- Make an “Asset” folder, and bring the Spiderbot OBJ file.
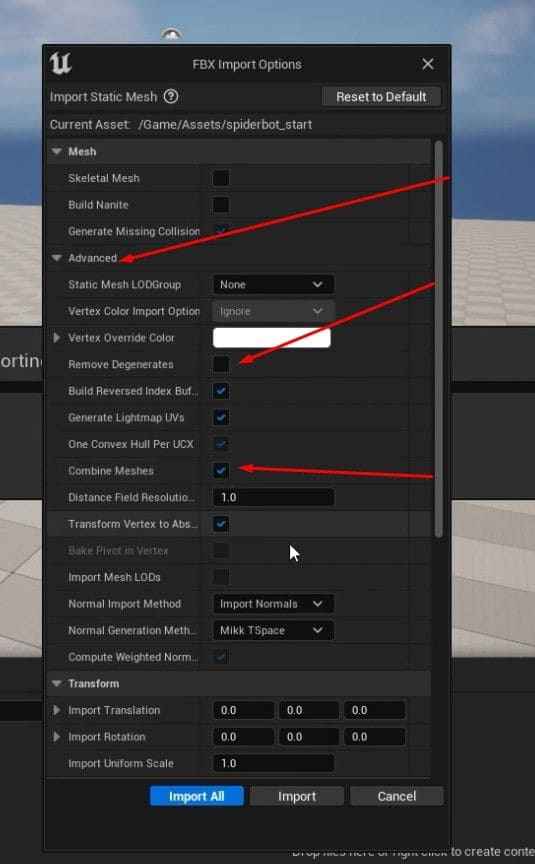
- When you import it, make sure to:
- Turn off “Remove Degenerates”
- Turn on “Combine Meshes”
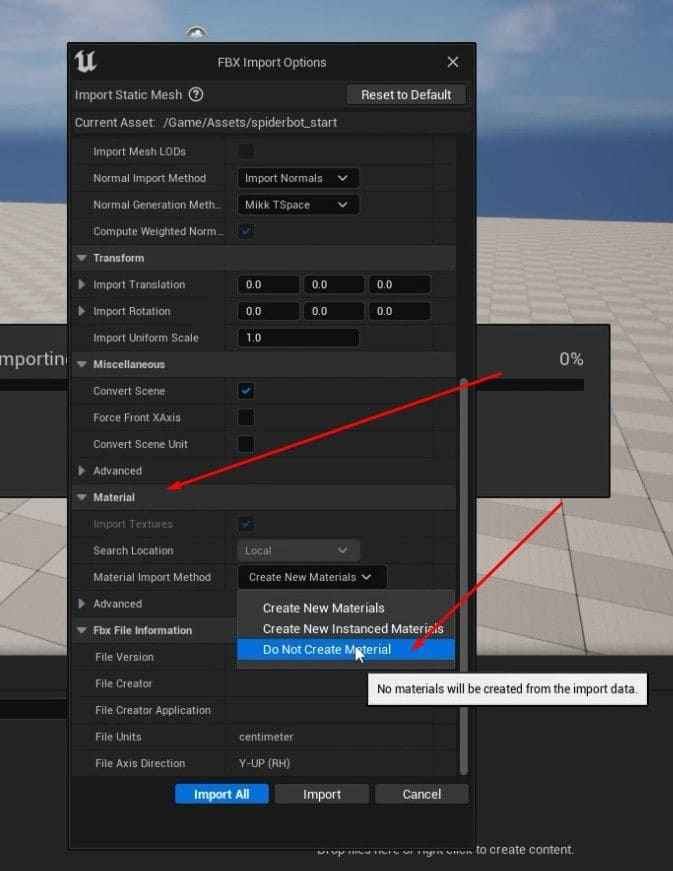
- Set “Material Import Method” to “Do Not Create Material”
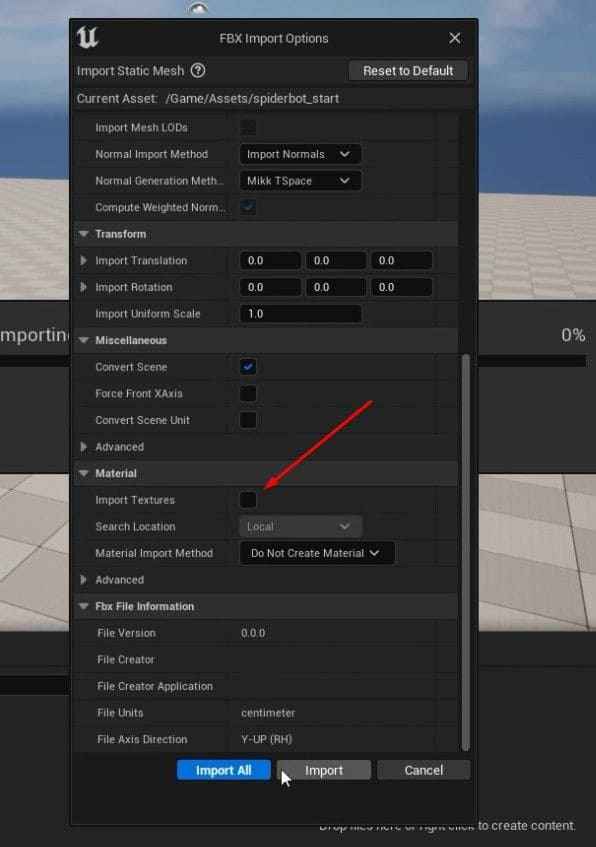
- Turn off “Import Textures”
- After everything is set up, click the “Import All” button.
Import:
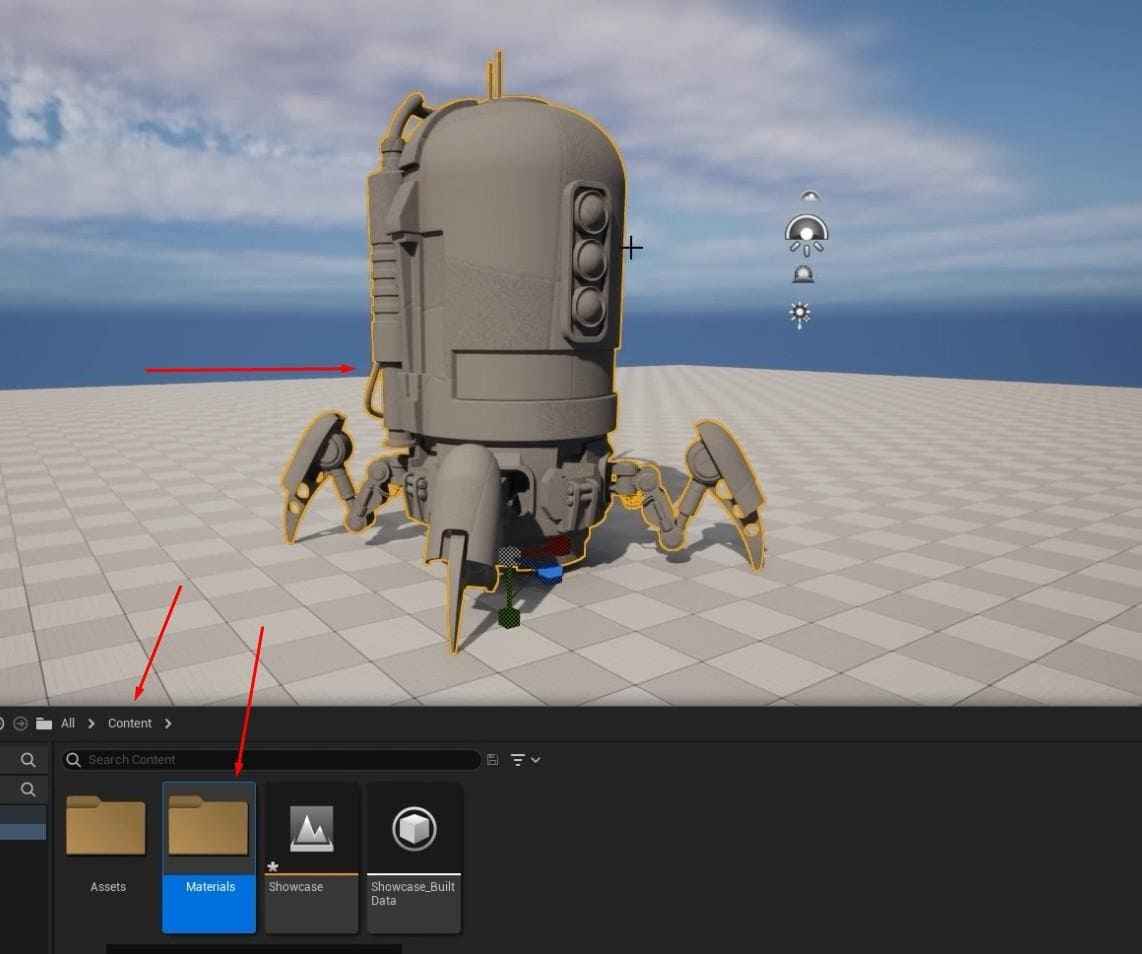
- Drag and drop the Spiderbot into your scene.
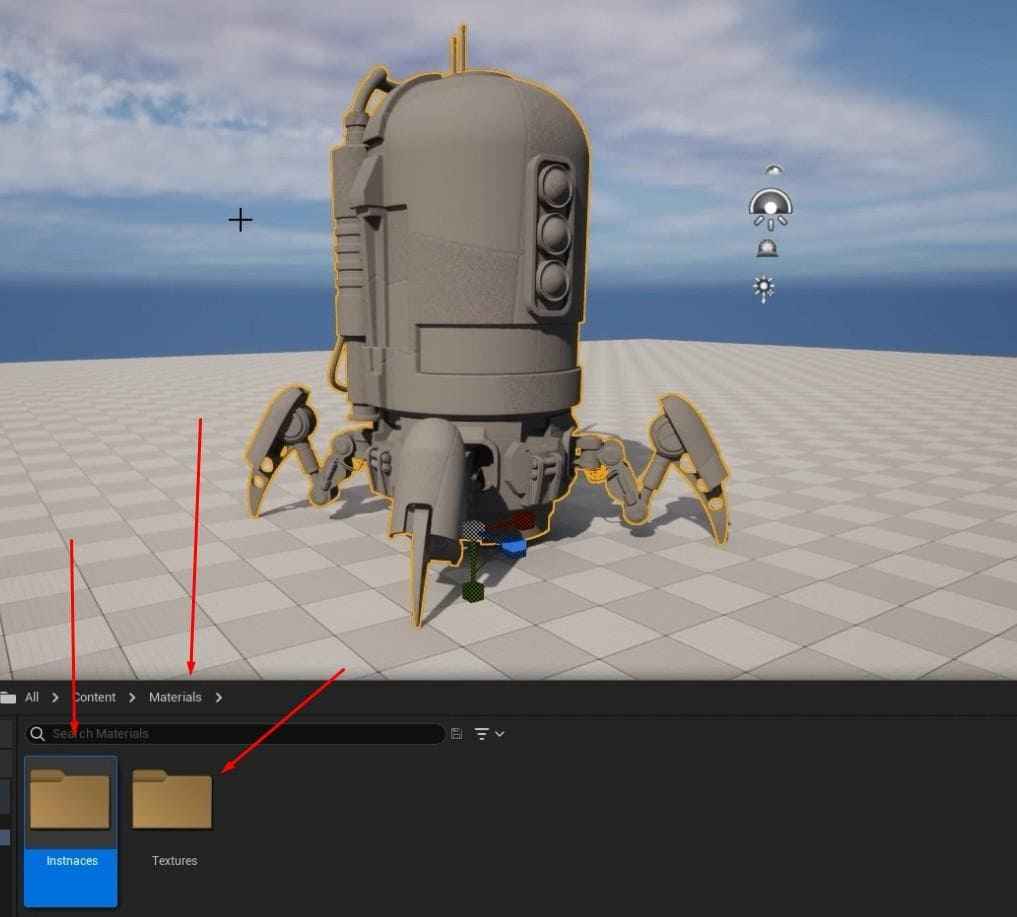
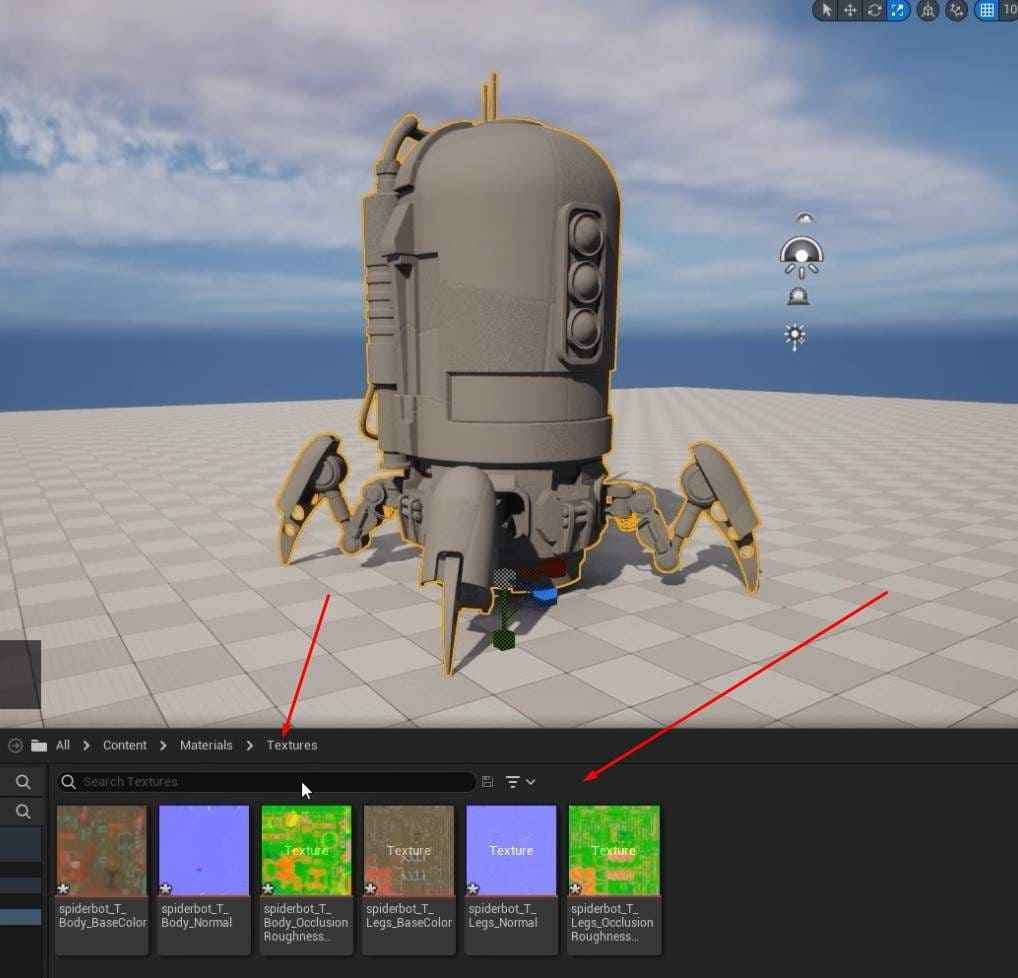
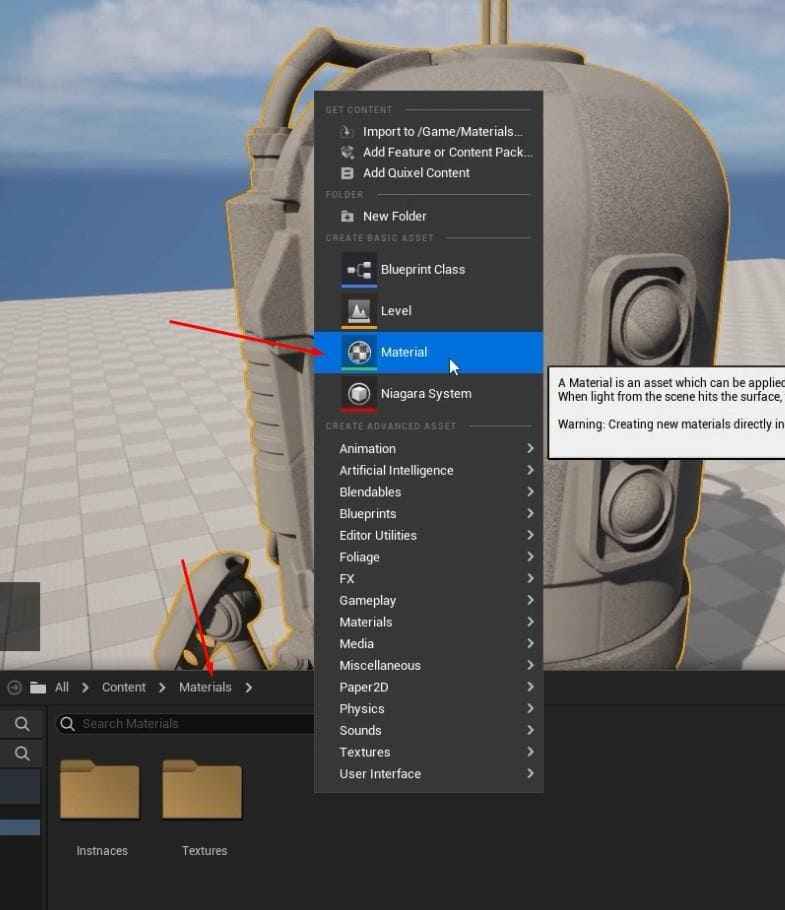
- Find the Content folder, and create a new folder called “Materials,” and inside it, create two subfolders: “Instances” and “Textures.”
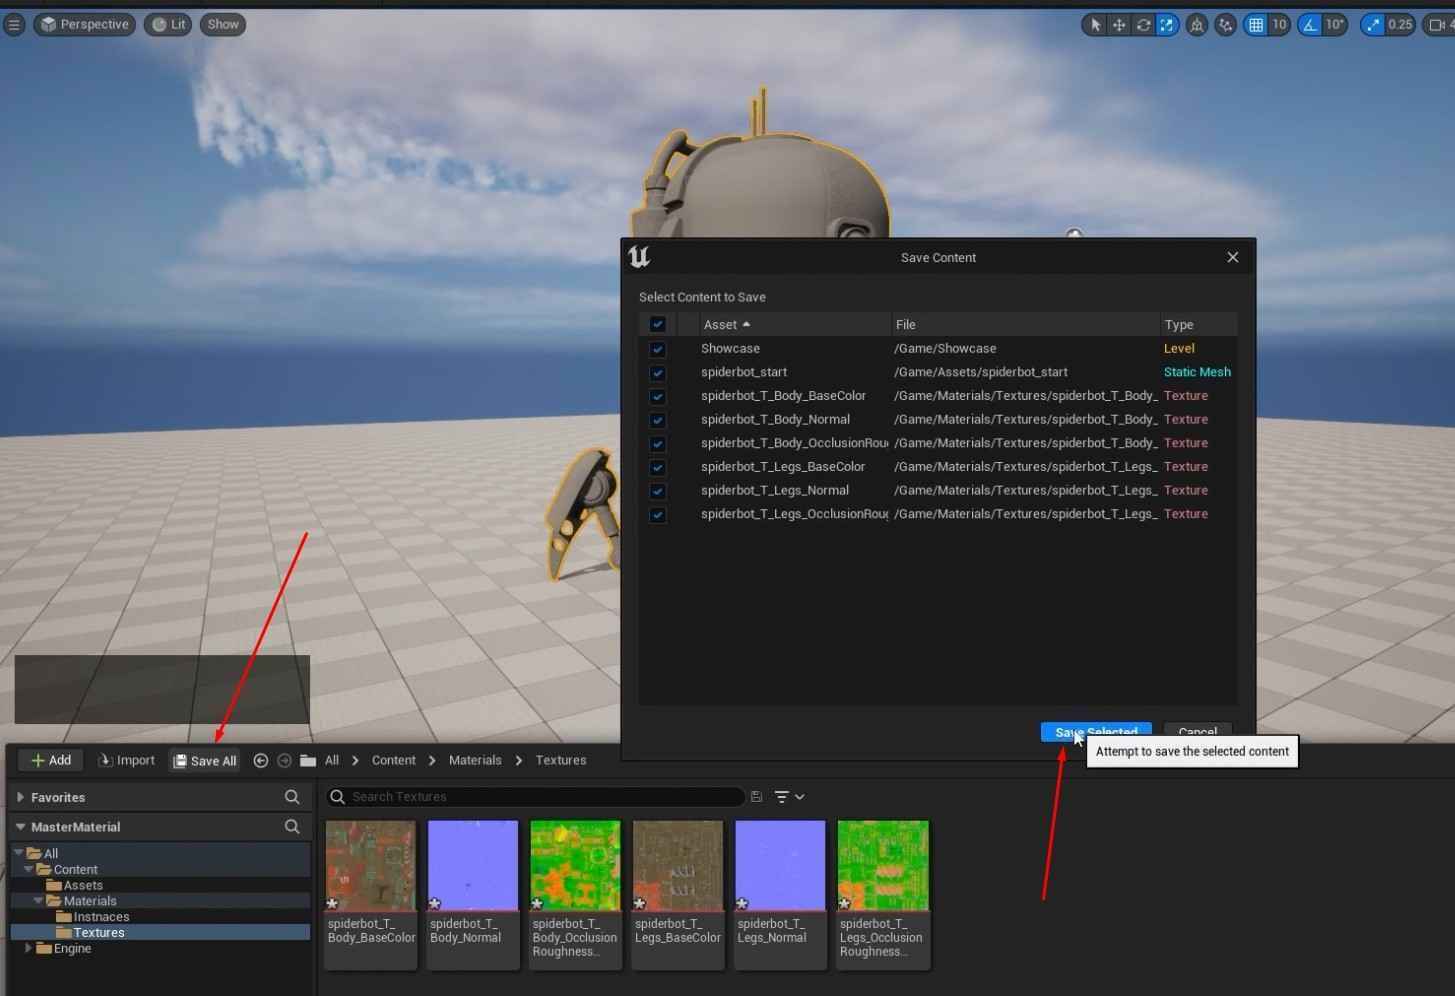
- Drag and drop the Spiderbot textures into the “Textures” folder.
- Make sure to regularly save your progress by clicking the “Save All” button in the content browser!
Creating the Master Materials in 3D Design:
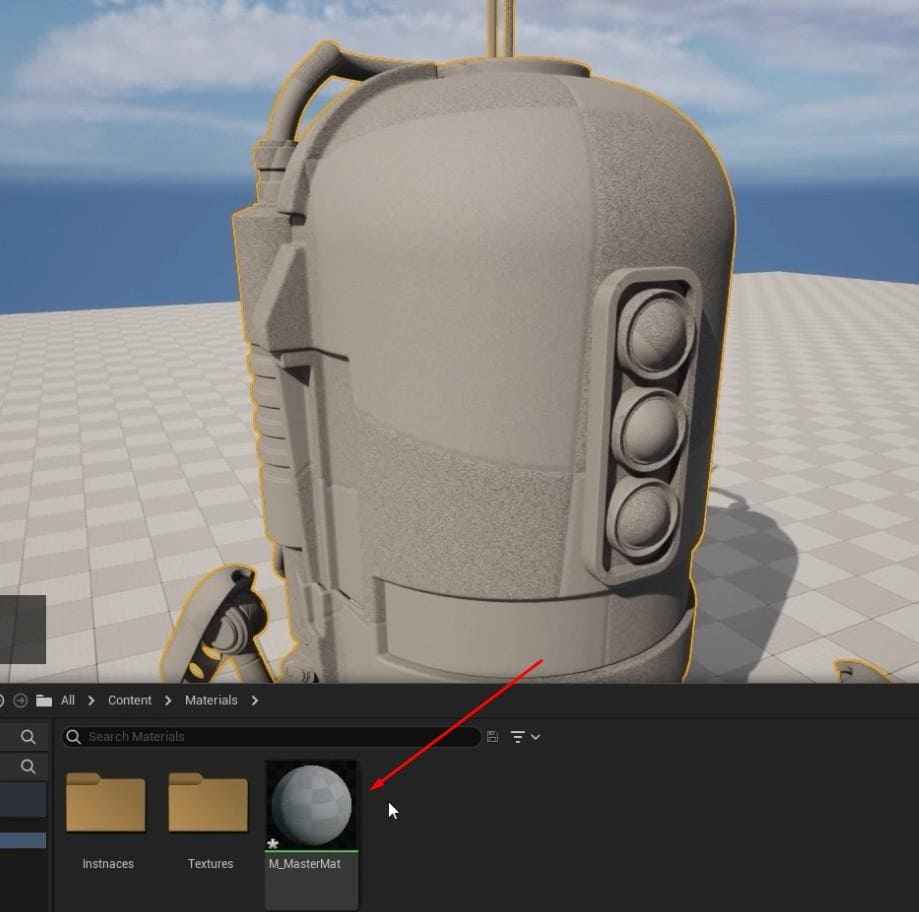
- In the Materials folder, right-click and create a new material called M_MasterMat.
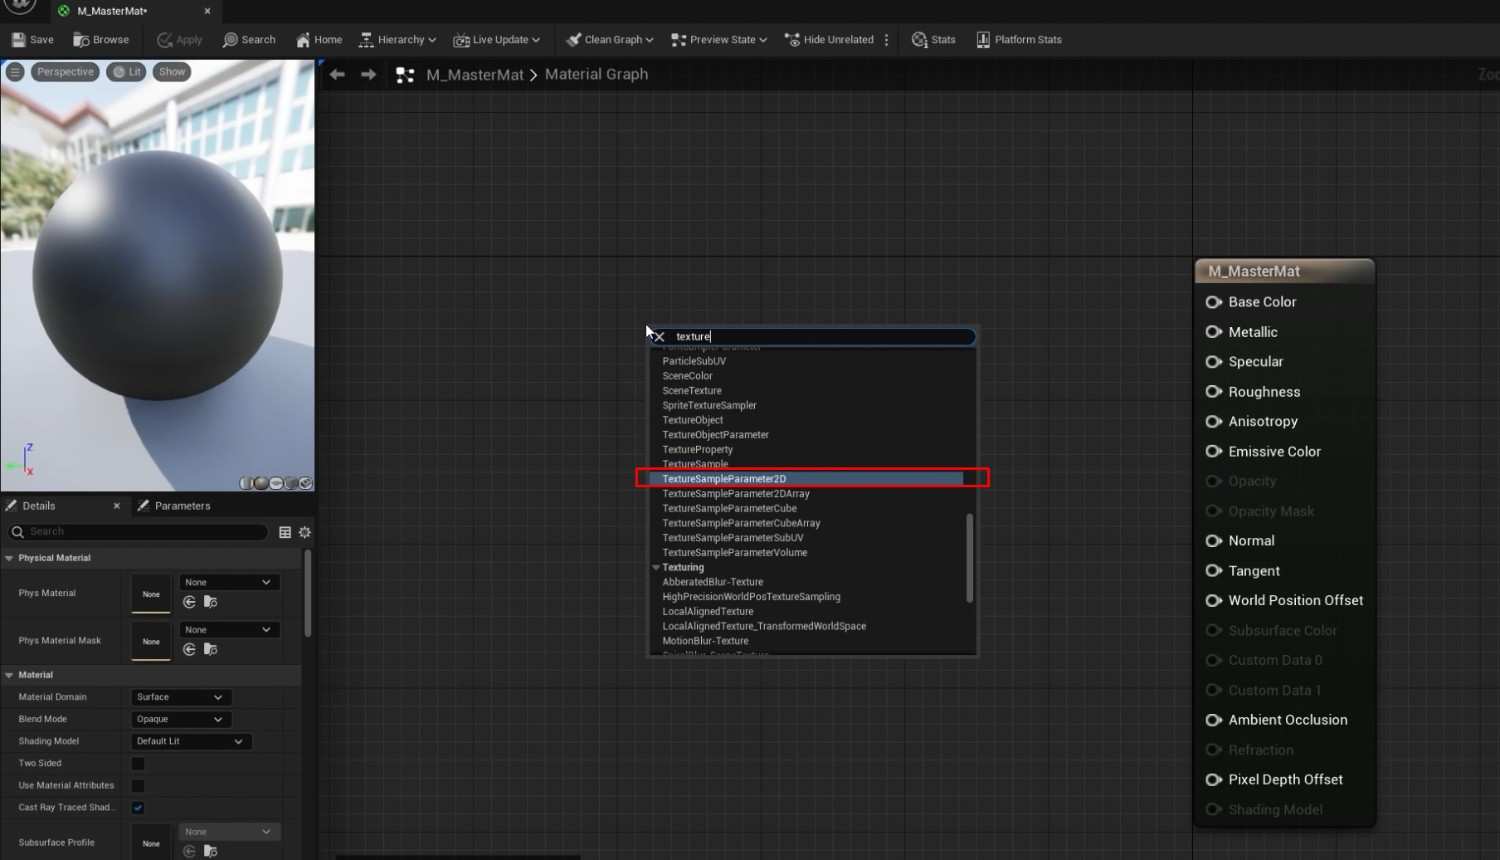
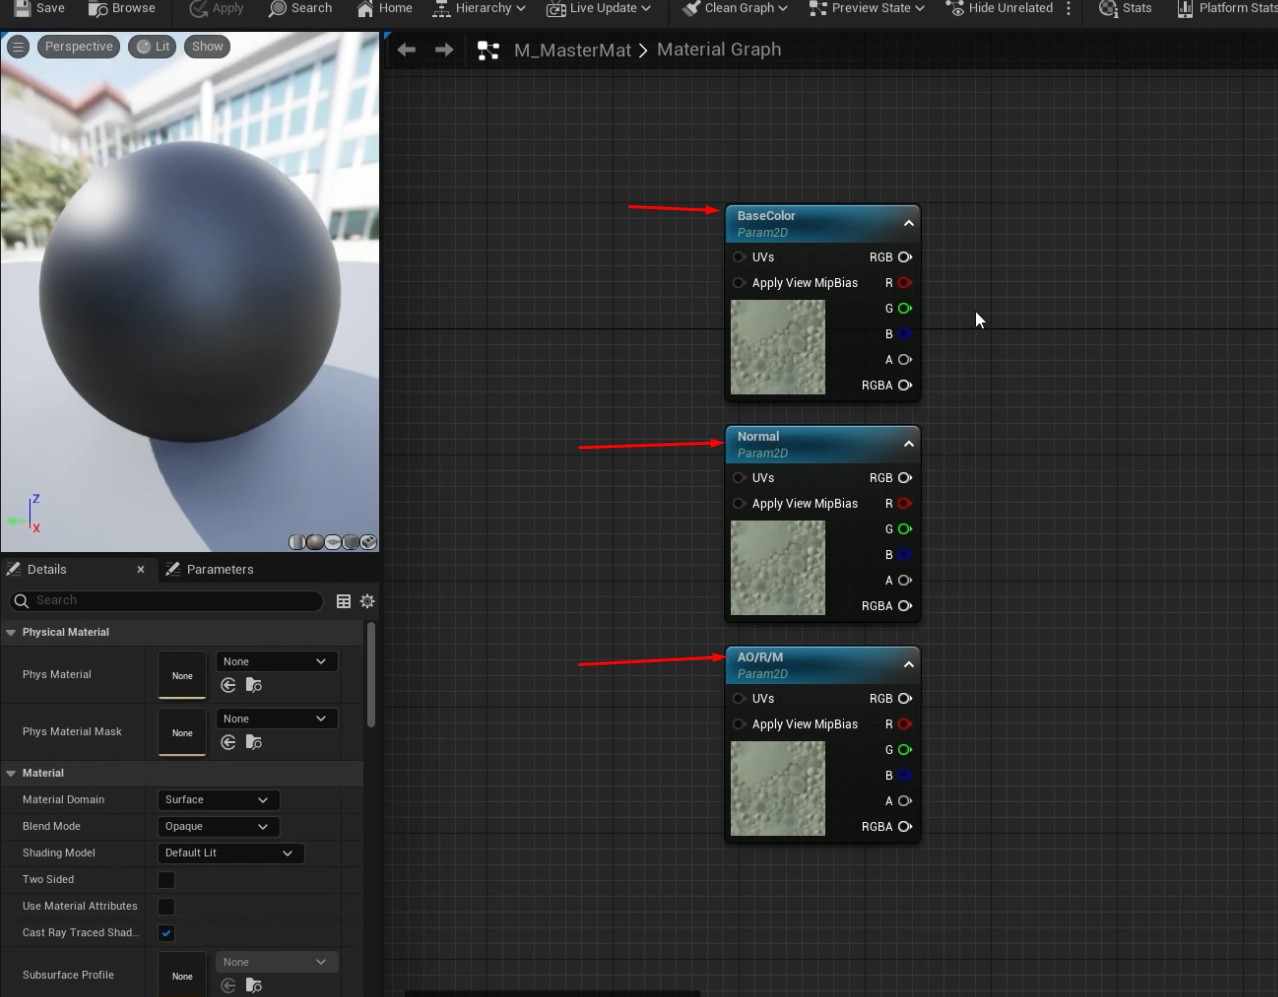
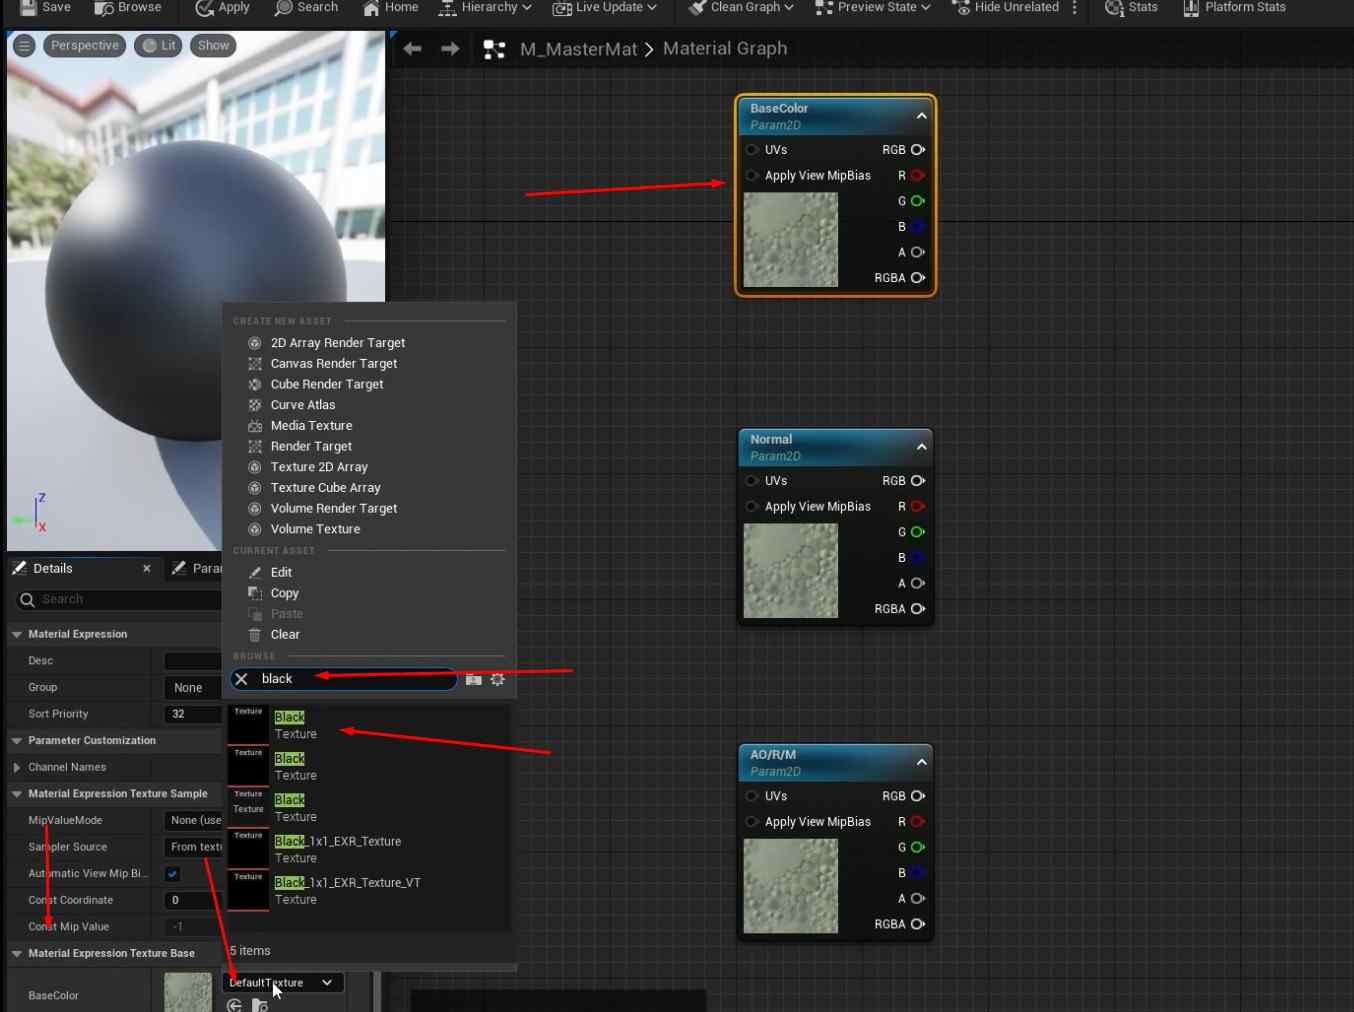
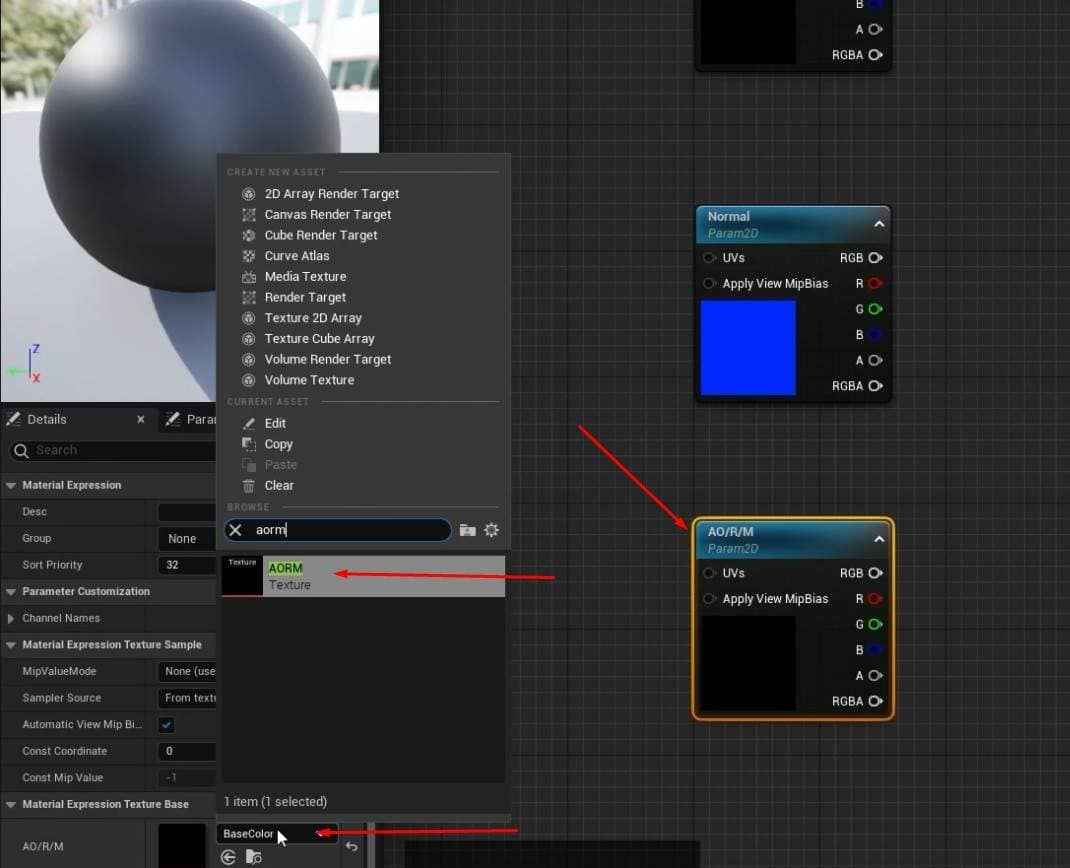
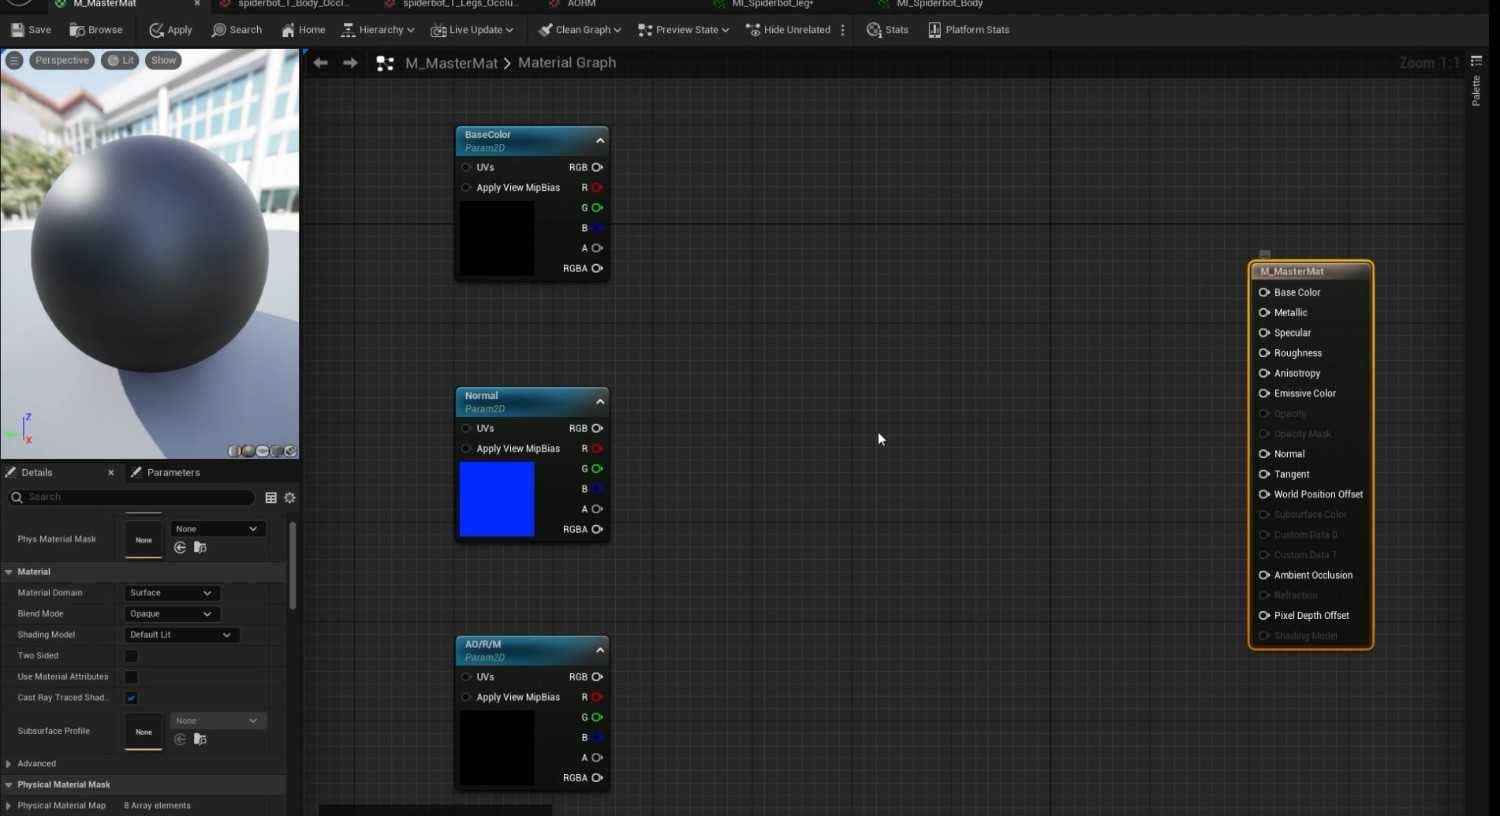
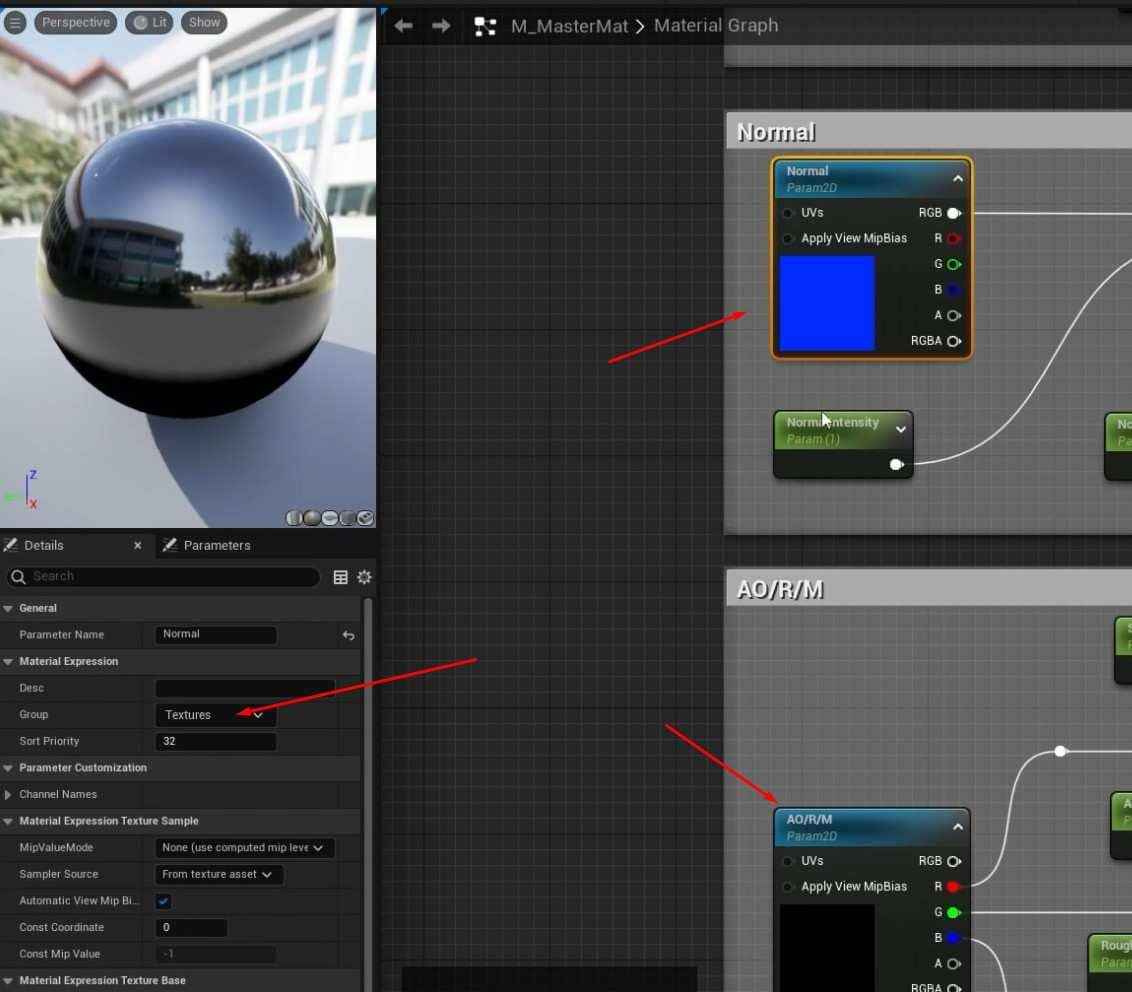
- Open the material graph and add multiple TextureSampleParameter2D nodes for the required texture maps (Base Color, Normal, AORM).
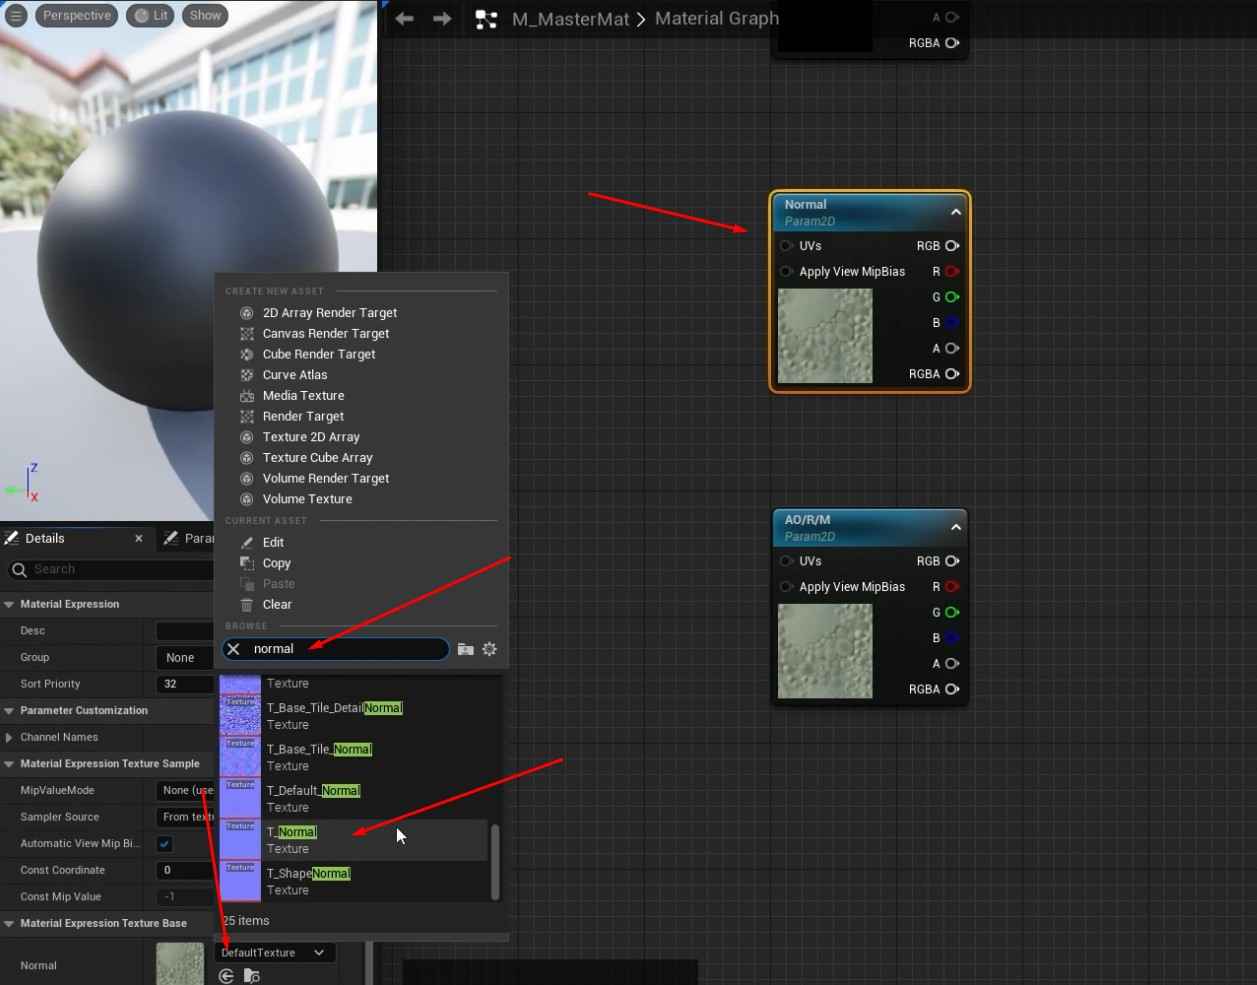
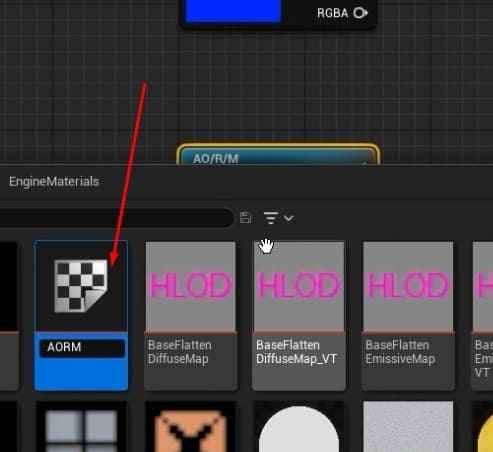
- Assign black placeholder textures for the Base Color and AORM and the default Unreal texture for Normal.
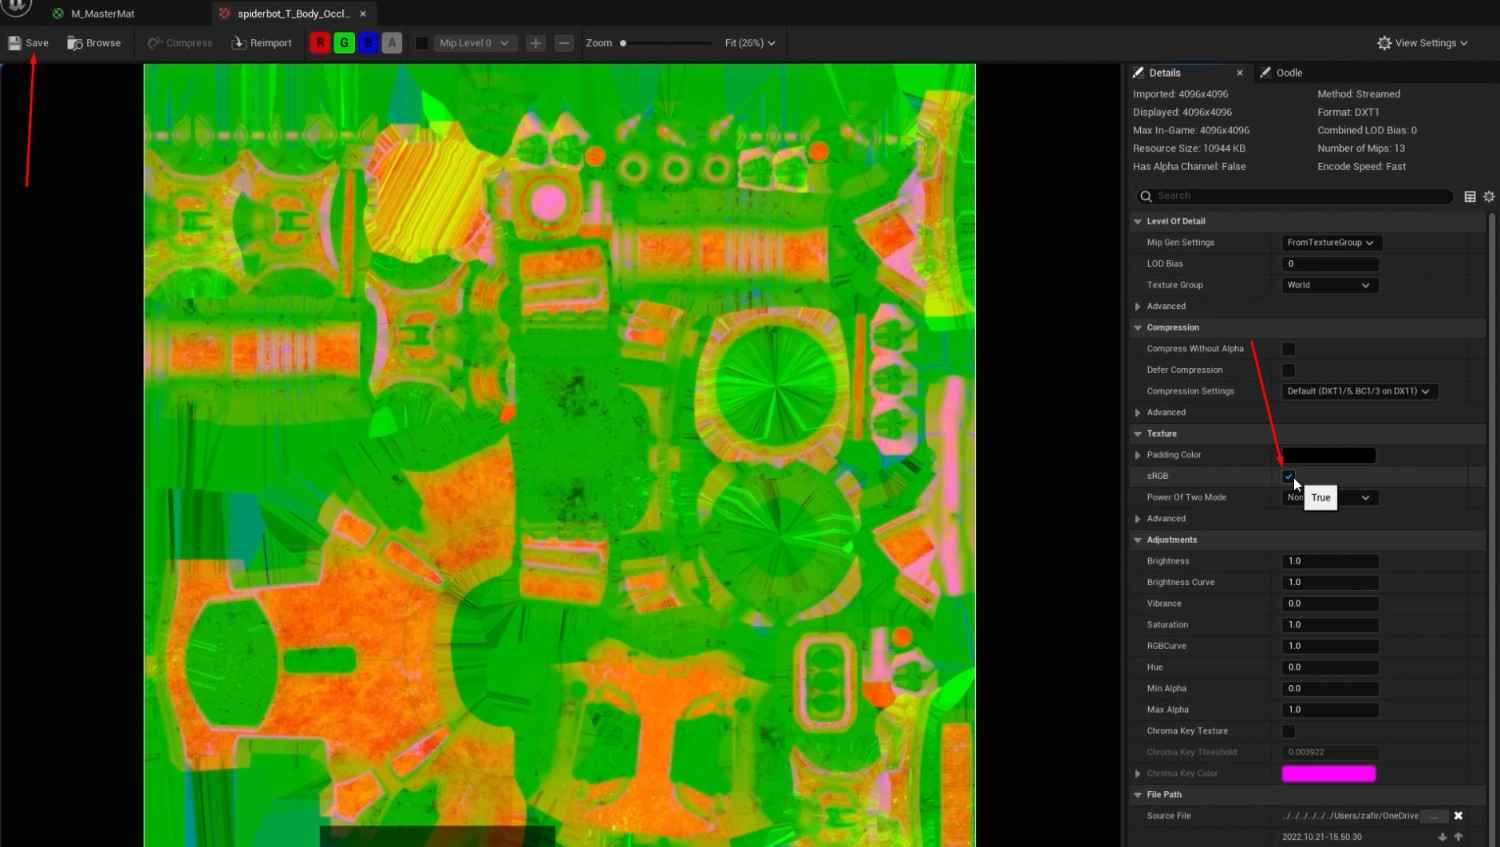
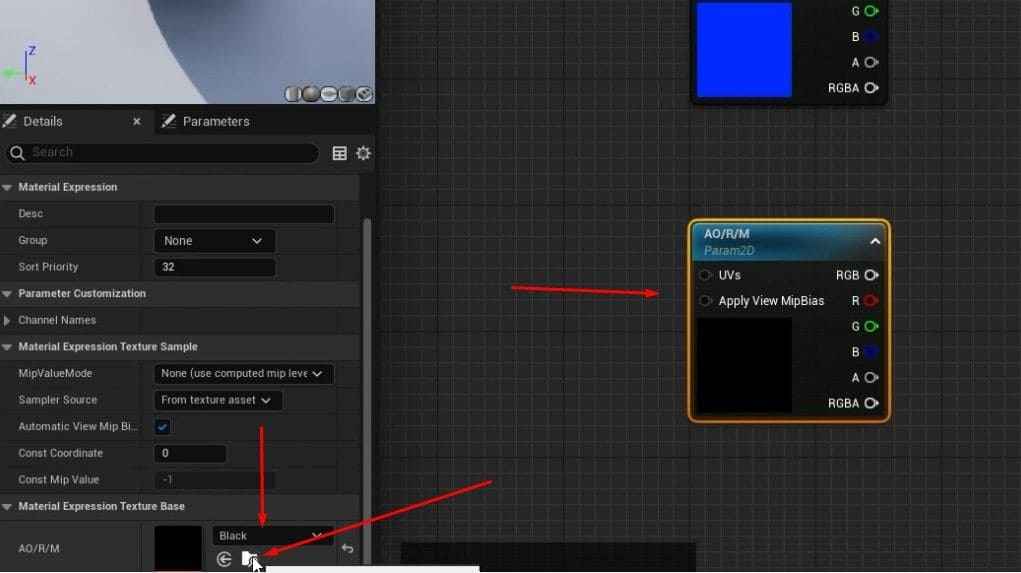
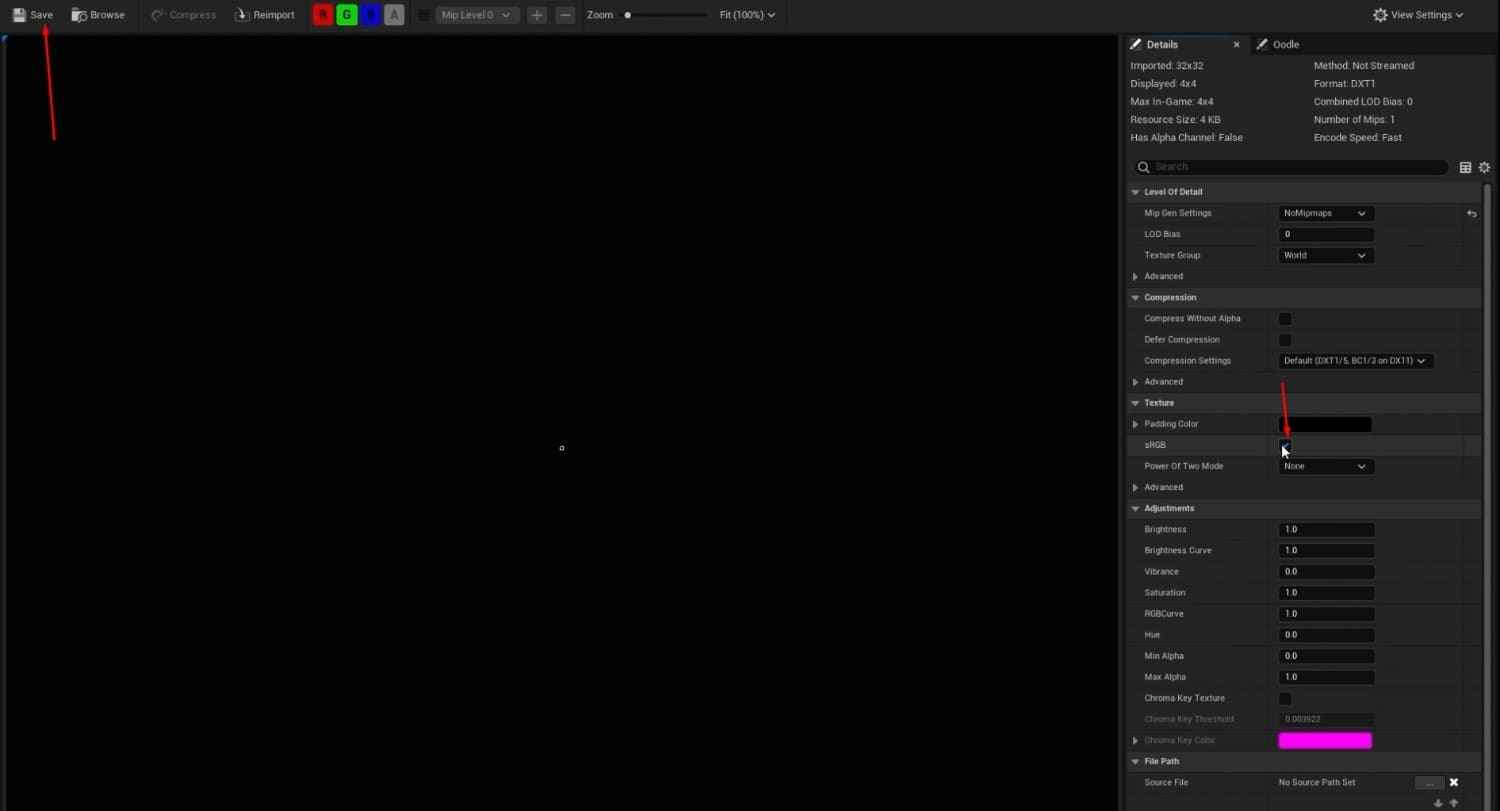
- For AORM, you’ll need to take extra steps like turning off sRGB and creating a black texture for the map.
- Rename each TextureSample node according to the texture map it represents (e.g., BaseColor, Normal, AORM).
- Confirm everything is linked correctly in the material graph, and save the changes.
Material Instances:
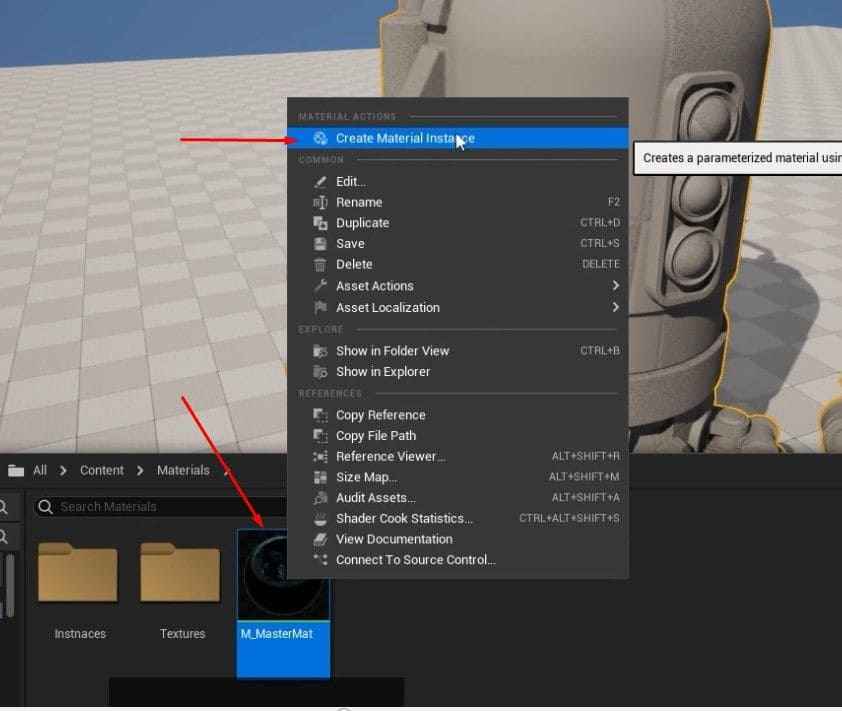
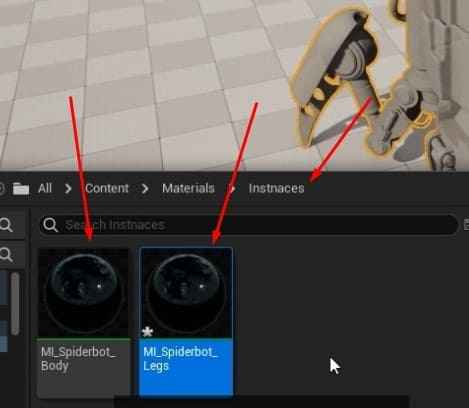
- After setting up the Master Material, right-click and create two material instances: MI_Spiderbot_Body and MI_Spiderbot_Legs.
- Open each instance, enable the placeholders for the texture maps, and drag and drop the corresponding textures for the body and legs.
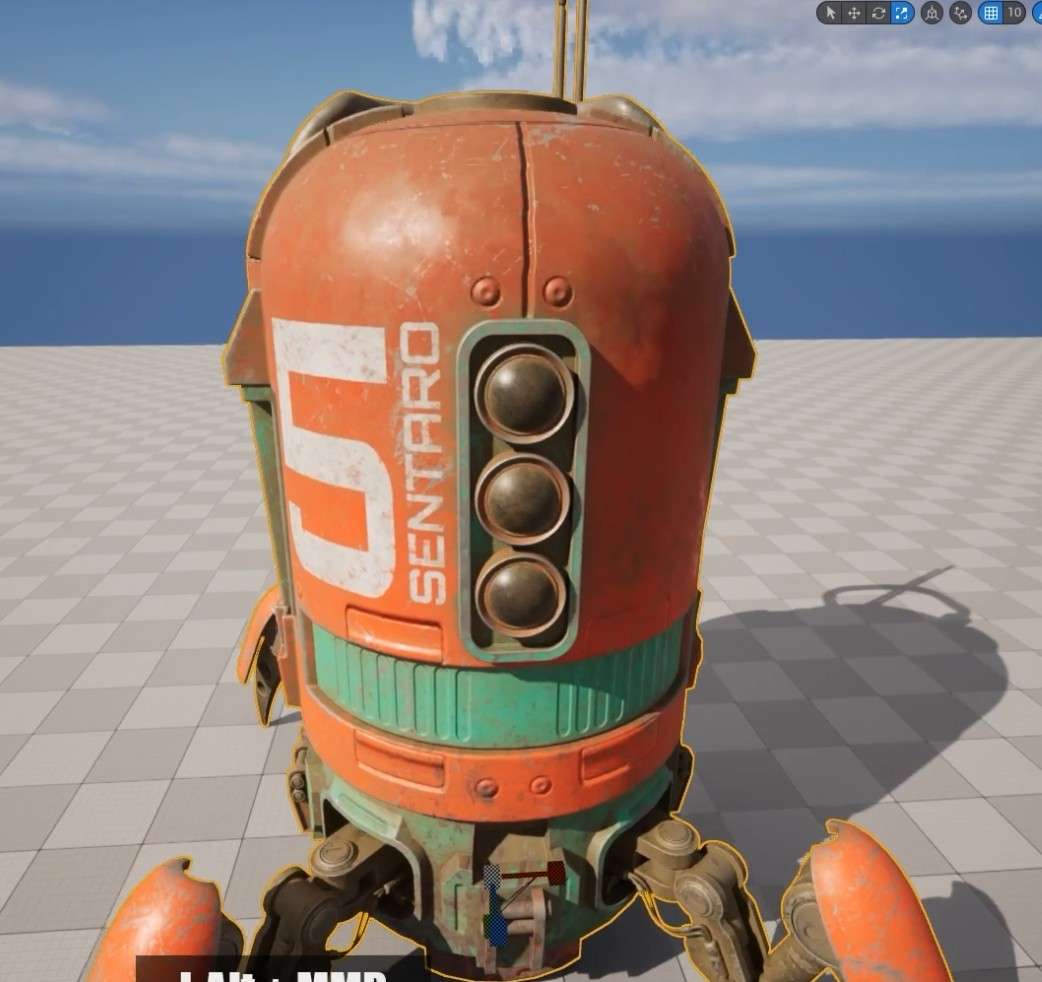
- To see the changes in effect, apply these material instances to your Spiderbot in your scene.
- Save any changes and close it afterwards.
Improving Master Materials in 3D Design:
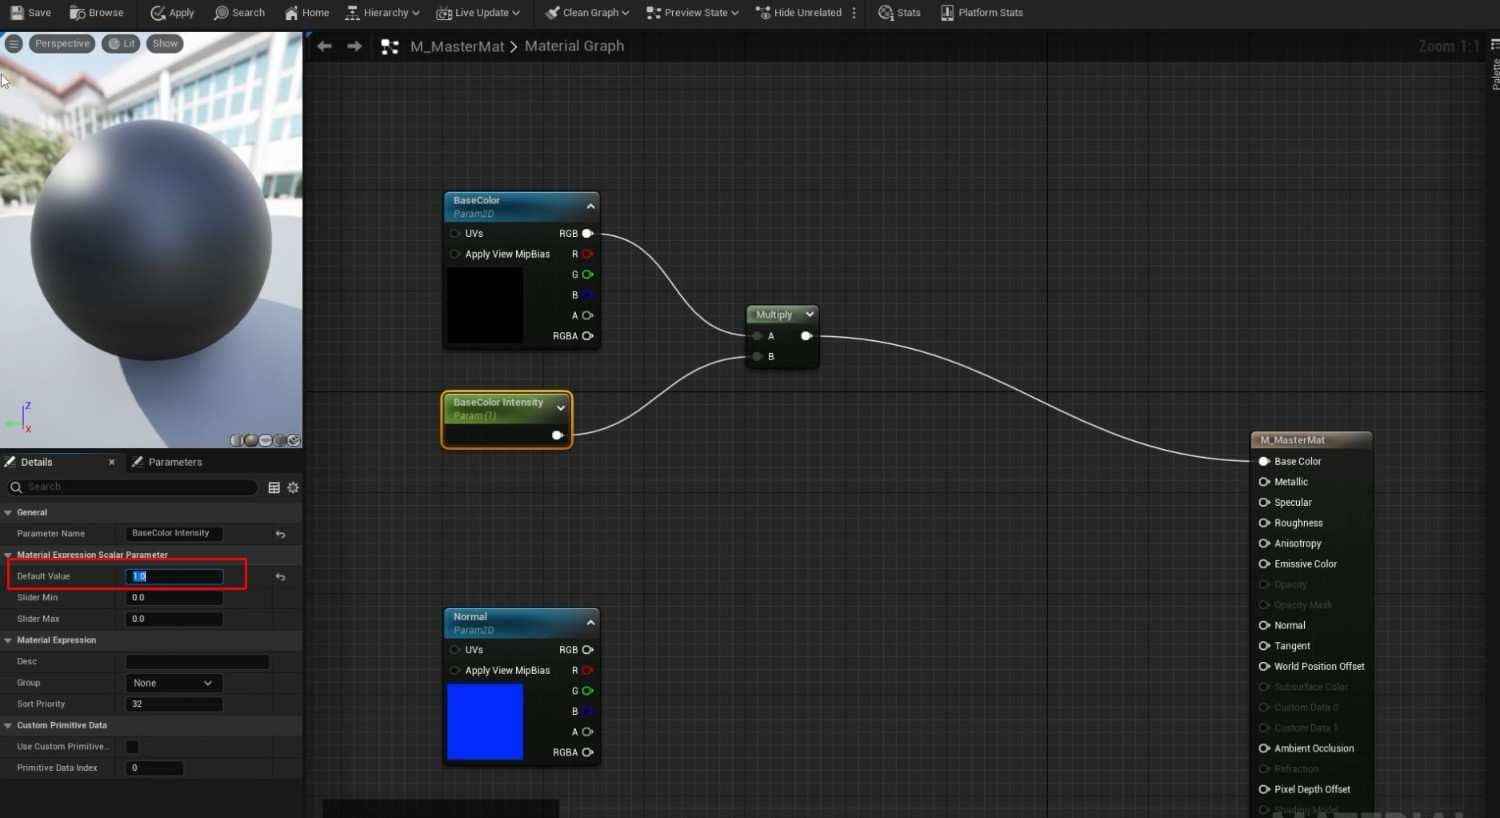
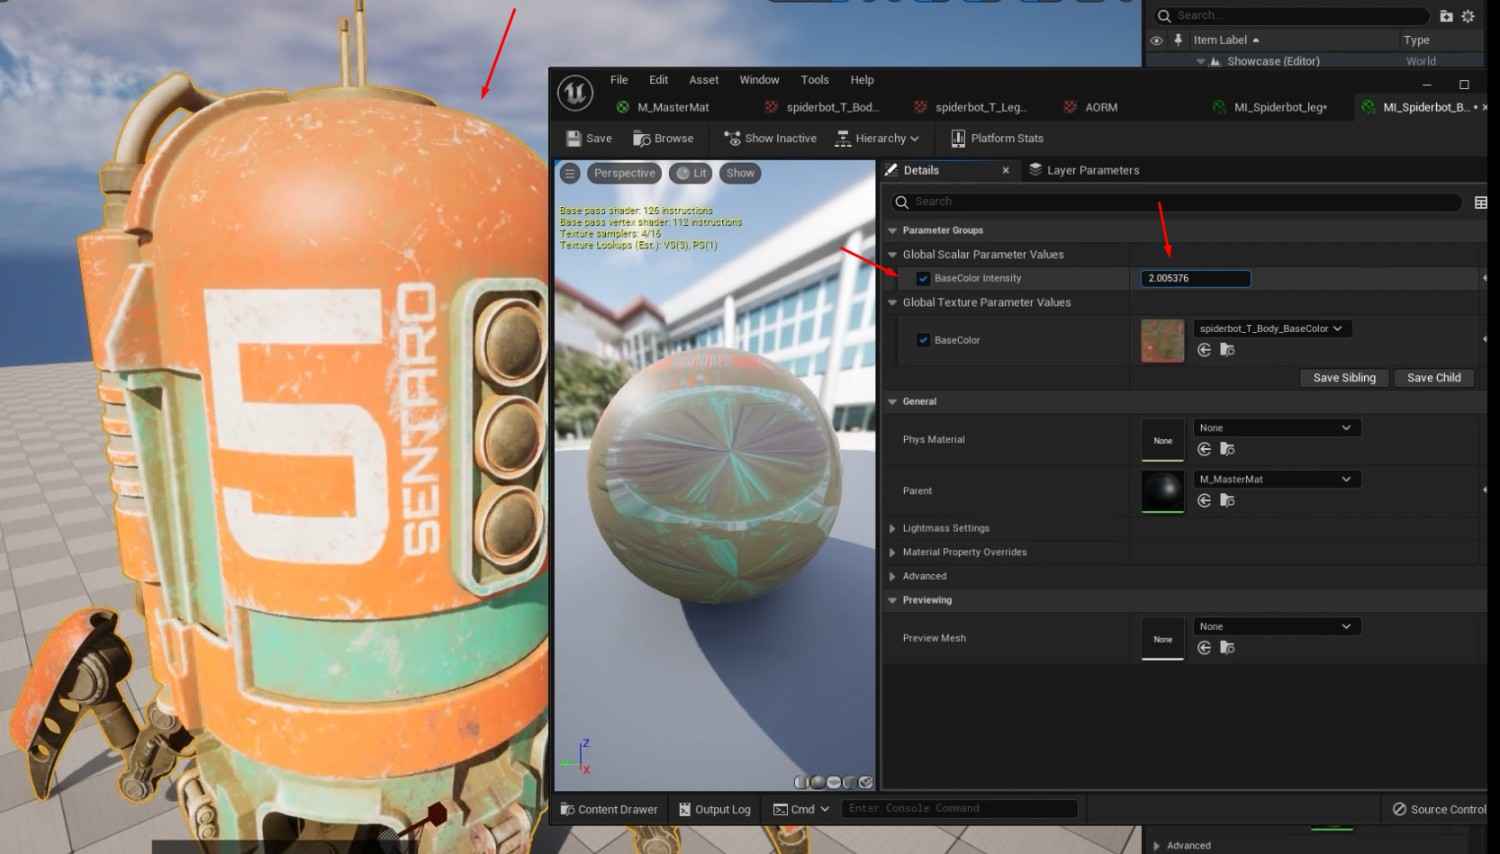
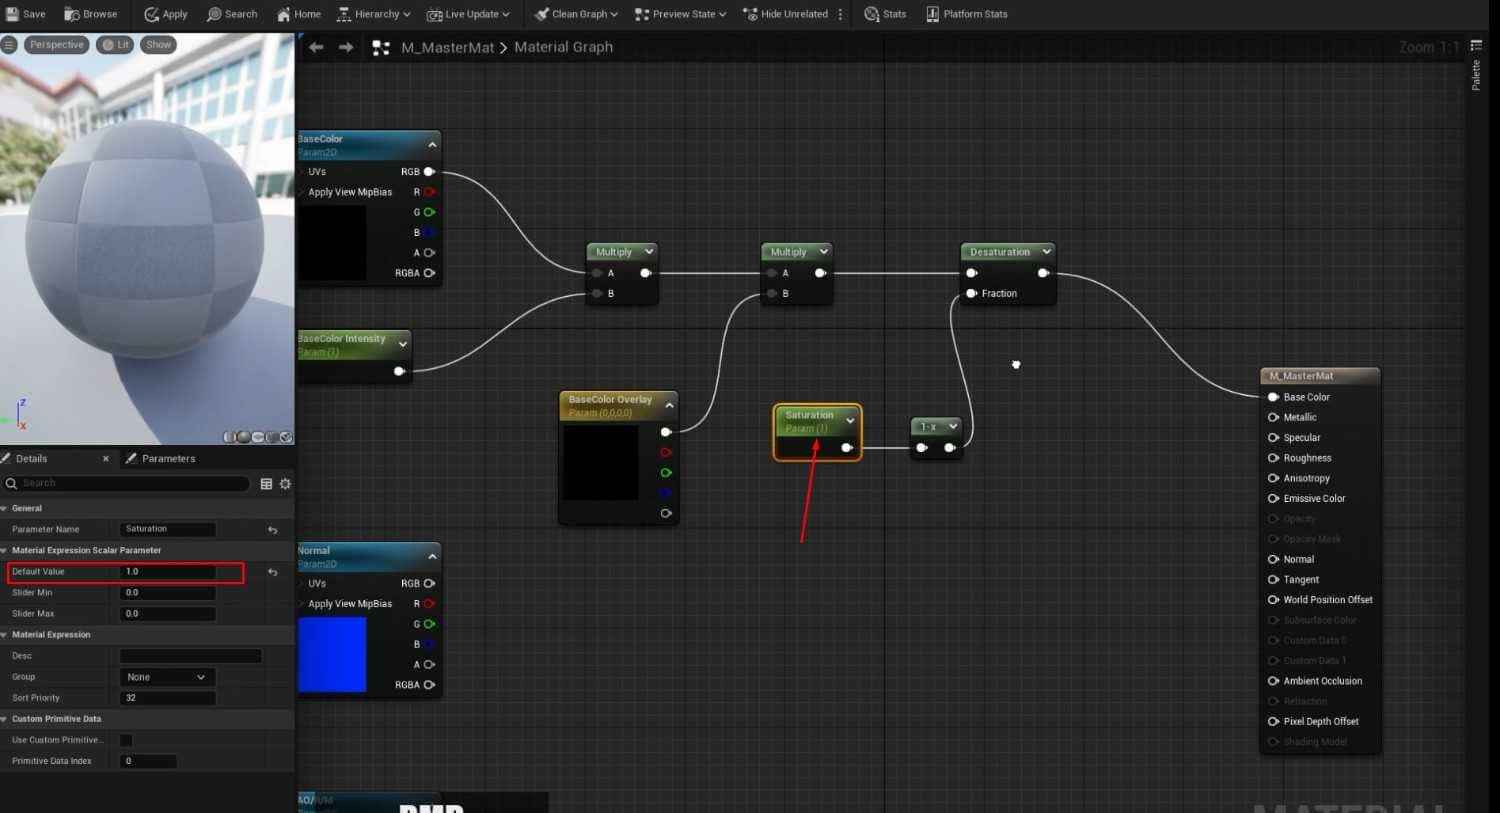
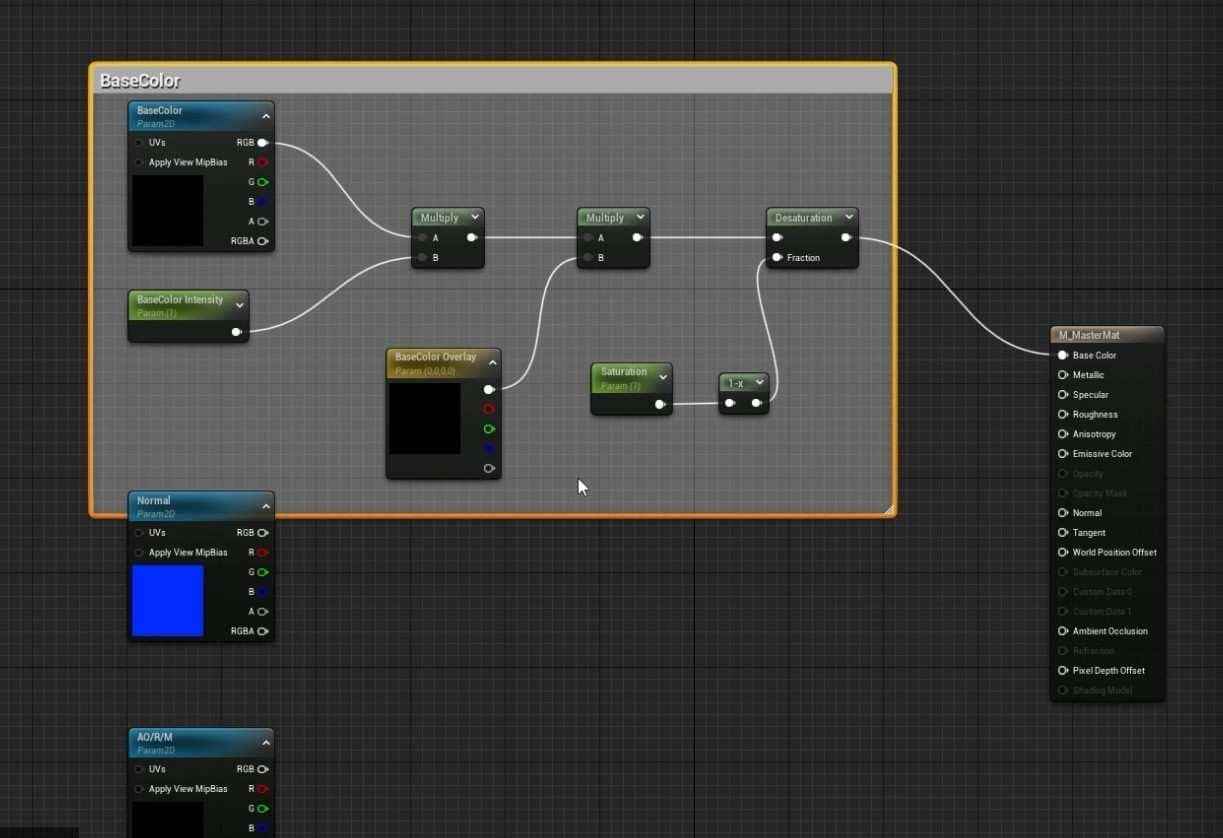
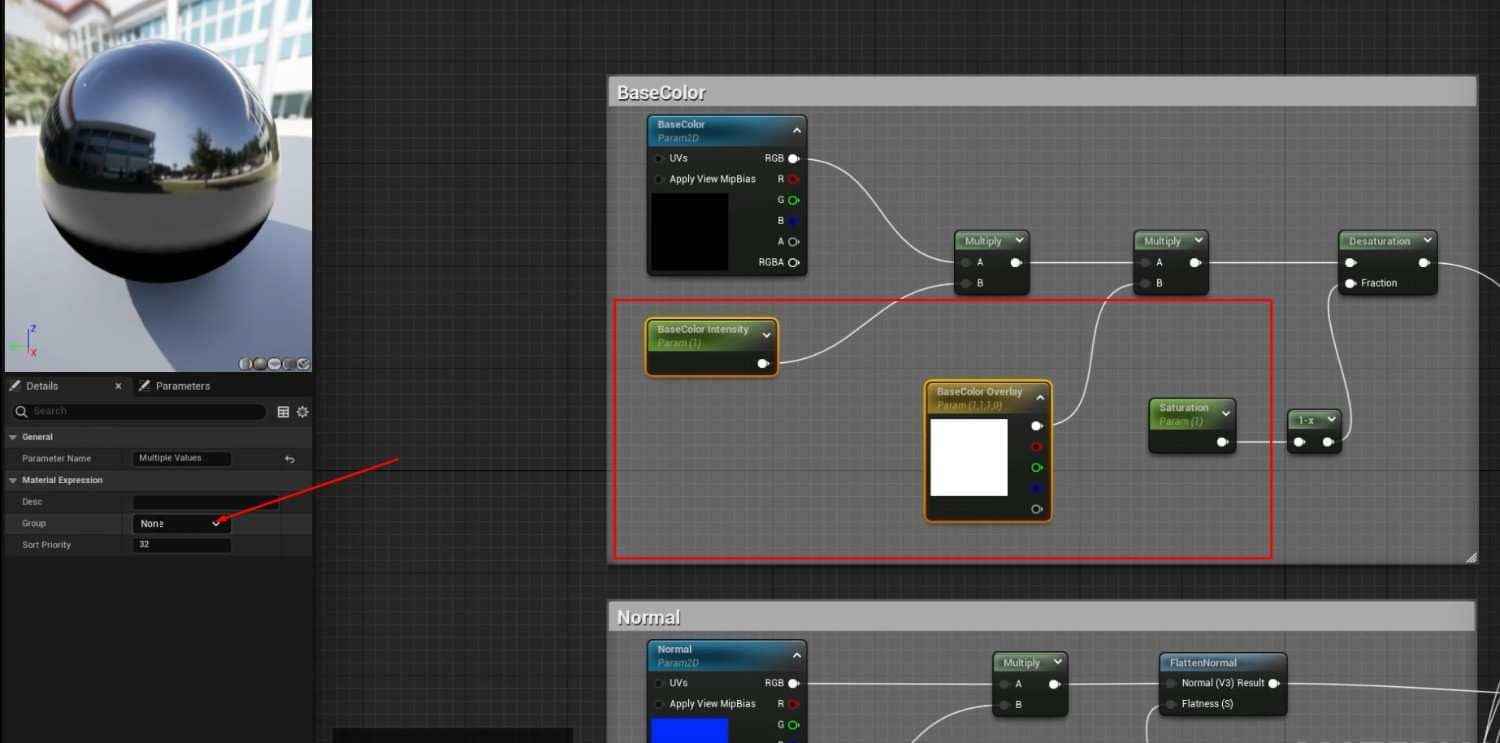
- To control the brightness of the base color in the Master Material graph, add a Multiply node and a Parameter node named BaseColor Intensity. Set its default value to 1.
2. Add Saturation and a new overlay over the base color nodes for more control BaseColor Overlay:
-
- To adjust the saturation level of the base color for Saturation, use a Desaturation node and a parameter.
- For BaseColor Overlay, add a Vector Parameter as BaseColor Overlay to adjust the base color.
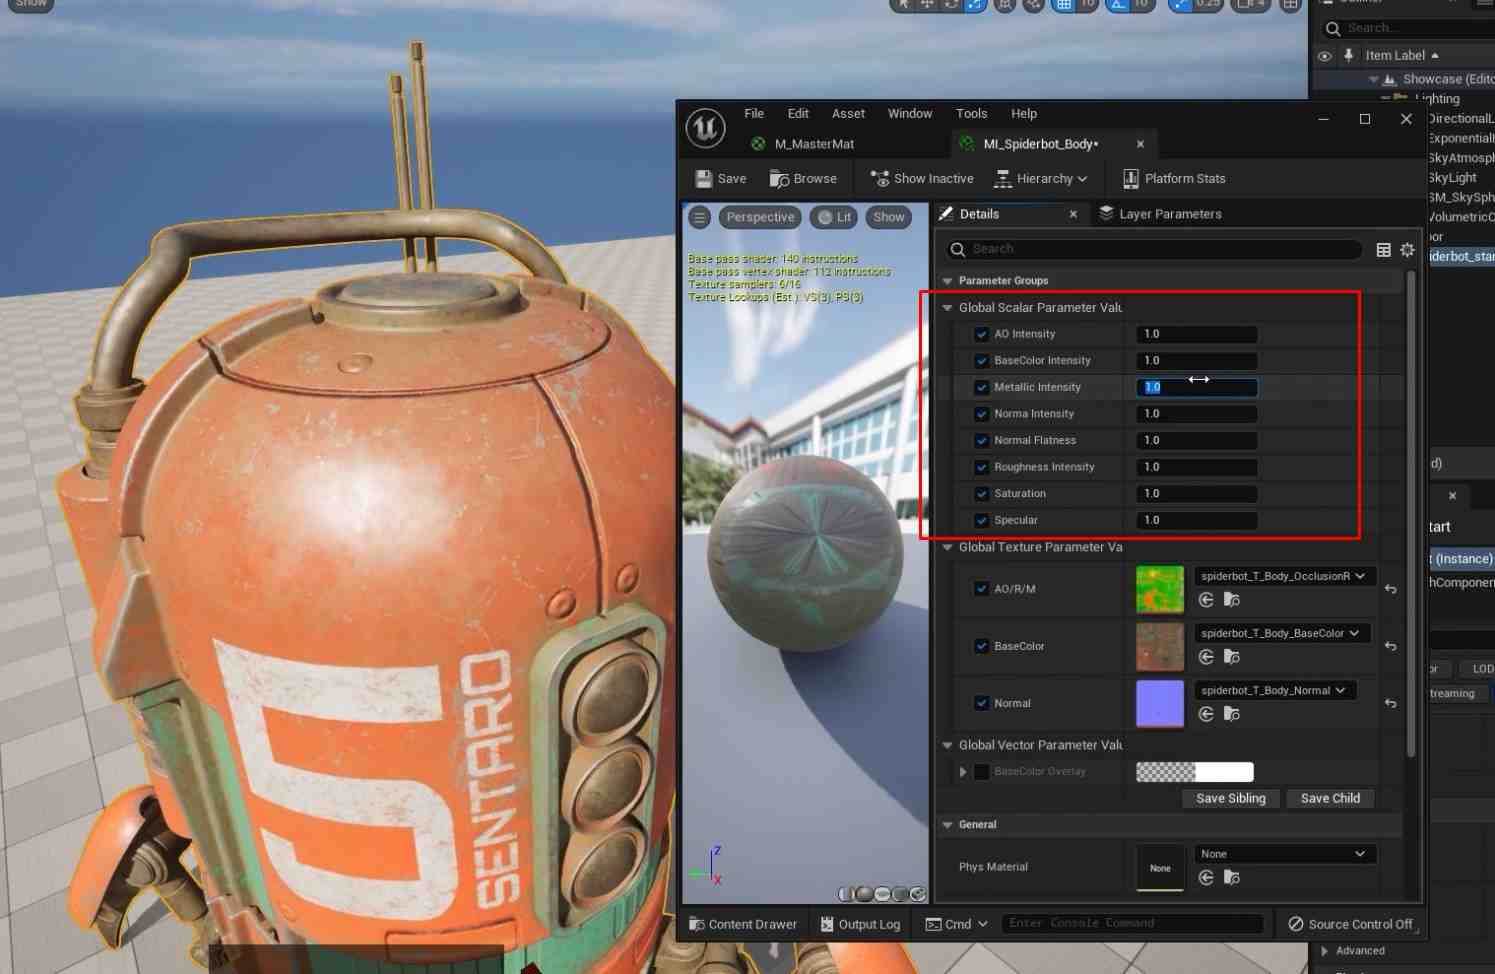
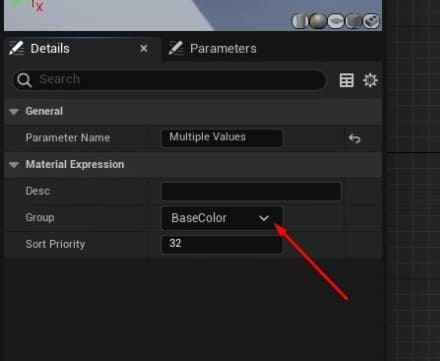
Group these parameters (BaseColor Intensity, BaseColor Overlay, and Saturation) under a group name like BaseColor for better organization within the Material Instances.
Organizing and Customizing:
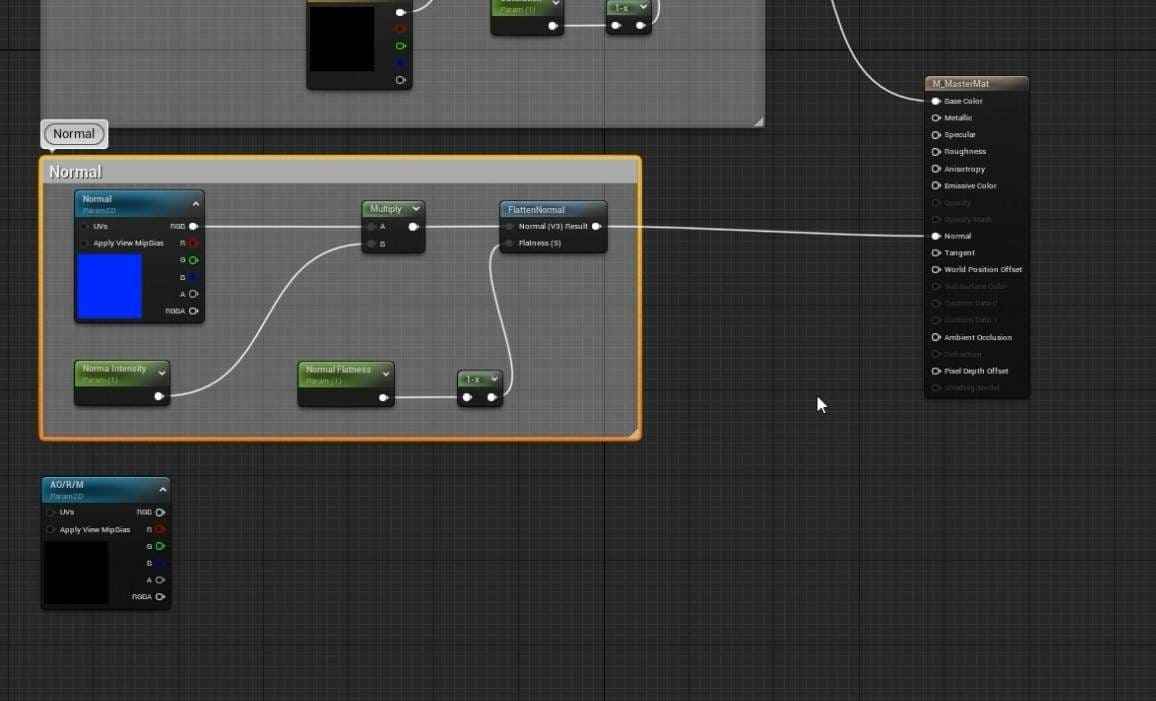
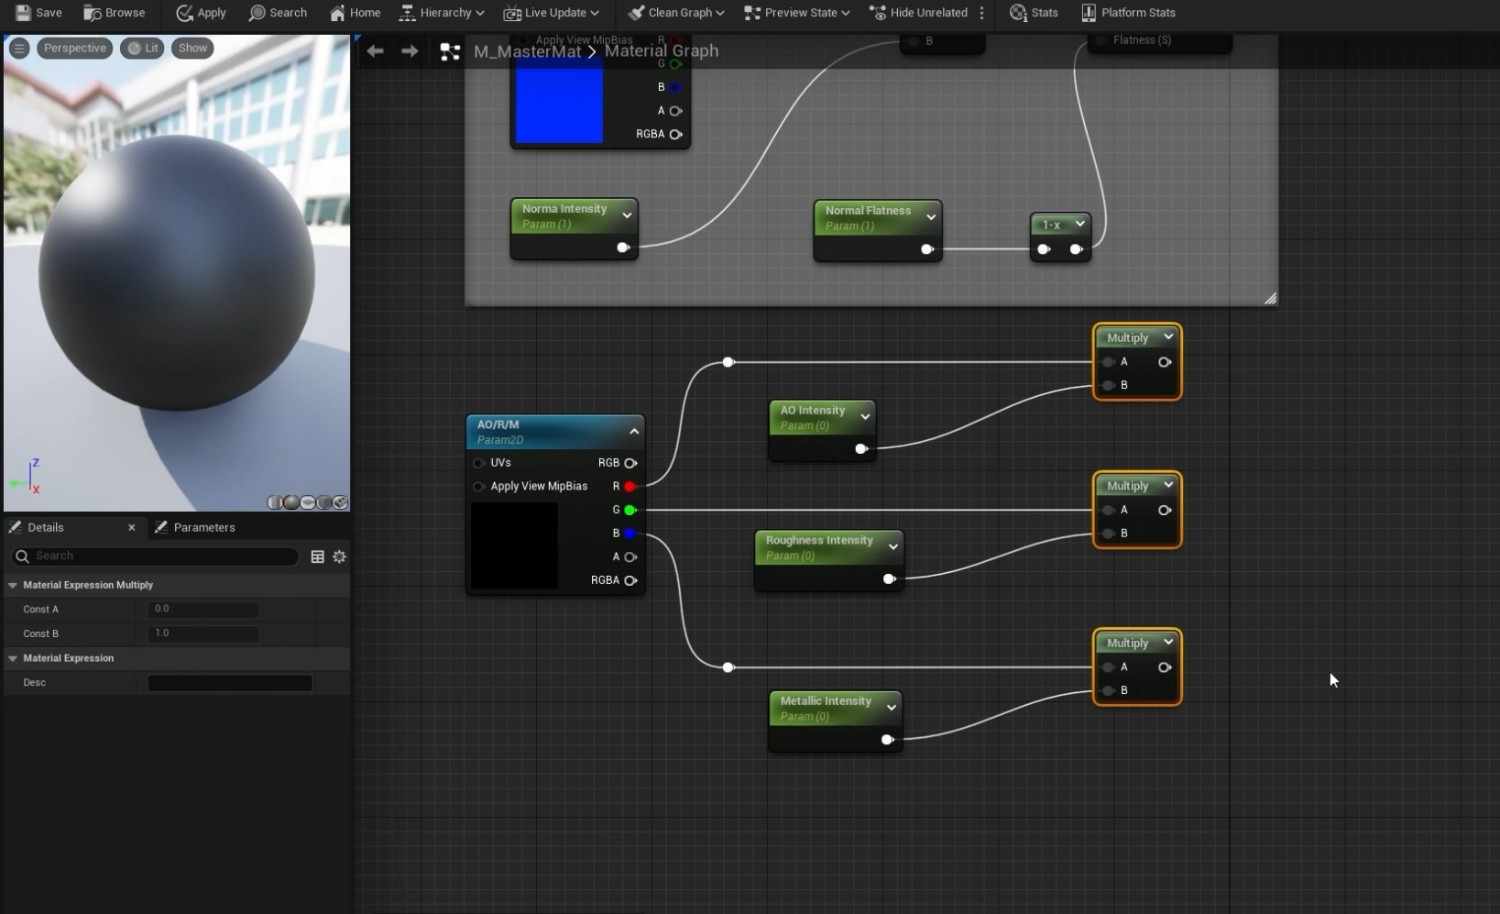
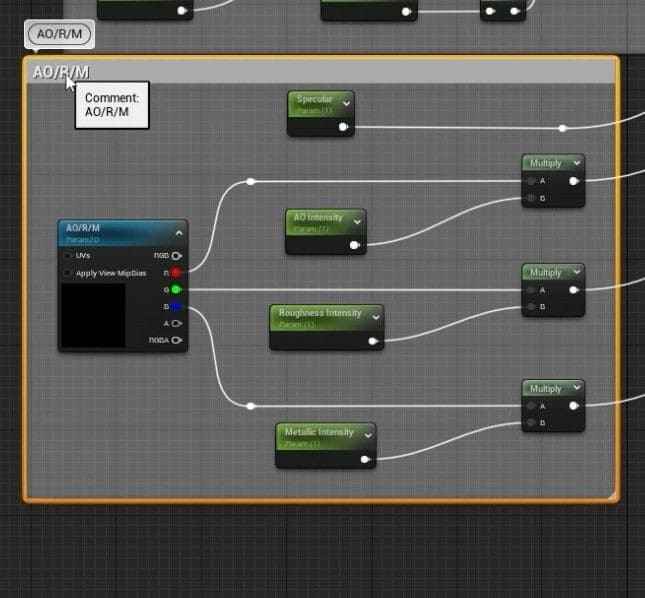
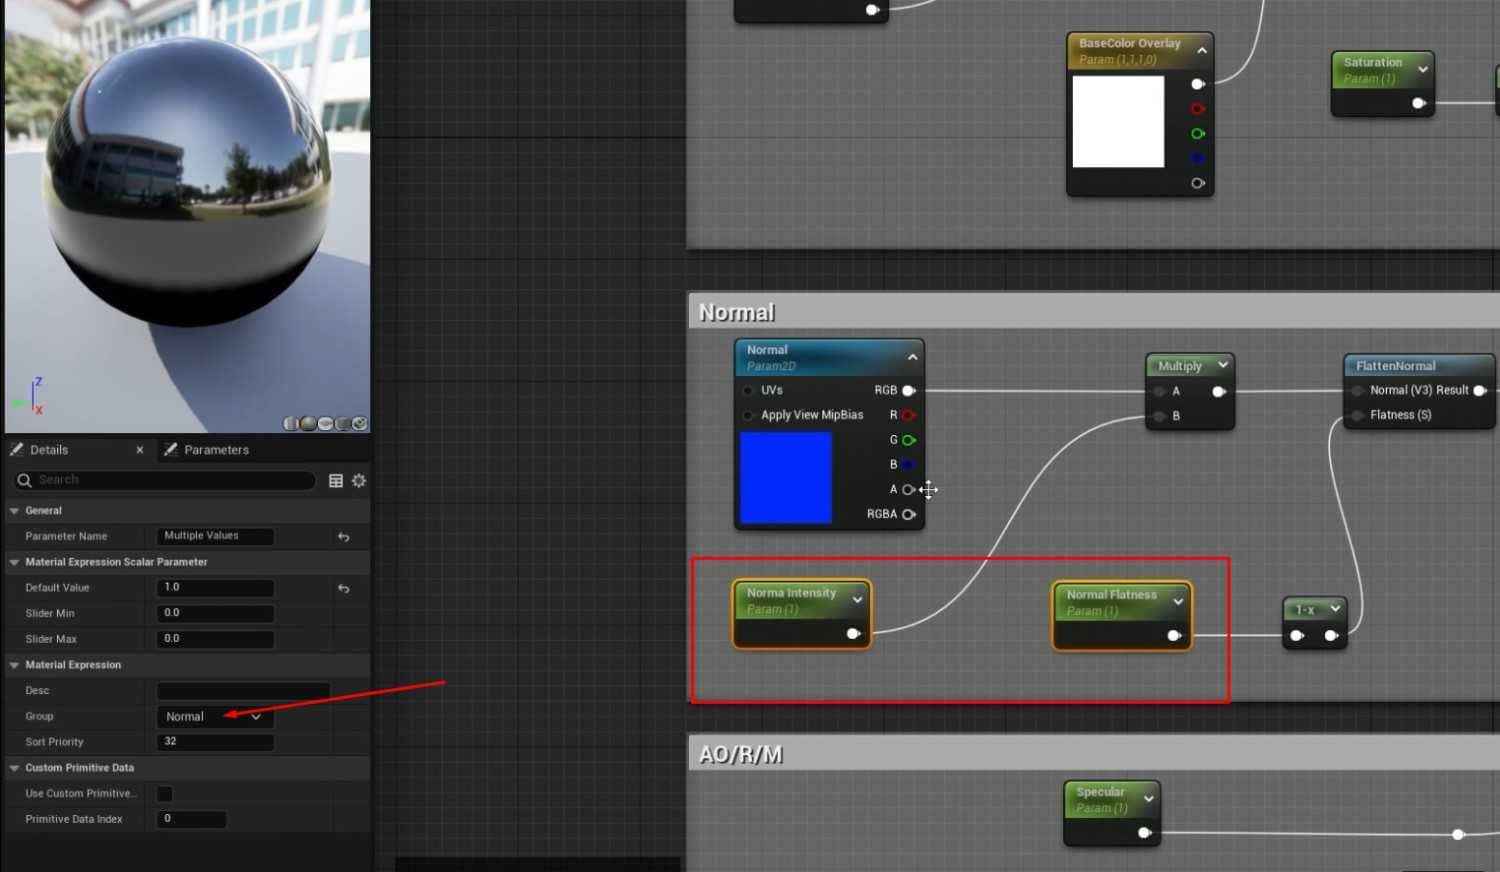
- Master materials in 3D design need to be firmly structured and organized. To keep the material graph organized, group related nodes into sections like Base Color, Normal, and AORM by selecting the nodes and clicking C to create a comment box.
- Rename the comment boxes by pressing F2 to keep everything labeled and easily identified.
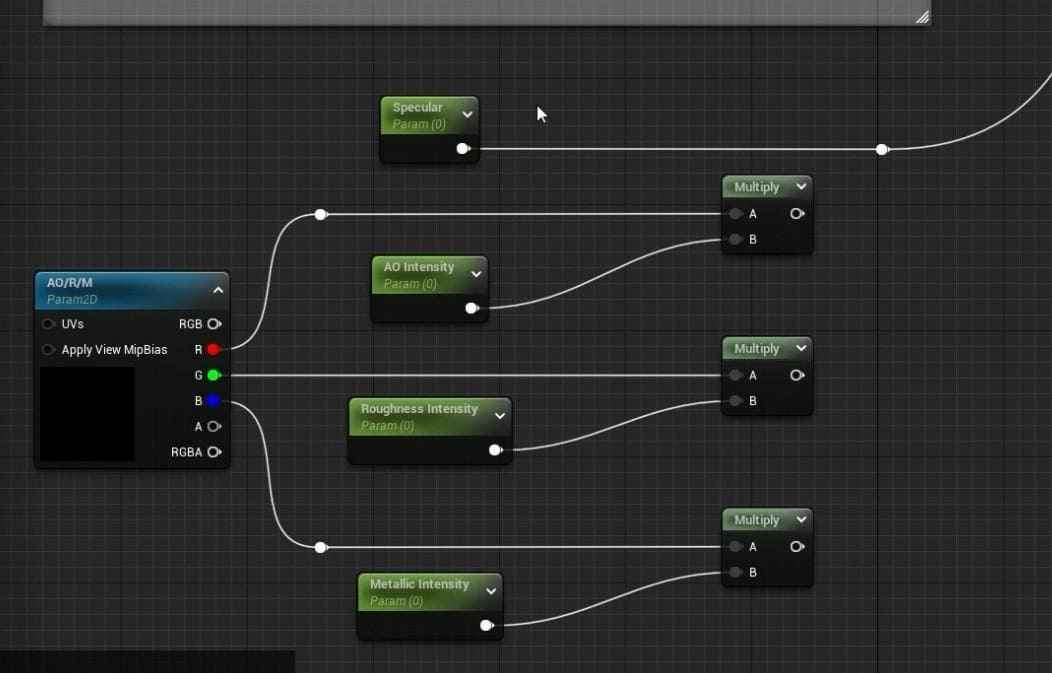
- Additional AO Intensity, Roughness Intensity, and Metallic Intensity should be included under an AORM group for better control within the Material Instances.
- Ensure all groups and comments are labeled appropriately, and the graph is clean and easy to navigate.
Adding Emissive Properties to master materials in 3D design:
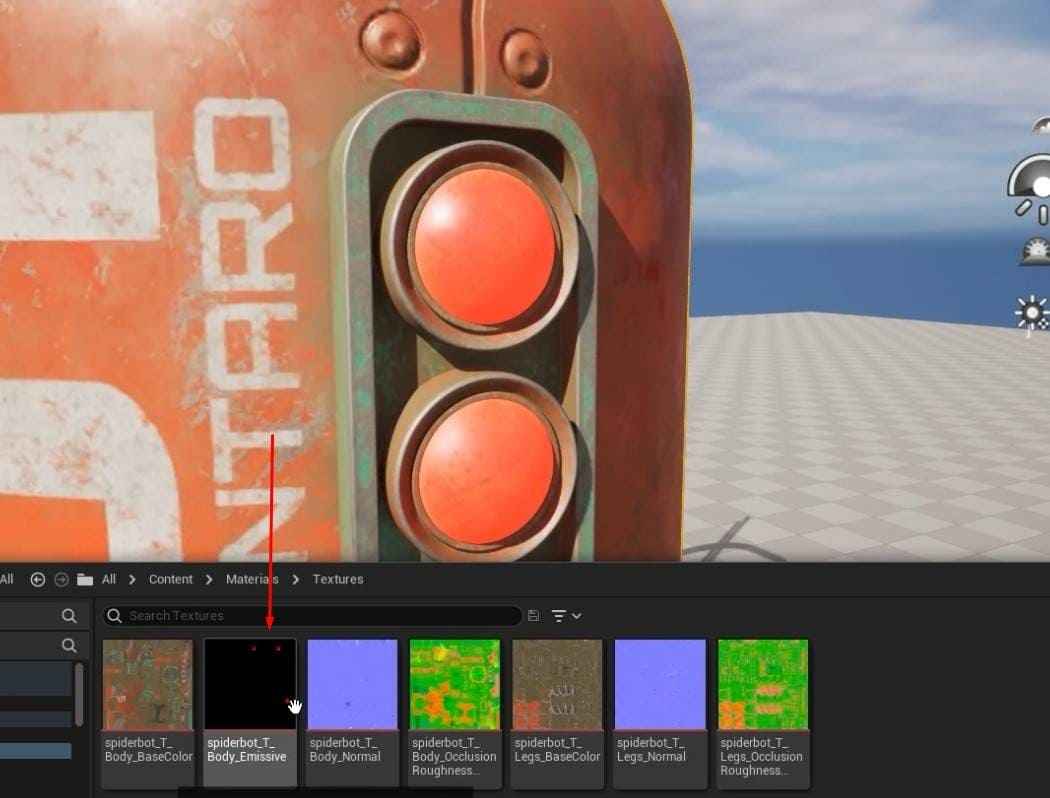
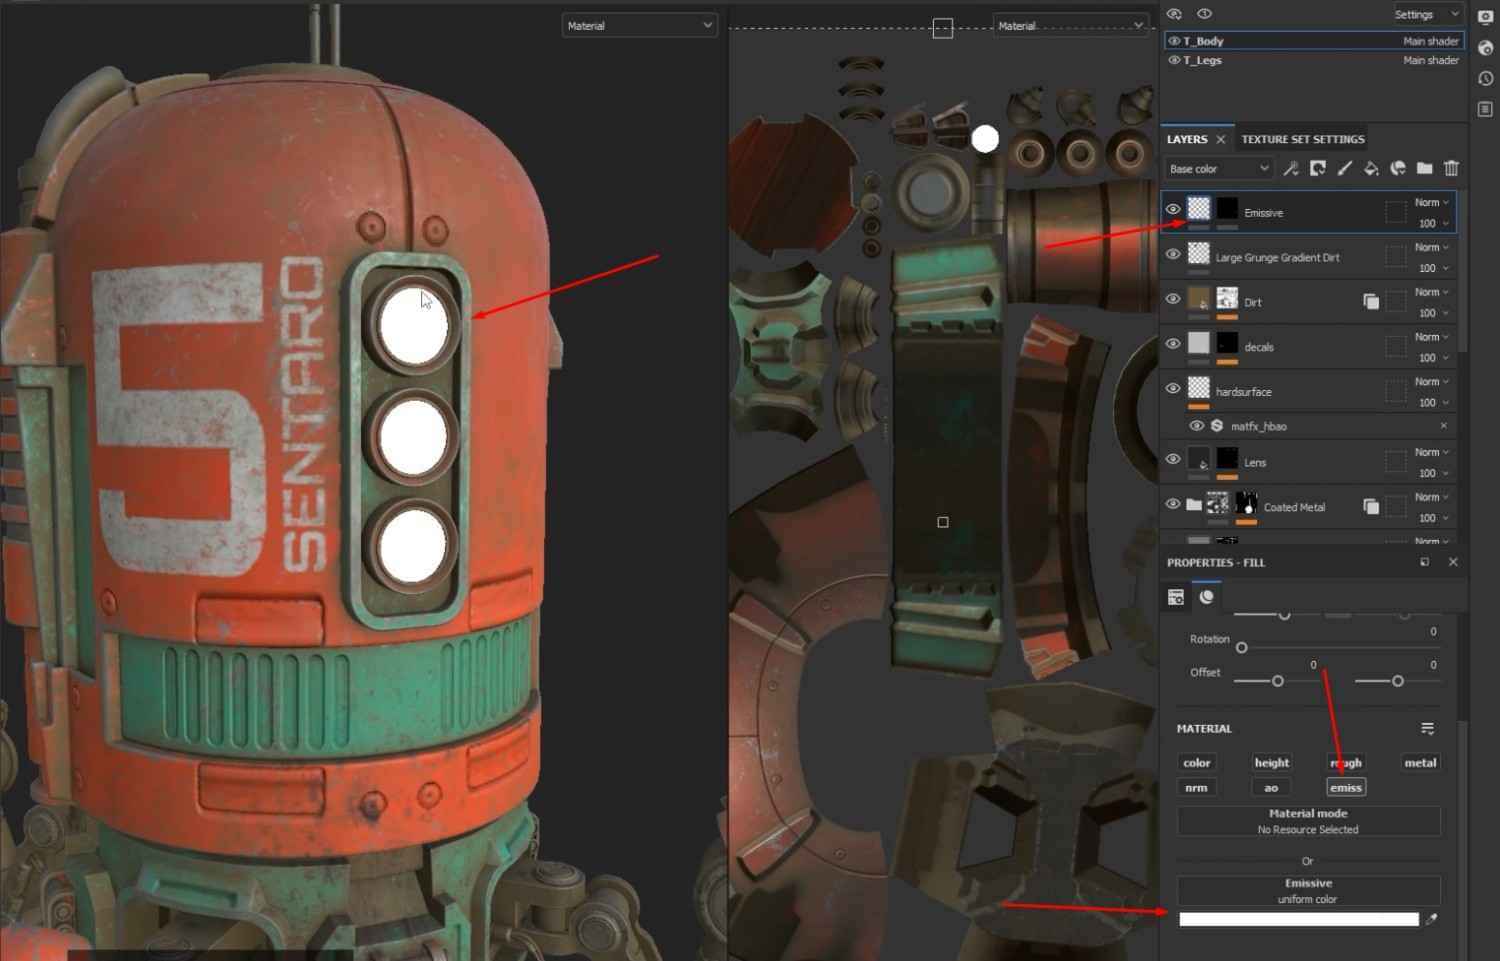
- Create and import an Emissive texture map for the Spiderbot.
- Inside the Master Material graph, add a new TextureSampleParameter2D node and rename it Emissive.
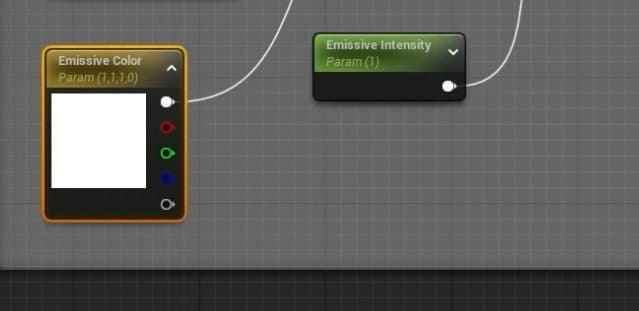
- Adjust the color of the Emissive node to white.
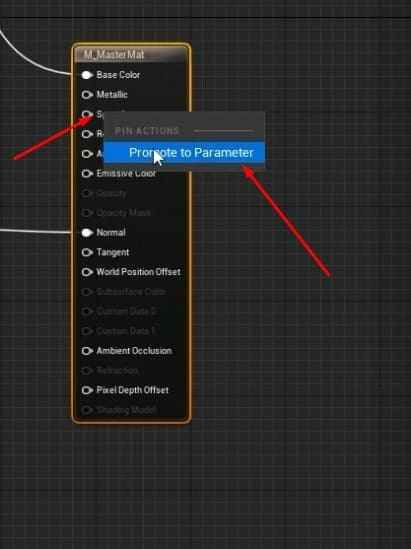
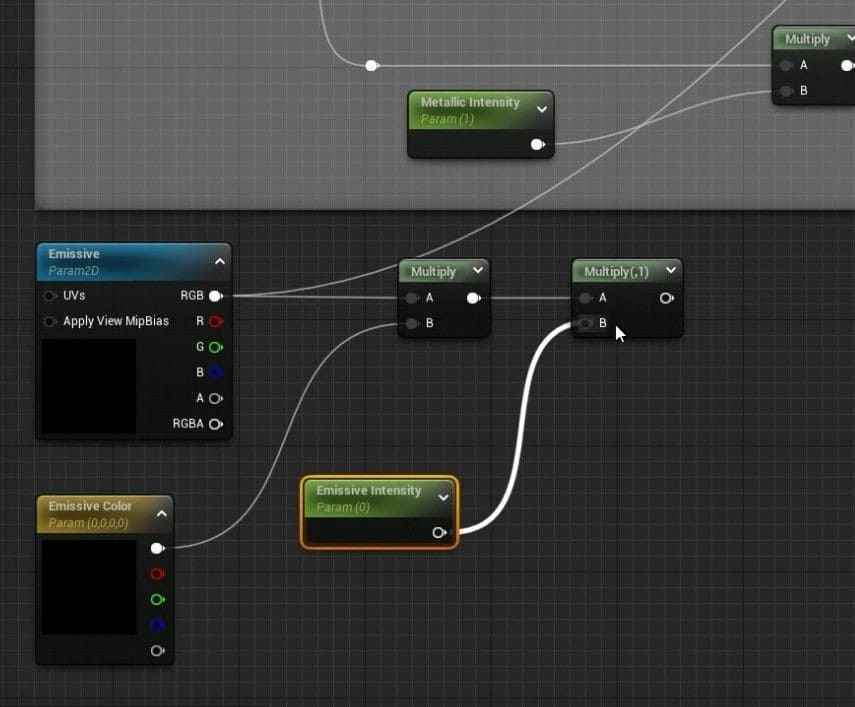
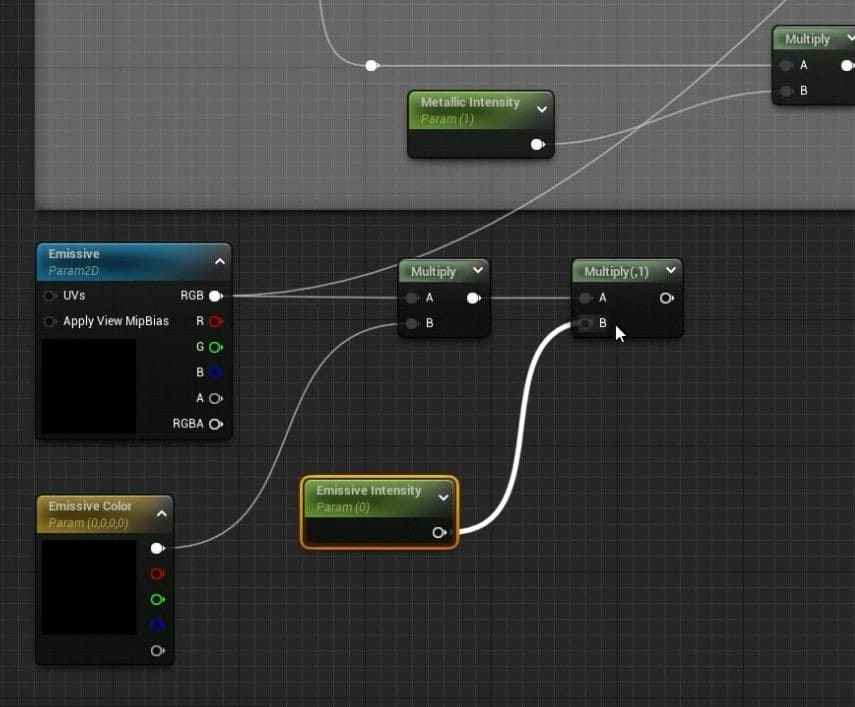
- Add a Vector Parameter to control the emissive color and connect it to the Emissive node through a Multiply node.
- Add another parameter, Emissive Intensity, with a default value of 1, and connect it to the Multiply node for intensity control.
- Connect the Emissive setup to the Material node and save the changes.
- Organize the Emissive parameters by selecting them and renaming the group to Emissive.
- Save all changes and check the Material Instances to see the newly added Emissive features.
Conclusion: Master Materials in 3D design
This guide shows you expert techniques for master materials in 3d design and how to use such knowledge to create so-called dynamic materials that can be adjusted in-game. For example, master materials in 3d design allow you to change their base color, add normal maps for extra detail, or make them glow in the dark with emissive maps!
Far from just looking great up close, these kinds of materials offer lots of benefits; they also make it easier to tweak things as you go along while developing games (something that generally becomes ever more important).
Whether building something simple or complex like our robot spider, having a good grasp of creating stuff with style and professionalism will stand out. There are plenty more tricks waiting if learning more about UE5 sounds fun.
Check out our academy programs and courses. We have included industry experts and think tanks for our masterclasses so that refining skills couldn’t be more accessible. Check what conditions and requirements you need to fulfill to enroll. Don’t question any longer; apply today as we offer the best of the best offers and game development study curriculum.

