

Creating a 3D model is only one part of producing a finished digital asset. To apply image-based textures accurately, artists need a way to connect a 2D image with the surface of a 3D model. This is where UV mapping becomes important.
UV mapping assigns two-dimensional coordinates to a 3D mesh so textures can be positioned correctly across its surface. Without a suitable UV layout, textures can appear stretched, compressed, misplaced, or inconsistent.
For beginners, terms such as UV coordinates, seams, shells, unwrapping, texel density, and UDIMs can sound complicated. Understanding how these concepts work together makes the texturing stage easier to manage.
What Is UV Mapping in 3D Modeling?
UV mapping is the process of assigning 2D coordinates to a 3D model's surface so image-based textures can be applied accurately. A 3D model uses X, Y, and Z coordinates to define its shape, while a texture is a flat image. U and V coordinates provide the connection between the 3D surface and the 2D texture.
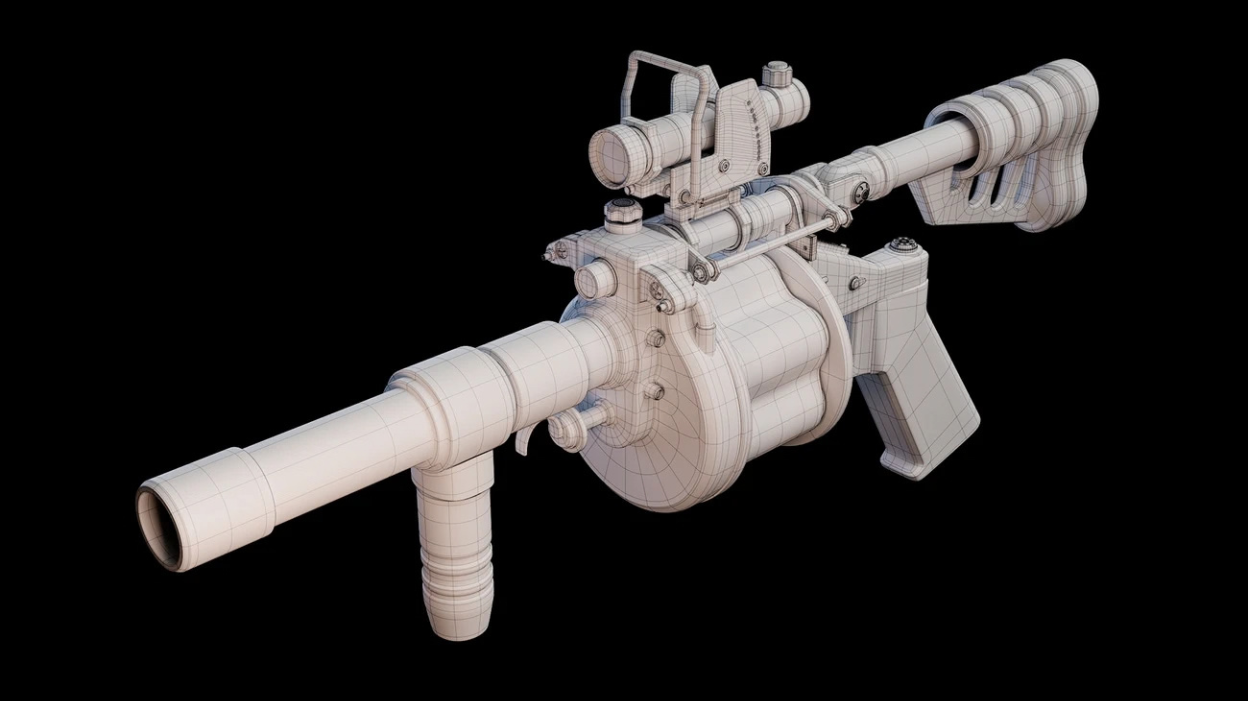
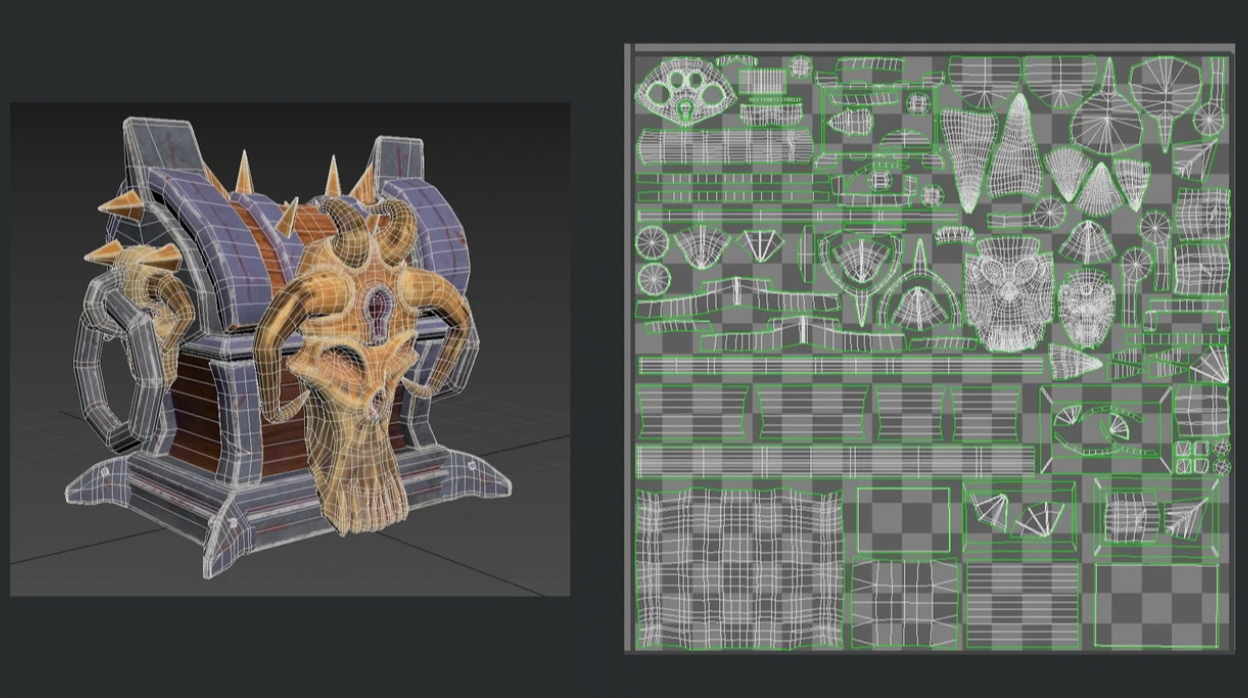
A useful analogy is unfolding a cardboard box. You cut along selected edges and flatten its surfaces onto a sheet. UV mapping follows a similar principle with a digital mesh. The separated and flattened regions are called UV shells or UV islands.
Most basic UV layouts use a 0-1 UV tile, where U represents the horizontal direction, and V represents the vertical direction. UVs can also extend outside this area for tiled textures and workflows such as UDIMs.
Credit: www.autodesk.com
Why Is UV Mapping Important?
UV coordinates determine how image-based texture maps are sampled across a 3D model. These can include:
- Base color or albedo
- Normal maps
- Roughness maps
- Metallic maps
- Ambient occlusion
- Painted masks and surface details
For example, when texturing a wooden crate, the UV layout determines where the wood grain, scratches, labels, and other details appear. Poor UVs can result in stretched textures, distorted patterns, misplaced graphics, uneven texture detail, or visible seams in unwanted areas.
UV quality is particularly important for game assets because texture resolution and memory are limited. Efficient UV layouts help artists use available texture space effectively while giving important surfaces enough detail.
If you want to see how texturing is applied to a 3D asset in practice, explore this tutorial - texturing a 3D model
UV Mapping vs. UV Unwrapping
The terms UV mapping and UV unwrapping are closely related but describe different parts of the process.
UV Mapping: It refers broadly to creating and using UV coordinates that determine how textures are applied to a 3D mesh.
UV Unwrapping: It is the process of flattening the mesh's surface into 2D UV space, usually by creating seams and unfolding the resulting sections.
Projection tools, seam tools, unfolding algorithms, and manual adjustments may all be used to create the final UV layout.
Common UV Mapping Methods
Projection methods are often used as starting points for creating UV layouts. The resulting shells may still require manual editing.
1. Planar Mapping
Planar mapping projects UVs from one direction. It works well for relatively flat surfaces such as signs, floors, walls, and panels.
2. Cylindrical Mapping
Cylindrical mapping projects UVs around cylindrical forms. It can be useful for pipes, bottles, barrels, and columns.
3. Spherical Mapping
Spherical mapping projects UVs around rounded objects. It can provide a useful starting point for spherical geometry, although distortion may still require correction.
4. Automatic Mapping
Automatic mapping tools generate UV layouts using software-defined projection or segmentation methods. They can save time on complicated objects, but the resulting shells often need manual cleanup.
6 UV Mapping Mistakes Beginners Should Avoid
Beginners commonly encounter these problems:
1. Ignoring distortion: A complete unwrap can still produce stretched textures. Use a checker pattern to inspect the layout.
2. Poor seam placement: Seams placed in highly visible or technically problematic areas can create obvious texture breaks or unnecessary distortion.
3. Inconsistent texel density: Different areas may receive noticeably different levels of texture detail without a deliberate reason.
4. Wasting texture space: Large empty areas reduce texture efficiency, although necessary padding should not be sacrificed simply to create a tighter layout.
5. Accidental UV overlaps: Unintentional overlaps can cause different surfaces to share texture information when they should remain unique. Intentional UV stacking, however, can be useful for symmetrical or repeated geometry.
6. Changing the model afterward: Major topology or geometry changes may require UVs to be adjusted or rebuilt.
Credit: www.autodesk.com
Beginner-Friendly UV Mapping Workflow
If you're new to UV mapping, start with a simple prop such as a crate, barrel, chair, toolbox, or other basic hard-surface asset.
A practical workflow is:
Model → Clean topology → Mark seams → Unwrap → Check distortion → Adjust texel density → Pack UVs → Bake if required → Texture → Test
Starting with a simple asset lets you practice seam placement, unfolding, distortion checking, texel density, and UV packing before moving to more complicated characters or environments.
Learn UV Mapping at M3DS Academy
UV mapping is easier to understand when it is taught as part of the broader 3D asset pipeline. M3DS Academy's Academy Year 1 curriculum includes UV mapping as well as advanced UVs and UDIMs alongside modeling, topology, retopology, texturing, and other 3D workflows.
M3DS Academy also provides Game-Ready Prop Workflow training, covering retopology, UV unwrapping, texture creation, and export for game engines. This type of pipeline-based training helps artists understand how UV decisions affect the final textured and game-ready asset.
Frequently Asked Questions
1. How many UV shells should a 3D model have?
There is no fixed number. The appropriate number depends on the model's shape, seam placement, distortion, texture requirements, and production workflow.
2. Can UV shells overlap?
Yes. Intentional UV stacking can save texture space when multiple surfaces are meant to share the same texture information. Unintentional overlaps can cause problems when surfaces require unique textures.
3. What is texel density?
Texel density describes how much texture resolution is assigned to a given amount of 3D surface area. Consistent density helps maintain comparable texture detail across an asset.
4. When should I use UDIMs?
UDIMs are useful when a complex or highly detailed asset requires more texture resolution than is practical to manage within a single 0-1 UV tile.
5. Do all 3D models need UV maps?
No. Procedural, triplanar, and some object-space material workflows can work without conventional UVs. However, UVs remain widely used for image-based texturing, texture painting, baking, and many game and production workflows.