
🟧Learn how to create custom clothes in ZBrush using presets, dynamics, and manual brushwork.
🟧Step-by-step instructions for making shirts and pillows with realistic folds and details.
🟧The class covers basic concepts of cloth simulation, custom clothing creation, and the use of various tools in ZBrush for clothing design.
- Workflow
In this class, we’ll be making clothes on the Malse base mesh using the Spotlight inside of ZBrush.
To use the male base mesh model, click on the LightBox, go to Projects, and double-click on the male base mesh model.
The Spotlight options are also inside of the LightBox but in the Spotlight tab.
In the Spotlight tab, there are two different clothing options.
For this class, we’ll be using the 128_Clothes_Spotlight.
Double-click on the clothes spotlight and they’ll appear on the left side of our workspace.
Holding Shift + Z will turn on and off these clothes on the side.


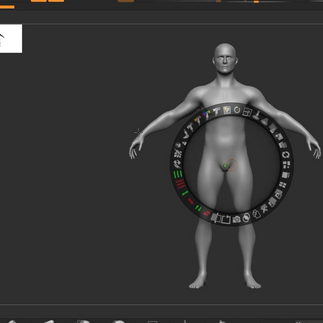
Clicking on Z will activate the Spotlight Wheel.
If you click on the inside of the wheel, outside of the orange circle, you will move the wheel along with the clothes from the Spotlight.
If you want to only move the wheel and not everything, drag the wheel by the inside of the orange circle.


Drag one of the shirts from the Spotlight and place it in the middle of the chest of the base mesh.
To scale the spotlight shirt, click and drag the scale tool option on the wheel clockwise.
You can’t scale it too much in one spin and it has to be done like dialing on an old phone till you reach a good size for the shirt.
To adjust the position of the shirt move, move the wheel by clicking and dragging inside the wheel.


To make the spotlight into an actual shirt, click on the camera button on the wheel, and it will create a new subtool in our project.
If this didn’t work for you and there isn’t a subtool created, drag the wheel inside the orange square outline on the shirt spotlight and try clicking on the camera icon again.


Adjust the shirt to make sure it’s fitting the mesh all around and that not too much of the body is phasing through the shirt.
In the subtool, click on the paintbrush icon on the shirt layer.
Ctrl + Shift and click on the red polygroups to isolate them.
Ctrl + Shift click again to hide the red polygroups.
Go inside the Geometry options, open up the Modify Topology, and click on Del Hidden to delete the red polygroups that we don’t need.


To make the shirt mesh stick to the body of our character we’ll be using Dynamics which is the physics inside of ZBrush.
Click on the Dynamics tab and click the plus button on the left side to dock the whole tab on the side of our workspace.
If we click the Run Simulation button, the shirt will just fall to the ground.
To undo the Simulation click Ctrl +Z.
To make the shirt stick we need to turn off the Gravity so that the shirt doesn’t fall down.
Activate the Contract on the Z Axis only so that the shirt sticks only in one direction.
Activate the Collision Volume, this wall add collision to everything in the scene.
And lastly, lower the Inflate by a lot to somewhere around 0.014.
Now when we run the simulation the shirt will stick to the base mesh.
But this is still not enough.
We need to add more edges on the side of the shirt because Dynamics works with how much topology something has, just like in Autodesk Maya.
The better and more the topology is, the better the outcome will be from the simulation.


With the ZModeler Brush (BZM), hover over an edge on the polygroup and click space to open up the Edge Actions.
Select the Insert action and set the Target to Multiple Edge Loops.
Press space again to close the menu, click on one of the edges, and drag up with your mouse to add more edges.
Do this on all sides of the shirt except for the front and back.
When we run the simulation again the shirt will stick better to the mesh.
To fix the wrinkles on the side use the smooth brush gently to straighten out the polugroups.


To fix the edges of the shirt, go into the Masking options and use the MaskByFeature only on the Borders.
Ctrl and click on the side to invert the mask so that only the edges of the shirt are exposed.
Go to the Deformation tab and slide the Polish By Feature slider to smooth out the ends of the shirt.


We still need to fix the topology with ZRemesh.
Like normal, set the ZRemesh to Adapt, the Target Polygon Count to 5, and click the ZRemesh button with the symmetry turned on.
After the first ZRemesh, turn off the Adapt and activate the Half option, and ZRemesh the shirt two more times.
After the ZRemesh add 3 divisions with Ctrl + D.


We can make the shirt double-faced by adding thickness to it through Dynamic Subdiv.
To activate it, click on the Dynamic button and increase the Thickness.
Adjust the shirt so the body isn’t sticking out of the clothes with the move tool.
We can add wrinkles and folds to the shirt through Dynamics Options.
First, mask out a part on the shirt with the masking lasso and invert the masking so the part that you want to have folds on is exposed.
Activate the Expand with only the Y-Axis on.
Before you simulate the gravity make sure you are on the 2nd division so the simulation adds faster.
If you want how the wrinkles look at a certain point, you can pause or cancel the simulation by pressing the space bar.
You can also mask smaller parts of the shirt and add simulations onto those parts to create wrinkles and folds.
In the Brush menu, there is a cloth brush called ClothNudge.
With this brush, you can easily nudge the folds around the shirt.


We can make a quick pillow with a cube and use the Dynamics options in ZBrush.
First, add a cube to the scene or in a new project.
ZRemesh the cube once on Adapt and then on Half till there is a smaller amount of geometry.
Squish the cube to be thinner.
In the Dynamics options turn on Inflate with only the Z-Axis on and the CollissionVolume active as well.
When we play the simulation the cube will inflate itself into a pillow.


Another way to make clothes in ZBrush is by Extracting masked parts.
On the male base, mesh use the Mask Lasso with Symmetry and mask out a shirt.
Use the Mask Pen to clean up any parts you’ve missed to mask.
In the subtool options click on Extract, set the Thickness to 0.006, click Extract, and Accept.
If you don’t click on the Accept button it will not add the extract.


It will be harder to ZRemesh the shirt with the shirt having faces inside of it.
To fix this, Ctrl + Shift and click on the front group of the shirt so that the other polygroups will get hidden.
Go into the Modify Topology options and click on Del Hidden.
Now that we only have one face on our shirt we can ZRemesh it once on Adapt with symmetry still on and then a couple of more times on Half with the Adapt turned off.
Add 4 divisions with Ctrl + D and from here you can draw it folds on your own using the Standard brush and DamStandard.
Once you’ve drawn in the folds, turn on the Dynamic Subdiv and add thickness to the shirt.


Bonus - Dress
-Workflow
We’ll be using the Female base mesh from the ZBrush project to create a dress.
Use the masking lasso with symmetry on and mask out the top torso and arms, not including the legs.
Extract the masked parts with 0.01 thickness and press Accept to finalize the extractions.


Ctrl + Shift and click on the front polygroup of the dress, go to Modify Topology, and press the Del Hidden button to delete the inside polygroups.
In the Deformation tab slide the Polish by Feature slider to even out the edges of the dress.
After that, ZRemesh the dress on Adapt once and then ZRemesh it on Half two more times with the Adapt turned off.


With the Move brush and a bigger scale of the brush, move down the dress from both sides and adjust it so that the mesh isn’t phasing through the dress.
Use a smooth brush to relax the topology.
ZRemesh the dress again, this time on Same so it fixes the current topology.
Smooth out the dress again and adjust the form of the dress with the move brush.
After the adjustments add two subdivisions to add more topology to the dress then click on the Del Lower button while on the highest division.


We can add some interesting front details on the dress.
Mask the chest of the dress and add a new polygroup with Ctrl + W.
Ctrl + Shift and click on the new polygroup to isolate it.
Mask the back part and add another polygroup.
Ctrl + Shift and click on the front chest polygroup to isolate it from the back.
Mask the top of the chest, add a new polygroup, and isolate the lower chest group.


Hold Ctrl + Shift to use the slice curve tool, with each slice it makes a polygroup.
Keep making small slices along the group till you reach the bottom.
In the Masking tab, make sure only the Border and Group options are turned on before clicking on the Mask by Feature.
Once masked, Ctrl and click on the side to invert the masking.


Hold Ctrl + Shift and drag on the side to reveal the rest of the plygroups.
Hold Ctrl and click on the side to invert the masking to where only the polygroups are exposed.
Turn on Dynamic Subdiv on the dress.
After that, go into the Dynamics options, turn on Expand with only the X and Z Axis on, turn down the Inflate to 0, and make sure the Gravity is also turned off.
When you run the simulation the exposed polygroups will start to wrinkle, creating an interesting fold on the dress.
When you are satisfied with the simulation at a certain point, press the space bar to stop the simulation.


With the DamStandard brush connect the front folds with the back by drawing out lines to connect them.
We’re going to use the ClothPinch brush to make subtle folds on the back in between the folds.
Use ClothNudge to add folds anywhere else on the dress.


End Result.


