🤩In this tutorial, the instructor is creating a monster over three sessions.
They demonstrate techniques using various brushes, emphasizing the importance of consistency and asymmetry for realism.
🤩The tutorial covers merging and refining the mesh, adding divisions for more detail, and enhancing specific areas like the eyes and ears.
Different brushes are applied to specific areas to finalize the model.
Blocking out the shape and adding minimal details
- Workflow
Working on creatures or monsters as detailed as this one will take a lot of time to finish and make them good.
Trust the process and the longer you work on something the better the outcome will be.
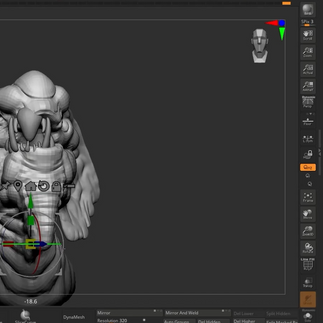
Almost every sculpture begins with a simple sphere.
With the Move brush make the general form of the top head, adding in the elongated forehead, the cheeks, and the top lip.
Use another sphere and mold it to fit the basic shape of the bottom jaw.
With the masking tool, mask out the bottom part, reverse the masking by holding Ctrl and clicking on the side, then use the gizmo tool to drag out the clay.
With Dynamesh fix the topology and smooth it out with the Smooth brush.


Use ClayBuild Up to make the eyebrow and the eye.
Adjust the mouth opening to make the gums for the teeth, do this for the top and bottom jaw.
Make the cheek pop out more with ClayBuild Up.
Use another sphere to make the shape of the ear, the stripes can be made using the DamStandard brush and adding in the volume with ClayBuild Up.
Make the middle of the ching stick out from the creature’s neck.
Make lines with DamStandard on the side of the jaw, ears, neck, and the bulge on the forehead.


Add a sphere to make the teeth, DynaMesh it to a low resolution to be easier to shape with the Move Brush, scale, and move them with the Gizmo tool in place.
After you are satisfied with the shape of the teeth, DynaMesh them on a slightly higher resolution so they’re not too low poly.
Duplicate a tooth and shape it a bit to differ from the original to speed up the process.
Use the Mirror and Weld tool inside Geomtery - Modify Topology, to duplicate and mirror the tooth on the opposite side.
Add a new sphere to create the eyelid.
DynaMesh the sphere before molding it with the Move Brush.
With DamStandard, make a line across the sphere horizontally.
Isolate the sphere, and with ClayBuild Up carve out a hole for the eye.


Reveal the rest of the model, and move the eyelid in place as well as the eye.
Mirror and weld the eyelid on the other side, then Merge the eyelids with the top part of the head.
After merging them, DynaMesh the model on a higher resolution.
Fix up the shape of the eye using the Move Brush and ClayBuild Up.
Make a hole for the nostrils.
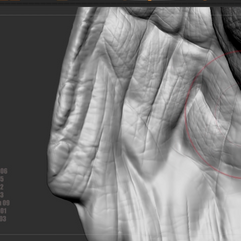
With DamStandard and ClayBuild Up make the wrinkles on the side of the jaw, front, and side of the neck and ears.


End of the blockout and minimal detail.

Adding the Primary Details
-Workflow
In this step, we’ll be adding the Primary Details.
Those are the skin folds on the creature’s head and neck.
We won’t be using any fancy brushes and use the standard brushes from the ZBrush brush library.
Add more clay where the teeth are to make the gums and use the Polish brush on the lump on the forehead to make it more straight.
With DamStandard, go over the gap around the lump.
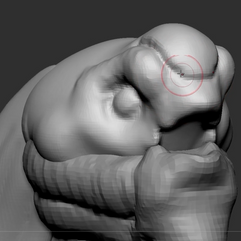
Use the Mask brush to create an interesting bump at the end of the lump.


Add a couple of more teeth at the bottom of the jaw, these don’t have to be mirrored and can be asymmetrical.
With ClayBuild Up make the gums around the bottom teeth.


After adding the details on the top part of the head, we can merge the top and bottom together, and afterward on a higher resolution, use DynaMesh to finalize the merge.
With the Smooth brush fix the seam between the top and bottom of the head.
Use the Standard Brush to create the folds at the cheekbone.
Now that we have a lot more Active Points, we can go over the folds and details we’ve added previously on the neck once more with the same brushes, adding more lines between the folds to add more texture and character to them.
You can use the ClayBuild Up brush to add volume between the gaps in the folds.


At this point, we can ZRemesh the model to make it easier to manipulate the shape when adding details.
Make a copy of the head, and hide everything else in the subtool except for the two heads.
In the Geometry options, open the ZRemesh tool, set it to Adapt, the Target polycount to 5 and click on ZRemesh.
After the model is done loading, check how many Active points the original head has.
Add divisions to the ZRemeshed copy to reach the same or exceed the amount of Active Points than the original.
Make sure the ZRremeshed head is below the one that isn’t.
In the Subtool, open the Project options and click on the Project All button.
Wait for the model to finish loading.
After the projection, hide the head that hasn’t been ZRemeshed since we won’t be needing it anymore.
From here we’ll be working on the ZRemeshed head with the divisions.
Having divisions on the head will help us switch between low and high poly counts depending on if we need help moving things around.


To make the folds stick out more, use the Inflate or Standard brush.
Masking certain parts of the model will prevent it from getting influenced by the brush.
Add sine lumps of clay on the side of the chin, afterward use the DynaMesh brush to outline them.


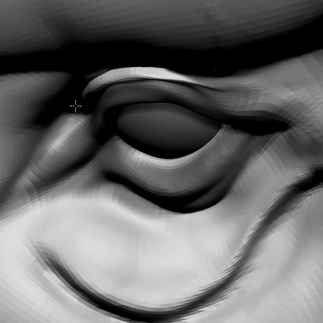
Mask the entire eye and use the MoveTopology brush to pull out some of the clay from above the eye to create an interesting fold above the eye.
Take your time making the skin around the eye.


Outline the side of the chin.
For the ears, add clay and use the DamStandard brush to create the lines going across the inside of the ear.
With the Move brush, pull down some parts of the ear to create waves.
Make the skin hanging from the chin thinner by using the Move brush, lowering down the divisions, and squishing it.


End of adding the Primary Details.

Adding the Final Details
- Workflow
For the Final Details, we’re going to use 3rd party brushes.
Throughout this process, make sure you mix these brushes together on different parts of the creature to get a more interesting result at the end.
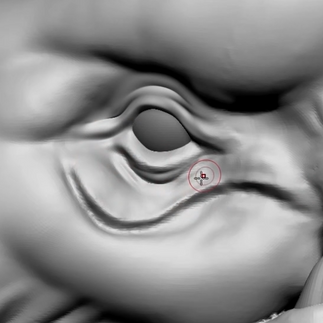
Anywhere there are folds, go through them using the DamStandard brush like the folds around the eye.
For the top of the head and the back of the creature, use a brush that has nice long scratches.
Around the eye and generally around the face, you can mix a variety of different scale brushes with this 3D party brush set.


Make sure you nicely go through each part and fold of the creature and fill up the empty space.
Don’t go too overboard as well.


For the lump on the forehead, use the DamStandard brush to create deeper cuts and scratches on the sides before going through it with the custom brushes.


Lastly, add details on the inside and outside of the ears, the back of the head, and nack, and go through the teeth with the DamStandard brush on a high division.


End Result.

Bonus - Using Layers in ZBrush
There is a handy tool in ZBrush that behaves in a similar way Blendhsapes do inside Autodesk Maya.
This tool is the Layers.
If the model has divisions, make sure you are on the last, highest, division for the layers to work.
On the side, you can find the Layers where the Geometry and Subtools options are located.
To add a layer, click on the square with the plus button in the center.
It will add a layer with a REC icon on the right side.
This means all the changes we add to our model will be recorded and added inside the layer.
Add a few brush strokes with any brush, after you’re done, click on the REC icon to stop the recording.
Once the recording is stopped, the layer will have two new icons next to it.
Moving the layer slider will switch between the moment when the mesh didn’t have the brush strokes and once you’ve added them.
In the midpoint of the slider, the new brush strokes will be more transparent.


If we try and make any changes to the model now, an error will show up.
This error states that no new changes can’t be added until the active layers have been baked or hidden.
Clicking on the eye icon on the right side of the layer to hide it.
After the layer is hidden, you’ll be able to add changes to the model.
After adding new changes, you can reveal the hidden layer but the new changes won’t be added to the layer since the brush strokes haven’t been recorded.


You can also record movement on the mesh.
Other options inside the layer tool are the: 1. Delete option, it deletes the layer 2. The duplicate layer 3. Re-naming the layer 4. Bake All adds the changes from the layer onto the model